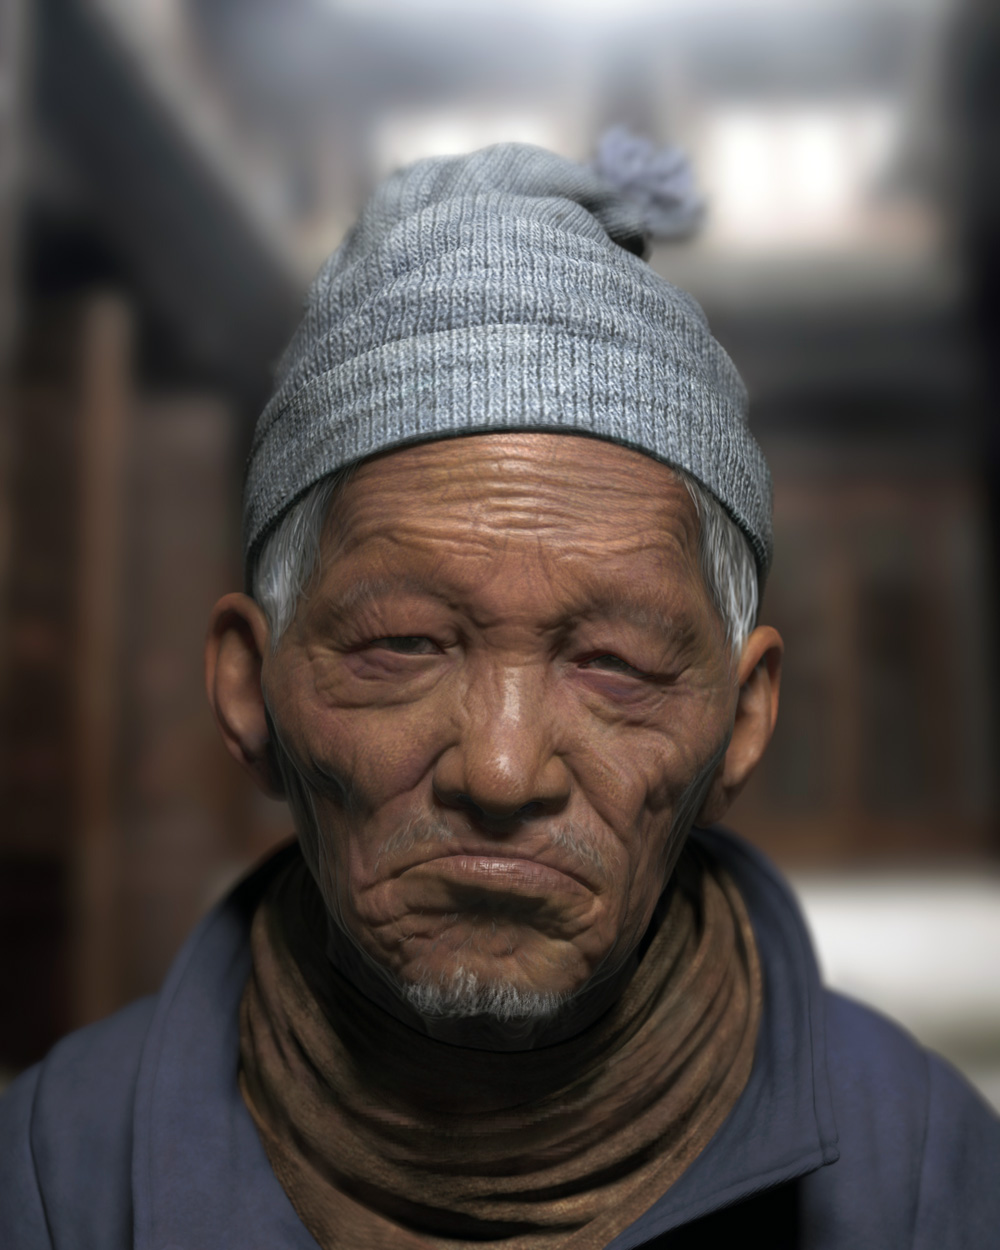
Hi guys, I just finished this render of an old man. Sculpting and texturing was done in Zbrush and then it was rendered with Mental Ray in maya. Hope you like it and C&C are welcome.
Attachments


Hi guys, I just finished this render of an old man. Sculpting and texturing was done in Zbrush and then it was rendered with Mental Ray in maya. Hope you like it and C&C are welcome.
Excellent portrait, sculpting - texturing , excellent skin shader. 
very nice!
top row!!!
tutorial please please please…
The model looks Fantastic!
In my personal opinion 2 little adjusts will improve the final image, a little less saturation and a depth map more soft. (Just because is hard to see a real portrait that has focus in the face and the ears are already 100% out of focus)
Congratulations
love your details. Great job
Great work! DOF and scarf are great combination.
grt job…
Hi guys,
Thanks for the comments and kind words. I won’t have time to make a tutorial of this but i can post the skin textures I painted for your reference. there isn’t any new technique I used on this. the shader is apparently the SSS fast skin and I just added extra reflection. I will post the maps later.
Thanks again 
woah. superb. almost thought it’s a photo. going to the top. i agree about the dof being too strong… lessen the effect by half or something and it would be even more wow.
hey guy, thanks again. here are 3 maps I get from zbrush polypaint. one color map serves as the base for epidermal and subdermal map. then the spec map and a quite strong reflection map. I prefer to get a strong reflection pass and comp with a fresnel pass to control it. you guys can click the maps to see how they look like. for the color map I mainly use different alphas to stamp different colors to the model, for spec map, i filled with quite dark color then paint brighter color, for reflection I filled the model with brighter color then darnked the cavities. I used cavity mask a lot. the color map was then manipulated in photoshop to get the epi and sub maps. I rendered the skin out with fast skin first then setup a render layer to render it with a high reflective shader for the reflection pass and then comped them together. Hope this simple workflow is easy to understand. and here is a different comp with less dof blur.
Amazing capture of the facial gesture! Great piece really, solid work! I would work on the eyes, the scarf and the jackets rendition a little more. But its there, simply amazing!
That’s really cool! Couple things…it might feel more natural if the eyes were brown. And it might look better if the shirt color was further from the flesh tone. Hope that helps. Keep it up!
very nice and natural looking character. Would you mind sharing the look of his hat and cloth. What does the scene look like? The placement of the lights and so on so forth? Thanks
Absolutely beautiful! Changes you made to DOF etc. made image much better (if even possible :D).
Hi guys, thanks for comments and advice. I will upload some image about the cloth and hat later. I didn’t spend much time on those pretty much freeformed them out inside zbrush. Persinally I don’t think it is the best way to make those but I did that since I plan to blur them in the finla render. So their details are not matching the skin details. For lighting I have a reference photo of an old man in ths sun light. So my first try was to use maya’s physical sun and sky first, however it blows out the skin shader and I couldn’t get the looking I want. Then I tried to use one main light (MR area light positioned to sim sun light) with FG. But I wanted more contrast. So finally I turned off FG and put 2 very dim area lights behind the head from both side and scaled them up to avoid potential sharp shadow I don’t want.