He he he Thanks man
Dude you deserve TOP ROW, you must work really hard for this.
My favorite mech designer returns! But I can’t save the high rez image!!! NOO!!
sorry man i guess the site i link it not allowed to download hi res images, i need to upload them from a difrent site
This is truly inspiring, the level of detail is exquisite…I also love the close up shots.
Amazing, looking forward to what comes next.
this is absolutely stunning, amazing job! 
wow that is amazing stuff. the metals looks sweet around the chest and the amount of detail you put into it really makes it look pretty while not busy. great work!
hope you get top row!
Why is not on Top row yet I don’t get it is great work  small_orange_diamondsmall_orange_diamond
I think Jehuty is jealous lol
I’m not big on mechs but I have to say, wow. Really well done.
Great job Yannis…well done…!!!..
Thanks Guys Here is another High Res that Link you can actually Save
http://jkarathomas.com/images/3d/work/Anubis/Anubis_Beauty.jpg
I’m kinda wondering why some other stuff went top row and this hasn’t yet.
Hello I thought it will be a good a idea to do a sort tutorial on my on how I build Anubis.
I’m posting some work in progress videos that I have created with Z brush there are not very explanatory but you can see my workflow for by detail work and how I created some of the mechanical parts. I’m also using the Pannel Loops.
My process is really simple no special tricks just be of patient for details and lots of repeating steps.
I would like to mention that I build the Mech before Z Brush R 5 was released so some parts I build on a separate software.
I hope you find them useful. :D:D:D
[http://www.youtube.com/embed/_i3blJT2ovM"***91;/url] frameborder=“0” allowfullscreen"]
[URL=“http://<iframe width=“1280” height=“720” src=”***91;url]http://www.youtube.com/embed/r2jVK-8TkHk"***91;/url] frameborder=“0” allowfullscreen"]](http://<iframe width=“1280” height=“720” src="***91;url)
Most of the times I have no clue what I’m aiming for and I don’t have a concepts so I’m looking for machines pictures over the internet or other concepts .
Using the ZR5 is really easy to create groups extrude and polish edges especially when it comes to hard surface.
To begin with I import my base mesh and I play with this shapes
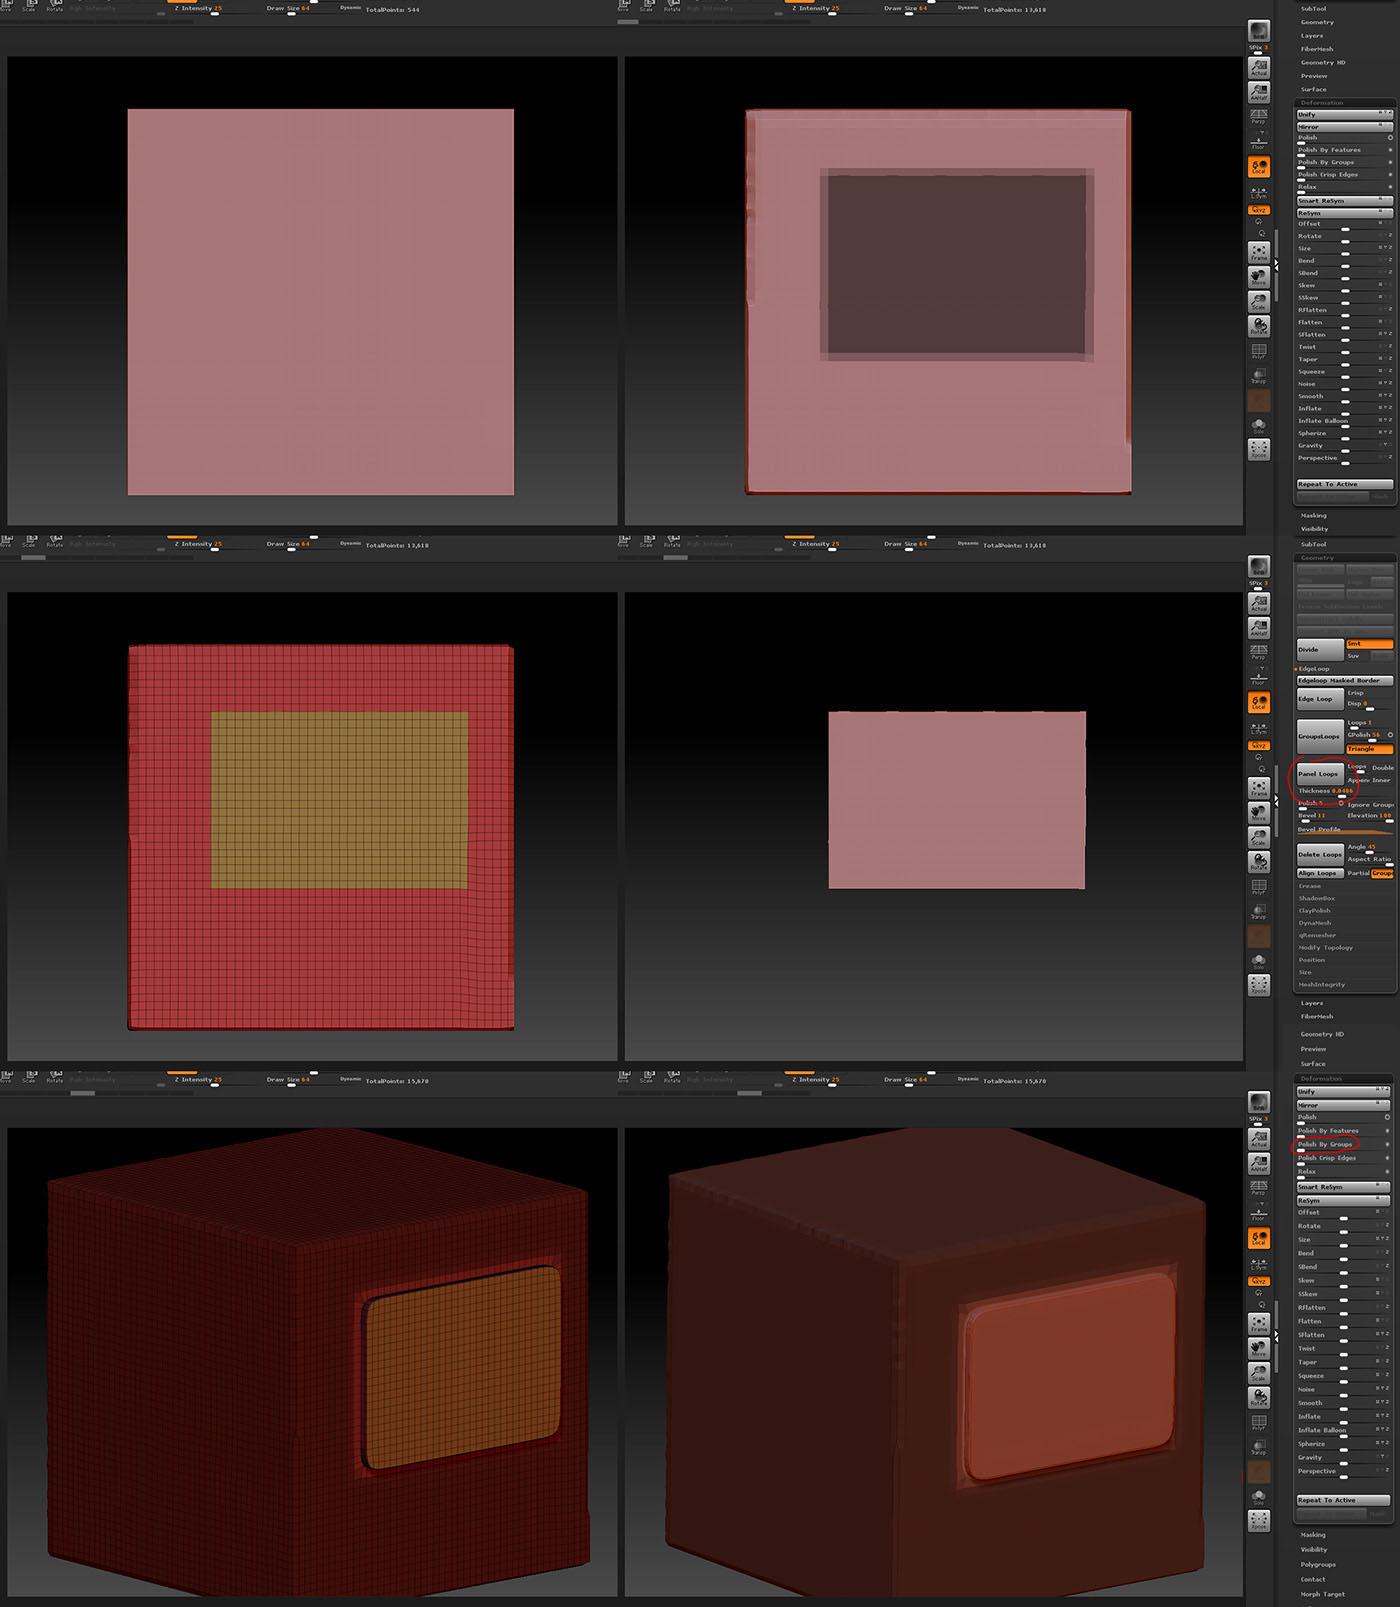
I divide my mesh few times I mask the area I want to extrude. Before ZR5 I will either go under geometry to extrude the mask area or under deformation I will inflate or Ctrl and drag the the unmasked area but with the new Version of zbrush I have the option to extrude my surface keep it as a separate group and polish the edges witch before it was a huge problem for me.
I will start masking a flat area that I want to change and by pressing Ctrl W automatically will create a new poly group that you can view if you turn on the wire frame on.I cntrl shift and click to hide everything except the group I want to adjust and then under geometry edge loop, set 1 loop turn off the Double mode and I also adjust the thickness which will tell me how far the geometry will extrude and then I click the Panel Loops button and that will give me with 2 new groups of geometry that there extracted from my mesh.
If my edges are deformed cause of the lack of my resolution I can adjust that by go to the Deformation menu and use the Polish by groups slider and the Polish crisp edges to sharpen and tight my edges.
I will continue using the same technique to create different shapes through the mesh.
When I have finally achieve my desire result I will load all my mech alphas that you can download from the zbrush alpha library I also have some custom made. I will use this alphas to add bolts and other details.
Pixologic also added the new insert brushes like the IMM Ind. Parts by Cg Carter which there are awesome to add bolts especially for close ups but when I want to add hundred of bolts the insert method will increase my geometry so it depends how close you will see those bolts. In Anubis case is more decoration that you will see from far away.
So after I load my alphas I select the standard brush then the Dragspot stock and the desire alpha and I start placing bolts wherever I thought it will create nice illusion that this is a man made machine full with patches.
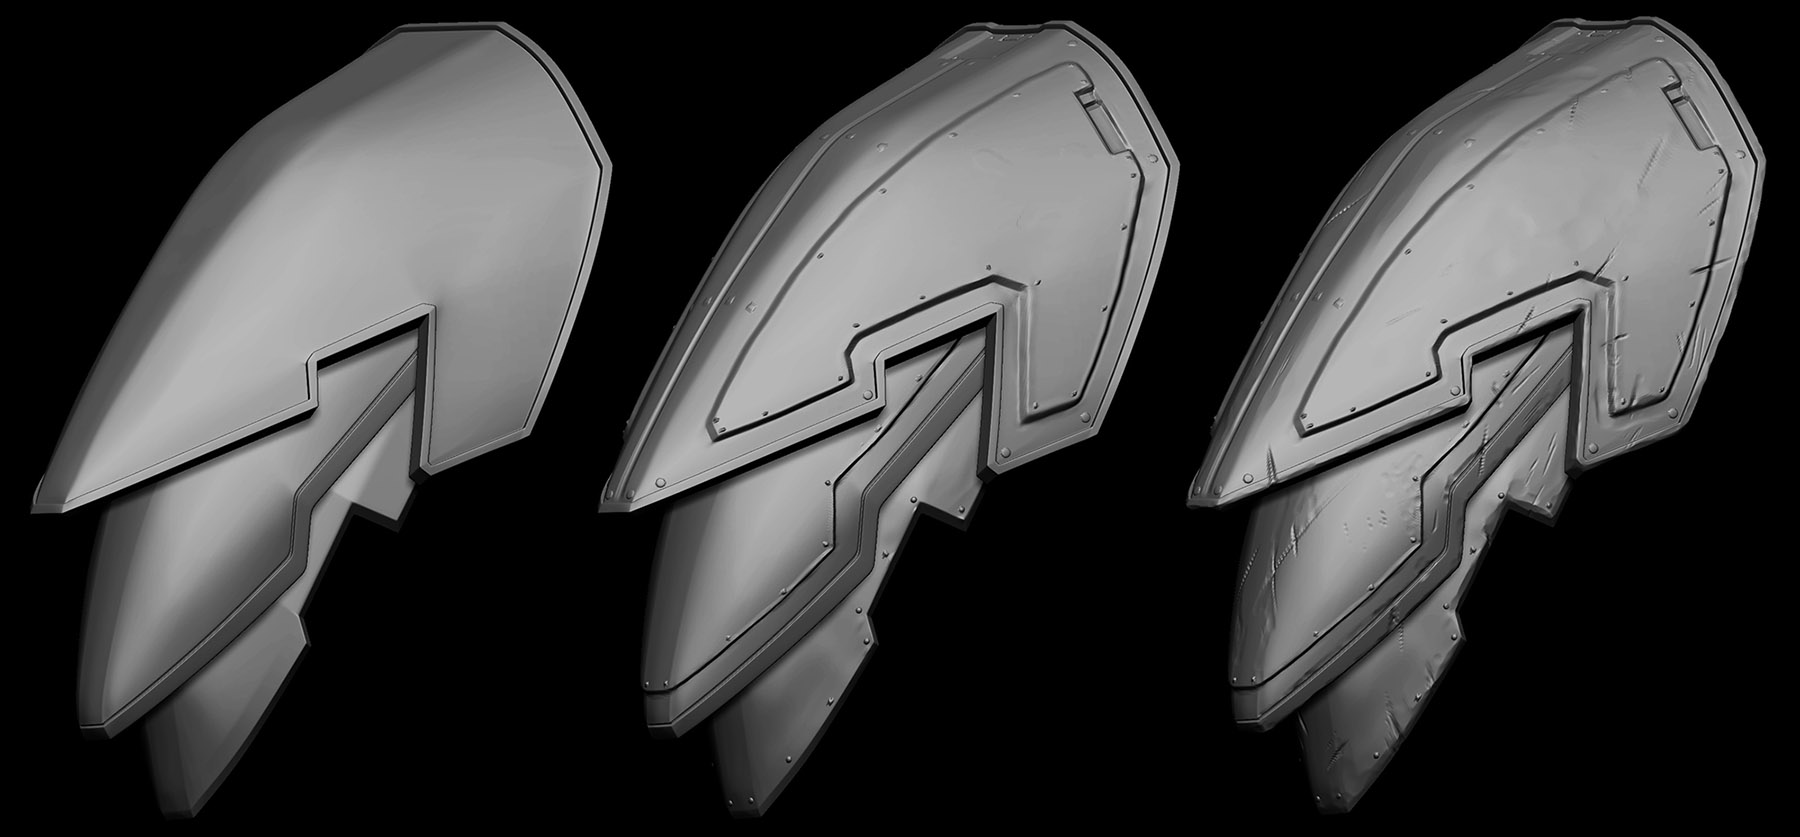
As soon I finish with adding bolts I select the Clay brush Zsub and low intensity and I go to all my edges and I start adding details cause I wanted to look like beat up metal, in round surfaces I like also to use the H polish Brush for the same reason. I always make sure I save a morph target or add a new layer before I do damages in case I want to do any changes.
One of my favorite costume bushes is the Orb_Cracks that allow me to do cuts very easy so I load the brush and I use it to create battle scars, damages and cracks on my surfaces.
I repeat those steps every were in my model to get the desirable result.
Attachments
Attachments
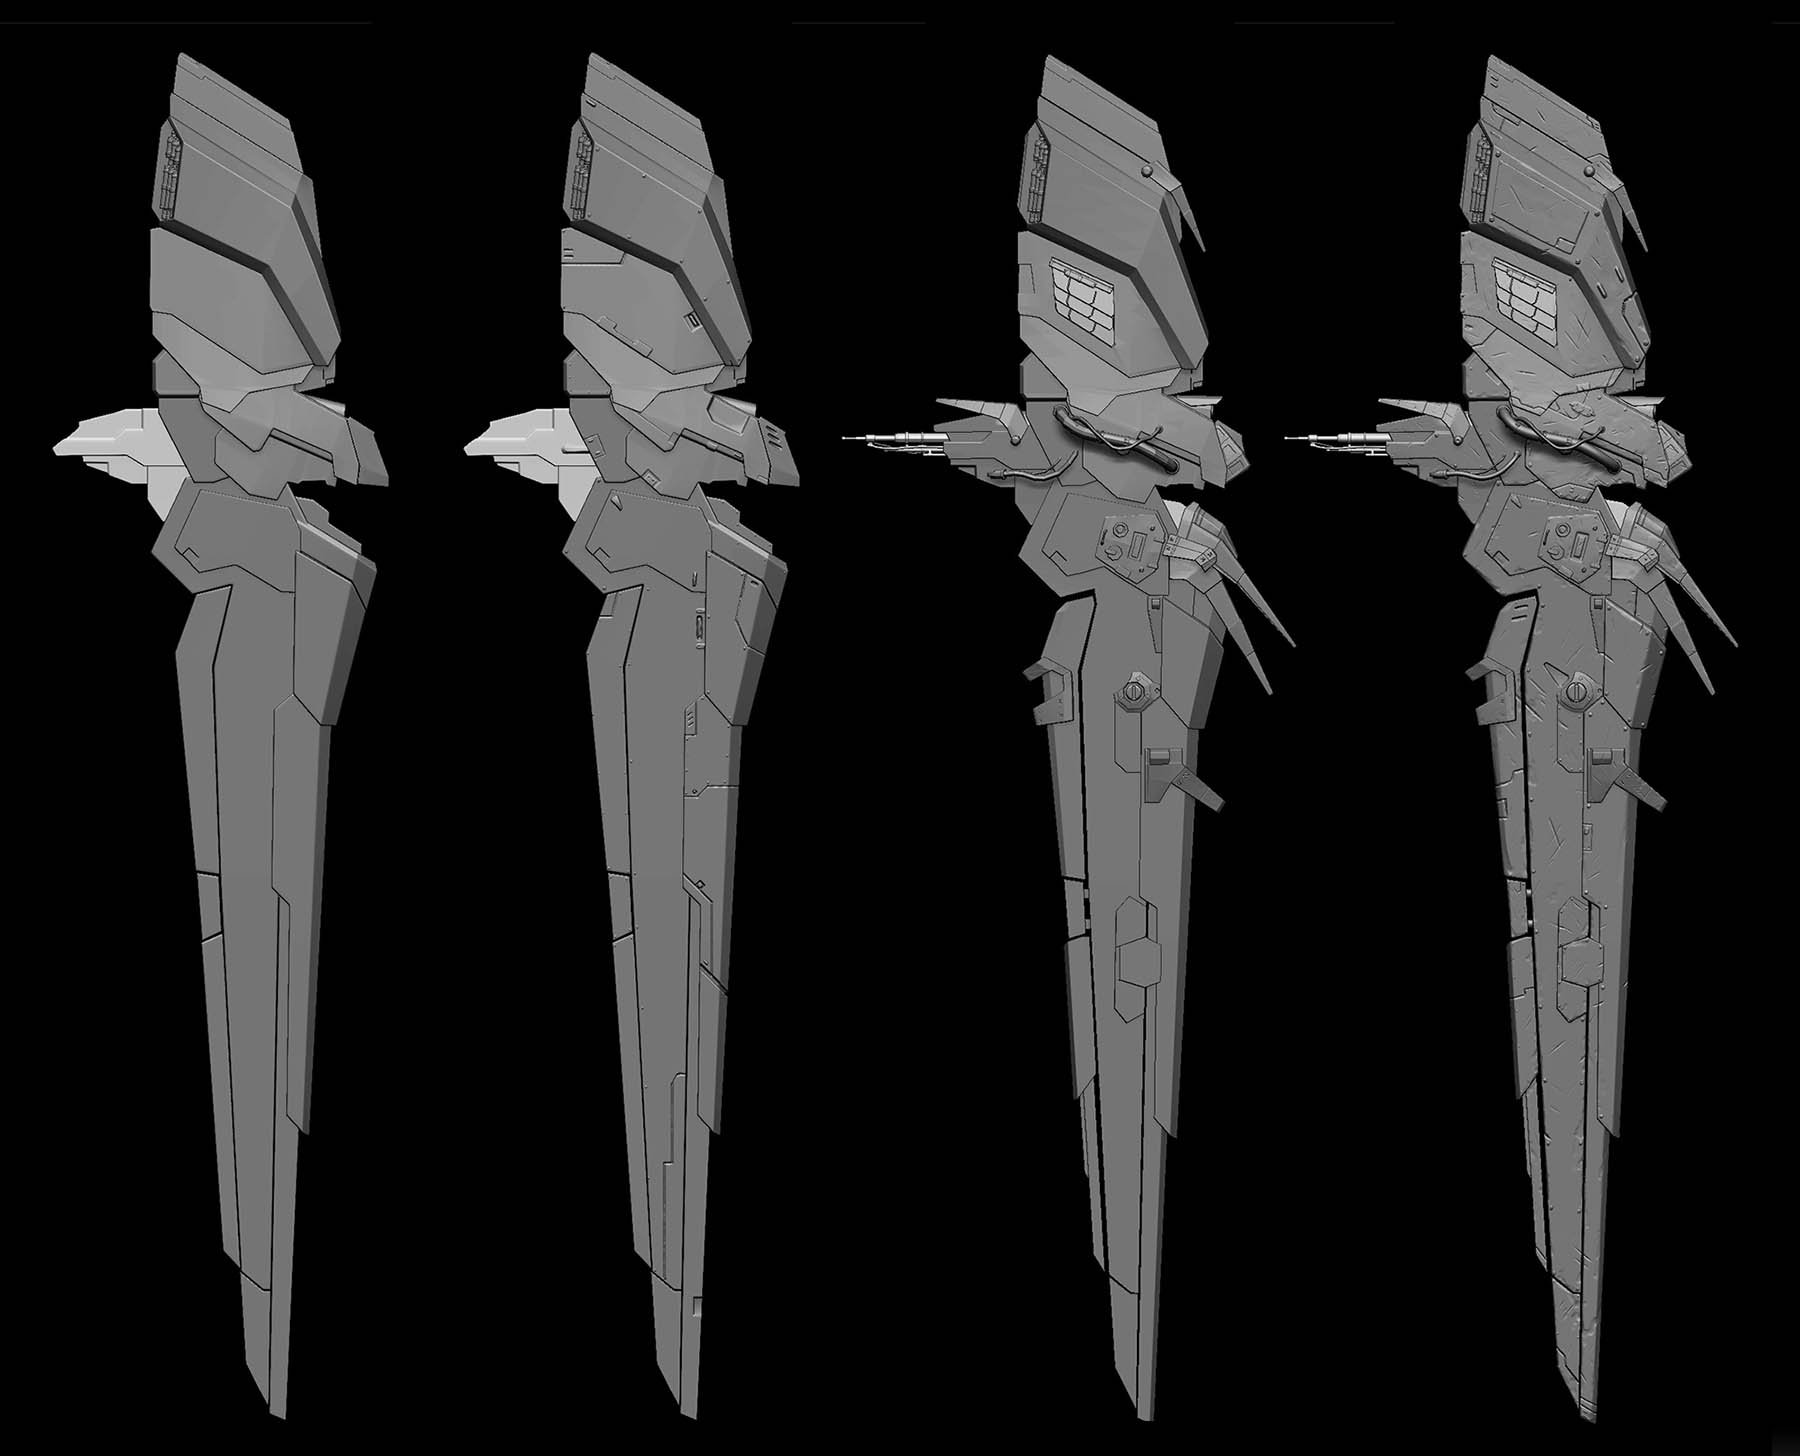
here im trying to create some parts for the body, I know more experience users will decently know more easy ways and faster to crate the same parts.
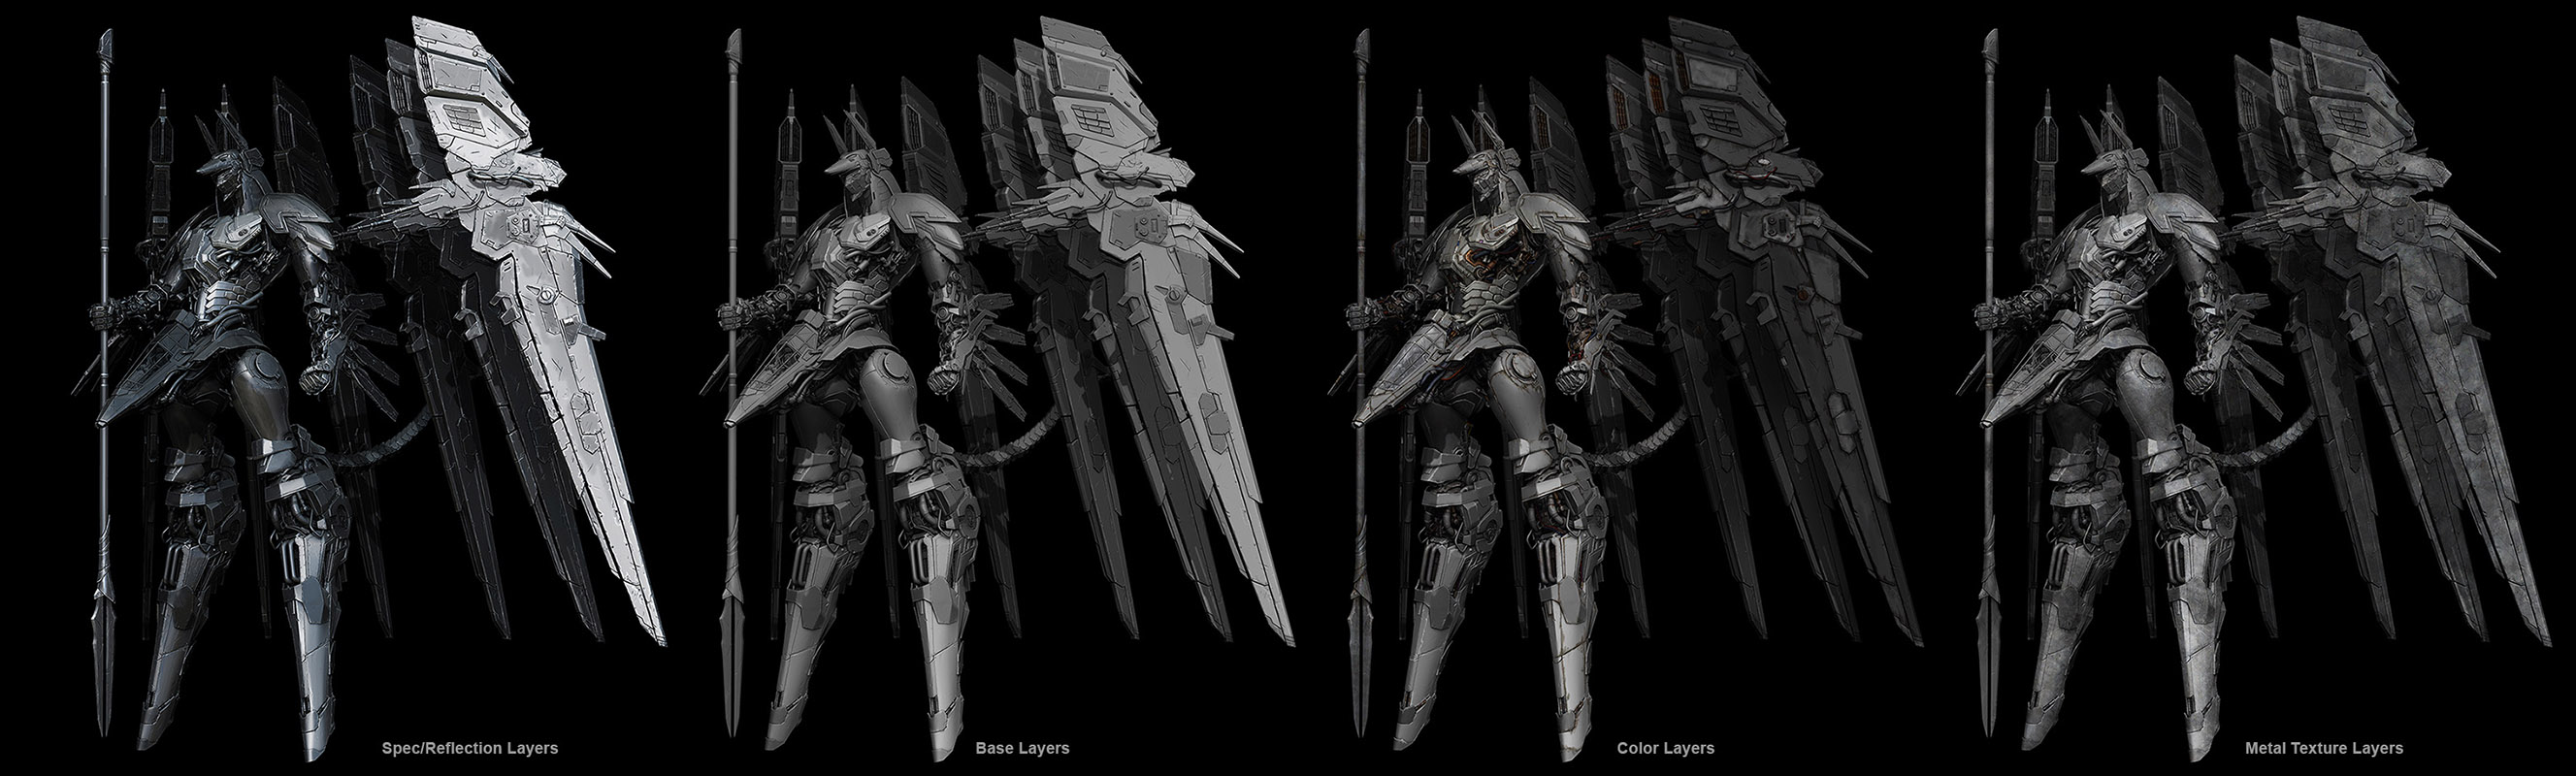
So for rendering I use a basic 3 point light from Zbush to do my render passes.
1 key light with shadows that cast from the side and top angle a soft light no shadows from below and a soft light no shadows from behind.
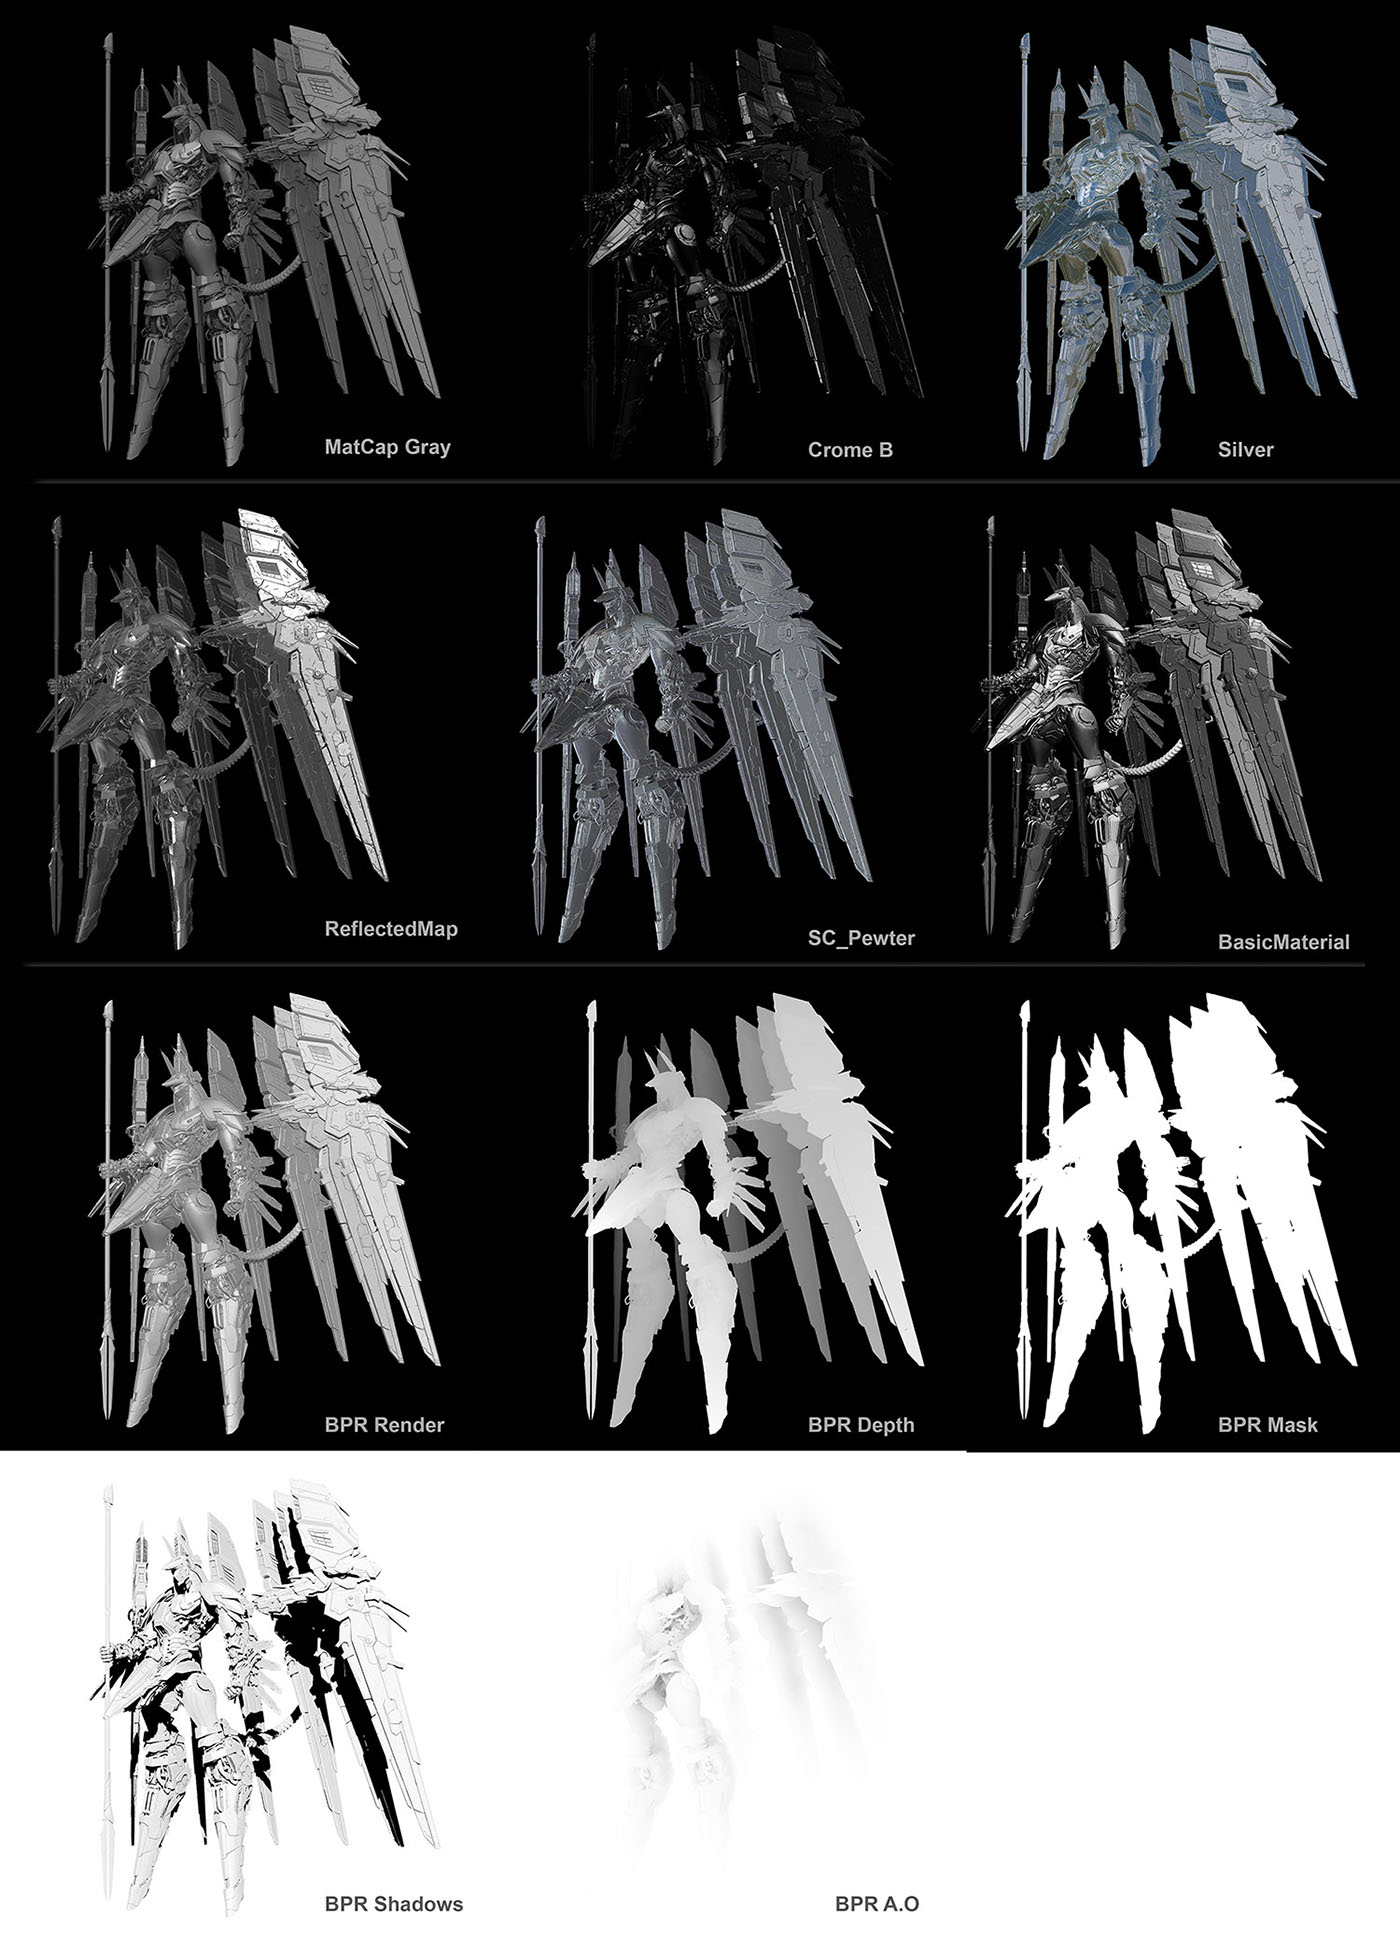
For starters I did a BPR render with the MatCap Gray material that will give me a base start Shadow pass Ambient Occlusion mask and Depth.
Then use the crome b material to render spec and the Pearl material for cavity detail.
I also download from the zbrush material library the silver material which I use for shiny metal overlay and the SC_Pewter that gave me high light edges extra detail dirt. I Comp them in photoshop for my final image
scroll on the right
Attachments
Here is the Link of forum about another old Mech that I build
http://www.zbrushcentral.com/showthread.php?96406-NZ-666-kshatriya-(tutorial-page-5)
Good Job I hope to see you on the top