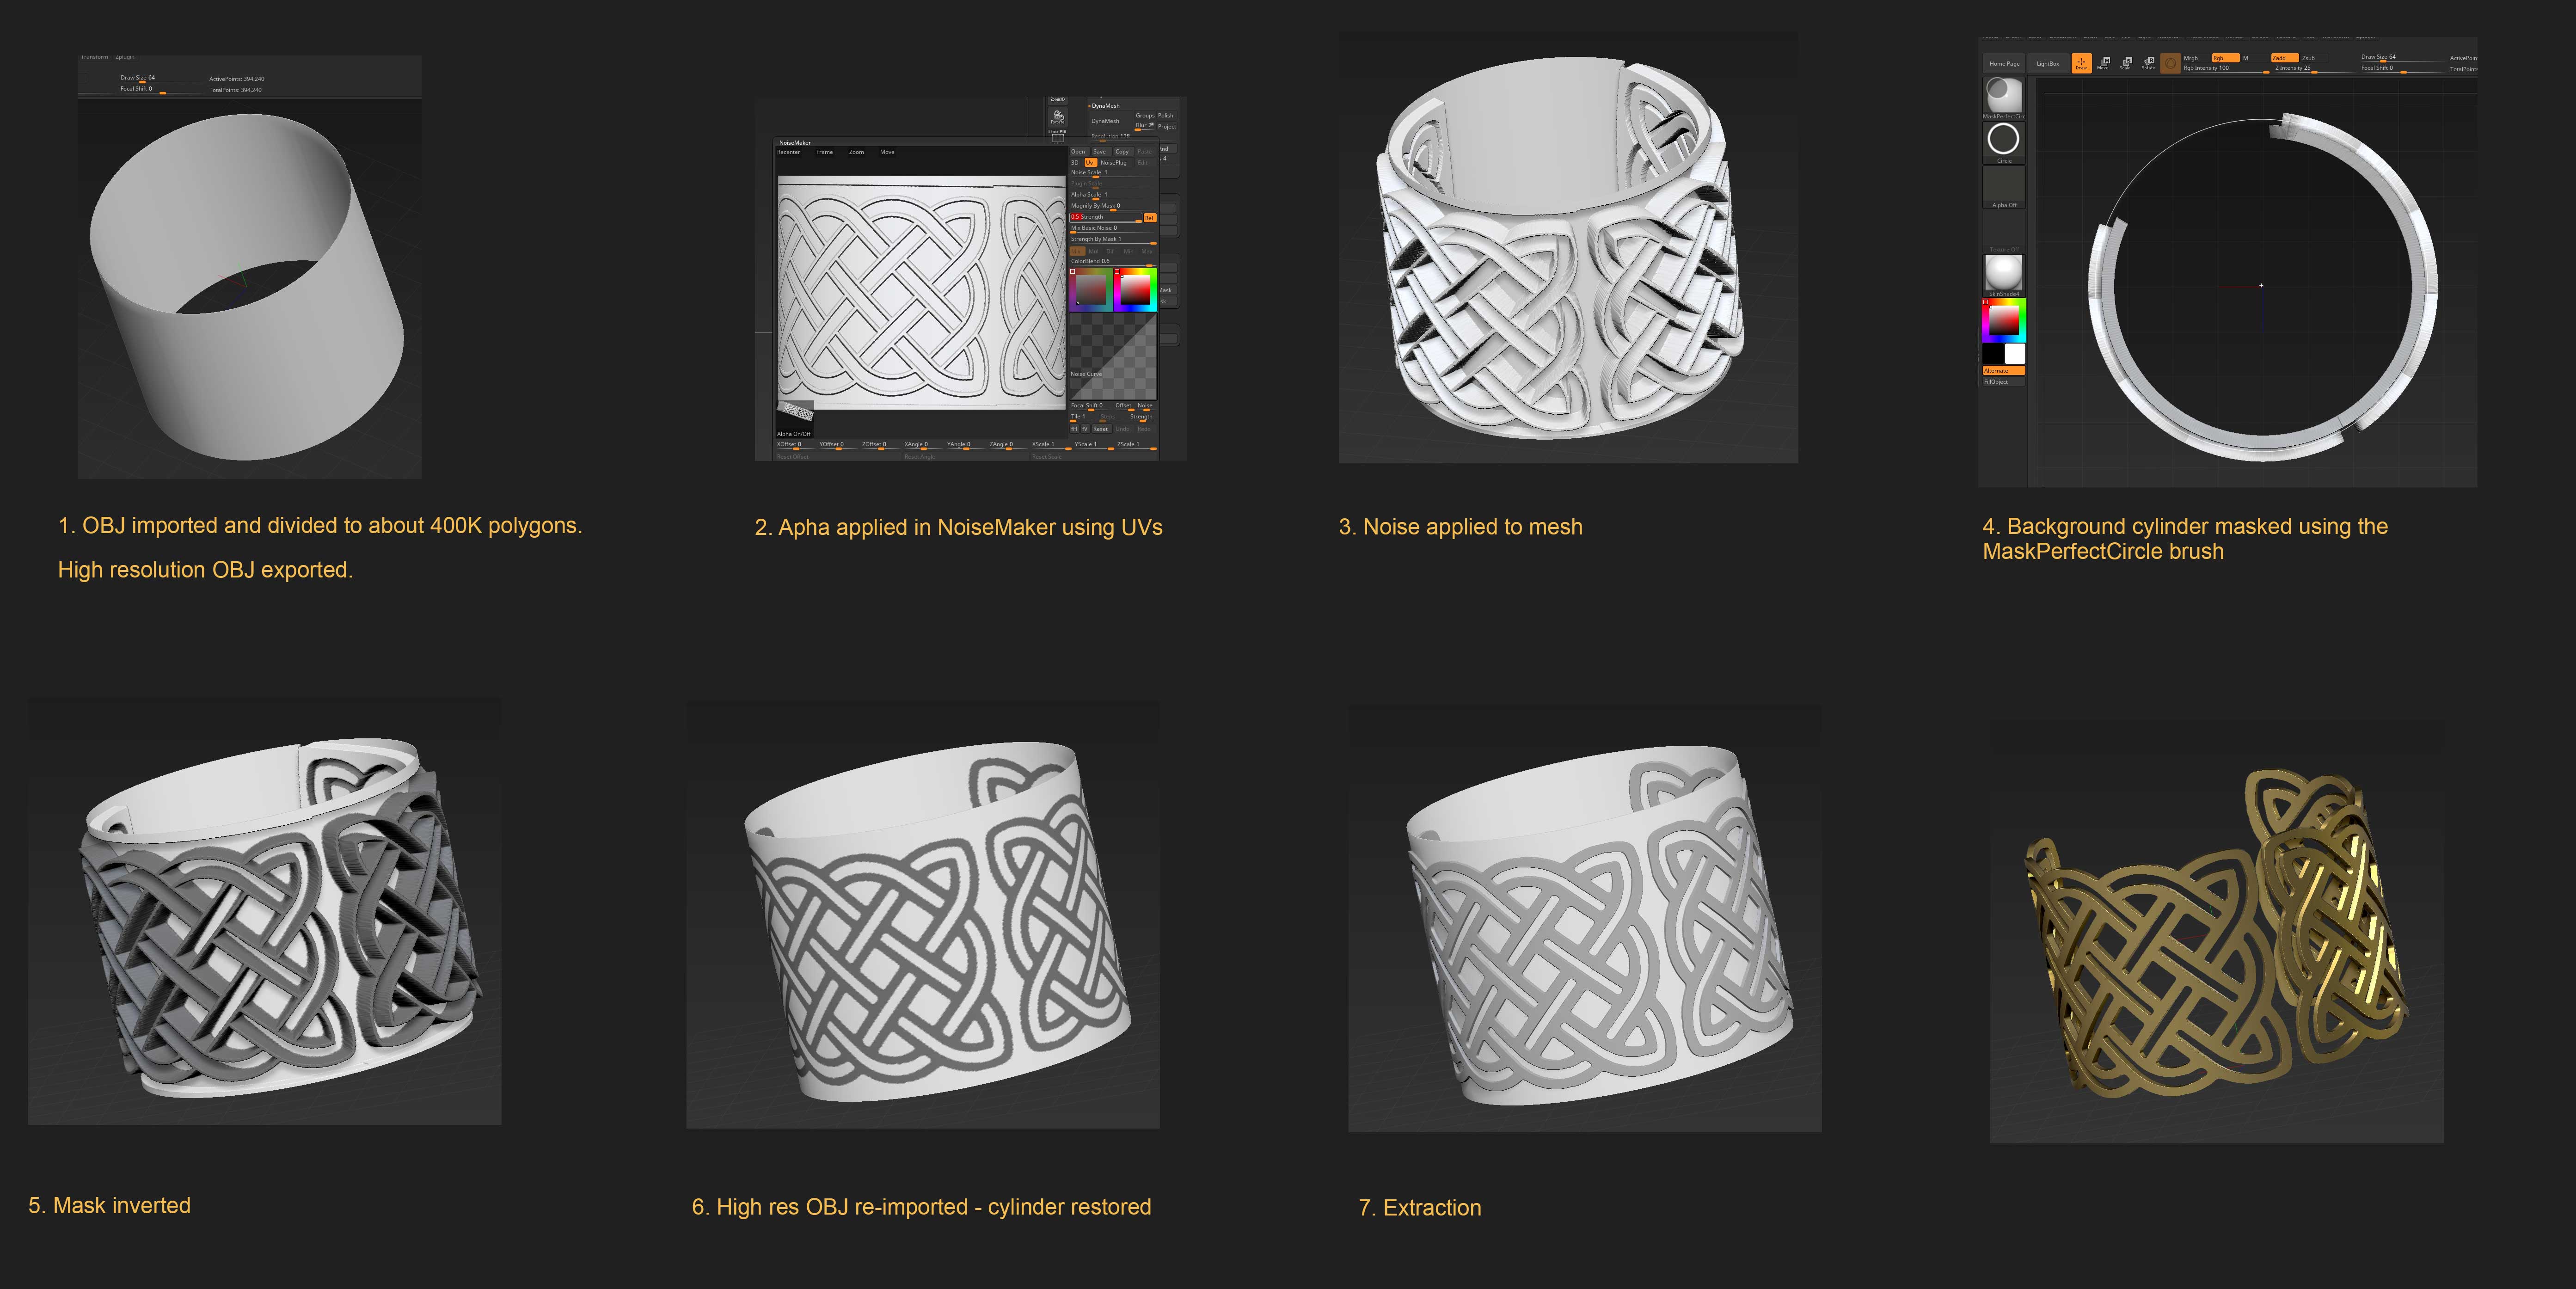
The initial object is just the Cylinder3D with the top and bottom cut off. It has no thickness. Turning on Double in Tool>Display Properties will show both sides. The low res OBJ and the alpha are in the zip attachment below. It’s important to subdivide the mesh and then export the high res version so you have a copy.
I did quick UVs but they aren’t the best. So long as your image matches the UVs it will fit perfectly in Noisemaker. Make sure you have the UV option on (as in my picture in the early post) and load the image by clicking the little Alpha On/Off button bottom left of the window. I set the Strength to 0.5 and the Mix Basic Noise to 0.
Once you’ve pressed Apply To Mesh to create the actual geometry it will displace inwards and outwards. But that doesn’t matter. It’s just so that you can mask the cylinder and leave the design. Make sure Perspective is off and you’re looking down on the model. Hold Ctrl and select the MaskPerfectCircle masking brush. This will create a perfect circular mask. Hold Ctrl and start to drag out the circle. Once you’ve started dragging you can let go Ctrl but don’t let up the mouse. You can drag away or towards the center to change the size of the circle and you can hold down the Spacebar to reposition. Once you’ve let go you can improve the mask by pressing ShrinkMask and SharpenMask as necessary.
Now you import the high res OBJ you exported at the beginning. This is essential. What it does is get rid of the displacement and leave the masked cylinder. The OBJ you import must have the same number of polygons as the mesh you are importing into, otherwise you will lose the masking. You can then invert the mask (if you want) before doing the Extract.


