Yes I know, it doesn’t work (it doesn’t actualy let you work with zmapper till you’ve hidden the other sets). The result is random pixels.
That is an OpenGL error message. ZMapper uses OpenGL so you need to check that it is enabled on your machine. I’m sorry I can’t be more specific than that.
Thanks for that,
OK, that’ll be it then. Boot Camp it is for that then.
Cheers, appreciate your time,
mick
mdme_sadie is right, this does appear to be a legit issue.
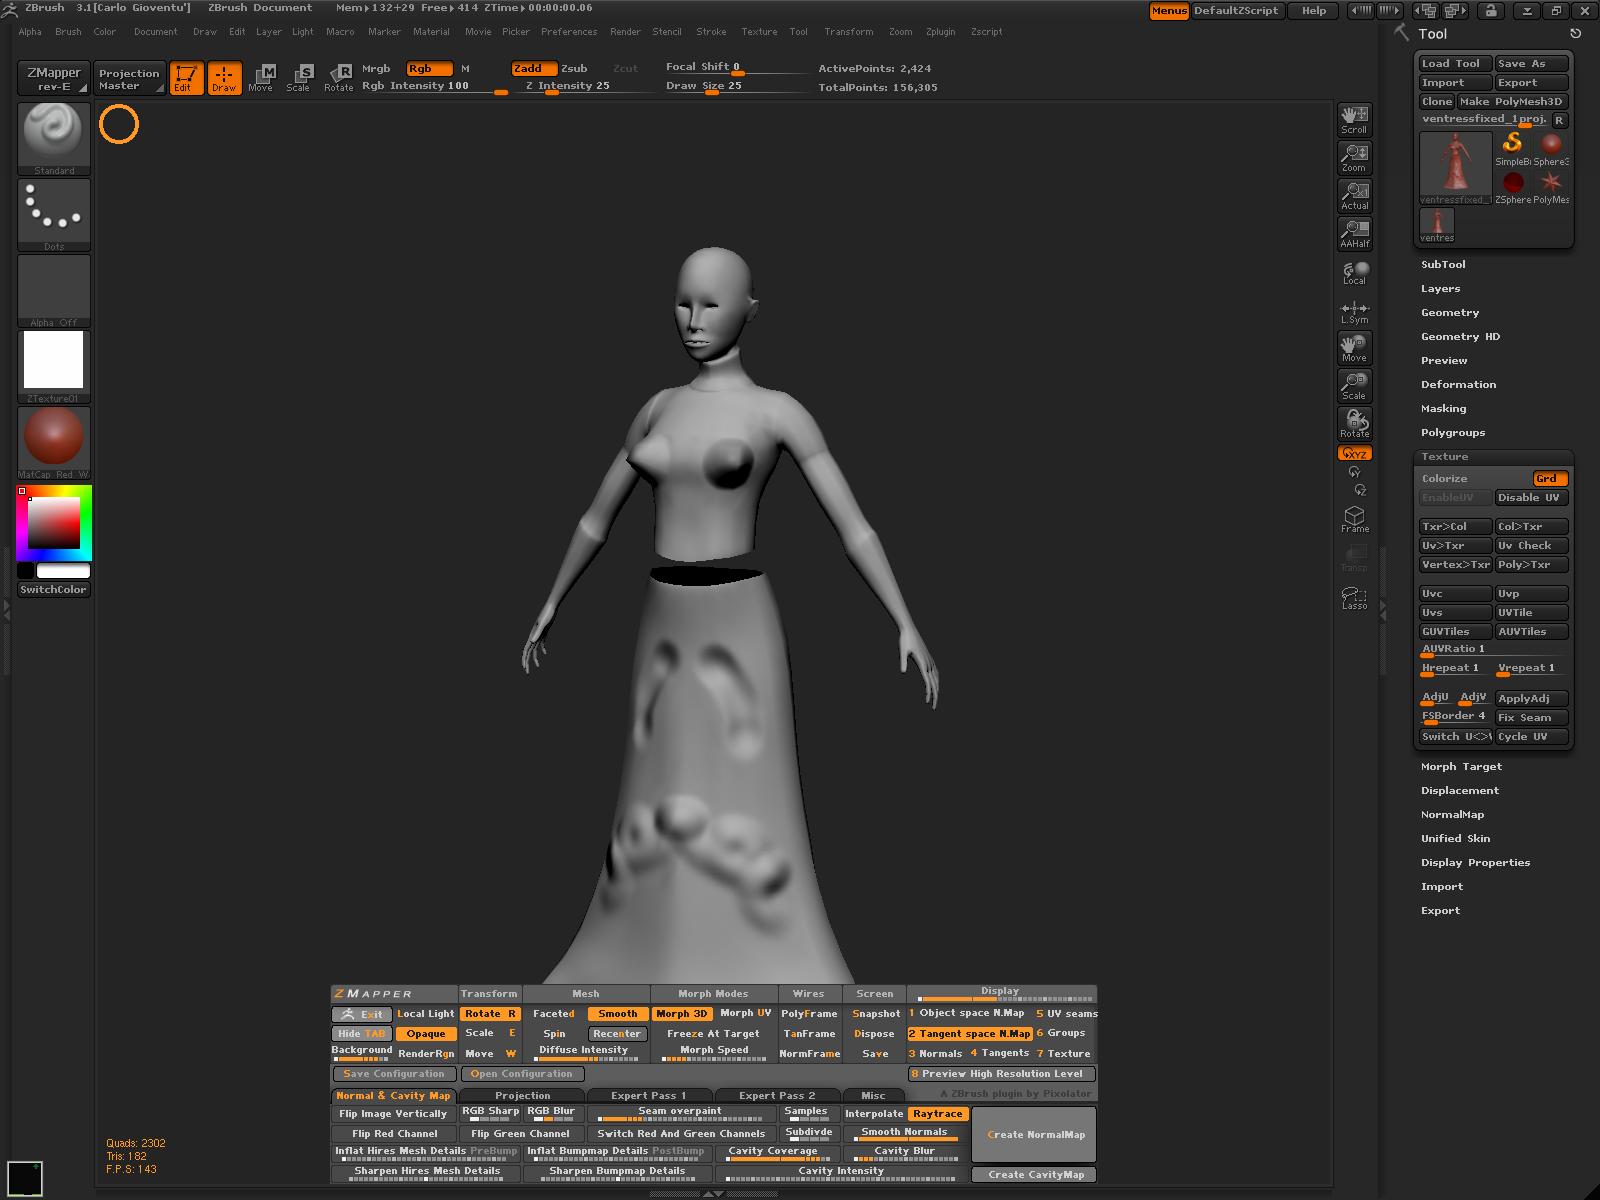
In zbrush 2. you could have multiple uv regions and zbrush would only calculate the uv region being displayed by the corresponding portion of the mesh that you had displayed. But in zbrush 3.1 it doesn’t do that. Any mesh that has multiple uv sets will not calculate a correct normal map, it comes out all jacked up.
Has anyone had any luck creating tangent space normal maps with Zmapper? All my attempts have resulted in garbage.
I posted in another thread regarding the mess that Zbrush output for me. Head and hands, head on its own… still the same problem. Exploding mess.
I’m working on a game model that has mirrored, overlapping UVs. That could be the problem. I didn’t use Zmapper for ZBrush 2, so I’m not that familiar with it. I can create normals for it in Modo or XSI with the UVs laid out this way.
used many times lately with success.
can i help you?
can you explain with more details possible your workfloshand whats going wrong?
I have a character I’m creating. The base mesh was made in Maya 8, sculpted in Zbrush3. I tried to reconstruct in in Zbrush 2 so I could use Zmapper but it messed up my Uvs. So I redid the UVs and to wait for Zmapper in 3.1 cos I wasnt too pleased with the displacement Xnormal results.
When I tried Zmapper 3 it exploded. I took it down to the lowest subdivision, transfered the uvs from my low-poly model in Maya to the imported OBJ. It transferred fine.
Imported the OBJ back into Zbrush went up the subdivisions, it worked fine, no explosions, but as soon as I took it into Zmapper, it explodes if I try the high res preview , and if I try to create a normal map, I get a mess.
I did try using automatic mapping on the Zbrush OBJ and that worked fine but that implies that I’ll either have to redo my uvs for the millionth time, or try another method for creating the normal map cos Zmapper does NOT like my model! :mad:
ok, can you send me the low res obj?
It’s an OpenGL message. Essentially Zmapper is using higher level GL functions than can be supported by emulators. Right now bootcamp is the only solution. As for me, as much as I love Z3, I’m doing more in Modo 301, which has a pretty nice sculpting set. (I like that I can directly sculpt my mesh, displacement, and bump maps at reasonable poly counts.)
It’s simply getting too frustrating to be a Mac Z3 user, but I think Pix has made their interest in the platform well enough known by now.
I can defend Pix all day long, but the disappointement with the latest Zmapper is close to the last straw for me. If I have to keep doing my baking in other tools, I might as well use Mac-native solutions like Modo, Silo, etc.
It’s sort of clear to me that Pix didn’t even bother to test Zmapper in the emulators like Parallels and VMware, and and to me that speaks volumes about their commitment to the Mac platform.
-K
The actual OBJ? How?
export the obj with the lowest subdiv, zip o rar it and send me through mail.
my address is the same i use for this forum.
PS sending my address via Pm.
ok kaisasose, seems that i’ve found a problem and a little workaround for you.
the problem is that multiple uv seems to dislike (is this a true word?) zb 3.1.
anyway i’ve checked with XSI your model, it seems all fine, then i’ve reduced it all in one UV projection and Zmapper worked fine:
[ ]
]
after that i’ve tryed many combinations of multiple uv, placing them in negative then in positive 0,1 spaces, but everytime zb seems confused but it.
BUT
if you:
- Draw your object with multiple UV and enter Edit mode.
- Press Uv Groups in TOOL -> Polygroups
- use GRPSLIT button inside Subtool menu (in TOOL)
and now you can create normal map for every subtool using ZMapper.
Truly hope this helps.
Cheers
Thanks VERY much for taking the time, I’ll give it a go and I’ll let you know the results.
~k~
I can defend Pix all day long, but the disappointement with the latest Zmapper is close to the last straw for me. If I have to keep doing my baking in other tools, I might as well use Mac-native solutions like Modo, Silo, etc.
It’s sort of clear to me that Pix didn’t even bother to test Zmapper in the emulators like Parallels and VMware, and and to me that speaks volumes about their commitment to the Mac platform.
Mate, I feel your frustration. I know how hard you tried to get this working for us Mac users, I am one of those who benefited from your advice on getting a tablet working in VMWare. I thank you again for that.
I must say though that from what I have seen so far of Pixologic they seem like an honorable bunch of folk, and I am inclined to believe them when they say that a Mac version will come as soon as they can get it done.
I have had a few dealings with Autodesk as a Maya user, and I cant imagine them releasing a major update like Z3/3.1 users for free, even for those like me who had just bought Z2 a few weeks before.
I will keep going with BootCamp, and suffer the rebooting palaver, for my normal mapping. I think it is worth it to learn this wonderful app.
cheers, and thanks for replying to my question,
mick
Gattomanzo, you’re officially my hero. Group Split did the trick… no more exploding mesh. Thanks a million dude!! 
always happy to help…
looking forward to see your work done.
cya 
God I love this forum! I was having the same problem with my mesh taking forever to render normal or cavity maps in ZMapper (with having multiple UV sets), then exploding and giving me useless results. GrpSplit FTW!!!
Hi there!
Im have a little problem:
Im a max user and i created a character for later use in a game (hl2 deathmatch).
I put it to Zbrush to add more detail for normal map and for texturing.
My problem is with the way the normal map is generated. the blue and green channels are switched in normal map export, and of course its get lightning weird (I created a normal map in max for reference it was good, i swithed the zbrush normal’s green and blue in photoshop and its became correct).
there is a lot of options in i/e preferences and in zmapper but only red and green can be switched.
Could it be the an axis problem? am i imported the .obj incorrectly flipped axes? (i tryed an other way imported but same channel order…)
- what is the difference between tangent space and world space? which one is used in games more?
Help me please!
And sorry for my english!!!


