One thing that I thought it might be was that those poly’s were “smoothed”, but I checked those settings already and they were not.
Its most likely a uv mapping issue. Check your uv map. Max may be altering the uv layouts upon import. Nice model btw, although the shading seems to be a bit dark on it.
Thanks for the comments.
One reason the shading is so dark is that I have the displacement turned about 20% more than it will be on the final. I was just wanting to push it a little too far to see how far I could take it without it “blowing up”, It needs to be relaxed some for that.
Test_Full006: Hair is getting much closer to my goal, but still not sure which setting is making it a bit too blond. I am working on that. Body hair will be my next target once I figure out what is causing the blondness to this hair. I will likely work on relaxing it just a bit more and give it a matted feeling as if mud, etc. is in the hair. Learning how to do the Mental Ray shaders was a huge step forward in my experiments. Thanks JP:). Render times are only around 20 min with the hair so I am happy with the compromises I made between render/quality so far.
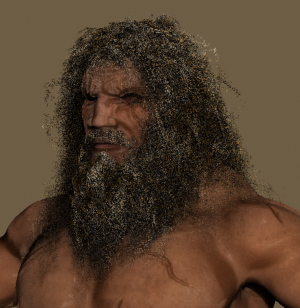
The hair seems fine. A bit of color variation never hurt anything, actually it improves it I think. I would work more on the skin shader though. It doesn’t feel like skin.
The skin is far from being done so I totally agree with you there.
Concerning the hair, I agree that color variation always helps, but I am unable to find what is adding the “blondness” so that I can control it at all. Still playing with the mental ray shaders but it seems to be somewhere in the hair and fur mod itself since when I place the same exact shader used on this one on a new material I can get a black/grey hair, but I like this one better. I have tried to replicate this hair with other hair modifiers and can not even when I use the exact same settings … at least all that I know of.
I am new to the hair mod so will probably stumble accross it in a few minutes … or hours lol.
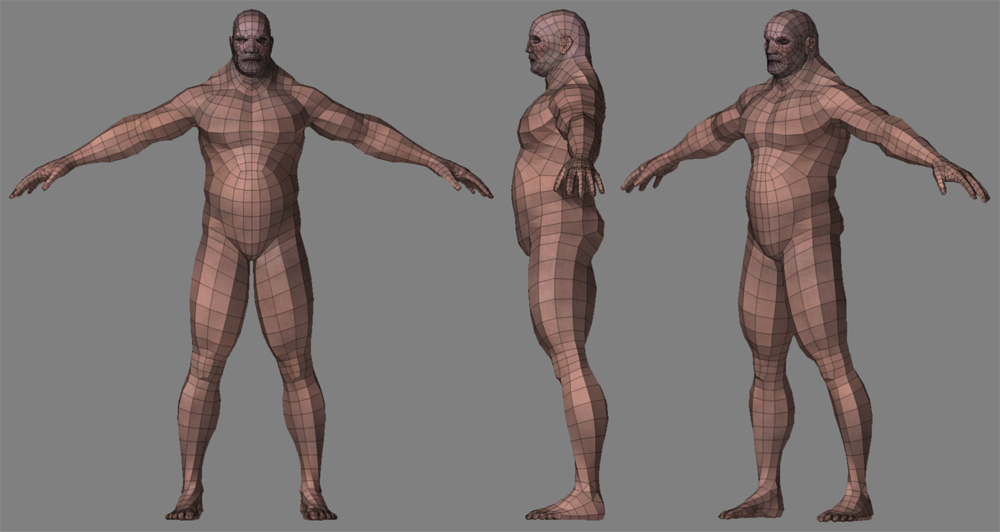
ZB_SamsonScreenshot_011: I had a critique from someone I really respect in the industry on my anatomy and totally agree. He did not give me specifics, but it definitely was looking inhuman so I reworked everything accept the head. I like the head being slightly smaller than normal now so that it gives him a bigger than life appeal and with his heavy hair load I think it will balance out and look about right. I am trying to make him look like he is about 7 feet tall, but not slightly off-balance like many tall people look. I want him to be fairly proportional since from what we read in historical/bibilical accounts people in some regions lived longer and grew larger back then.
I also removed some definition from the lowest level of geometry so that he was not so defined which would not be normal having a slight potbelly. I originally had a concept of him as slightly “sumo” wrestler style, but decided against it for a number of reasons, the main one being my wife’s request that I go this route than the sumo route. The things we will do for the women we love, lol. I drew a few concepts and she liked this style best and I agree for what I am doing this works.
The feet and hands have been totally reworked paying closer attention to the reference I started with. The hands have been enlarged a bit and the legs/arms were elongated about 10%. The Gaston brothers are both artists that I have always respected and they always told me that on the legs, arms and hands I should make them a bit larger than true proportion and I think it helps sell my desired impact.
[attach=45524]ZB_SamsonScreenshot_011.jpg[/attach]
Attachments
Nice work! It’s good to see you past those issues hosch.
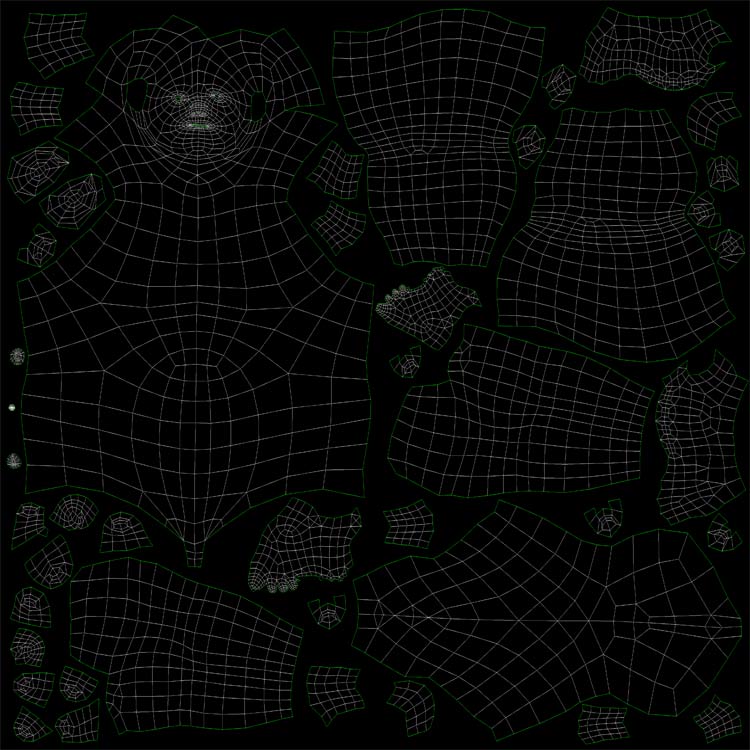
I also completely reworked my UVW’s. They were causing a number of issues and I did not know that each time I re-import the OBJ back into max that I needed to re-apply the UVW unwrap and reload the old UVW information. ZBrush or just the creation of an OBJ in general was not actually “moving” the uvws, but was making each polygon its own entity so that each edge in the model had its own seam. This seemed to be causing a few issues when being displaced. Either way re-loading the original uvw map solved those issues.
Since I was doing them over anyway, I took that time to use the information I learned from my first time at it and use the map more efficiently. So far I have seen a much better result.
Unless anyone sees major areas of concern, I think I can start on the home stretch and finish texturing this guy, do the hair and rig him for posing and later animation.
Thanks everyone for all the interest and help so far.
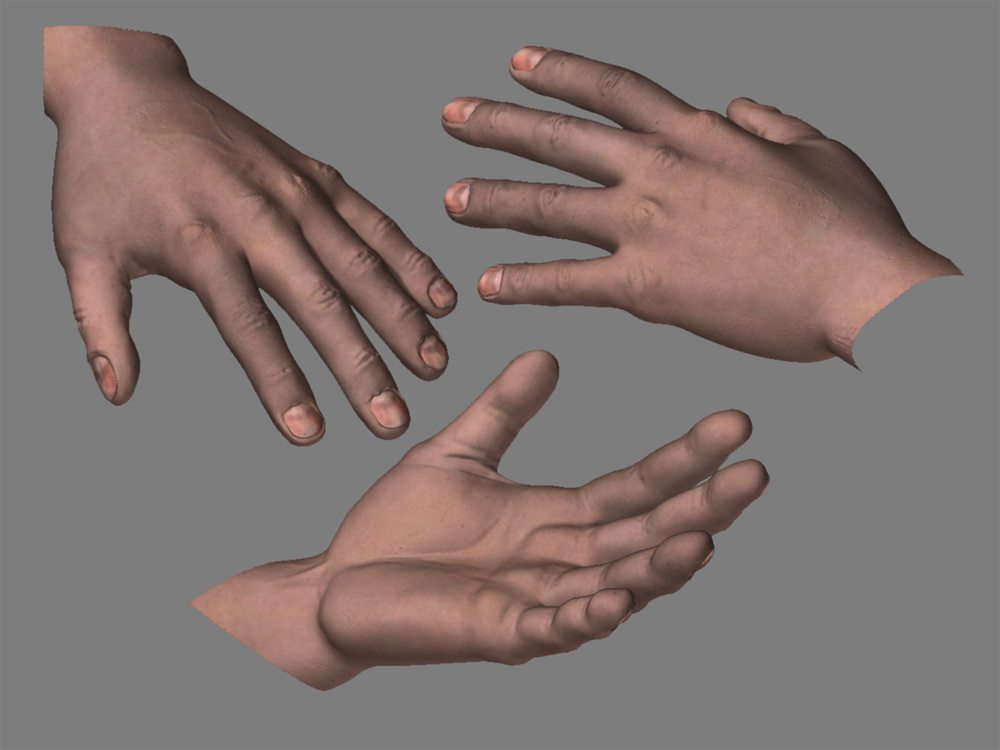
ZB_SamsonScreenshot_012: Obviously these hands need more work since they definitely do not look real, but I am running out of time for tweaking as my texture deadline is tomorrow at midnight and Sunday night midnight is my deadline for hair and rigging for a pose. The obvious “manicured” look and gloss to the fingernails will easily be fixed later as I do all components on their own layer in Photoshop via ZAppLink in ZBrush. I think it will look good enough for the medium to far shots that I have planned for the animation and pose shots. Also I have a great deal of “dirtying” to do on a final layer of the texture which will cover much of this anyway.
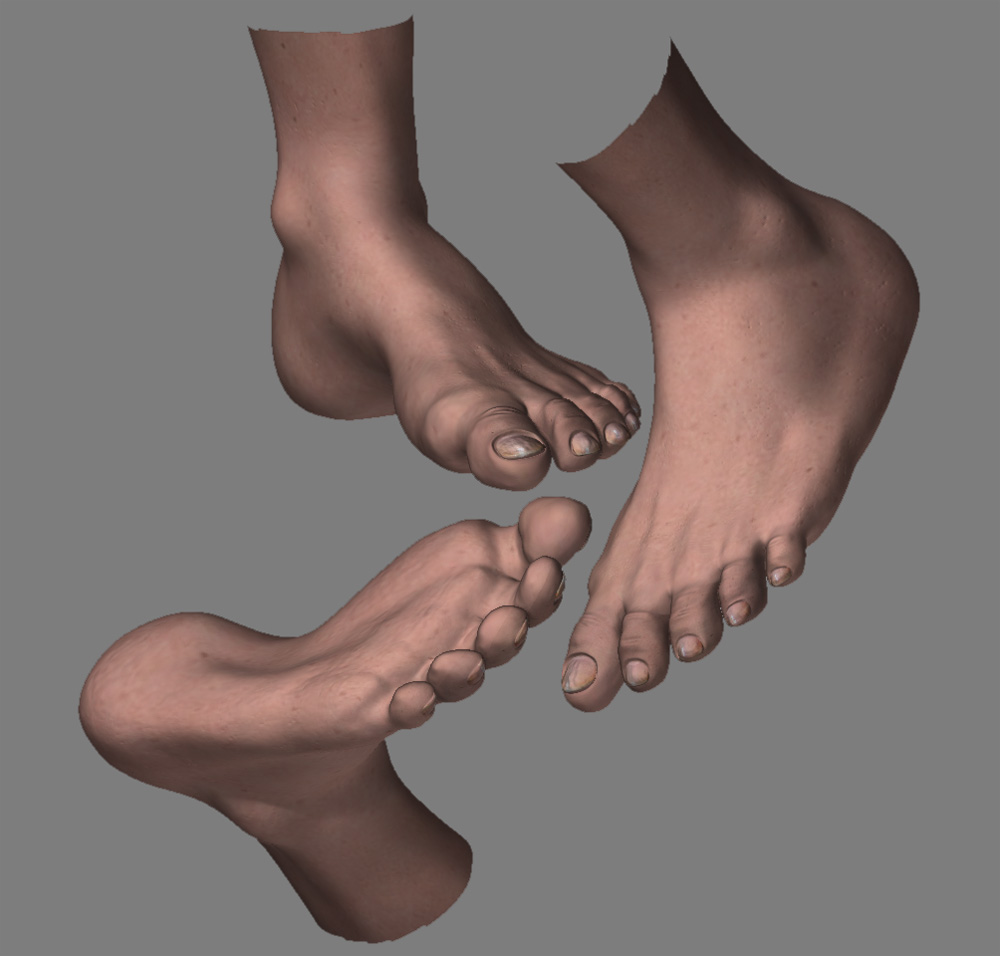
ZB_SamsonScreenshot_013: Same as with hands, the nails are on separate layer and will be toned down later on tomorrow when I am tweaking. Right now I want to block in the parts of the body quickly. The feet could use more anatomical work, but I must move on to other things to meet my deadline:(.
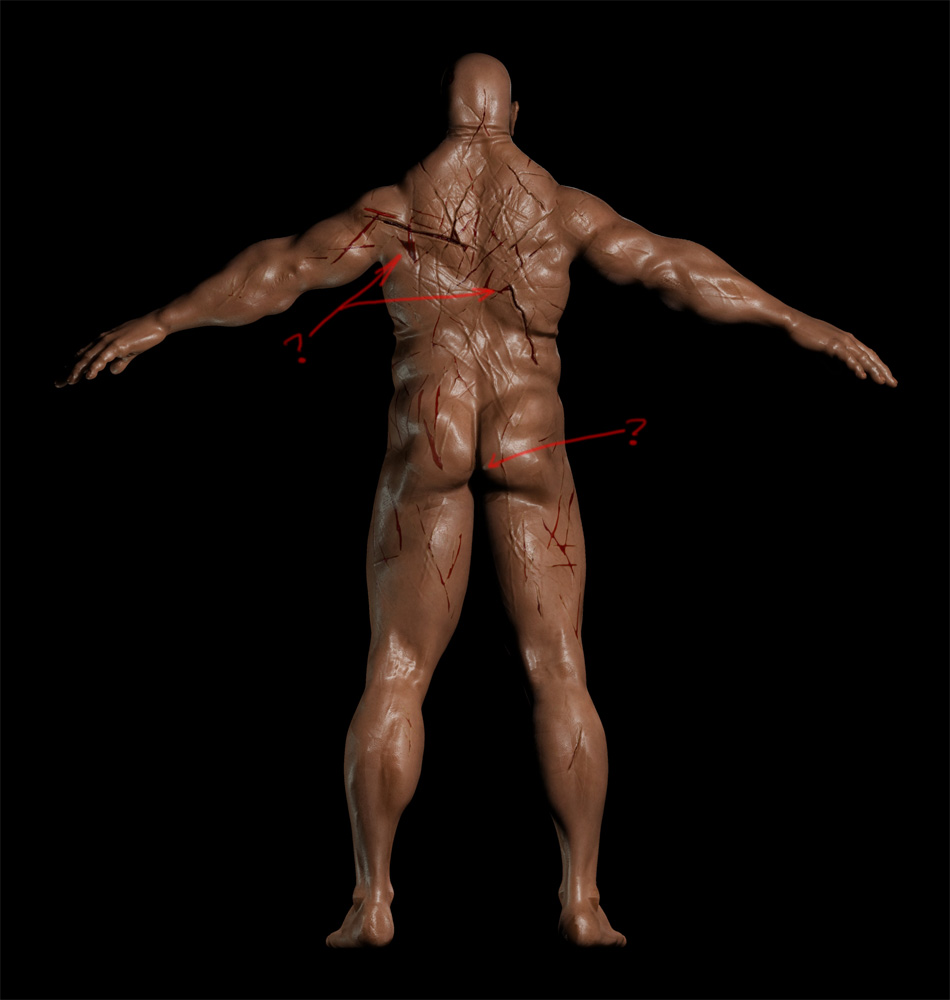
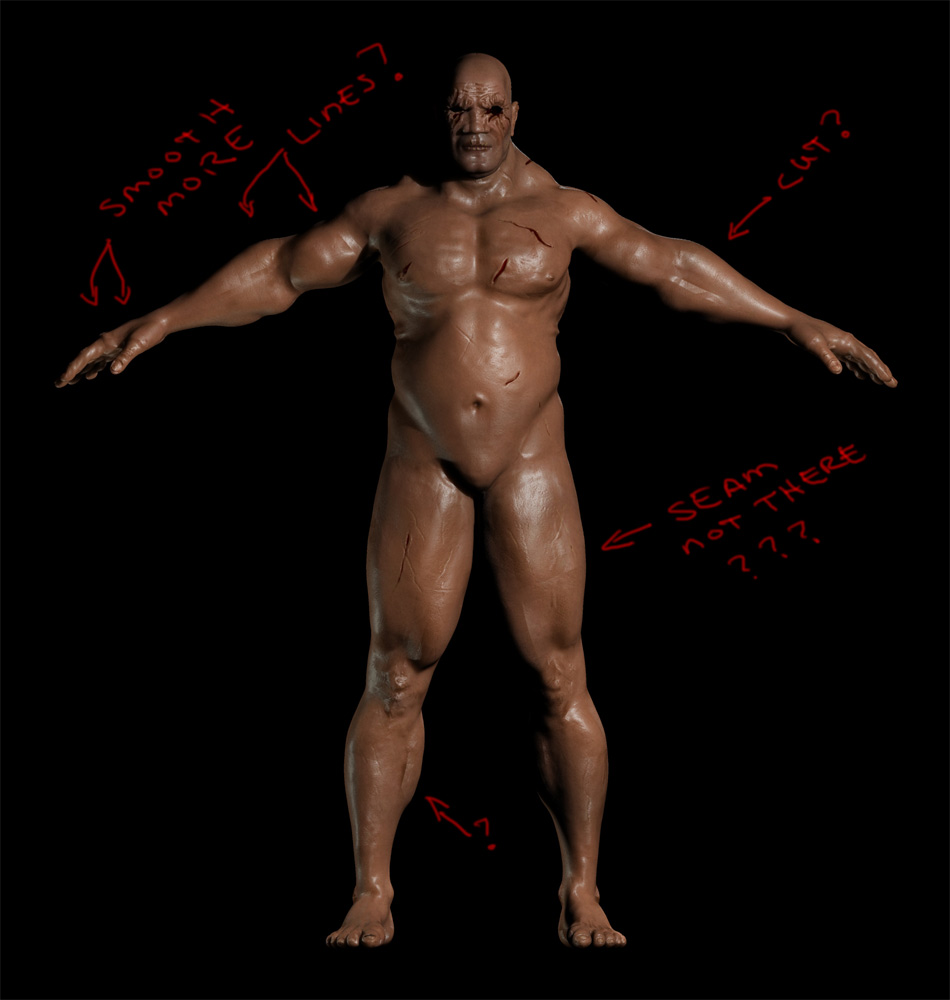
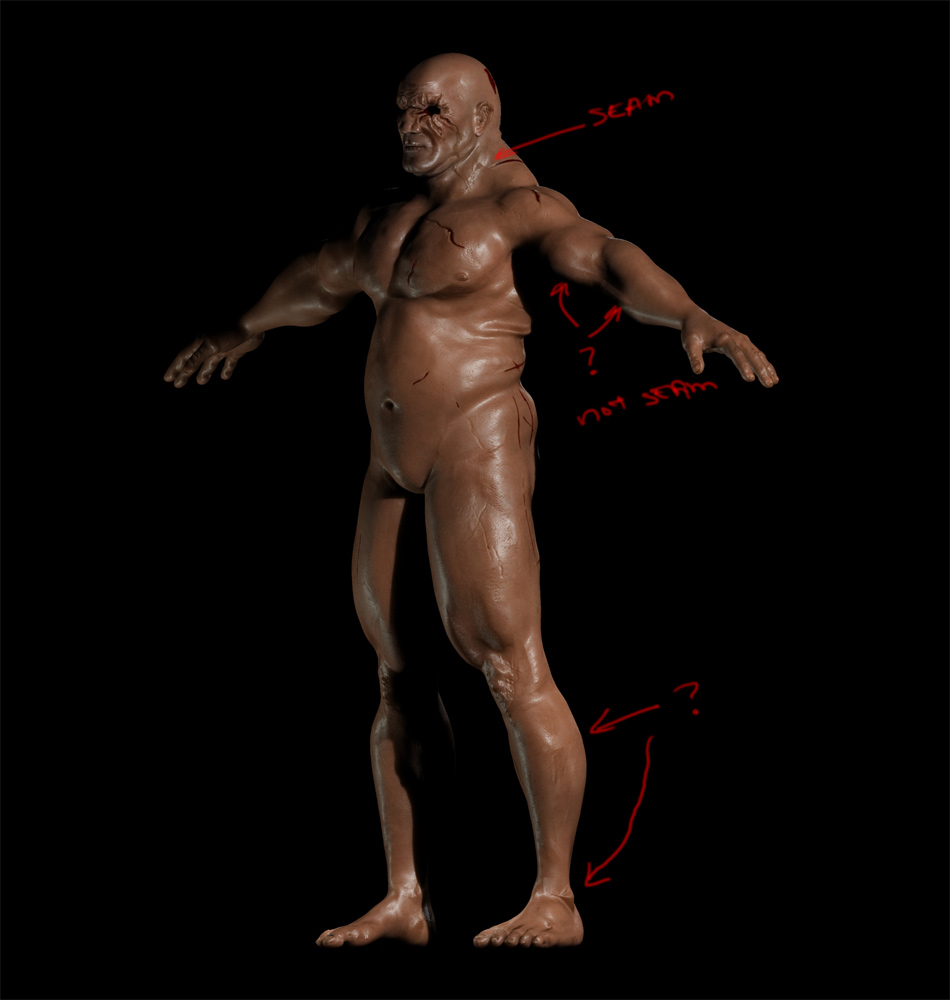
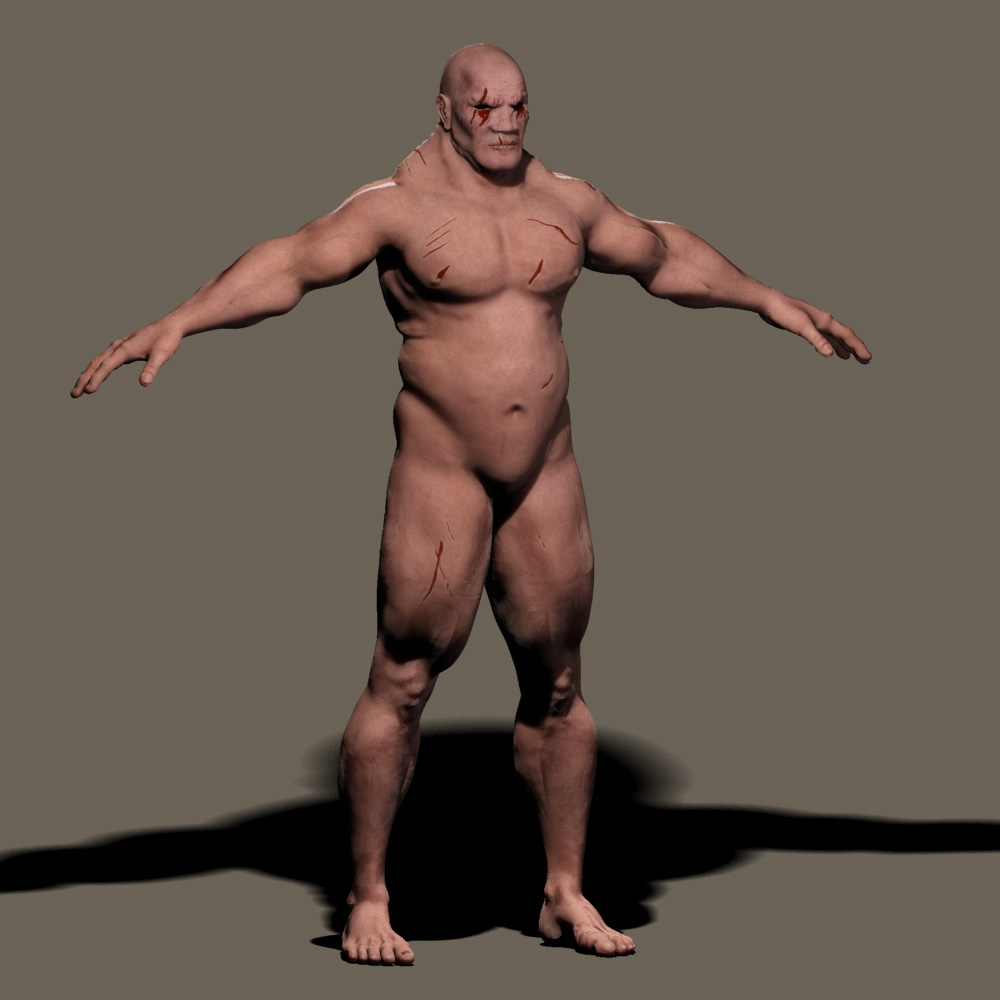
Samson_Front/Back/Quarter_002: I have pointed out the areas that I know need attention for sure and some that I do not know what is causing the issue. If anyone can assist with these areas with advise or direction please post or PM/email me.
There are still a number of maps that I have not done yet as well as layers for this map.
Completed accept for final adjustments:
Diffuse:Epidermal layer
Diffuse:Finger/toe nail layer
Diffuse:Scaring layer
Still do to:
Diffuse:Grim layer
Diffuse:Callouse layer
Diffuse:Dirt/mud layer
Specular Map
Subsurface Scatering Map
Vein Map (Subsurface)
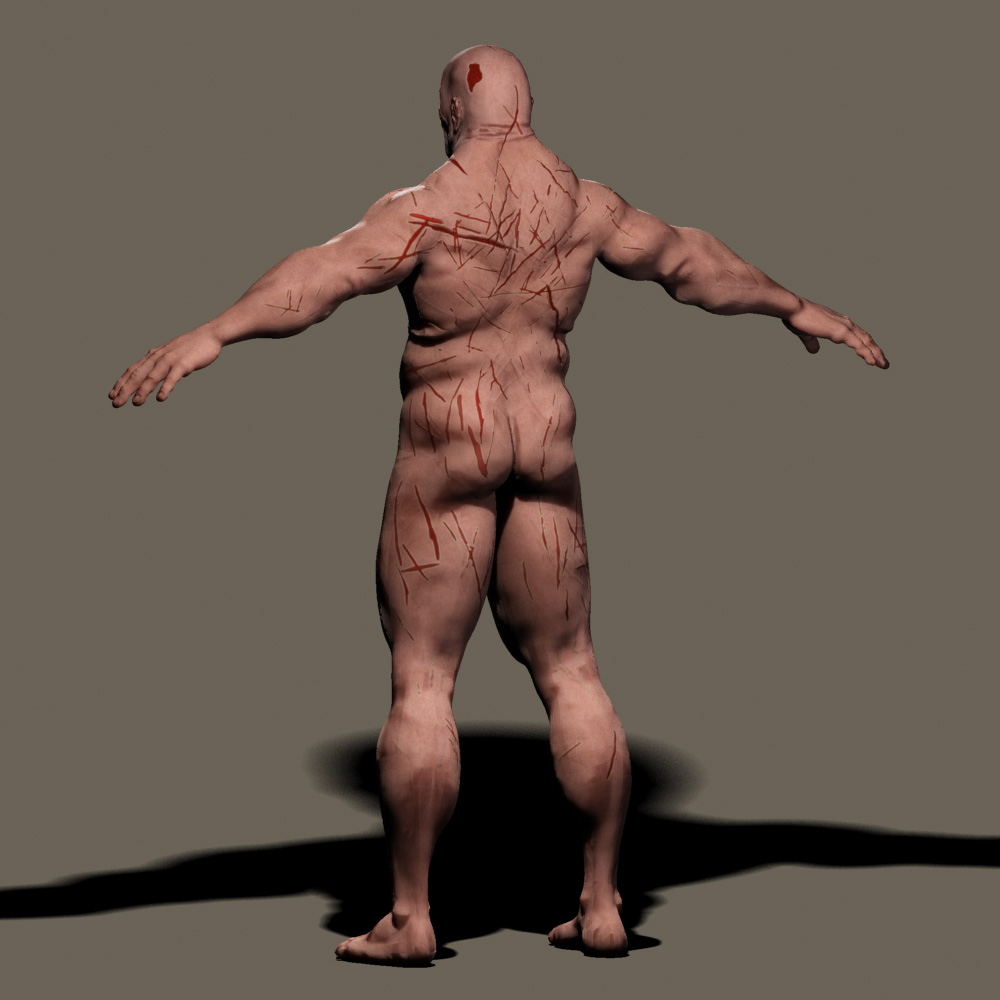
On the back view notice two areas of “pooled blood” that I did not texture. This looks like scewed polys or UVW’s but I checked them and they are using my orginal UVW’s so I am stumped.
Once this is all complete I will be able to start the rigging/hair/posing before I move on to the environment. If I can not figure out a few of these anomolies I may have to strategically place some hair to hide those flaws. I would prefer to understand and correct them so if anyone has any ideas please chim in:).
Attachments
I figured out the back “pooled blood” oddity. What happened is that in projection mode in zbrush my uvw’s got scewed like I thought so the paint I “thought” I was doing was being thrown accross the back and when I fixed the uvw’s upon importing into max it “pooled” the color like you see.
I do not know how to fix this since when I try the mgr that was suggested previously upon import into zbrush I get crashes when I try to then apply the texture. I will continue testing and see if I can find a solution.
LATER EDIT: Actually it was … yet again … operator error, lol. When I selected the grey background I used as the base of my scars layer I forgot to uncheck contigous and it left some grey in that triangle area that once the filter applied looked like blood. Ok, 1 down, many to go on figuring how to fix them.
The skin shader looks fantastic! Thought it was real when I first saw the thumbnail. You need to get more definition for this guy though, he’s lumpy like , um grits!
I actually have been painting out some of the detail I had since I want him to be slightly stocky/bulky rather than defined. Like a wrestler or strongman from the “strongman competitions”.
Do you think that will look good once I get him all hairy?
He will be less shiny in the final, I have not adjusted that yet.
Test_Full_000000/000017: Still a good ways to go, but I wanted to get the material editor set up since this is my first time. I am happy with the material settings such as spec/sss/diffuse/etc., but still need some work on the feet/hands anatomical as well as the dirty/grim layers and if I have time some more work on the underlying textures like the scars which are very bland, etc. I think I am going to call it a night since I have been at this almost 36 hours trying to tweak settings and such, but I am fairly happy with my progress. Also he will be much darker at the end, I have not given him his weathering yet. There are still some seams which I cant figure out how to get rid of. I know my shadows are crappy, but I just have not gotten to that yet since I am new to mental ray I will get to that eventually.
Attachments
I kind of like some shine. He’s too flat without out it, and it looks a lot more realistic. Nice leathery look to the skin. How about a halfway point between the two? And I would still define the muscles a tad more. They are getting closer to looking right, they don’t need to be overly done.Also you will probably get some forearm veins too popping out.
Thanks. I am talking to an EMT friend now that is giving me advise on the wounds. I have almost all of them way off lol.
I will probably put some shine back in, we will see:).
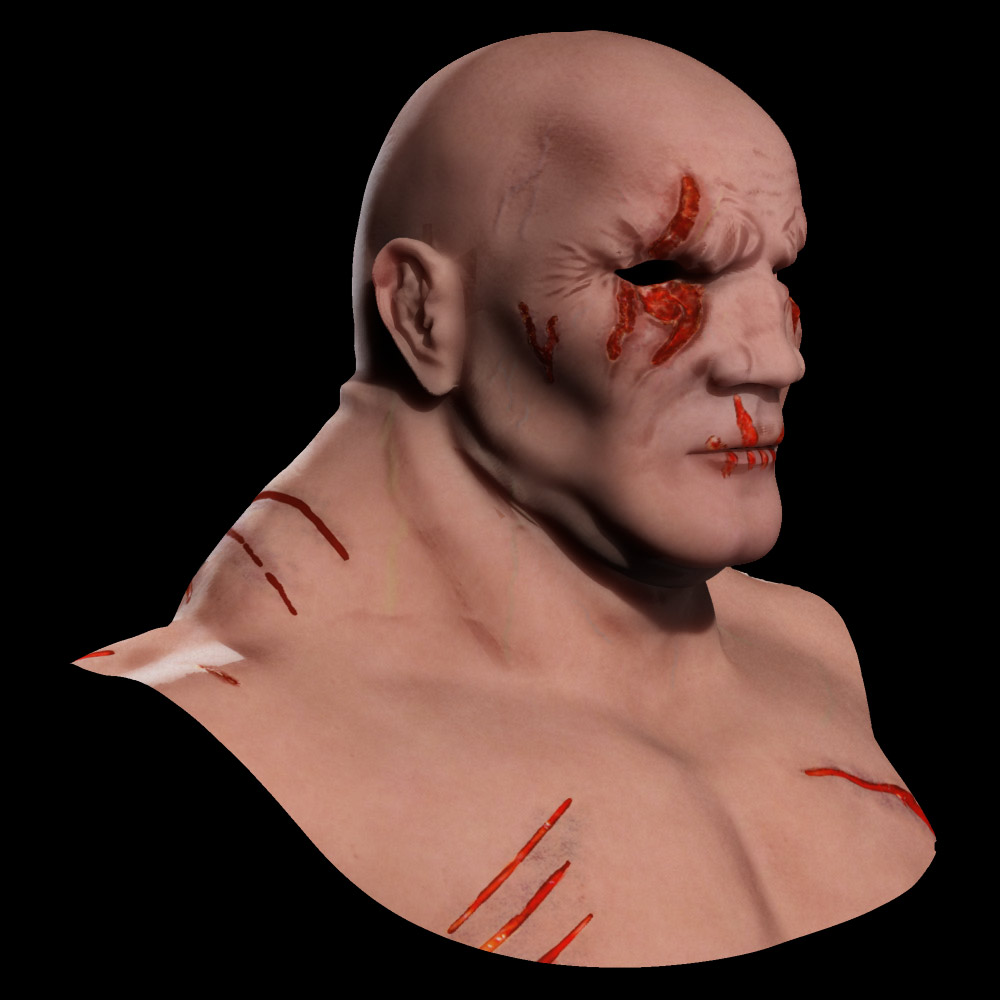
Samson_Portriat: Unfortunately, the only way I get him to look this good is by jumping through a few hoops in Photoshop. I have not been able to get him to look this “crisp” with displacement and texturing alone. I am at the stage where I take my renderings into Photoshop and “idealize” them a bit. My next step is to try to figure how to get him as close to the idealized images as possible in true 3d for the animation.
This stage is something I learned in Ian’s training DVD. It is something that I was not taught formally and I find it to be extremely useful in pointing out the flawed areas in the 3d model/texture directly. If only I can figure the work arounds now, lol.
About 80-90% of this bust is the displacement render and the last finishing touches that I am trying to figure out in 3d I did playing a few tricks in 2d.
If you look at the two you will see where I have areas to work on still. The actual render is not bad … for five years ago (before zbrush made such an impact), but by the standards of today it is just not cutting the mustard :(.

Attachments
Some of the issues I am trying to figure out are not zbrush related. For example, how do I get my textured dirt, scars, etc. to show up on the model without being affected by the sss skin material. I am trying to do it without adding additional geometry which could be done with another character that is transparent and “wrapping” the one you see here using max’s skin wrap, but that seems too complicated for a standard issue the industry works with everyday. Any ideas anyone?
My main problem with the displacement map not working as desired is still my main issue at the moment though.
You need to map your SSS like you would map a specular map or a bump map!
Hope it helps!
Keep up the good work!
Cheers!