Hey guys, I brought this old werewolf model back from the shelf, it was uhh collecting dust you see 
So anyhoots, I decided to redo the Rig and Hair/Fur from 3d max native. Reason why I got this guy back is to test out vector displacement. I sculpted the character in Zbush long time ago and tried to create the vector displacement within Zbrush at that time, but that all failed leavin me to create normal maps and displacements. I was never too happy about the end results, it seems I lose volume and shape plus added long render times.
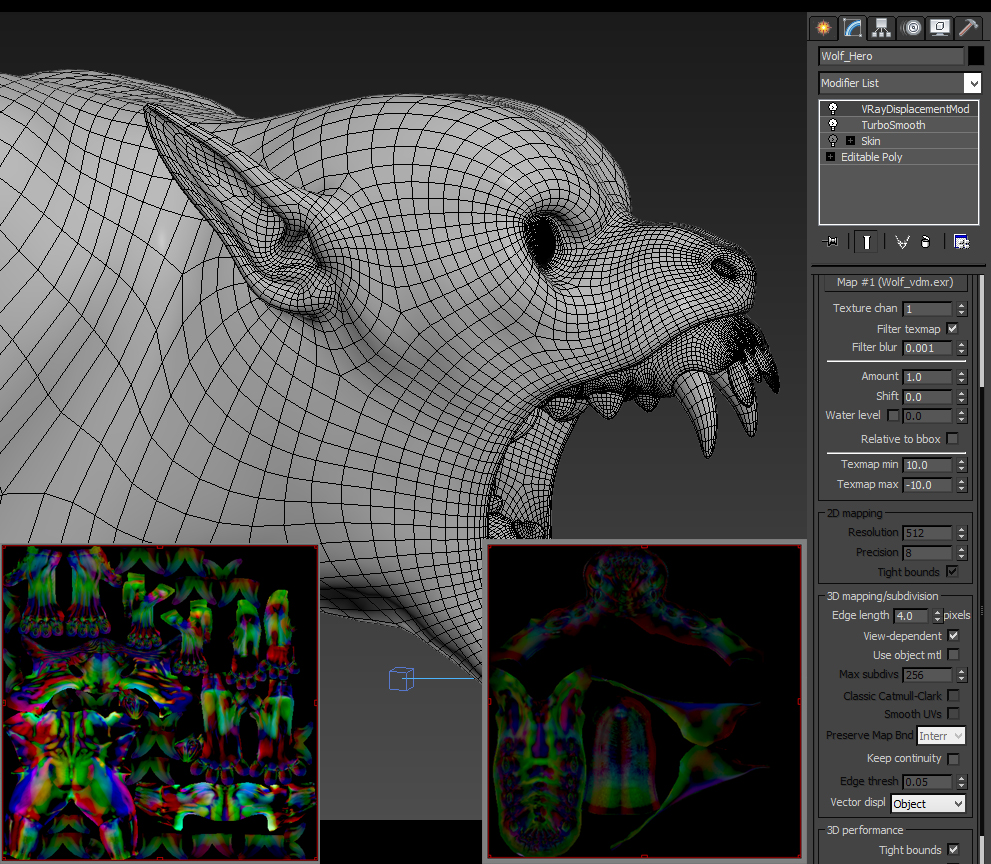
So I waited for the tech to catch up and now there is mudbox 2016, this proggie now has the proper feature to generate vector displacement maps and thus the test continues.
what I did was, export the highest levels of your zbrush sculpt and import that into Mudbox2016. In Mudbox tool bar, I used MESH then down to rebuild subdivision levels. I went to level one on my model and sent that to max, thats important because the model scales should be the same within 3d max and mudbox, or eles there would be loss of volume and shape, oh an one more thing, your UVs must be flat as possible and no over lapping, this also works with multiple tile Uvs aswell. In mudbox I used the extract texture maps and select the vector displacement map option. In there you select your level 0 (low resolution mesh) and the other part you select your highest level (high resolution mesh) selceted the image size to be 2048x2048. the most important option after that under vector displacement map options, select Object mode, then output should be a .EXR format. Generate!! Done! (ferk I should just do a video tutorial, hate typing this much!)
In max, add a turbosmooth to your model and add a VrayDisplacementMod on top of the turbosmooth. In the VrayDisplacementMod rollout, addin your map (somethin_vdm.exr) leave import exr options default, Set the Texmapmap min to 10 and tempmap max to -10… Lastly holy gawd this writing dammit! LASTLY set the Vector dspl to OBJECT mode.
What I found during render times, the renders are super fast and holds your true sculpt right to its curves But when you render close to the camera the render time increases, not sure why. Don’t ask me I didn’t build it! 
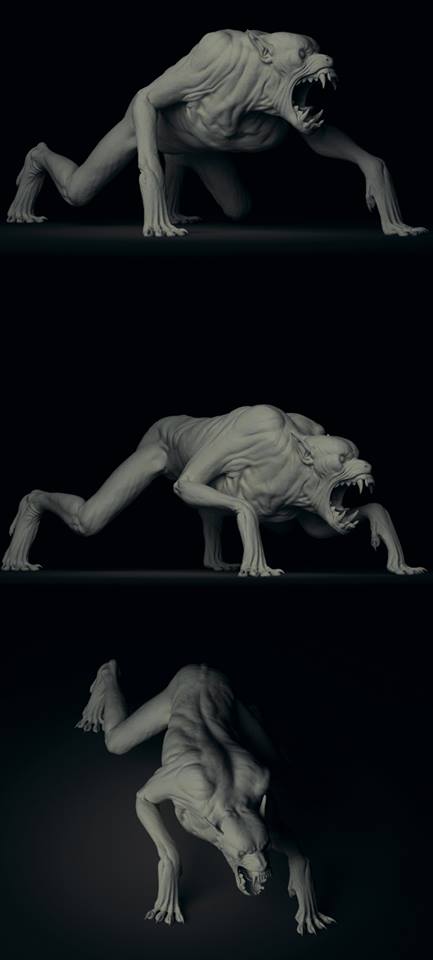
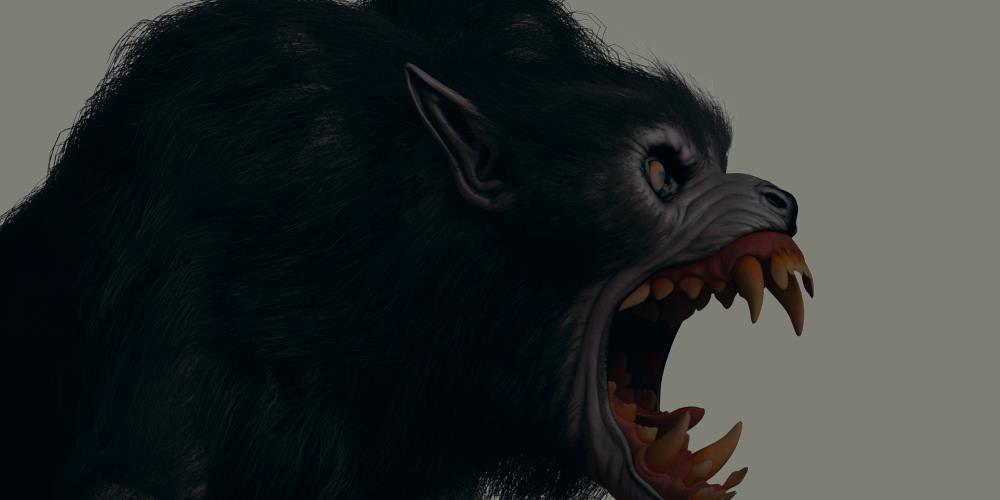
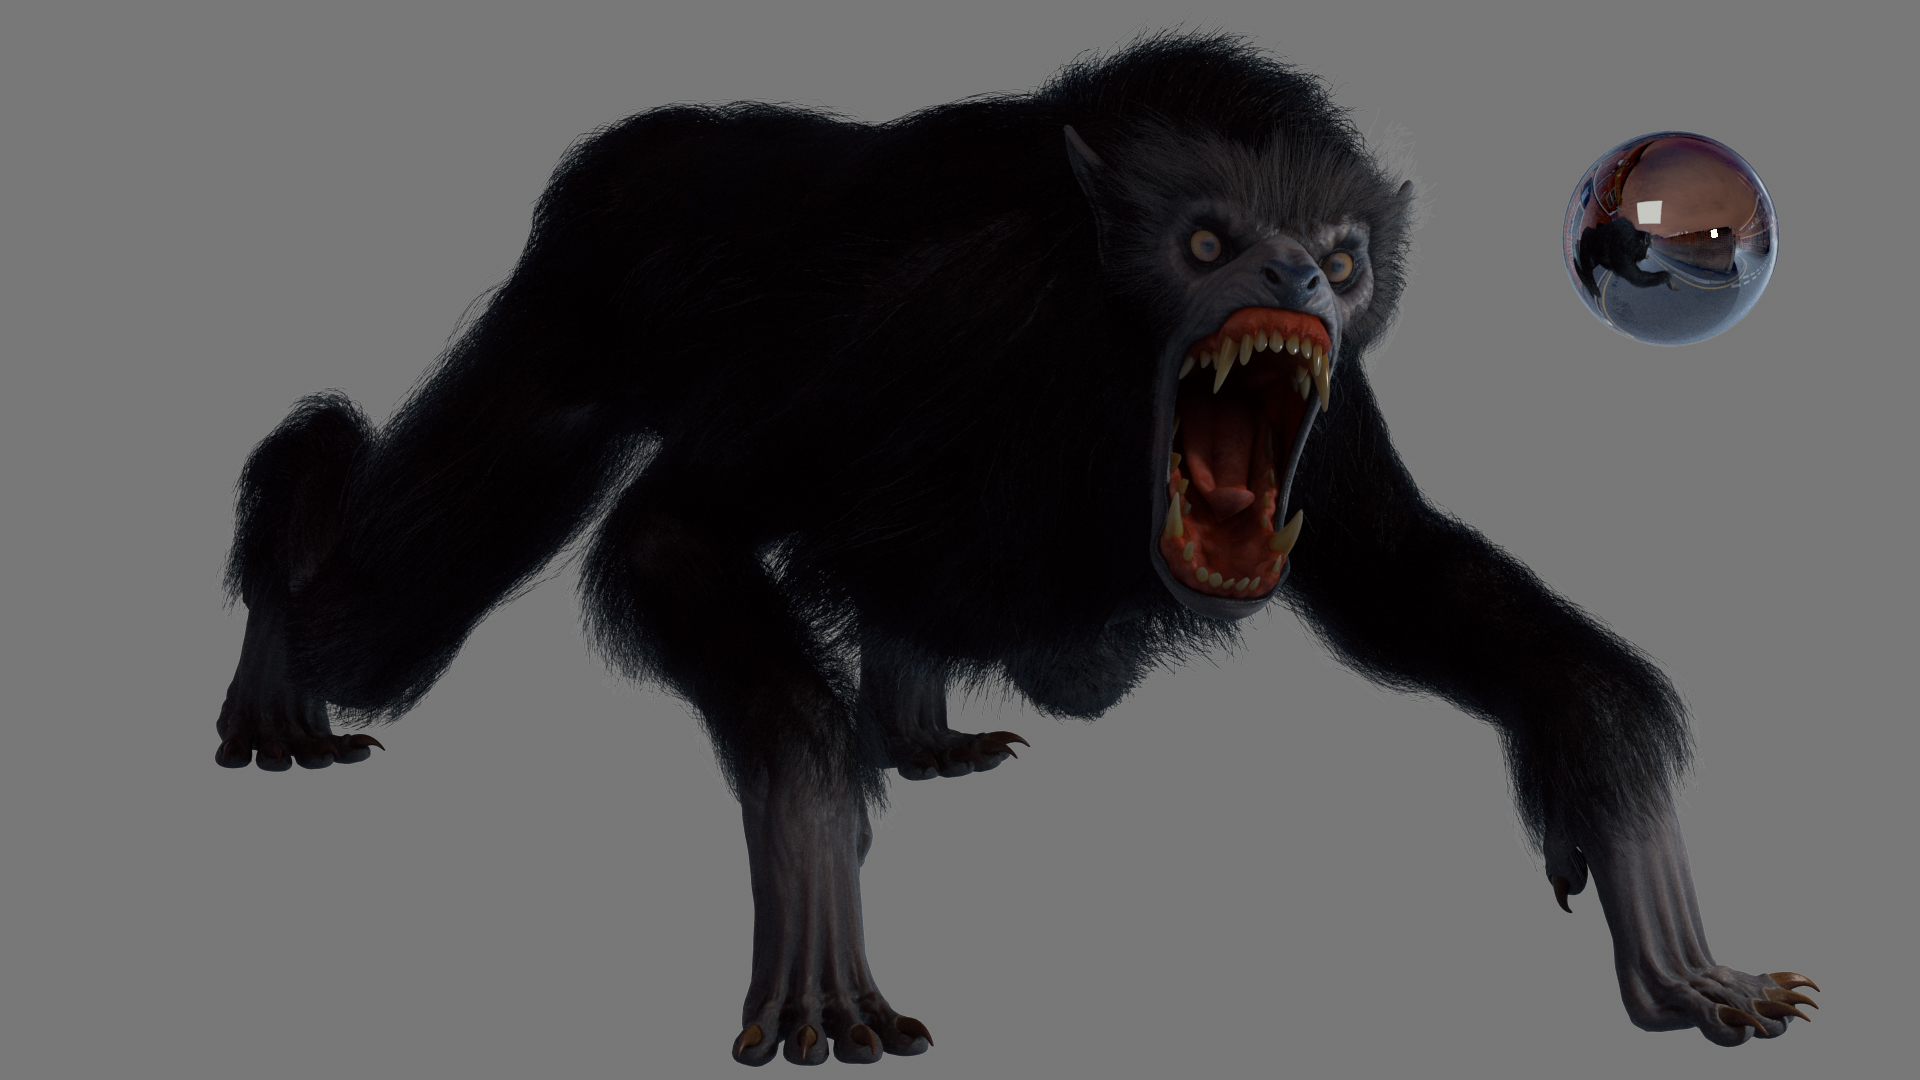
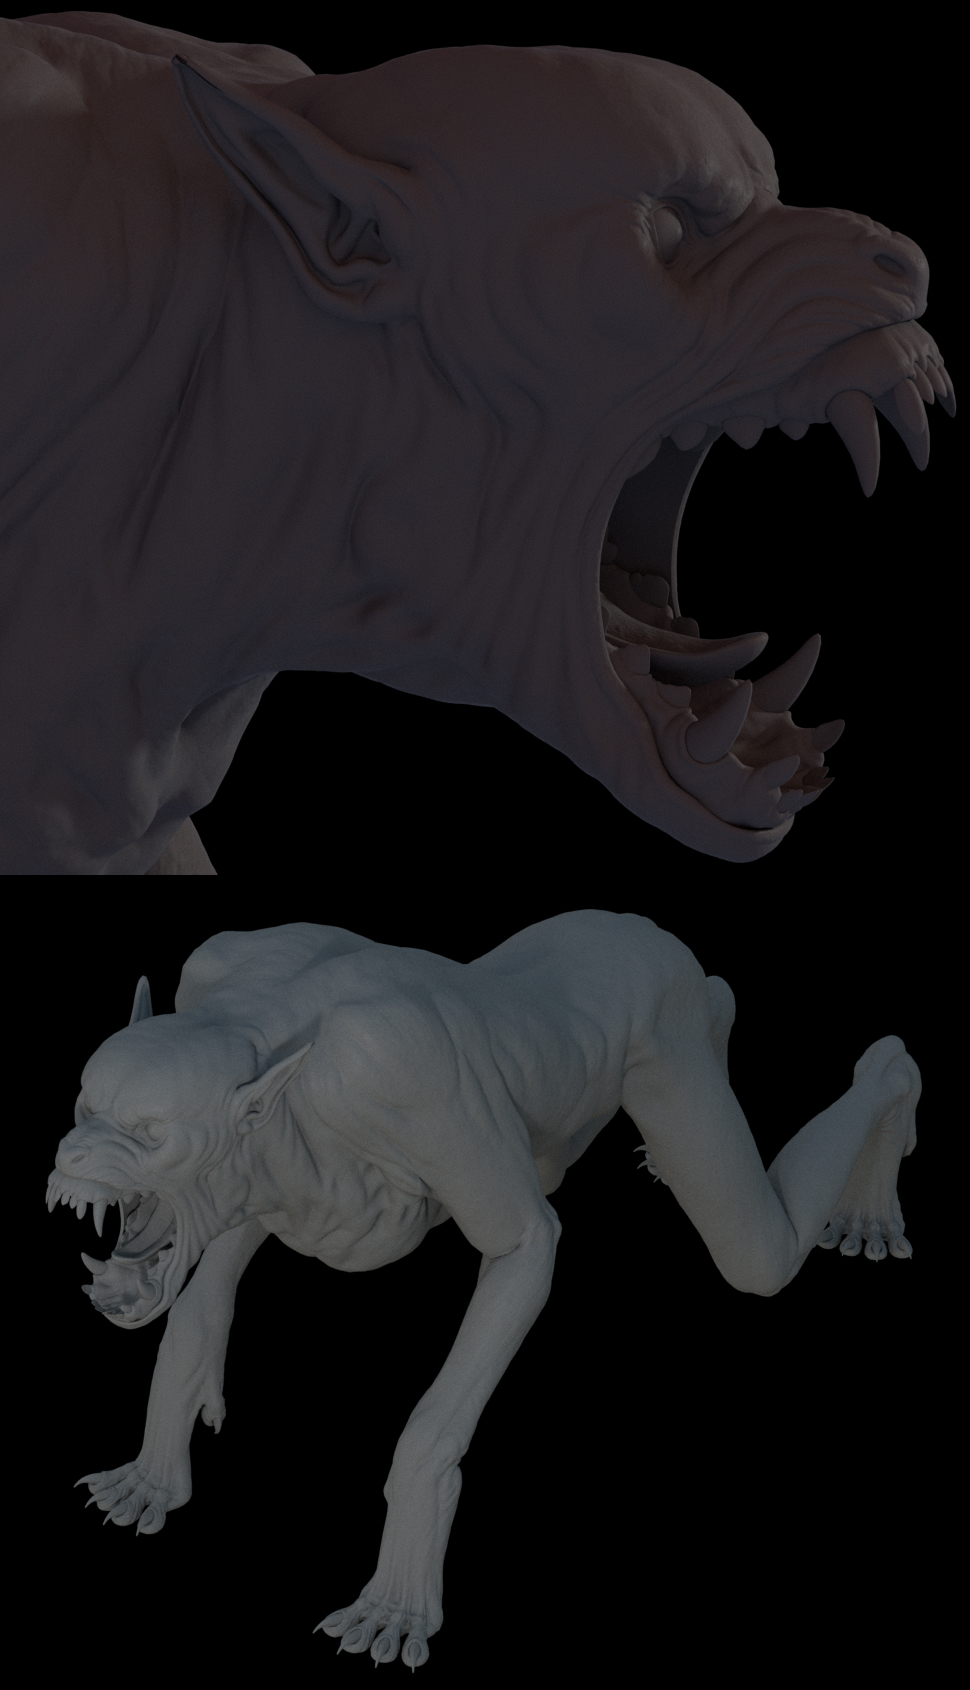
The renders of this wolf does not have any normal maps nor displacement maps. Just using vector displacement maps
Here somes examples!
Attachments