ZBrushCentral

The Mummy [WIP]

mummyClothEdge.jpg
Mummy Cloth#2

Here’s some alphas I’ve been using (and will use) on the model in case anyone has a use for them on their models. I hadn’t noticed the stretching that was due to the angle I was using at the time so I’ll probably have another go at it tonight time allowing.

Wayne…

Attachments

mummyCloth1.jpg

mummyCloth2.jpg

hey cool. thanks darth! nice little alphas you made up there. ill try em out sometime! :slight_smile:

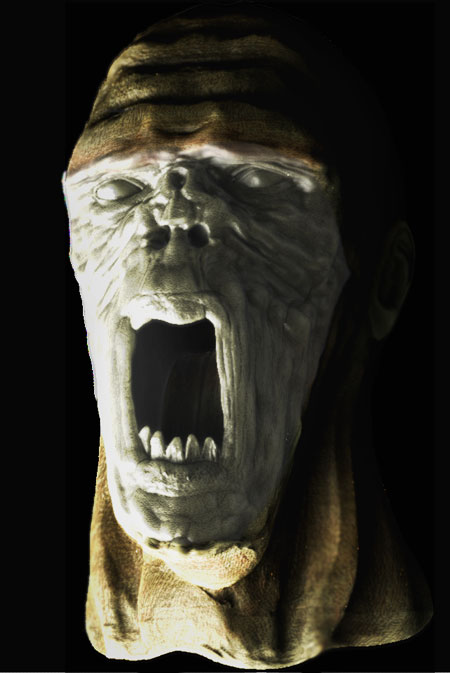
Well it looks like due to my inexperience when I started this model and not really knowing what the hell I was doing and learning as I went. I messed up my UV and a load of other things that haven’t became apparent till now at this late stage. I’ll break with my tradition and put my render’s from tonight below instead of above.

I started to texture further the model, trouble is once I got beyond a certain level of detail everything messed up right royally! It really is a shame because as I dont have the experience to put this right I may have to ditch this model. I’ve learned one helluva lot doing this mummy head but it’s stil a shame I haven’t got to finish him off.

If someone can find a work around for this or wants to have a go on their machine I’ll post the tool and texture so far here. No matter how I UV thgis bugger it messes up, I think I’ve tried everythi8ng I know and beyond…So I’m open to ideas! Failing that I’m really gutted that I can’t finish him off unless thers a miracle (or a guru psml).

Wayne…

PS for anyone intersted he neded up at just under 3 million polys

side.jpg
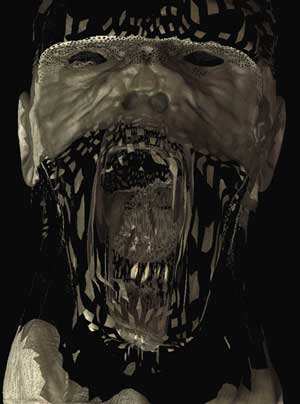
Soon as I tried to start texturing the face and further detail texturing the whole thing goes mental and refuses to texture properly!

Attachments

fuckedup.jpg

pers-text.jpg

Tool > Texture > Check UV. If you get any red showing, you have over-lapping uv’s which will always cause probs in ZB. The probable reason you’ve got an issue, though, is you had a texture map applied when you started pressing the uv mapping buttons in ZB. Go from one type to another, and ZB will still use the texture map as showing in the preview thumbnail. What works for guv tiles, for instance, is gonna look damn weird if you then select spherical mapping (for example). Try going back to whatever uv mapping version you were using originally.

ps. 3 million polys is a lot for just a head, ya know. :wink:

Good luck. Hope you get to finish him.

I checked the UV’s and its got red so wide they are a 1/3 of a head width in size! Where my problem arose was that when I started I approached it like amaya model and modelled first and textured later…looks like a big mistake. I’ve tried every UV type and still no joy.

Wayne…

No probs … just lose the current texture map, select auv mapping in ZB and start again with a blank texture. And rework the ear first, as it’s not up to the standard of the rest of your model, imho.

Now go to bed. It’s nearly 2am. :smiley:

t5-web.jpg
Front view of 1st bandage layer texture…more dirt etc to be added and face still to be done.

Thanks! Although I’d tried this before it worked this time, probably because I was a bit stressed before when I did it. I’ve done the 1st layer of the texture for the bandages and they are starting to take shape a bit.

I’m leaving the ears till a bit later on as I really hate doing ears…I really REALLY hate doing them.:cry: 
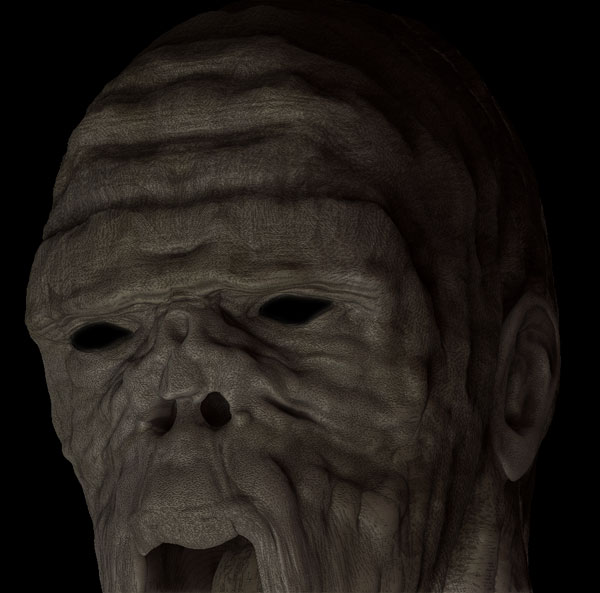
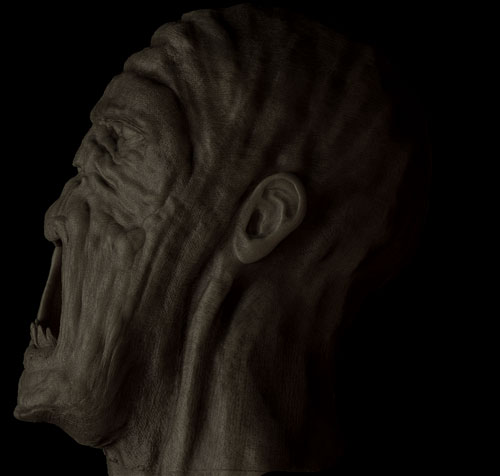
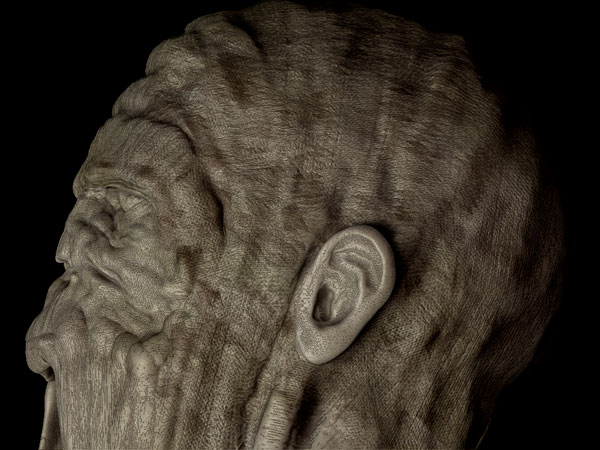
I’ve went back to my 1.8 million poly mesh as there’s probably a bit less wrong with it than the last version from last night. I’m not looking forward to texturing his face as I know if I get that wrong I can ruin the whole model.

While in reality a mummys face is nearly jet black due to the resin used, that might not come out too well but I may try a few different ones to see which looks best. When this models finally finished I’ll be glad for two reasons. Firstly because now I know more I wont make the same mistakes, and secondly because it’ll be one of those rarest of things for me…a finished project!

Wayne…

Attachments

t6-web.jpg

mummy_comp_small.jpg

I thought I’d have another mess around with this model. It’s got to the stage where all my early errors made while still learning Zbrush have came and bit me on the backside. I’m looking at Major UV probs (redoing texture and mapping doesn’t seem to help) and if I try to apply another material to the face area it messes up big time. So I thought I’d try a different approach.

What I did was to do two renders each using a different material and composite the face area in Photoshop. Yeah I know it’s cheating but it seems to have worked, meaning I may actually be able to continue with this model.

Wayne…

[attach=21963]comped-variation2-overlay.jpg[/attach]

Some more bits and pieces have been done. Although I’ve had to compromise on the face texturing as this model is screwed, so I’m just trying to get it looking as good as I can before I move onto other ones. I’m pretty damn pleased with the way the bandages have turned out and to my eye the neck area looks pretty damn real. All done by hand no app link, only some color correction (and pasting the face render as outlined above) done to it in photoshop.

I’m starting to notice the limitatins of using a mouse of late, although I do have a ‘no name’ micro small tablet its worse than useless. But looks like I’m sticking with the mouse for a while.
Enjoy

Wayne…

Attachments

comped-variation2-overlay.jpg

bw.jpg

Thought I’d mess around with a nice black and white image…after all most mummy films were made in black and white.:wink: 
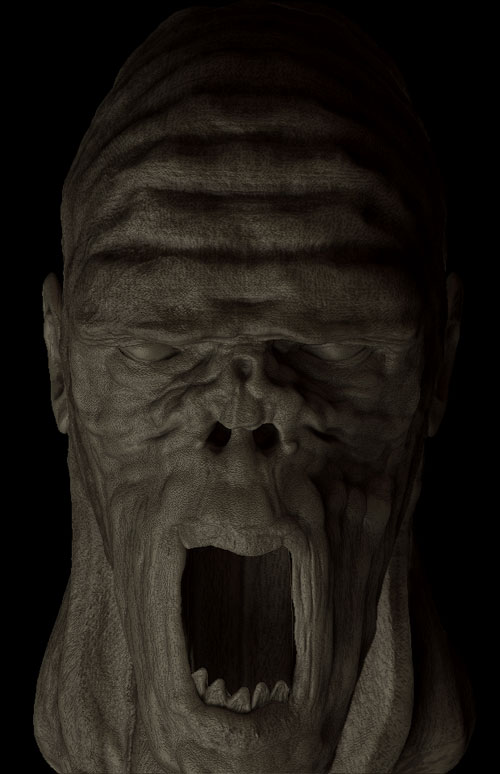
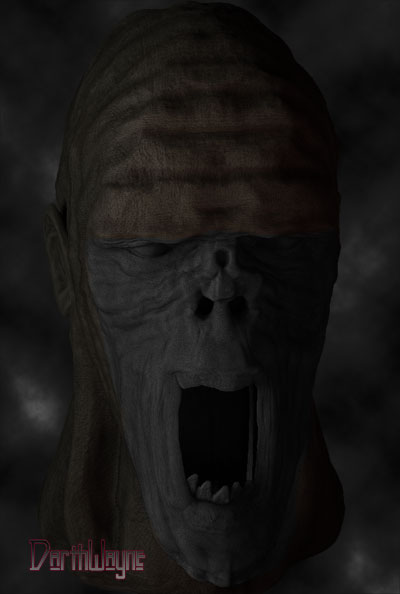
Mind you it also helps to hide the dodgy face texturing lol.:lol: :lol:

Wayne…

Yup … you did good and learned a lot from this piece, I think. And you stuck at it, too. :+1: