ok so wanted to see if I could control layers a little more and intergrate the effect with projection master.
This shield is too wide for my character but it was just a test with layer control.

ok so wanted to see if I could control layers a little more and intergrate the effect with projection master.
This shield is too wide for my character but it was just a test with layer control.
Sorry but, how does layer works ?
lol freewaldo The video is rendering out as I type;) its 1 hr of fun with a cool workflow. And layers are covered on the vid  I’ll be uploading it to veoh and my site and since all my bills are paid up it will be free on veoh
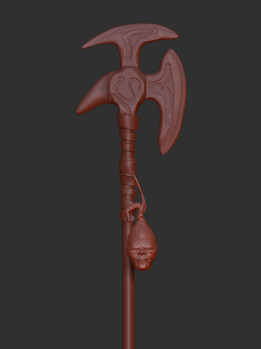
Heres the paladins weapon along with a trinket around the handle. A nice long Halbert AKA pole axe.
[
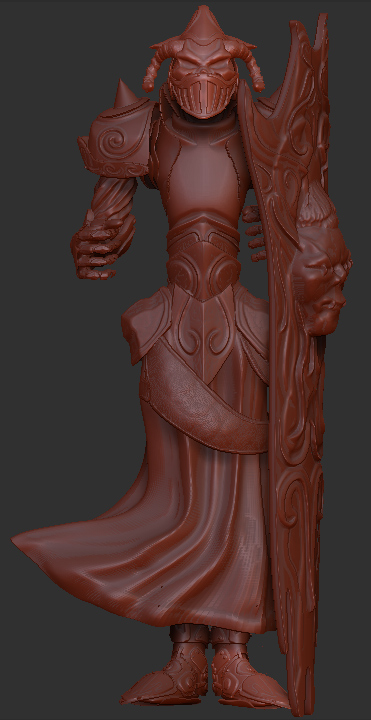
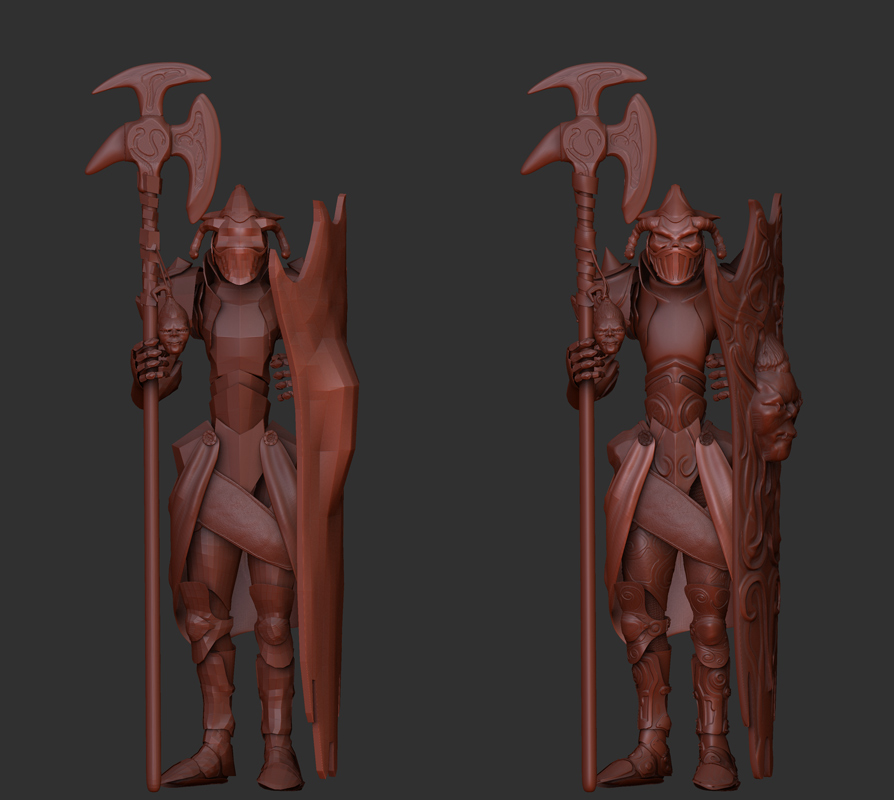
You’re getting there! That shield looks BIG! 

You still have to look at that skirt I feel. It makes me smirk a bit when I see his armor feet when the wind blows up his skirt. 
Love the trinket on the halbert. The blade part looks a bit blunt right now. Some sharper edges would maybe be more impressive?
The chest of his armor could do with an emblem or some other details perhaps.
Just my ideas, you make up your own mind no doubt. 
p.s. I’m in awe with your speed, and look forward to the vid!
Thanks Plakie
Nope I agree with the skirt for sure. I think I will be modeling the thighs and kneecaps and make the skirt a back item.
I will be at work today and they blocked veoh at my work. Along with a million other censored things but I wont get into that rant. So Heres the link to the video on veoh. It is in the “Processing video state” which could mean an hour or a day. Veoh is being a little slower than normal i noticed;)
Free
http://www.veoh.com/series/houseofZbrush
And here is is on the all powerful
membership fee
http://www.houseoftutorials.net/page2.html
off to work;)
So I wanted to show how I model.
Basically I do all the parts all at once in topo tools. I think thats why I can whip out a character in a three/ four day period. It actually takes me 300% longer to do the weapons and shields and stuff then it does the actual character. I will Model out all the armor parts on a balloon animal and the forge the parts separately after doing a group split in the sub tools. Then I will reassemble those high res parts back into a combined piece. This cuts down on the time that you spend modeling parts of the character nobody ever sees and is just a waist of polys to begin with. Example the chest inside the armor. WAIST. armor inside a long sleeve jacket WAIST. These are alot easyier to pose at the end also because you dont have breakthrough meshes to deal with after you pose.

Ok so I always save the trump card till last
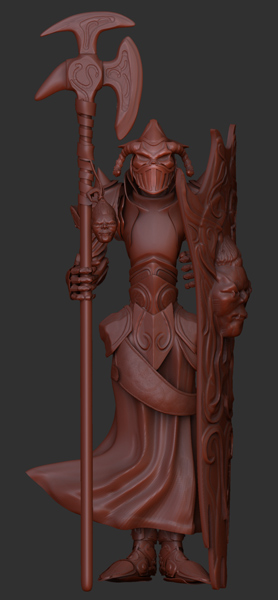
Thanks Plak for the C + C it really did help. It all fell into place after I took the skirt out of the design.
Enjoy the Black Paladin.
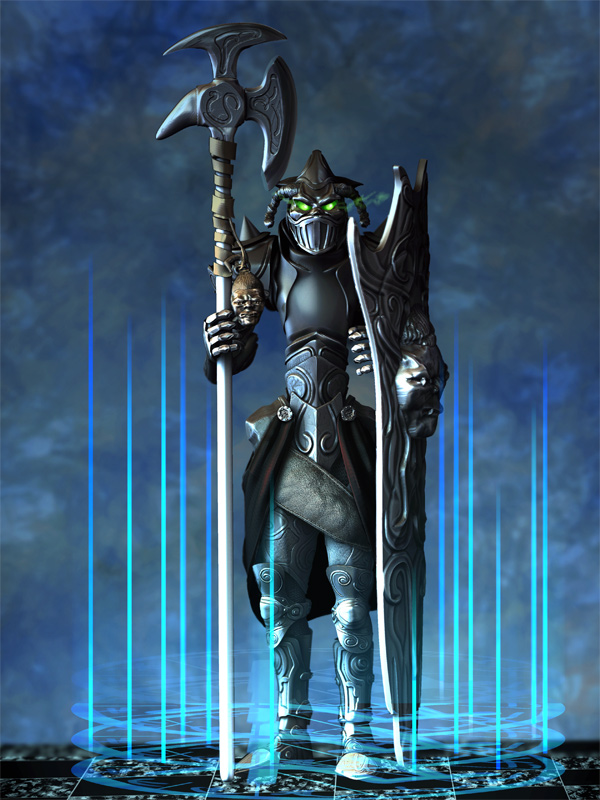
High Res Render can be viewed here
http://www.houseoftutorials.com/art/main.php?g2_itemId=798
Hey jason really liked how your paladin turned out it must have been quite a task to retopo tried to send you pm but your box is full keep up the great progress wish we could get skype group together again maybe when you get caught up thanks again for sharing.
Very good Job Cannedmushrooms. Now you should sculpt the Good Knight…
Ok wanted to document this final spin before I move onto my next project.
Which I have no clue what it will be. Thanks everyone for the look see at my model.
I agree Troy the channel would be good to get back together. I have been working 2 jobs and modeling on the side now, so ya when it comes to my old vampire ways, I have fully turned into an american morning tool and goto sleep at A wossy 12am.
As far as re-topo goes I really dont Re-topo anything technically. I just topo
So I skip that whole make a base mesh process most of the time and model straight with the topo tools on Zbrush Primitives lol. The days of Pushing a ball into a 4 legged creature with two heads are over. But I do still use a maya ball for the head base.

awsome character man, I love it:)
Yeah Jason! That new cloth makes all the difference. I love those armor details on the shins and knees. And look at that: he even has glowing eyes now. 
It was great to see you whip up this character in so short a period. I can learn from that… :o
Great result here and looking forward to your next project!
Plakkie
Great work CannedMushrooms!! Love the character and the detail you have put into this. I’m gonna have to start looking into using layers abit mor myself with the fine effects you have acheived here.
Jason,
Great new model. Great new tut.
When you have finished the shield with all its layers, and now want to use it as a subtool, must the layers be merged or baked or something first?
Thanks!
~S.~
I delete all lower levels and then reconstruct sub d the parts that have layers. And thats only if I want to merge them with other parts. Other than that I keep the layers for fun.
So I really made this guy to pose so heres a test of how easy it is to pose a now 25 million poly mesh hard edge model. I cut the fat a little on the polys by getting rid of inside meshes. because it was 37 million;)

Truely amazing work! And a great site you have there! Loads of tutorials! I’m tempted to sign up for it!