Hi,
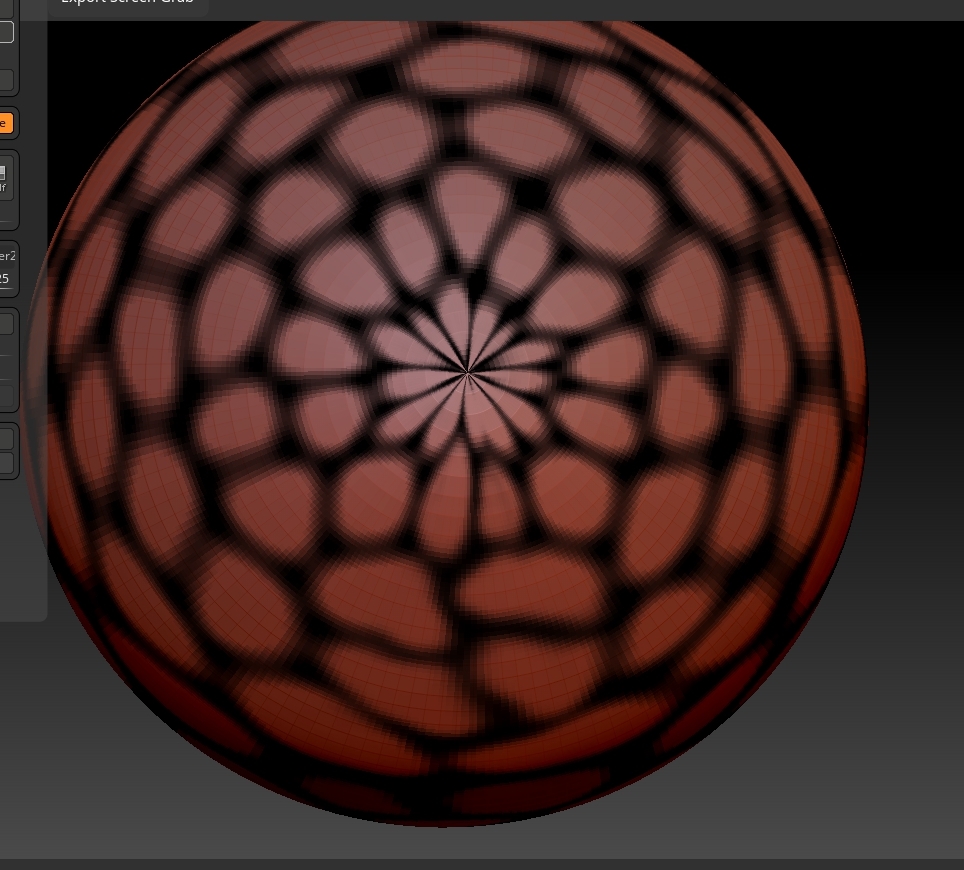
When I tried to apply a texture on a sphere, on the two poles of the sphere the texture is converging to a point as in the screenshot shared. Is there any method to avoid this?
Thank you
Arun
Hi,
When I tried to apply a texture on a sphere, on the two poles of the sphere the texture is converging to a point as in the screenshot shared. Is there any method to avoid this?
Thank you
Arun
Hi @arunr6600
When it comes to sculpting, textures and polypaint, ZBrush prefers square, 4 sided polygons. You should get better results using a QSphere instead of a Polysphere.
This is a result of using the default UVs that come with the parametric sphere primitive. Those UVs are designed to work well with its specific radial topology to allow a texture to wrap around the mesh with minimal fuss or seams. The tradeoff is that pinching that appears at the poles. This will work better with some kinds of textures than others.
While it is true that your topology plays a role here, when applying a generic flat map to a mesh it wasn’t designed for, this ultimately comes down to how your UVs are laid out. If you were to simply use a QSphere and do a default unwrap with UV Master, you will find that your texture no longer wraps cleanly, and there’s going to be bad seam issues. You’re going to lose that nice clean wrap along most of the sphere.
You will need to study the general 3d subject of UV layout, and how to use tools like UV Master to get the results you want.
However, that kind of study is going to take a bit of time. If you want a faster solution to this problem I would recommend the following:
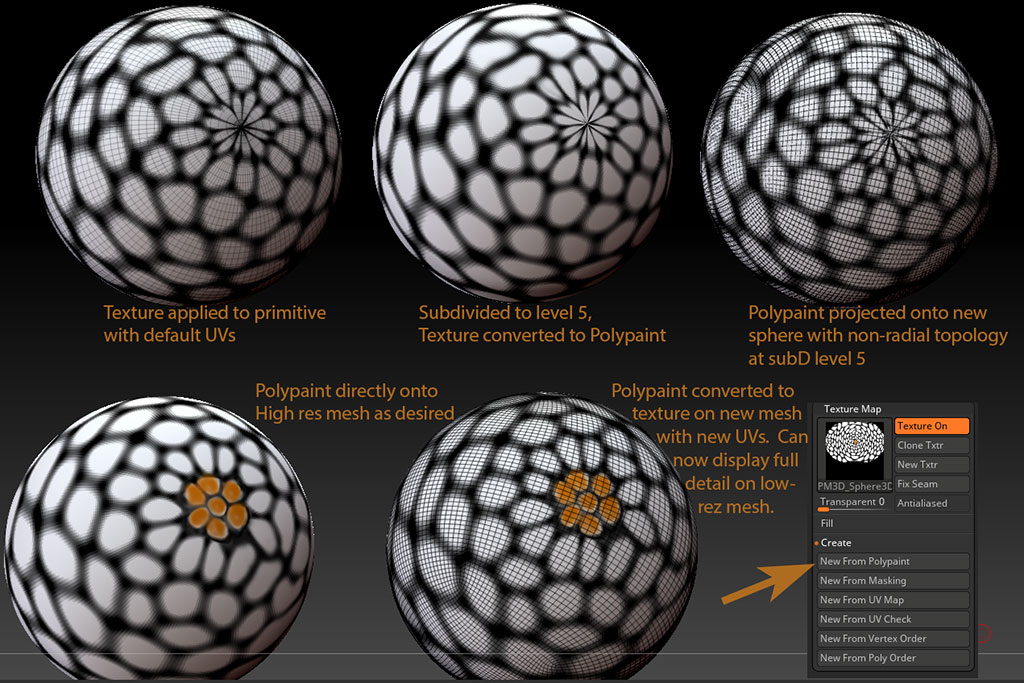
Take your original primitive sphere with the radial topo. With the texture applied, subdivide this sphere to about subdivision level 5.
Now with the texture applied and either the MRGB (color +material) or RGB (color only) channel active, use Tool > Polypaint > Polypaint from Texture. It will then apply the color of the texture as Polypaint directly to the mesh, independent of any UVs. Polypaint detail applied this way is dependent on your mesh resolution, which is why you subdivided.
Duplicate the sphere subtool , and send the duplicate through ZRemesher to get those nice quads Zber was talking about. Subdivide the subtool to subD level 5.
Use the second process listed on this page to project the polypaint detail from your original sphere, onto the new sphere. Both subtools should be at the highest subD level.
It is often easier to approach a situation in Zbrush with polypaint first, as that can avoid texture wrapping or seam issues. Then create UVs and texture after the fact, so you don’t have to worry about carrying UVs around. UVs can cause performance issues.
The process for creating textures from Polypaint is listed here.
.
Thank you for the reply. I tried but its not working as i desired.
If you were particularly attached to your original primitive sphere’s topology, you can also project the new polypaint back onto the original sphere. We converted it to non-radial topology for better painting performance. Because of the problematic topology at the pole, the original sphere may need an extreme level of subdivision to capture the incoming paint detail without distortion in that region.