ZBrushCentral

Starcraft Marine

really like the way of working from a clean version going on further with specific id’s about it. i also like your new distoted version with the nice collors, meby a better metal look but anyway i think you dont need my help :slight_smile:

i keepon watching 4 the end results.

Looking really nice, man! I dunno if I agree with the rest of them about the armor, though. Shouldn’t it be some sort of futuristic, ceramic armor or something, not metal? Maybe i’m crazy, but I think it’s looking pretty cool the way it is!

This guy is getting some nasty damage, must be some war he’s in. Looking really good thou’. keep us upto date. :cool:

hi guys
thanks for the comments.

I’m now at work, and left a short render at home - I’ll have a post with the Head in a few hours here.

Warpy - we talked man. Hopefully I fixed it - I’ll upload the new image soon.
Ldgree - Thanks :smiley:
Joep - Thanks man. I’ve worked a bit on the materail, but I’m not sure I want a real METALLICA look to it, but rather a ceramic one.
orko60 - Glad you like it. I agree - I want a none metal meterial around the metal… I hope it will be obvious when I’m done with it.
WENDEX2112 - I love damaging heavy armors! :smiley: Thanks for the comment.

Wow, the model’s getting better and better. Really nice! :+1: :+1:

So is that friendly fire on the side of his collar like that? :slight_smile:

Nice work so far! I like the armor color and design. The bullet holes are great!

POST MORE UPDATES!!! POST MORE UPDATES!!!:+1:small_orange_diamond:+1:small_orange_diamond:+1:small_orange_diamond:+1:

Hey everyone.
Thanks for the comments! :slight_smile:
Appreciate it, and it’s giving me a boost to work harder :slight_smile:

Here’s the last render I’ve got:
[attach=38192]Head3.jpg[/attach]

I also have a question to all the VRAY users here:
This render, originally 700X700, took my AMD 3500 some 30 minutes to render (!). I used Irrradience map on Medium preset settings, I have some glossy reflection and alot of displace (where I’ve set the Pixl length to 7…should I up it some more?).
Does anyone have any idea how I can cut back on this monsterous rendering time?

Thanks.

Attachments

Head3.jpg

LOL !!
i thought 30min is a short time when you use displacement :expressionless:

Slocik - Really? So I should get used to this?
Well, I think I’ll consider rendering at work, where I have a nice Dual 3.2 Xeon BOXX, with 2gb ram, as opposed to my home station with AMD 3500 and 1gb ram.

Anyway, here’s the gun:
[attach=38194]Gun1.jpg[/attach]

Attachments

Gun1.jpg

Nice. How did you finally resolve the stepping problem on the cracks? Did you just go with bump maps?

This is going to look really cool when your done :+1: .
your textureing looks tight, forget the naysayers…just keep doing what your doing!

then again, the metal might could use a little work… :smiley:

but then again maybe not…

Looking forward to the finished render.

brojay

nice work, david.

faster rendering-does max have aps(adaptive pixal subdivision), if it does you can use it so area with discplacement would get more polys than areas without which will give you more speed and if used proporly can sharpen the cracks.

cracks-if you need more polys you should take the original model and up the polys in the cracked regions so it would give you more detail when using zbrush.
im assuming your using zbrush on a part to part level and not an entire model level, so i wont suggest it.

another way i would suggest is to create another model that is inside the cracked model so that whenever the crack is deep enough it would be visible.

30 minutes to render with displacement. You guys need to try Modo then. lol.

Keep up the excellent work. I am keeping an eye out on this.

Cheers

mike R

Hey guys
thanks for the posts! I really appreciate it.

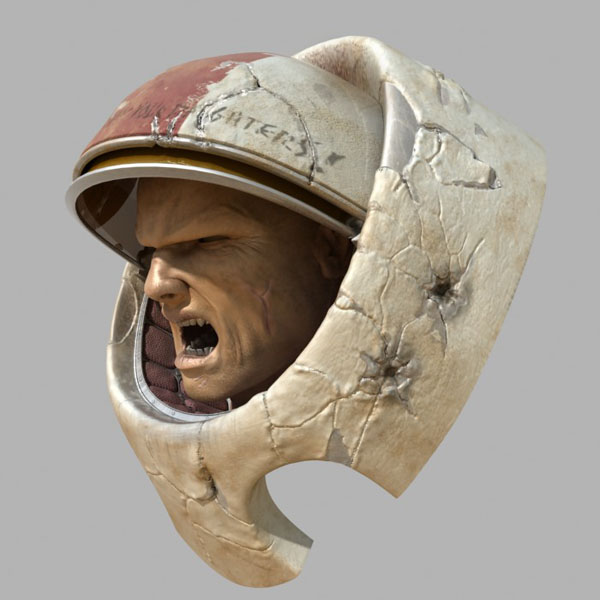
Am now at work, but when I get home I’ll finnish the almost done breast plate and upload for comments.

VeryGrimm - and to all VRAY users - A couple of things I found out for proper usage of zBrush displacement maps in VRAY:

  1. Whatever the displacement amount, put a negative half of it in the Shift and do no place -0.5 in the map RGB offset as required in MR (e.i. disp=x, shift= -2/x).
  2. To avoid steppings in the displace, all you need to do is reduce the default blur amount of the disp map from 1, to 0.01.

Hope you find this helpful.

Brojay - I sure hope it looks cool when I’m done :smiley:
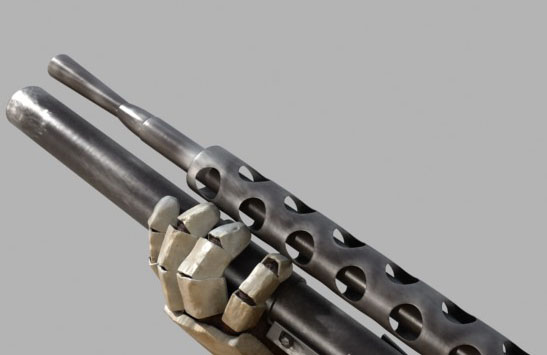
Materials are not final yet and I’m doing well calculated usage of instanced materials in the scene so changing the metal once I have a BG won’t be a problem.

Dogbite - hey man. Thanks. I’m familiar with the disp max offers, but I’m rendering in VRAY, which offers a different host of displacement features and options.
Some of your suggestions were considered in the planning I did before working and were discarded for various reasons.

mykyl - I have a negative disposition towards modo… I really have no reason to base this opinion on, I must admit.

Thanks again everyone. More to come in some hours.

hey Opeth i realy love what you done with the helmet textures and detail ar awsome.

myself i am in a learning proses and thought id reacreate your helmet for educational purpose.
i hope you dont mind.

heres the base mesh i made

learnen.JPG

Excellent stuff ! texturing and render are great !

This is heading for high places.

Great job!

it´s looking really really good! Cant wait til its finished!!:smiley: