Thanks for sharing your workflow.
Neat and clean spiderwebs!
Awesome, I love it!
Thanks for shearing your workflow 
Thanks for the tutorial. Did you also use the same method for the honeycomb pattern on him?
Awesome,thanks for thr tut!
Brilliant, and thanks for the tips, I want to try them all.
This is also on the [color=yellow]Pixologic Turntable gallery
Thanks for checking out my model.
Attachments
I would also be curious to know how you approached the honeycomb affect across his entire body. Any help would be awesome. Great model…
Soulty,
Spidey is my favorite Superhero so this caught my eye. Great Sculpt!
That Honeycomb effect could be easily achieved using a normal map.
sliiiick!
Good detailing on the costume.
Ah Spidey, such a big mouth for a relatively weak superhero but I digress. Nice model. I like the texture you used
man, great spidey. one of my fav superhero.love the texture. A tut on this will help me a lot .  hope u post one, and a nother superhero :lol:
Ditto. Awesome work!
Thanks for the comments and this model is bit of an old one now, just excited its on the pixologic site.
I have a new model MAXIMUM CARNAGE and Im working on a original comic style ninja turtle. Going to start my own sketchbook soon.
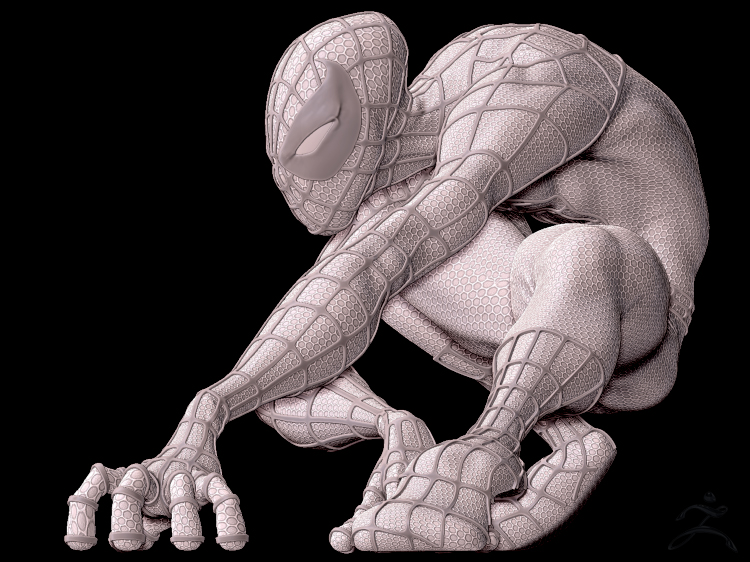
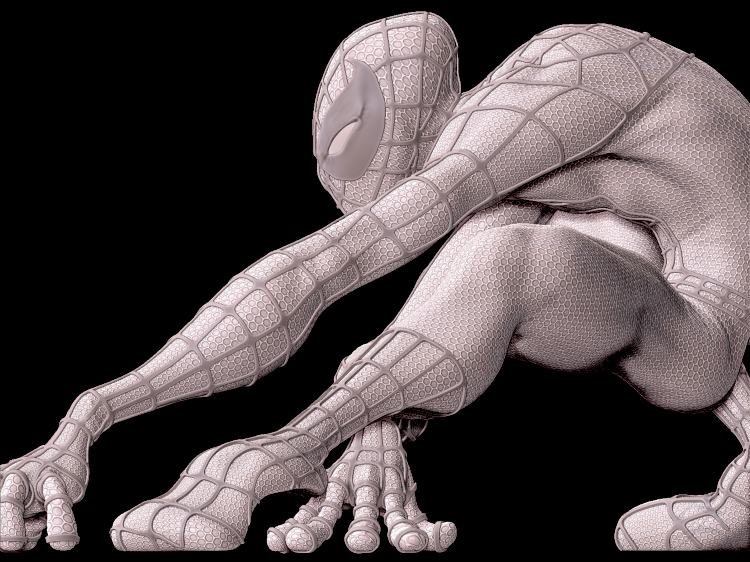
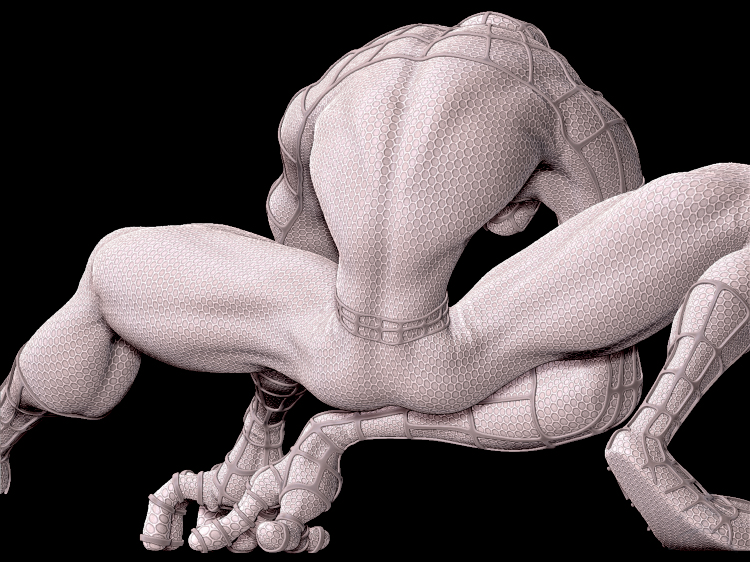
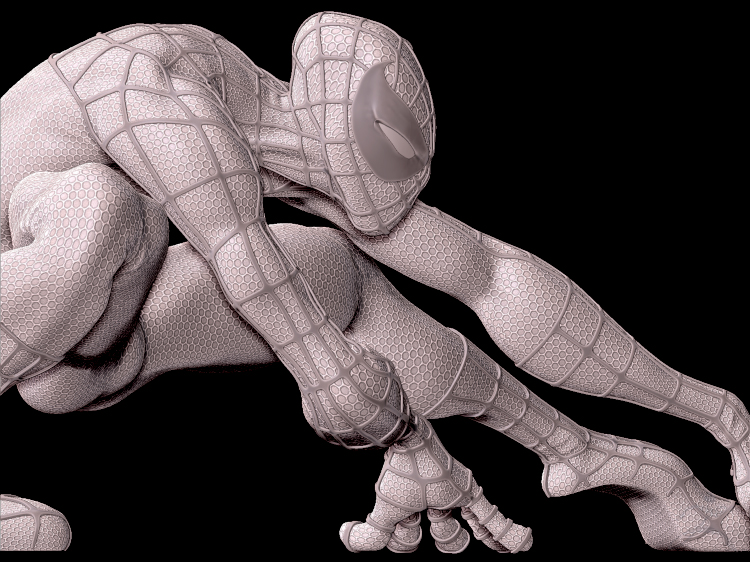
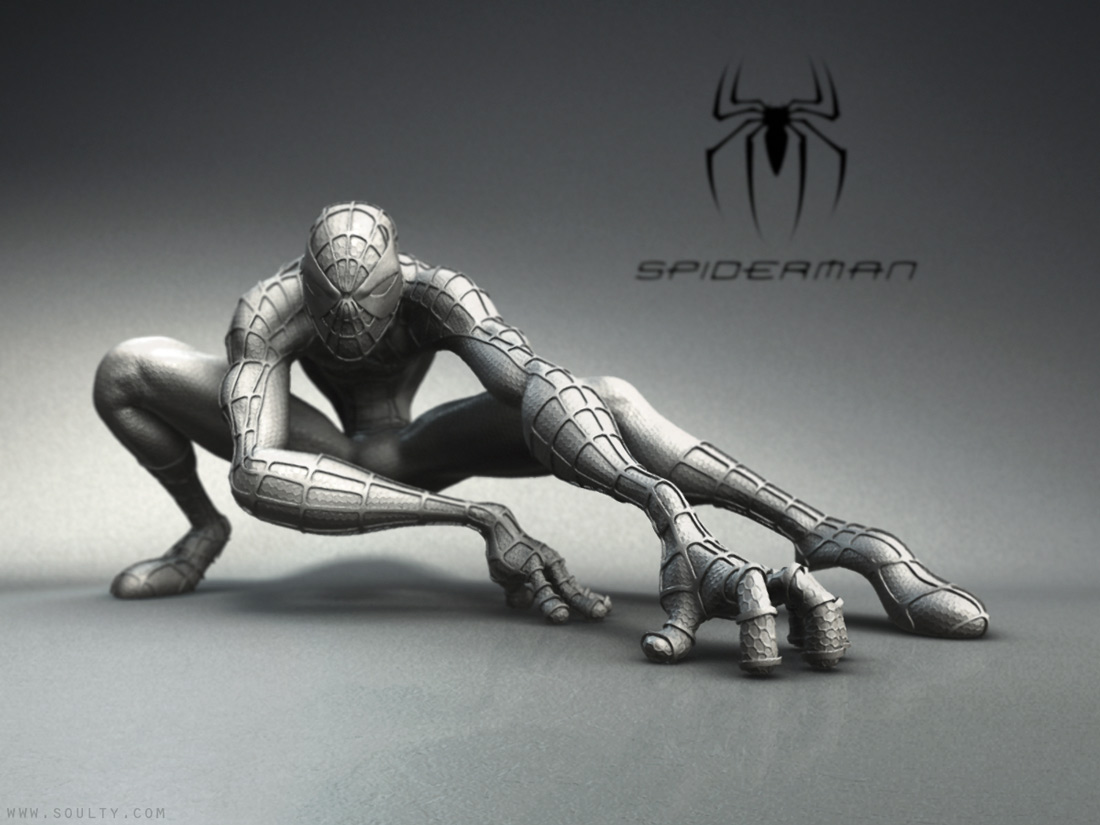
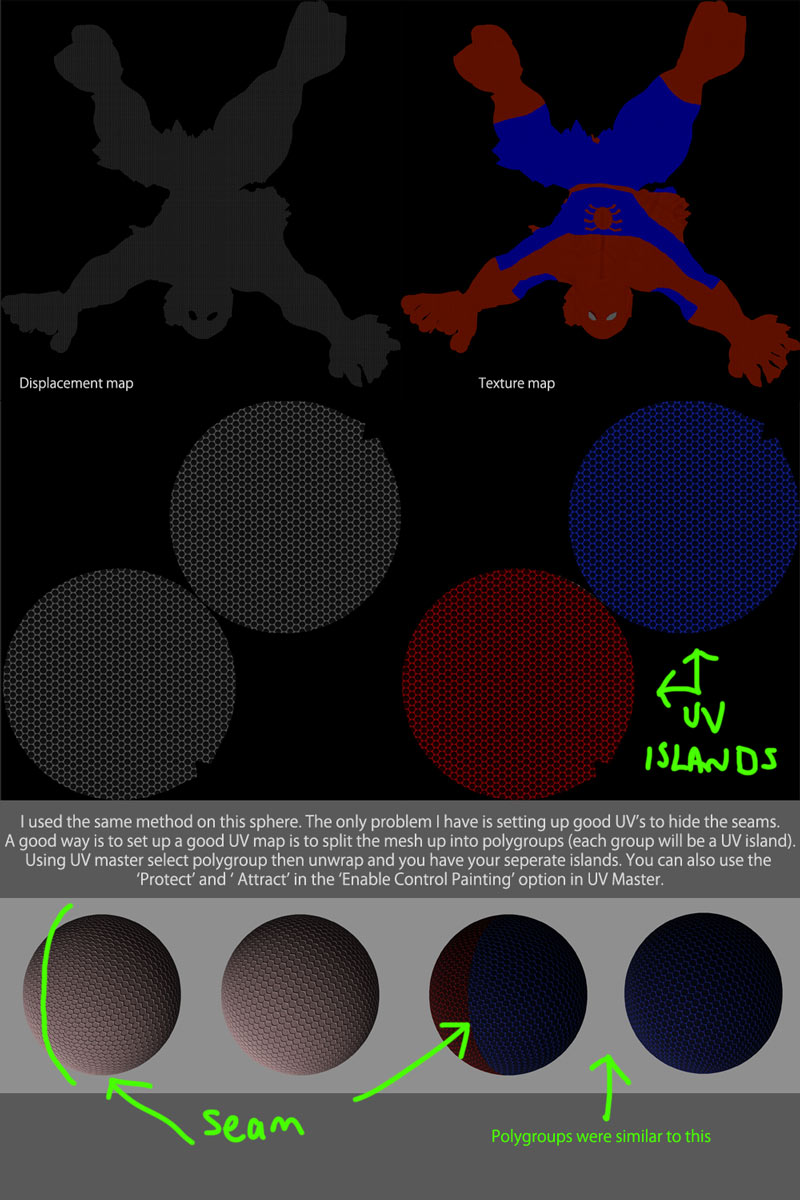
wickedfool<SCRIPT type=text/javascript> vbmenu_register(“postmenu_699378”, true); </SCRIPT> : I used a displacement map for the honeycomb. The Uv map was one whole island with the seems down the back and insides of limbs. If i split the map up like most do it would of been very hard to hide the seems. you can see them on the inside of the legs.
Paint Guy<SCRIPT type=text/javascript> vbmenu_register(“postmenu_699431”, true); </SCRIPT> : Thanks man. Not normal maps. I have no need for them as I cant figure out how to render in max or maya. LOL. I am just learning max now so am starting to get into low poly modeling more now.
DanyBoy<SCRIPT type=text/javascript> vbmenu_register(“postmenu_699556”, true); </SCRIPT>; Just look up displacement maps. They work the same as the alphas as in grey scale white + black -. I some times use a greyscale copy of my texture maps as a starting point.
Hey!!!
i was wondering how did u make the lil octagons on all the surface of the model???
I once was texturing a model and olso doing a fabrik kinda the same octagon… but it was imposible to make it fit okey!!
and i saw your model and it fit perfect!!!
how did you do it???
UV Maps.
Use UV map plug in then add the pattern to a PSD from the color from texture option in ‘texture maps’
Apply the new map as a displacement. The idea is to hide your seems when making th uv coordinates to make the pattern appear seemless.
If you havent learnt this part of 3D then you are really missing out. Hope this helps
mmm… yeah… thats what i tried… but there were so many places that couldnt be hidden…
could you post an image of your UV map???
chobed: Sorry for the late reply. Its just about playing with the uv map until you can hide them seams some where.
[attach=231934]displacement-and-uv-maps.jpg[/attach]
Mental ray render of spidey.
Attachments
great style and pose. Love the hands.
awesome spider man model, ive got this page bookmarked
been trying to create the same effect with the octagons that you did and never thought of applying it through disp map so cheers for the heads up, but if you have the time there any chance you can post the image you used?finding it hard to find a good image or even make one