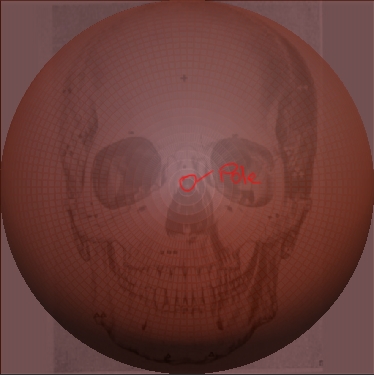
I love this new feature. However, when I was following the tutorial, I started off with a minor problem which eventually became worse and worse. When I hit the macro button and got the image plane on the canvas, it seemed to automatically face perpendicular to the poles in my sphere. Here’s a picture of what I mean:
[attach=144993]zbrusherror.jpg[/attach]
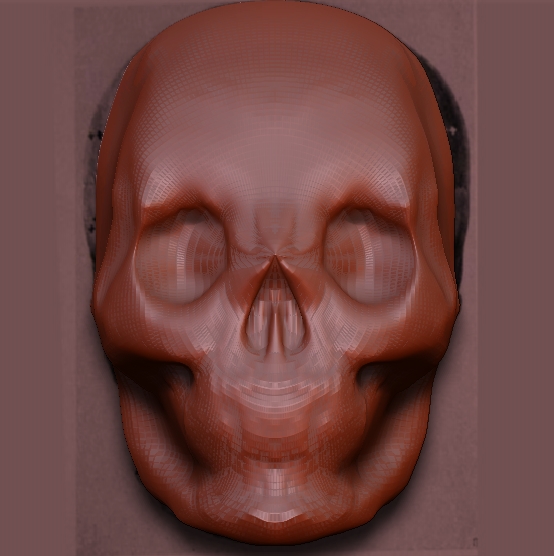
It later became a problem when I tried sculpting the nose. It became all pointy. I tried dividing the geometry a few times, which worked ok when I smoothed everything out. But once I start sculpting that pole, it becomes a problem. Here’s the result I got:
[attach=144994]skull.jpg[/attach]
Now what I would like to do, and hopefully you guys can help me figure out how, is to make it so that the poles on my sphere are on the top and bottom of my skull. I tried snapping the sphere in place the way I wanted it before hitting the macro button, but the plane automatically reverts itself to this position everytime, regardless of which way my sphere is facing.
Attachments


![[attach=144993]zbrusherror.jpg[/attach]](http://i5.photobucket.com/albums/y157/boofarts777/zbrusherror.jpg)
![[attach=144994]skull.jpg[/attach]](http://i5.photobucket.com/albums/y157/boofarts777/skull.jpg)