Hi Mark and thanks very much. As far as I know that is the first time an image of mine has been someone’s desktop wall paper so that’s quite a compliment.
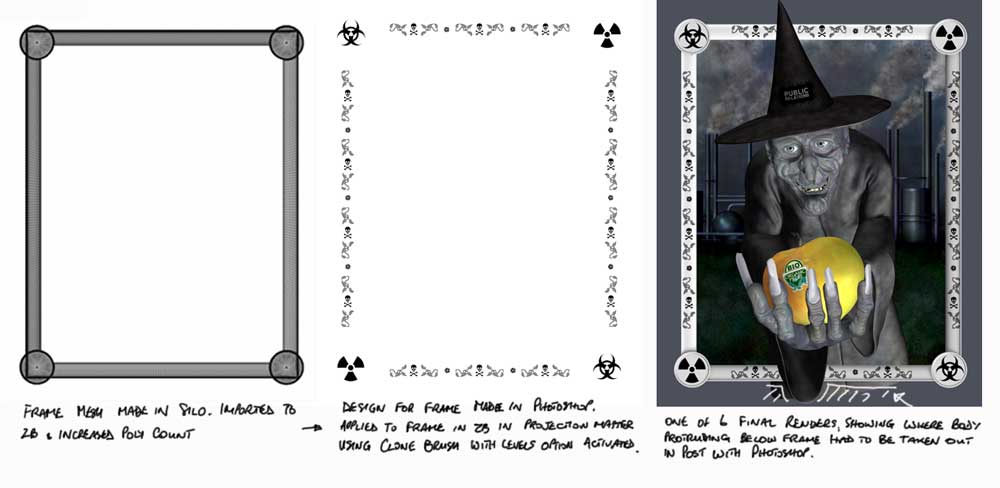
The frame was part of the final render. I was working in ZB2 so I’m not sure everything I say here would be exactly the same in ZB3 but I think it would more or less. The base mesh was made in Silo. I then imported it to ZB and upped the poly count to around 100,000. I made the design for the frame in Photoshop as a simple B&W image. I originally intended to use this as an alpha to create a bas relief on the frame, but decided I preferred the simple B&W painted look. I put the image on a separate layer from the frame, activated Projection Master for RGB only and used the Clone Brush to transfer the design to the frame (the layer option has to be activated in the Clone Brush in order to clone from one layer to another). The frame was then saved together with it’s texture for later use.
In my final ZB file the frame was drawn on it’s own layer (I had 7 in all for different items). I moved it backwards and forwards several times until I had it in front of the body but behind the hat, hand, apple and extended sleeve. I think I actually had it probably too far back since I had problems getting shadows from these to fall on the frame even with long shadow values in the lighting settings. I therefore cheated a bit and made the colour of the frame a little darker where I wanted shadows before doing some of the later renders (I did 6 in all for different light settings). Time was getting short for the deadline!!
This method did leave the bottom part of the body visible below the frame. I suppose I could have cancelled this out in ZB, but I chose to do it in Photoshop after final compositing of the various renders.
Hope this explains things,
All the best,
Jason [attach=76655]framebase.jpg[/attach]
Attachments


