ZBrushCentral

Recent Toy Work - Fisher-Price

This guy stands 2.5 feet in his upright position. What is show here is his ‘dome’ position, but activate one of the power pads and he stands up and roars. He’s got a cannon seat in hi smooth as well as a boulder launcher on his back and a boulder launcher under his chest. The final product also has a whole cage assembly between his legs. And did I mention this guy walks? This is my original sculpt which got tweaked and embellished for the final product This was one of the coolest projects I’ve gotten to work on and it turned out to be an awesome toy as well.

Ultra_T-Rex.01.jpgUltra_T-Rex.02.jpgUltra_T-Rex.03.jpgUltra_T-Rex.04.jpg

Attachments

Ultra_T-Rex.01.jpg

Ultra_T-Rex.02.jpg

Ultra_T-Rex.03.jpg

Ultra_T-Rex.04.jpg

1 Like

Nice work! Love the planar dinosaurs.

That’s some lovely work, have to agree those planar dinosaurs are great.

Very clean, and they have a lot of personality in such simplified forms.

Will you post a breakdown of your process in the future? (If you’re free of any NDAs to do so, that is) I find process posts to be as inspiring as final work.

What a cool job. Excellent work on that T-Rex. Feels like I could reach out and grab it.

Edit:
How does one get hired at Fischer Price? :wink:

Matt, you mentioned you are moving away from Freeform. How are you now converting your meshes to nurbs, or are you using Geomagic for that?

Those look great. Especially the dinosaurs. :smiley: 
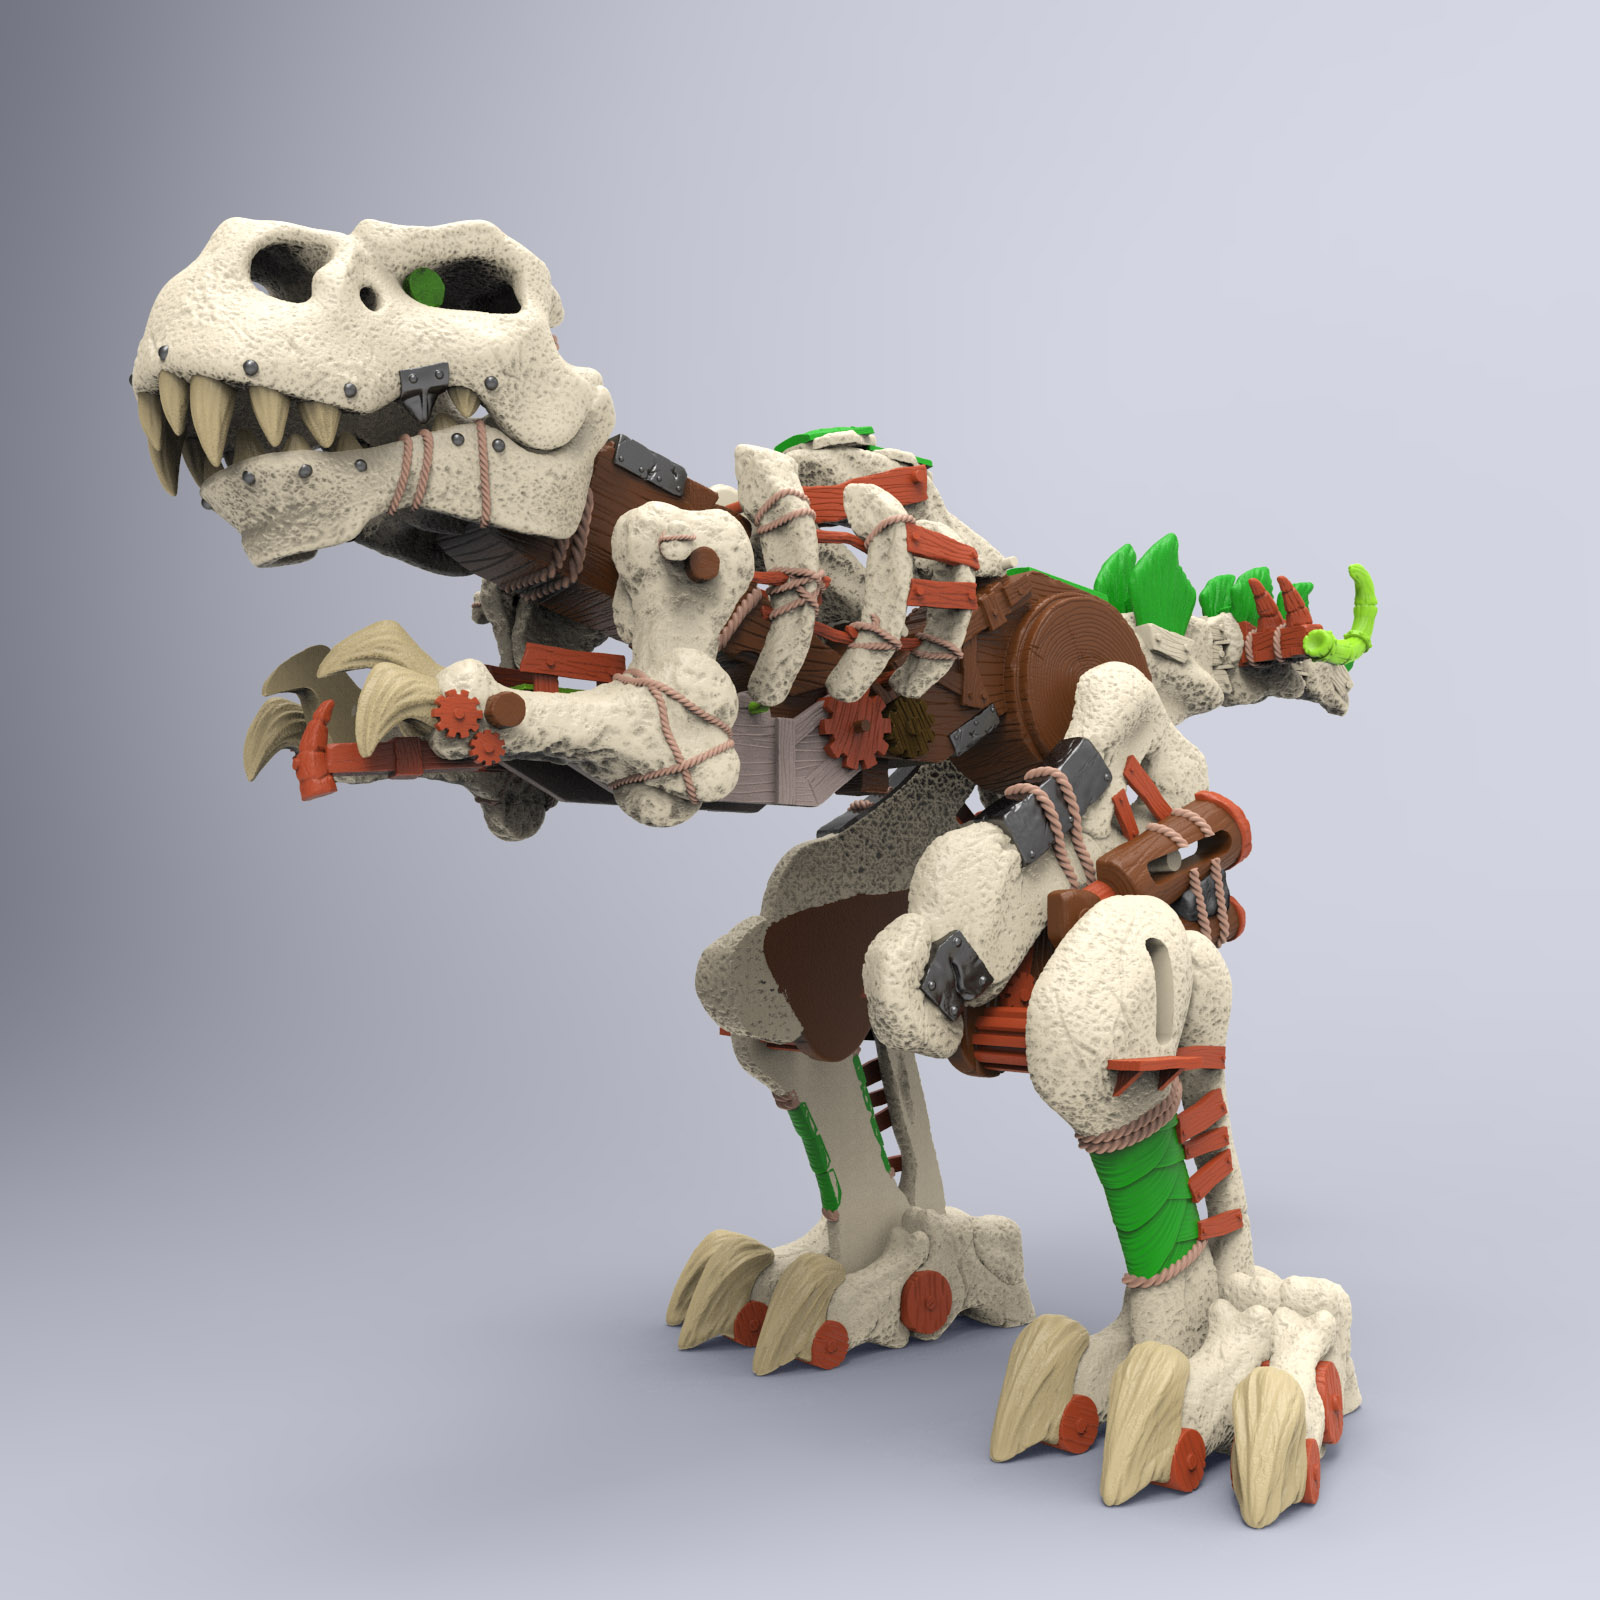
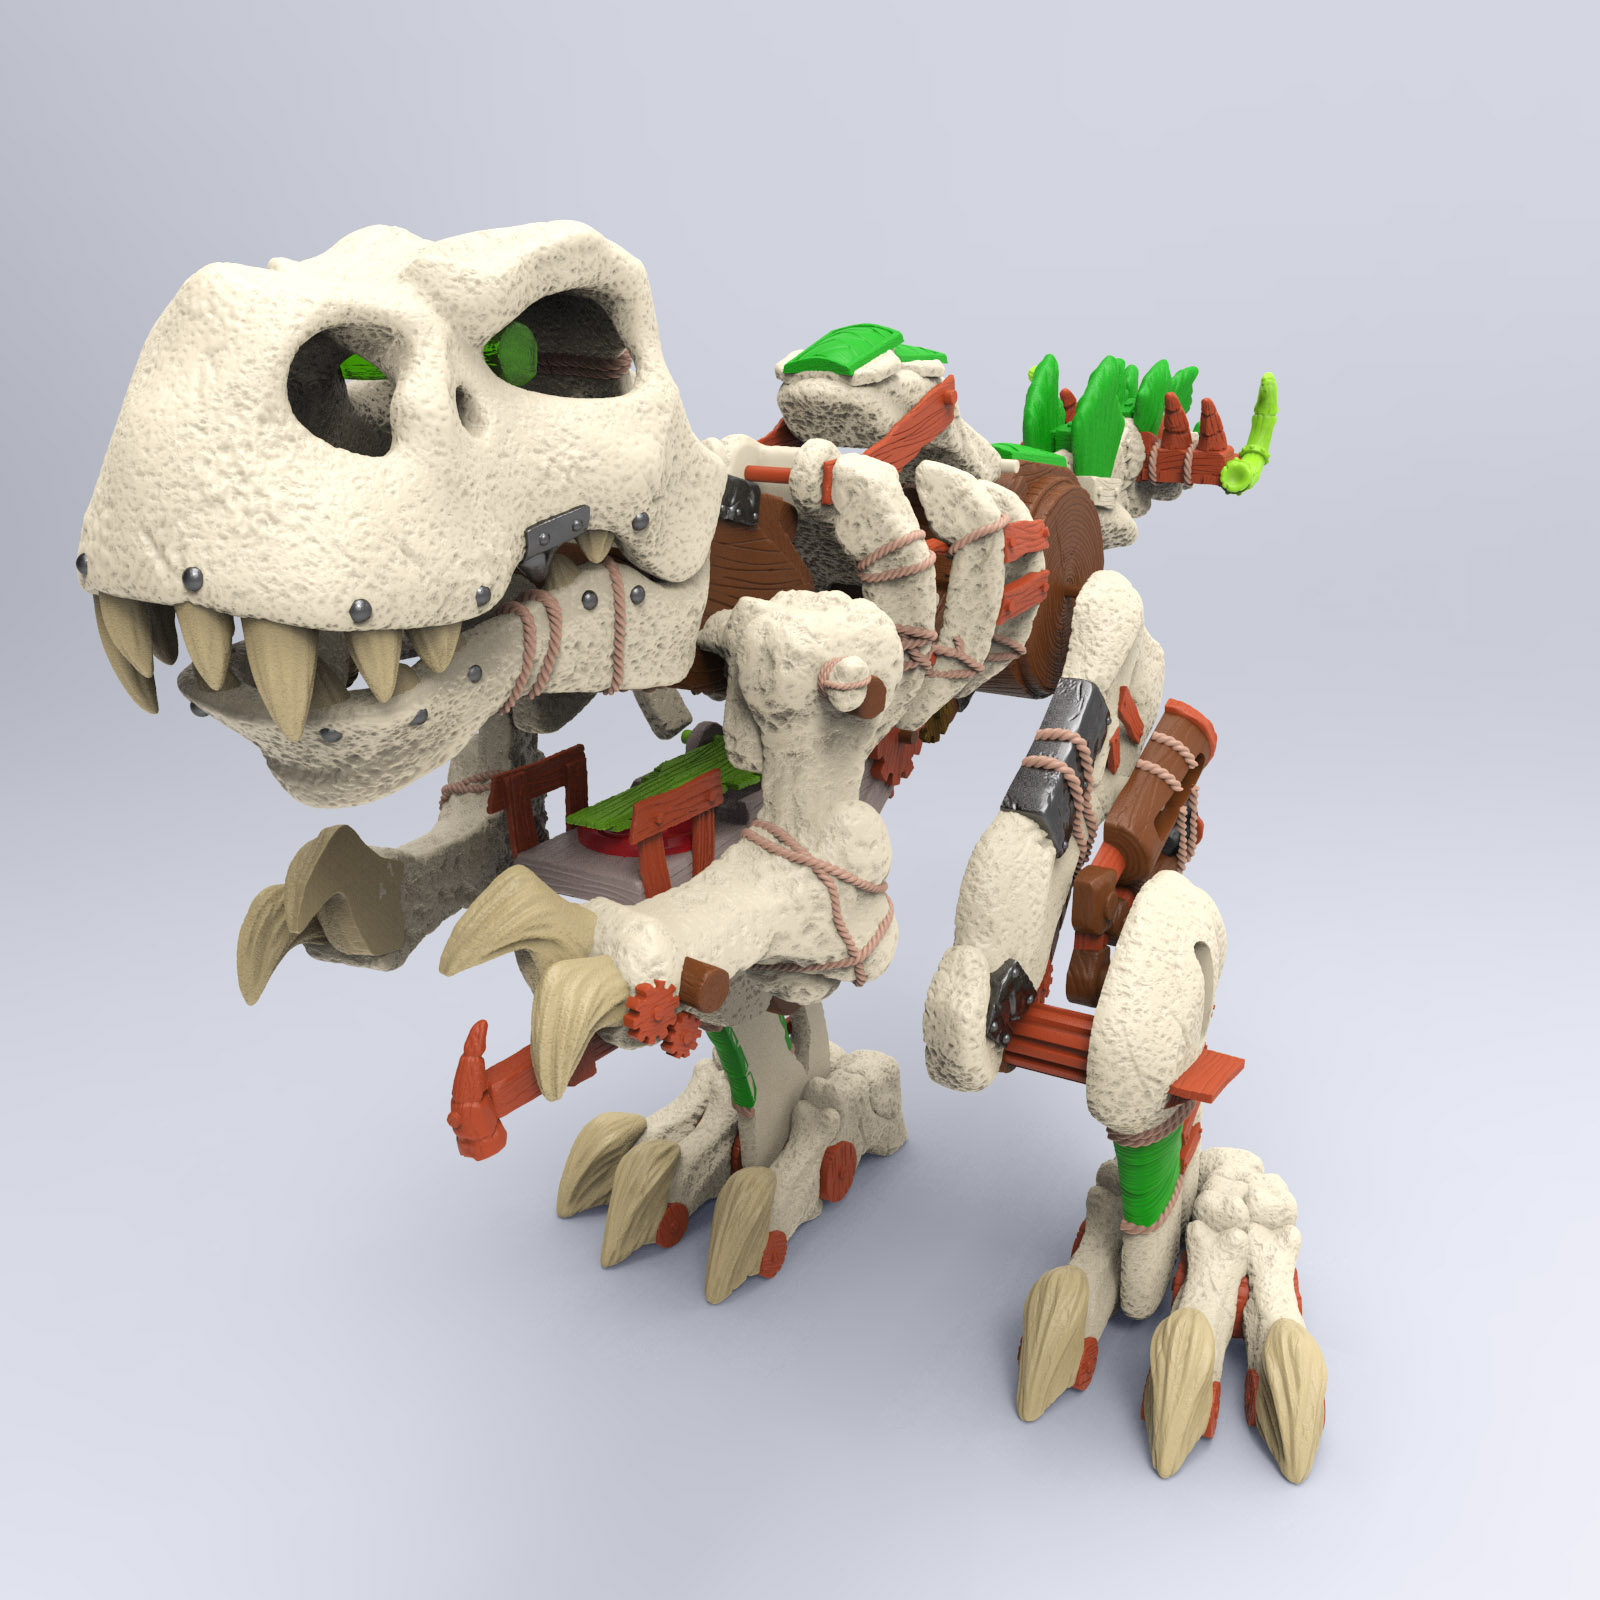
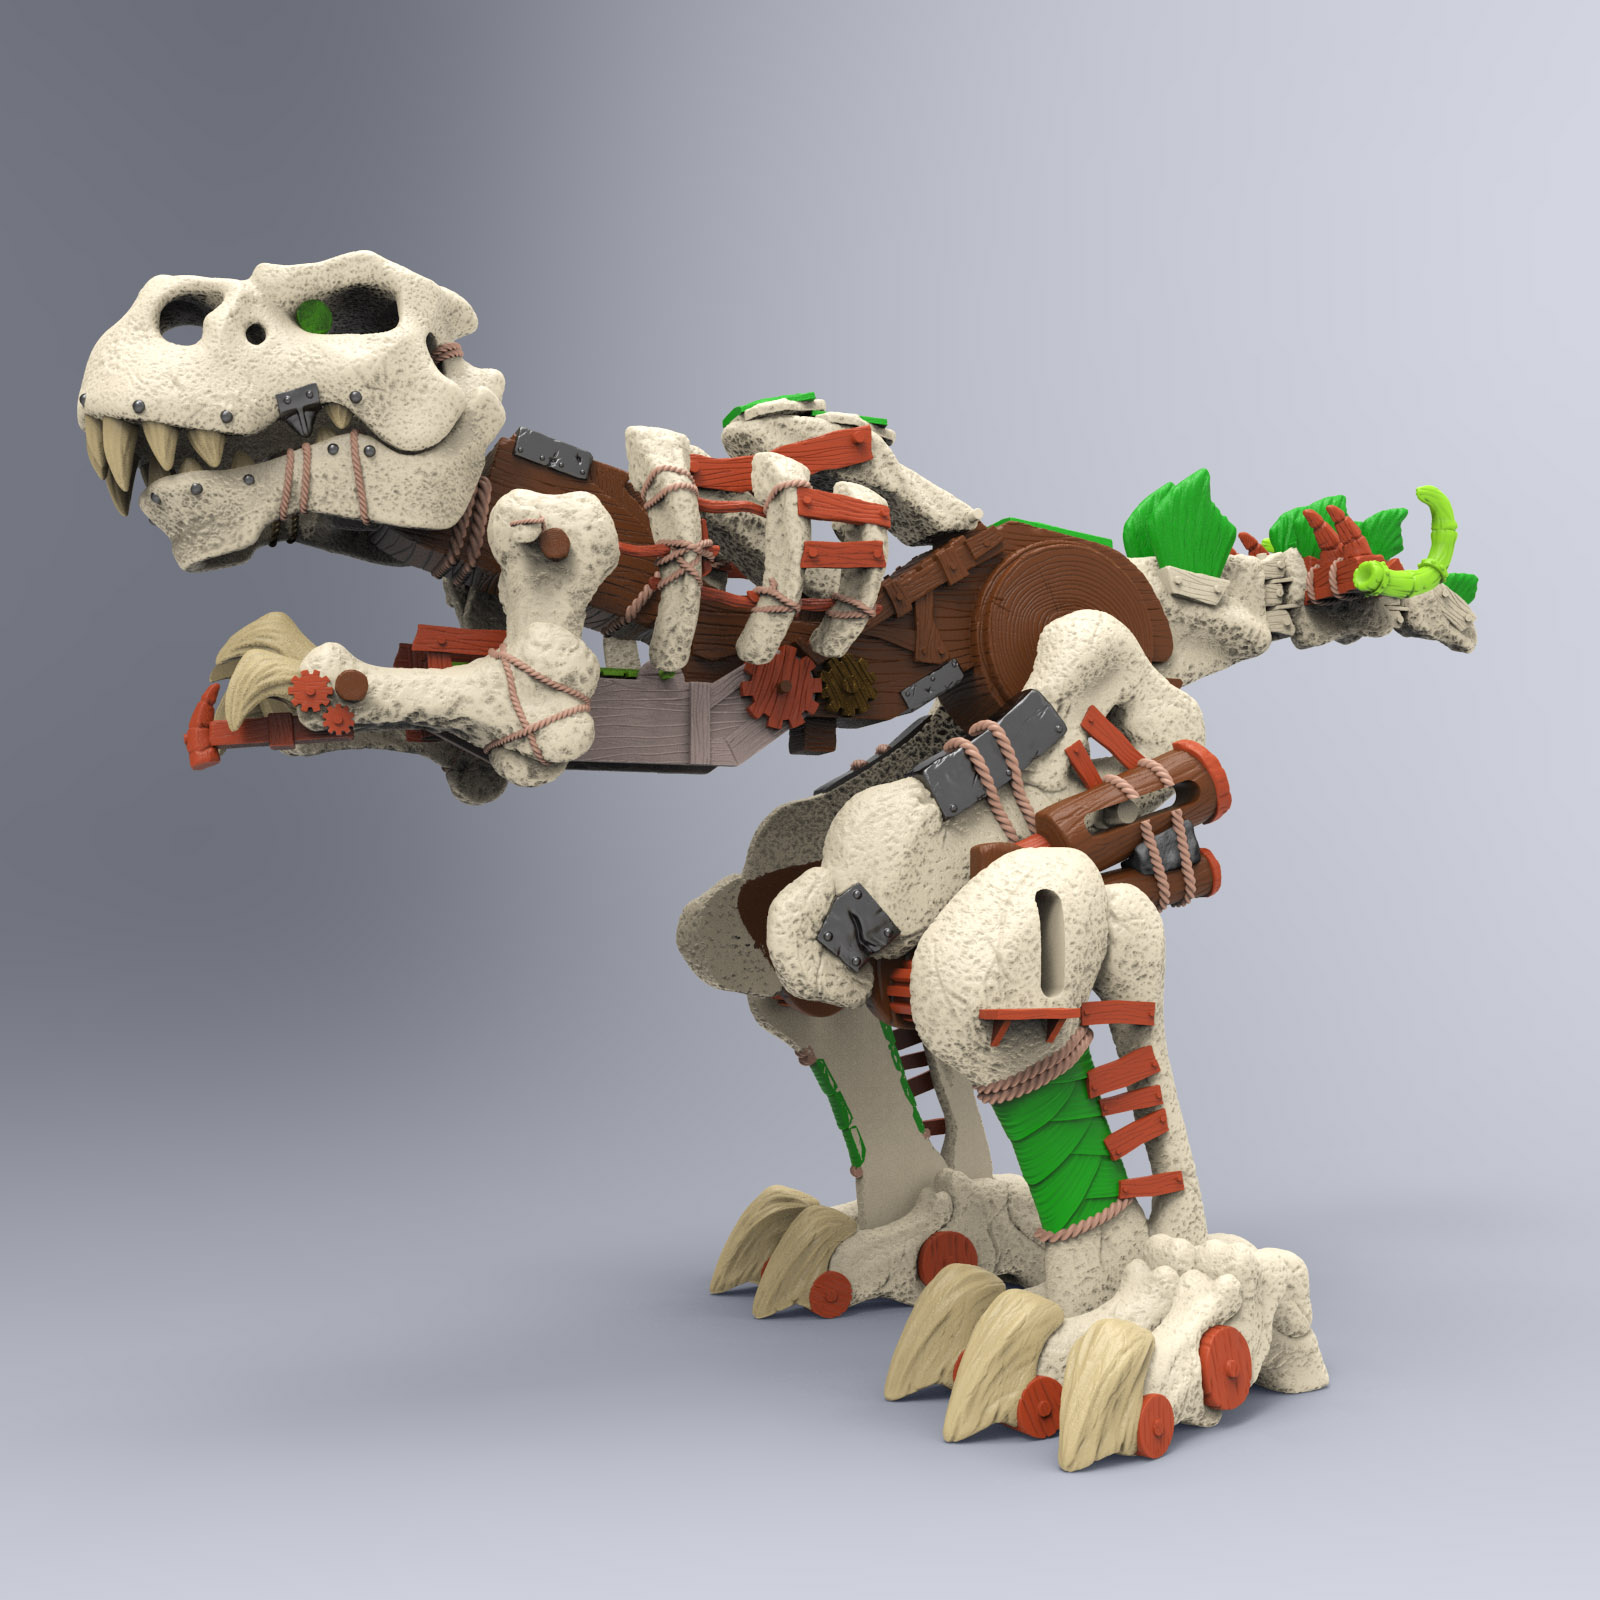
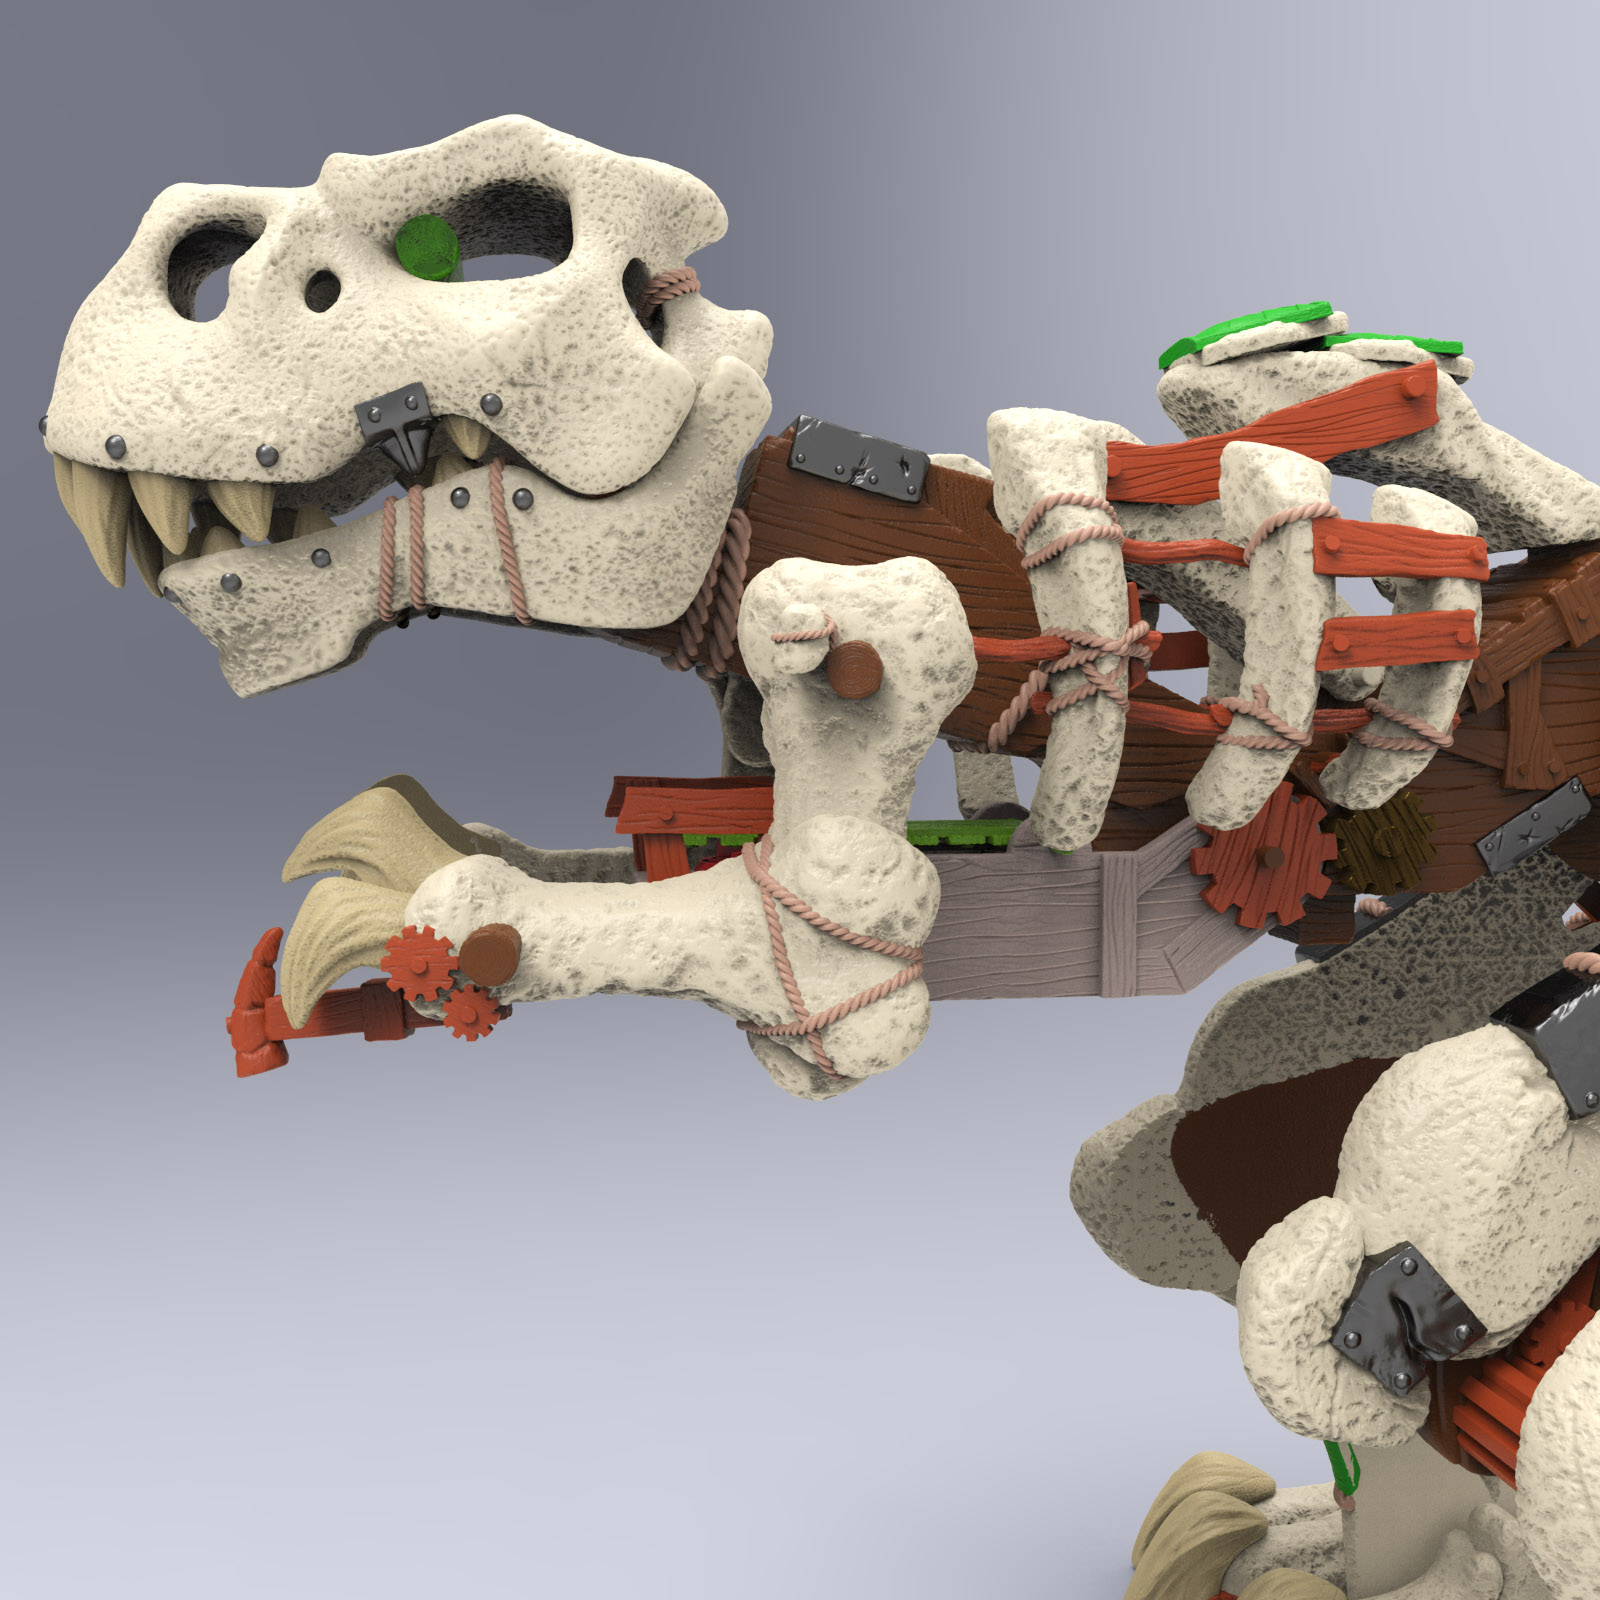
How do you make the joints? I’d imagine they have to be very precise. I bet it’s difficult.

Love the dinosaurs! I was planning to do something similar to 3D print for my kids!

Very nice and clean product work!
I know how subtle and tricky this kind of work is having worked for Mattel, many props to you :+1:

Love the dino Toys! Awesome stuff!

lovely,

…a cool tool for your work! :wink:

You have the coolest form down. I especially love how there’s a sense of clean lines, yet retains its organic shape as well with inference to muscles :).

Awesome work! Very, freegin inspiring.

Thanks so much everybody! I really appreciate all the kind words. And thanks so much to ZbrushCentral for the top row! What an awesome surprise to wake up to!:smiley:

ArtMonkey- I will try to post a breakdown of my work sometime soon. But honestly it’s not that much different than what I see a lot of sculptors post. I generally like to start with is Dynamesh sphere to block out a rough. Sometimes I’ll use more than one. Once I have my rough, I will usually duplicate it and start cutting apart into parts with boots, hands, arms etc. then I’ll either take those parts and clean them up directly with hpolish, dam standard etc. , eventually Zremeshing them and re projecting details before a final cleanup pass. Or I’ll use them as references to rebuild clean toppologyon top of using primitives or Zmodeller. My process was a lot different on the Allosurus and the Raptor, because I was just really diving into into Zbrush at that point and still learning. I spent a lot of time manually re-topologizing my basemeshes for those using zspheres, which I don’t really do too often now. Hope that helps a little for now.

Wyatt- I totally lucked into my job and Fisher-Price. I was a freelancer for a number of years working traditionally in clay and wax and my current boss just stumbled across my website and reached out to me to work as a freelancer. So I did freelance for them for seven or eight years and when it came time to hire a new in-house sculptor he reached out to me and figured I could learn digital on the job, which I did!

ChrisD- I don’t really need to convert to nurbs. I usually just turn over STL files or sometimes a Freeform file created from OBJ.

So you send these to your slicer. Which slicer are you using. I have simplify 3d which seems to be pretty sweet, however hadn’t been able to print much as I’m working on my 3rd printer from Monoprice. Everyone seems to be having a good time with theirs, guess I just have bad luck! LOL.

I’ve been exporting models from zbrush using the 3d printer export “plugin”. The scale is the only issue I was having problems with. What would you be using to print these?

It’s great to hear stories from folks that make it big, or at least make it further than most. You say that you lucked out. I know some people don’t believe in luck, but I do; I’ve seen it personally happen for others. It does those chance meetings for some. There are those that will struggle for the rest of their lives, sadly. It’s just the way the universe is wired. That’s why it’s still so refreshing to hear of someone such as yourself with incredible talent that made it. :).

Keep making these awesome sculpts.

Super rad work! I really like how durable and childsafe they are yet, they still have form and clear reads. Great stuff you and Hasbro are making.

…Looks like you’ve got the best job in the world!

Good for you Matt. All the best.

srlake314
take
Britney Spheres
Wyatt

Thanks so much for the kind words.

srlake314 - We’re using high end Objet printers at work, so I just export STLs and send them to our model dept and they do all the rest of the prepping for print. I have no dealt with having to set up my work in a slicer myself yet. For a long time as a I was learning Zbrush, I was still exporting my final geo as OBJs and taking them back into Freeform and decimating and exporting from there because I could be 100% certain of scale and it was also easier to merge pieces and core them if necessary. But lately I have been exporting right through the 3D exporter plugin and have had no issues so far. I usually set my scale at the beginning of the project by importing something with a known dimension and working off from that. Then I just verify the dimensions in the plugin before export.

Black-Tooth - the joints aren’t as complex as they seem. The swivel parts that just go up and down are simply two discs face to face with a pin through the center. A ball joint for shoulders and such is a little more complex and there a couple different ways to tackle it if you need a functioning joint for your model. But usually I don’t need it to be full functional for model and approval purposes, so I will just drop in a ball as a placeholder for size and location and let the engineers work out the joint. Hinge joints like knees and elbows are really just a series of 3 discs face to face with a pin through the center. The center disc attaches to on limb (the lower leg for instance) and the other two discs attach to the other limb (The upper leg). The trickest part is figuring out the right clearance tolerances when you are 3D printing it. I find it to be a little trial and error and in my experience usually the bigger the pin, the more clearance you need. For instance, if I am using a 3/16" (4.7 mm) pin, I might leave around .08 mm clearance all the way around. But if I am doing something larger with say a 3/8" (9.5mm) pin, I’d probably do more like .10 - .12mm. The material you are printing with can also affect the tolerances as well as other variables. I know sometimes if I get parts that have just been washed after coming off the printer and haven’t dried thoroughly, the extra moisture can make my normally good tolerances a little tight. So it is a lot of trial and error and even when you think you’ve found the ideal settings, you’ll still get a random model that you either have to do a little sanding on the pins because they are too tight, or use a little glue or fun tac because they are a little looser than you thought. I’ve probably gone into way more detail than you wanted, so I’ll stop rambling now:D