ZBrushCentral

Questions and Troubleshooting for ZMapper

It seems that i was not using “SUV” or smooth uvs while subdividing the mesh.
anywayz i got the lines removed but i quickly ran into another issue.
when i save the ztool, i got the same facet UV issue that i didnt got before saving it.

i don’t know if this is a bug or something.
any ideas?

regards,
saad.

P.S
i’m using xp sp2
3.0 ghz P4
2 gb ram

There is a known issue with 3.1 where smoothed UV’s are lost when the model is reloaded.

hay thnkx for your reply, Aurik,
i just have one query,
is there going to be a service pack for this issue,
if so then when is it gonna be released?
cause this is a really shocking bug, u know
i mean , u worked on the model for 3 to 4 hours then u save it and booooom!!!
ure normal map is historied.
:wink:

reply soon.

regards,
saad.

Hello and Happy 09-th
i recently upgraded to 3.5 GB of RAM so i can generate more detailed normal maps but when i try to do it for a + 4000000 0R 10 000 000 POLY MESH z mapper says that i can not do it (there was an error mesage but i dont remember it , so it is possible that i dont have ennough RAM to generate a map from a 1000000 poly .OBJ

11111111111111111111111

Some configuration well-working with Maya 2009 or 2008 sp2?

Some documentation where get more info than here:

http://www.zbrush.info/docs/index.php/Expert_Pass_1_%26_2_Tab#Expert_Options_Summary

Some site to know how MayaHardware & MentalRay normals work?.

In the “Expert Pass” tabs are enough buttons for get a million of combinations!.

We can’t work for this poor results, by god, we need updated presets.

Do you think Autodesk is changing this for bind us to use its Mudbox software in place of Pixologic’s one?.

We need a solution, I can’t waste lots of days trying combinations, ey!, we have deadlines and customer who despair, this isn’t a childs game!.

Hello all,

I’ve been trawling the forums for abit but I can’t seem to find a definite answer to my problem.

I’s just like to know if its even possible et all to generate seamless Normal Maps on a Mesh with Multiple UV Regions?

I’ve been able to create seamless displacement maps on a creature mesh with 4 UV Regions, using DE3. The Normal Maps from DE3 aren’t seamless though, and neither are the maps from Zmapper.

I’ve also tried converting my displacement maps to Normal Maps using XNormal but the results are wonky as well.

What do you guys think? I’d like to keep doing more tests but I also want to be sure that I’m not flogging a dead horse.

Cheers!

Yes, it is possible and in fact quite easy.

Use Tool>Polygroups>UV Groups to regroup the model based on the UV regions. Then Tool>SubTool>GrpSplit to actually break the model apart so that each region is its own SubTool. You can now create normal maps successfully for each SubTool, which will give you the maps you want.

hello aurick,

thank you for the speedy reply, i tried what you suggested and although i got the maps, the seams are still showing up.

maybe its because im not generating my normal maps with the original base mesh shape?

Before I did the GrpSplit I dropped to Level 1 switched my base mesh using the morph target i originally stored. However, when i split my mesh up into Subtools, it will revert all the parts to their sculpted shapes

any ideas what i could be messing up?

bump, gone throught tonnes of settings but it still showing up seams.

I work with ZMapper to get the best result for Cinema4D (for searchengine: C4D).
I try to write a Tutorial for ZBrush->C4D in german Language with Pictures and Scenefiles.

Displacement looks nice, but a little bit lower details as ZBrush shown.
Now I want to map the normalmap for last fine details.

This is the mesh and only Normal Map rendering in C4D:

pic01.jpg

I don’t understand why!
I make many many tests with different settings in ZMapper, but this is the best result.
Some settings I understand now. Like smooth uv and smooth group in Presmooth normal. But every other settings I don’t understand like Orthogonalize, Derive at normal/binormal.
I don’t know what is binormals.

I get very good result with other settings and Object-Normal Setting in C4d.
But I thing when I want to animate my object by bones(joints) I must use Tangete ???

Here is the model for try: http://www.total3d.de/pub/Tutobject.rar
Is it a mesh problem ?

Here my actual setting:

Attachments

pic02.jpg

pic03.jpg

Ok, I found: Its no mesh problem.
Because the cavitymap looks nice.
without creases

Hi i have the same problem as thegreypencil, i ve seen tutorial from gnomonology which shows how to make seamless normal maps with uv regions (the one with stegosaur). That guy did not use grpsplit, he just unhide one polygroup and simply made norm map as usual, without grpsplit. I’m tryuing repreat step by step same actions but my map looks blowed up.

Any other suggestions?

The tutorial that you’re referencing was most likely done with ZBrush 2 rather than ZBrush 3. In Z2 you could use the technique of simply hiding parts of the model. In Z3 you must split it into groups. Hiding will not work.

So is there a way to get seamless result?

Now I try a higher res mesh.
1 Sub higher.

Better (loot at downer picture), but same problems(look at upper picture).
I have try some more different settings.
Never get better.

It looks like different smooth algorithm between ZBrush and C4D.
Is it possible ?

Can anybody test please ?

pic04.jpg

Attachments

pic05.jpg

Your problem might lie in the UV mapping for the model. It’s also possible that you’ve sculped some overhang into your model, which is virtually impossible to get a good map from.

Hello! perhaps I should post here.

I stil didn’t found response.
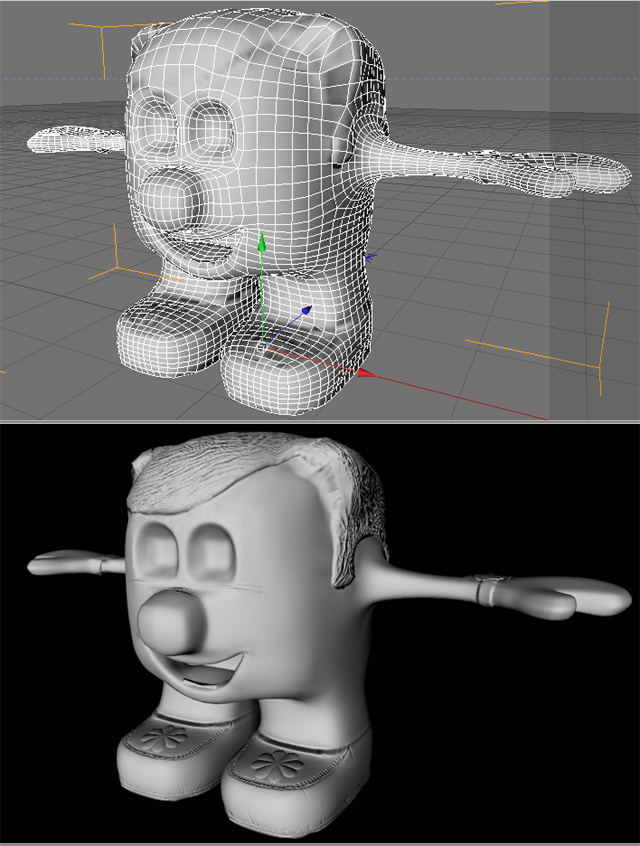
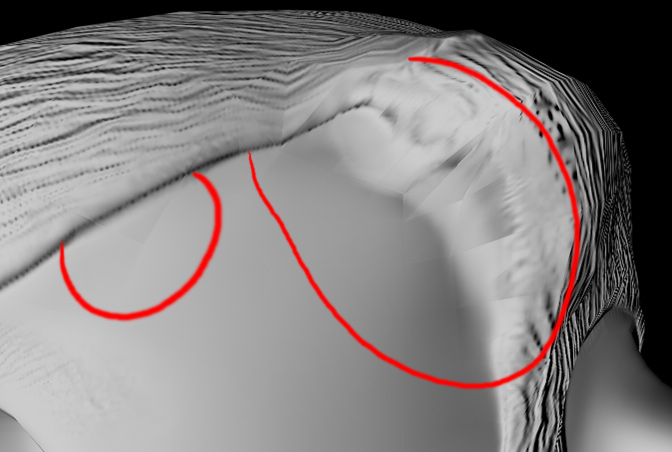
My matter is that I see seams under my 3D logs. I have the same matter in max, maya and torque engine!
I have absolutly no matter in UVs, normals, mesh, so it comes from Zbrush…

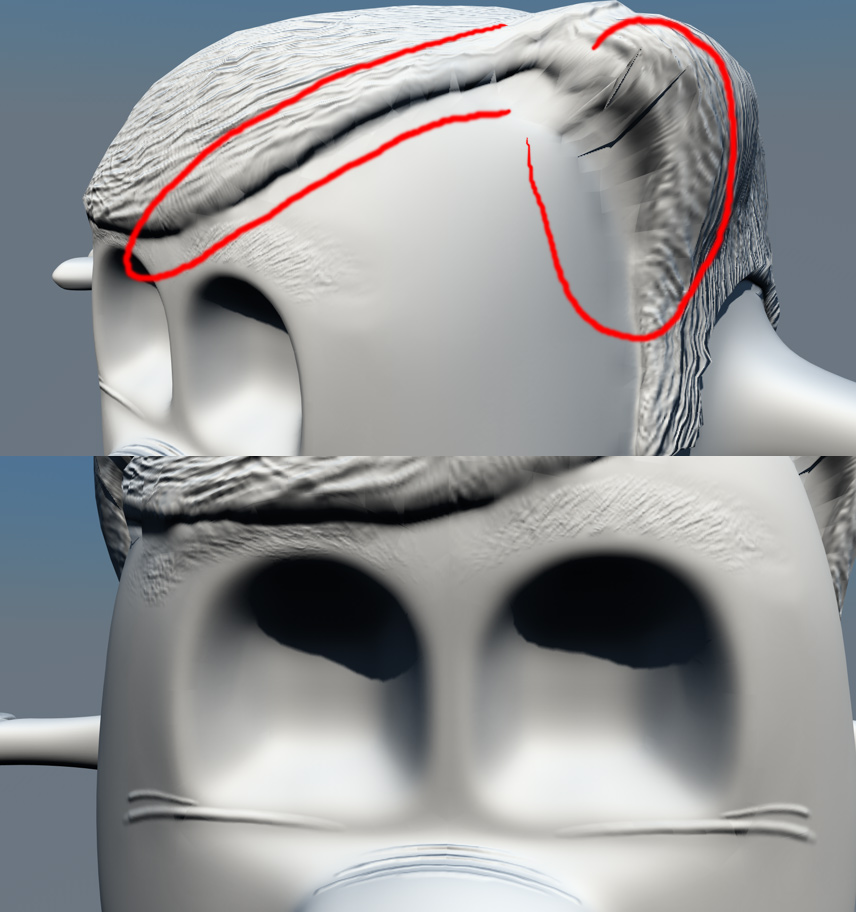
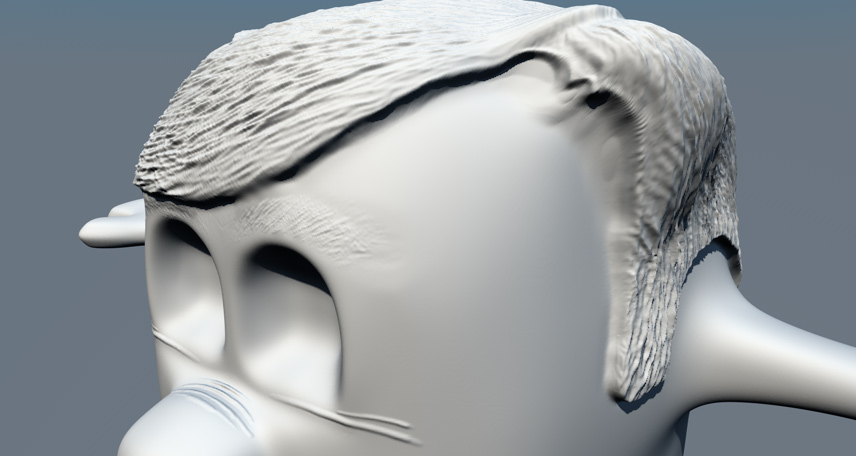
here is some screen to remind you the seam broke in normal maps:

http://img199.imageshack.us/img199/4021/nmatterscreen.jpg
it renders:
[http://img36.imageshack.us/img36/7594/nmatterrender.jpg

notice this is NOT a symmetry matter, cause the back is OK, not the shoulder.

here is the belly seam:
[url=“http://img190.imageshack.us/img190/1161/nmatterrender2.jpg”]http://img190.imageshack.us/img190/1161/nmatterrender2.jpg

here is what happend under Maya: the same thing!
http://img190.imageshack.us/img190/6629/rat3p.jpg

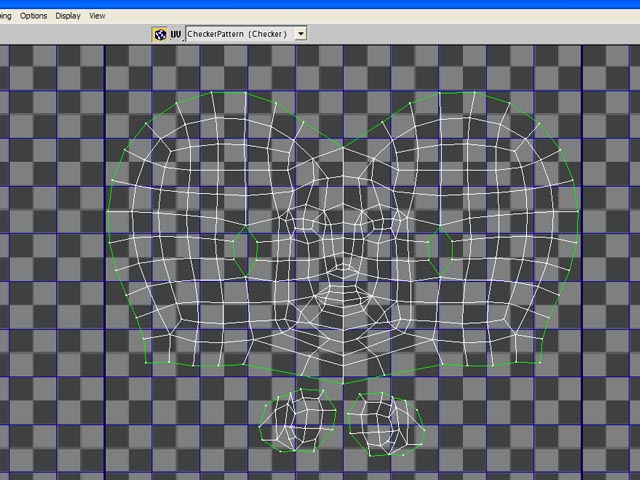
here is my CLEAN UVs (no inverted UVs, no double UVs…)
[url=“http://img38.imageshack.us/img38/1717/ratuvs.jpg”]http://img38.imageshack.us/img38/1717/ratuvs.jpg](http://img36.imageshack.us/img36/7594/nmatterrender.jpg)
no hole in mesh, not a renderer matter, not a computer matter, not a soft matter, not a face normal, smooth group, bug, double, inverted face, UVs nothing of alll this… so please don’t ask me to check my UVs, to check my model, my normals, it’s already done and it’s all clean.

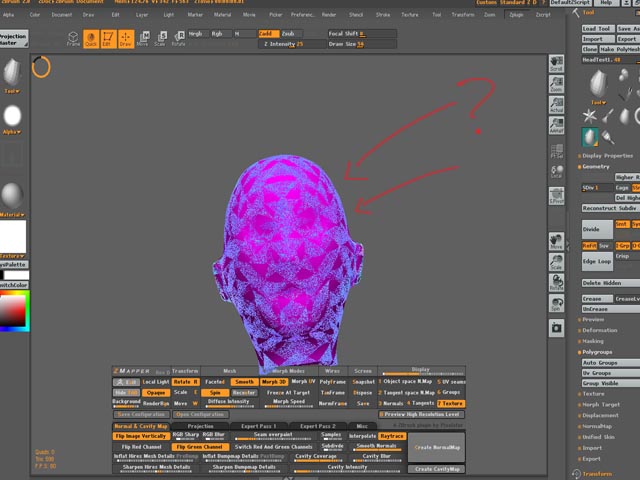
and the normal maps render like in maya and max in torque engine.

any idea, please?

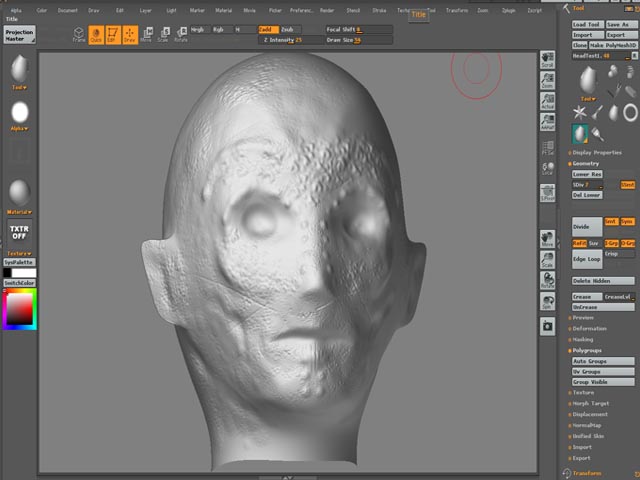
I would be gratefull, If I could use zbrush to create this bad rat.

Hey everyone, I hope someone can help me with my problem. I have been looking through all the forums and I havent been able to find a solution as to why Zmapper acts up.

  1. I created a low poly model in max 8 , my UVs are also laid our well, and no overlapping, then I export to Zbrush 2.
  2. I add the sub divisions and start to sculpt, also using projection master.
  3. I set the sub divisions back to level 1
  4. I use Zmapper with the 3DS Max 8_TangentSpace_BestQuality.zmp setting (is this the propper setting or should I just use the default?)
  5. I go to the ‘Normal and Cavity Map’ tab, click ‘Flip Green’, and hit ‘Create Normal Map’ button.
    6.** Now this is the problem area, once I hit the button, the normals get displayed, but renders in a weird symmetrical fashion, and ends up looking like it just exploded.

Am I missing a critical step somewhere? Also, are there any settings I should firstinput into Zbrush ? (a graphics setting etc?)

hahah, thanks again guys.
Specs: Windows XP Home SP2, Intel Core 2 duo, 2Gigs of RAM, 345 GB free space, NVIDIA GeForce 9400 GT
1.jpg

Attachments

2.jpg

3.jpg

4.jpg

I installed zbrush on my mbp, scupted for 6days and now i want to generate my normal maps BUT I can’t fine the ZMapper button it’s not next to the projection master button and it’s not in the Zplugin palette… In the application folder are no traces of a plug-in called zmapper…
can someone help me???

(ZBrush 3.12 on OS X macbook pro, intel core 2 duo 2.4ghz, 4gb ram)