Outstanding! I don’t even know how to respond to such a thread 
@qoyun You can also use a vrayhdri shader with udim <udim>tags (myDisplacement_UDIM_<udim>.tiff) in the file name if you want to avoid using composite and setting the u and v tile manually.
replace _ with <>
forum keeps removing those when I add them above</udim></udim>
What a brilliant collection of work. Very impressive and a great dose of inspiration here =) Thanks for sharing!
Great work. Nothing more to say. 
OMG!!! Simply Amazing!!!
Thank you for your stunning artwork and the inspirations.
Amazing Work!!!
Wowzers! Really fantastic stuff. Thanks for sharing!
Thanks guys!
@bomoh: Thats definitely an option, I personally prefer to do it with composites so I can view the textures in the viewport and from my personal experience those nodes are slower than using composite
@believerdeceiver: Thanks a lot Jason, I am glad you liked it man
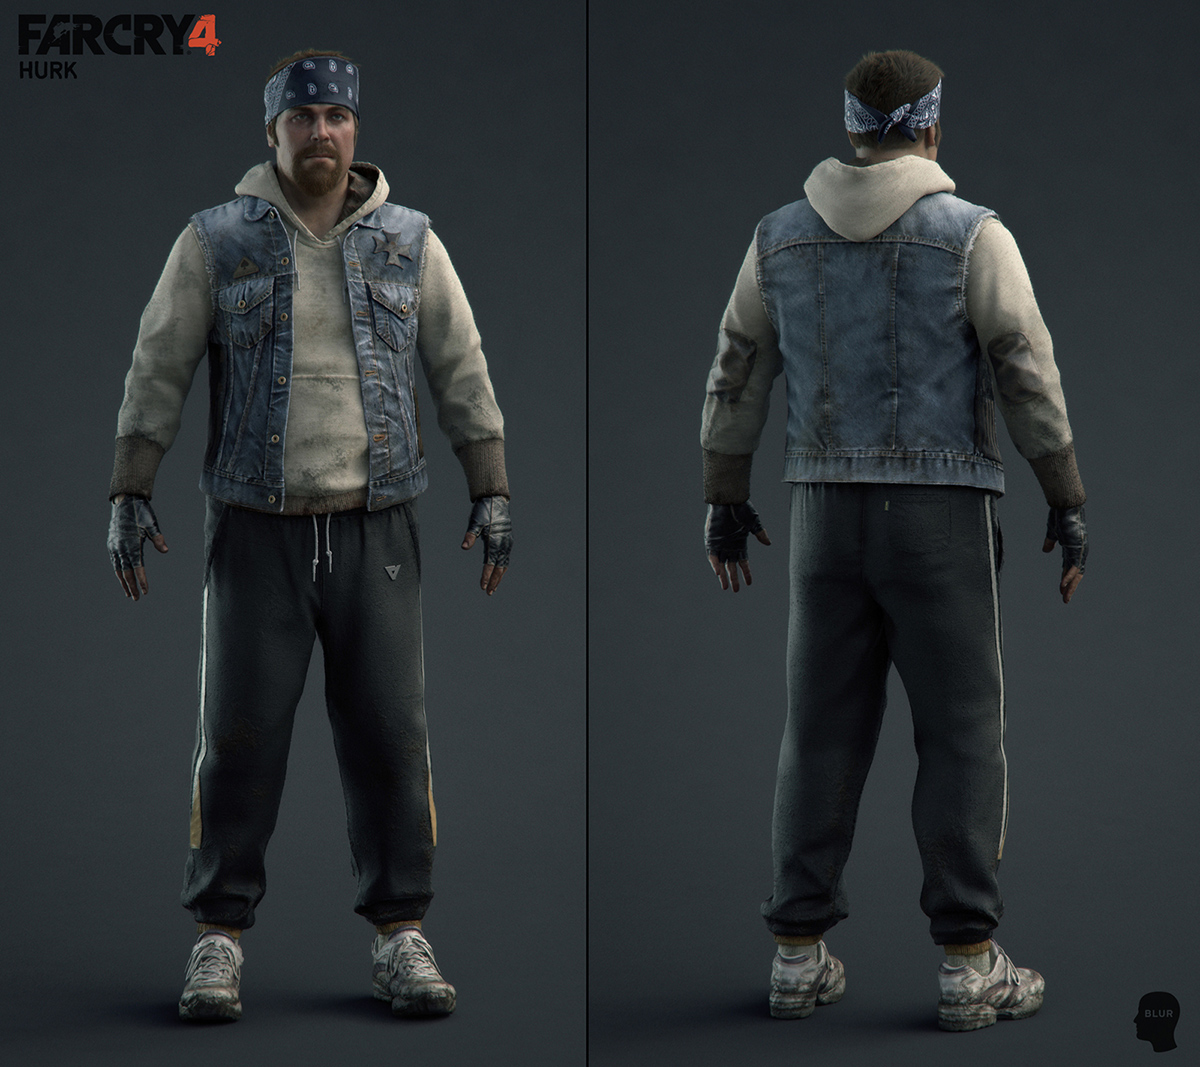
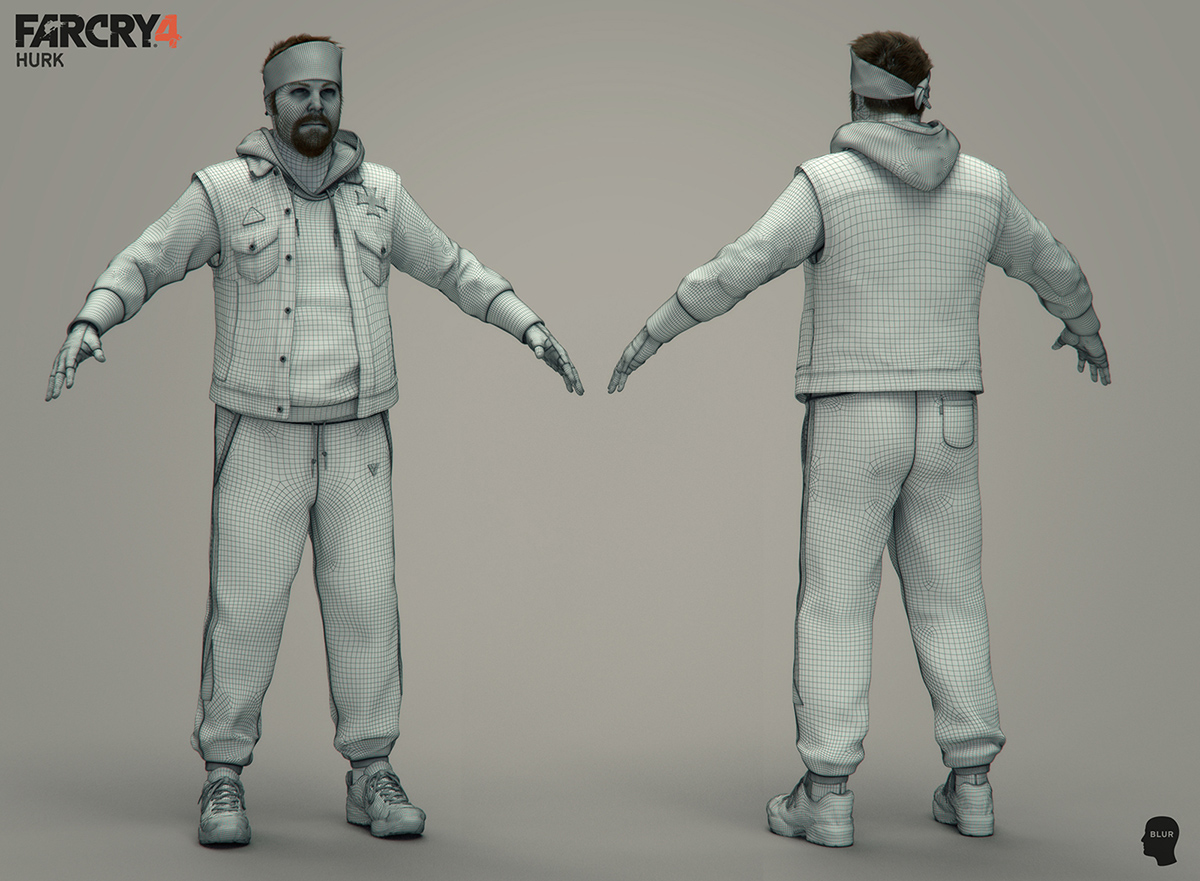
awesome man would really like to know how you did the texturing for clothes in mari ??
is the cloth texture displacement map or a bump map??
@mahi_6038: I mostly paint dirt and wear/tear in MARI. Cloth base color is generally a solid color with subtle noise on it. I use tiled displacement for the cloth texture. I add a composite node in diffuse channel and instance the tiled displacement on top of my cloth texture map to get extra detail in the colors. I hope it explains your question.
What can I say !!!
I finally had time to put this together,
I hope you guys like it.
Here is some new artwork as well:
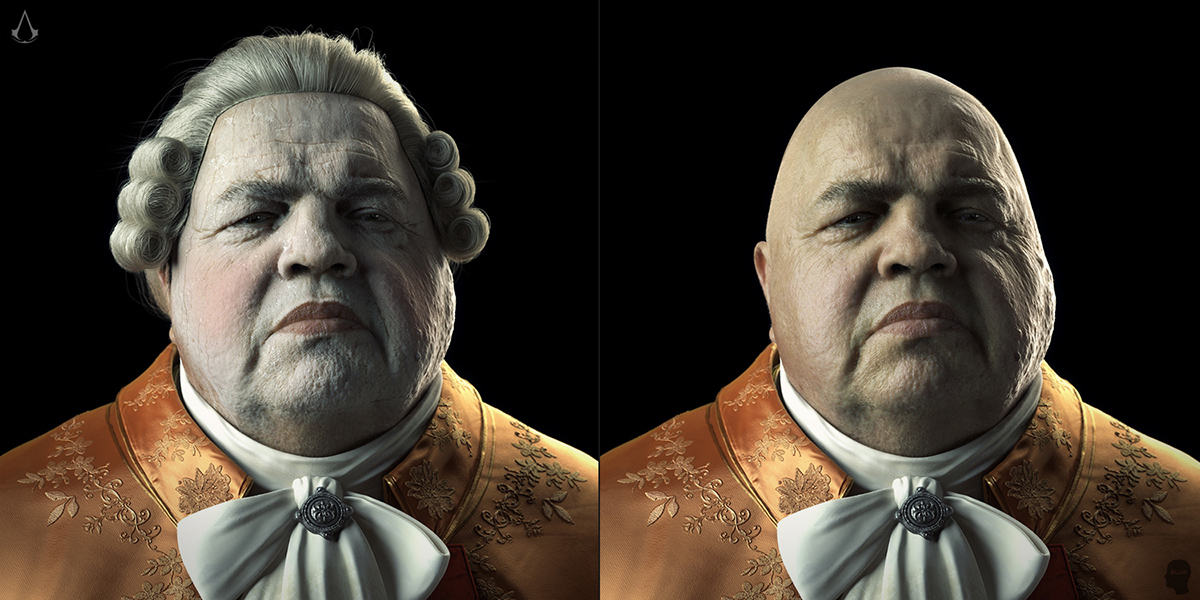
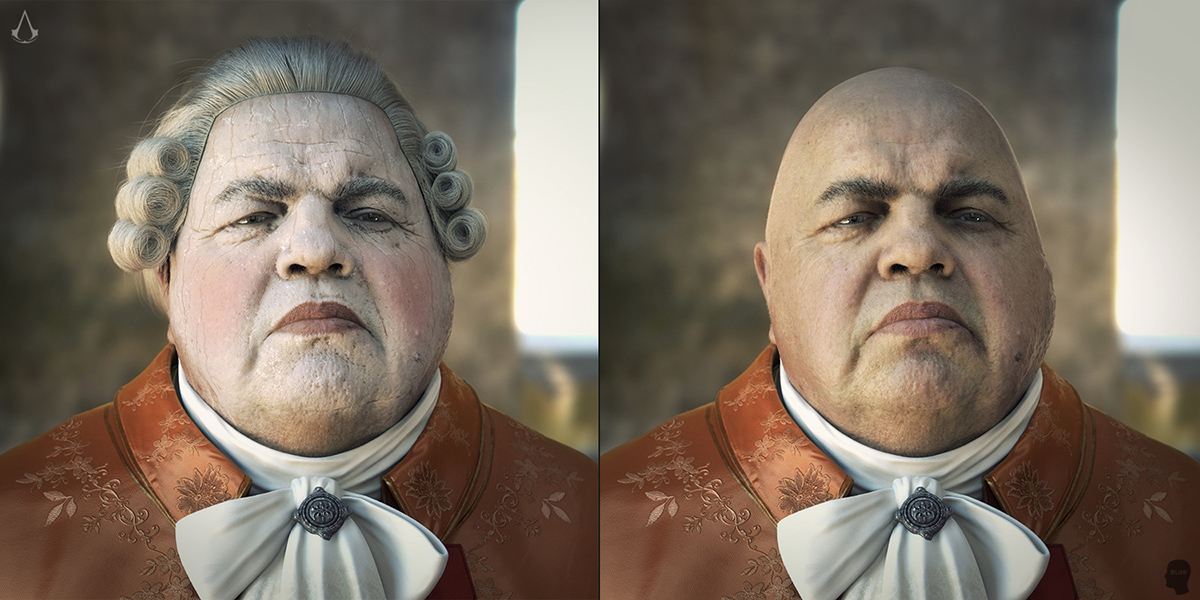
Modeling, texturing, shading, facial expressions and hair on Fat Aristocrat’s head for Assassin’s Creed Unity Cinematic. I have started from a headscan, repaired and polished the model in ZBrush. Make up and Hair are from scratch.


Attachments
I have never seen a more disgusting fat aristocrat than this one, including the matte powdered skin, the badly shaven beard hairs… I can nearly smell the perfume that must hide the unwashed body and clothes.
Pure masterwork, and top row for me!
And congratultions on your demoreel.
Like they say in the US : my jaw dropped to the floor.
Wow this is amazing! Could you post what tools do you use to make
these? Like besides Zbrush where do you texture/render it etc.?
Do you have any tutorials for achieving realism? ^^
Impressive work I really enjoyed studying it. I was wondering if you could share your technique for the powder makeup. I really am struggling with it on a character that I am working on and it does not even come close to the way your amazing work looks. If it is not a trade secret I and I am sure others would be very greatful to some get some insight.
Thanks
Again awesome work!
The fabric and the wig are wonderful.
Thanks a lot guys.
@Zeriel00: All the texturing is done in Mari. Rendered in Vray.
@maddabout: I think the problem you are having with your powder make up is mostly shading and it needs subtleties like clumped powders here and there. If you get rid of the powder from the creases it will also add realism. In terms of shading, I am using a VrayBlend material that has a base layer which is the skin shading. Then there is 2 blend materials, one is for the powder itself and the other is the clumped powders. The trick to this is, the powder and clump materials do not scatter and via masks you can adjust the intensity of the makeup. Your powder is skill scattering and it feels odd, try to incorporate the makeup into your shading. Hope this helps.
Thanks so much for responding I updated the image on my thread. My image still pales compared to yours but I am much happier with it. Thanks so much for the help you are a great artist!
Excellent work on the aristocrat qoyun! Love the shading and texturing on the face, especially details like the sweat trails on the forehead and the dried patchy makeup.
Great attention to detail here.