Hi Guys, I’m really happy you all enjoyed this piece. Thanks so much for the compliments.
This piece started Sunday 9, inspired by the astonishing concepts of Paul Sullivan
http://pencilprimate.blogspot.com/
http://www.pencilprimate.com/
http://cghub.com/images/view/11893/
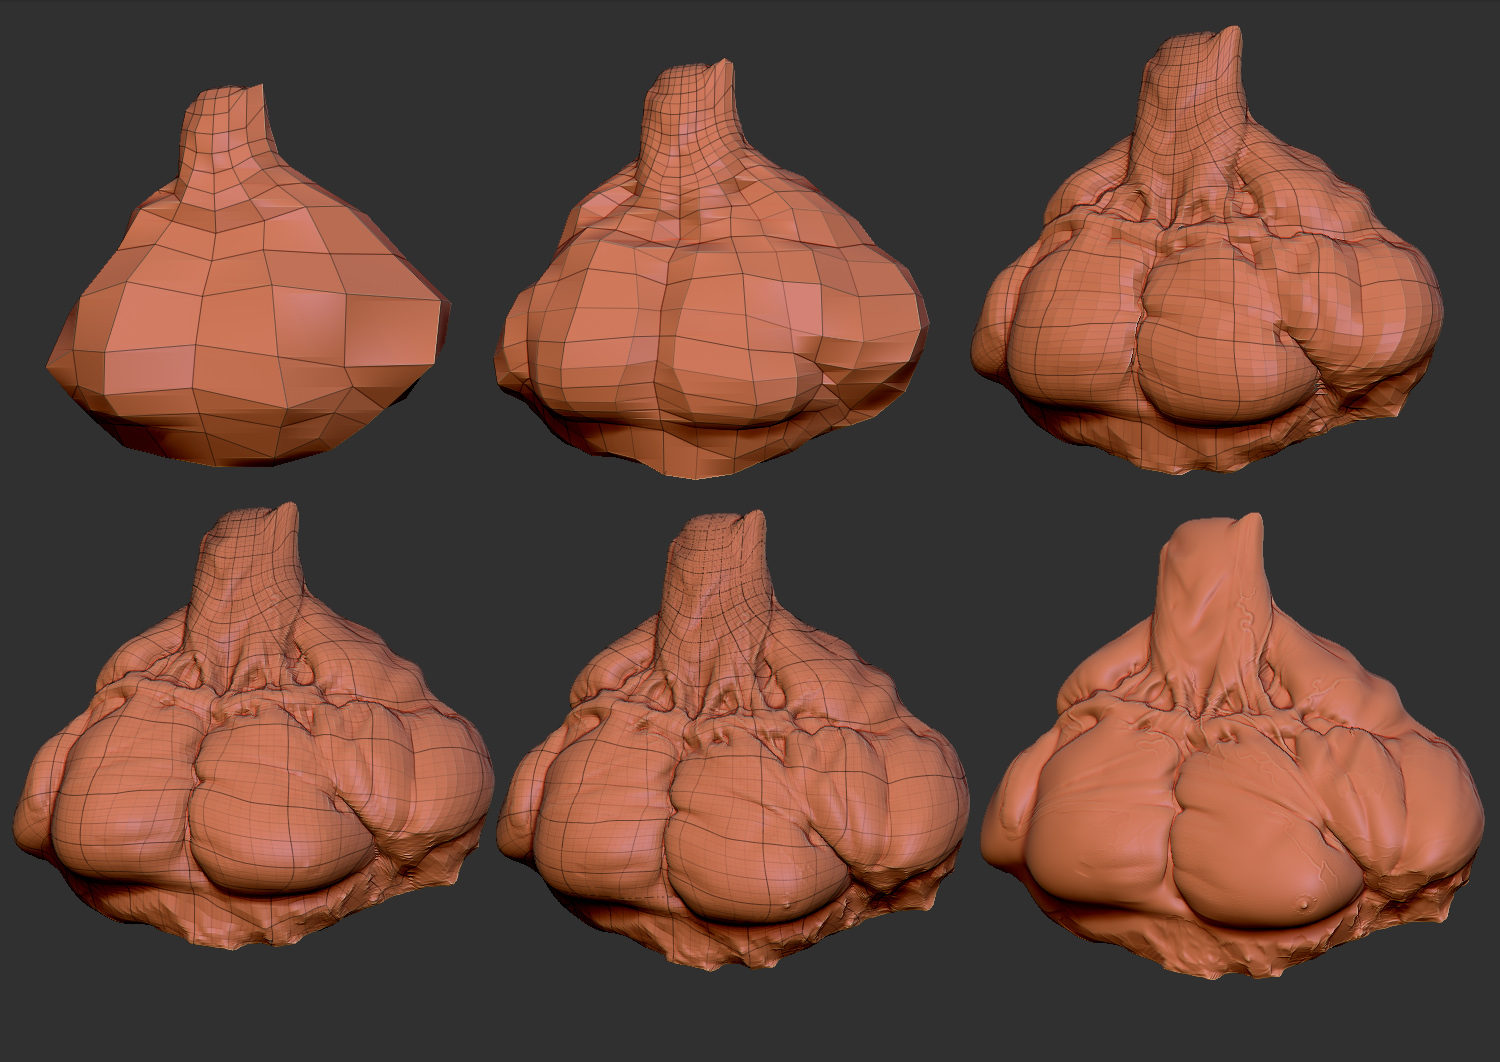
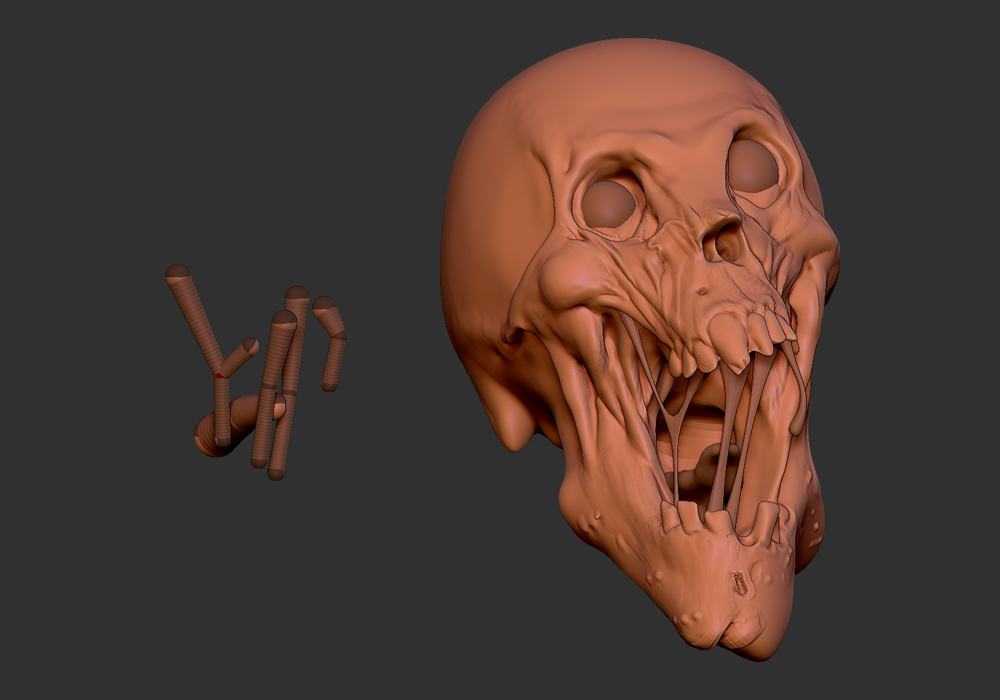
I Started with the head, using ZSpheres and sculpted all on it including teeth, except for the eyes.
And tryed to put as much details as possible.
The drool and tongue are from ZSpheres too.
Then the Body, same process. For the head an body the symmetry was broken very soon.
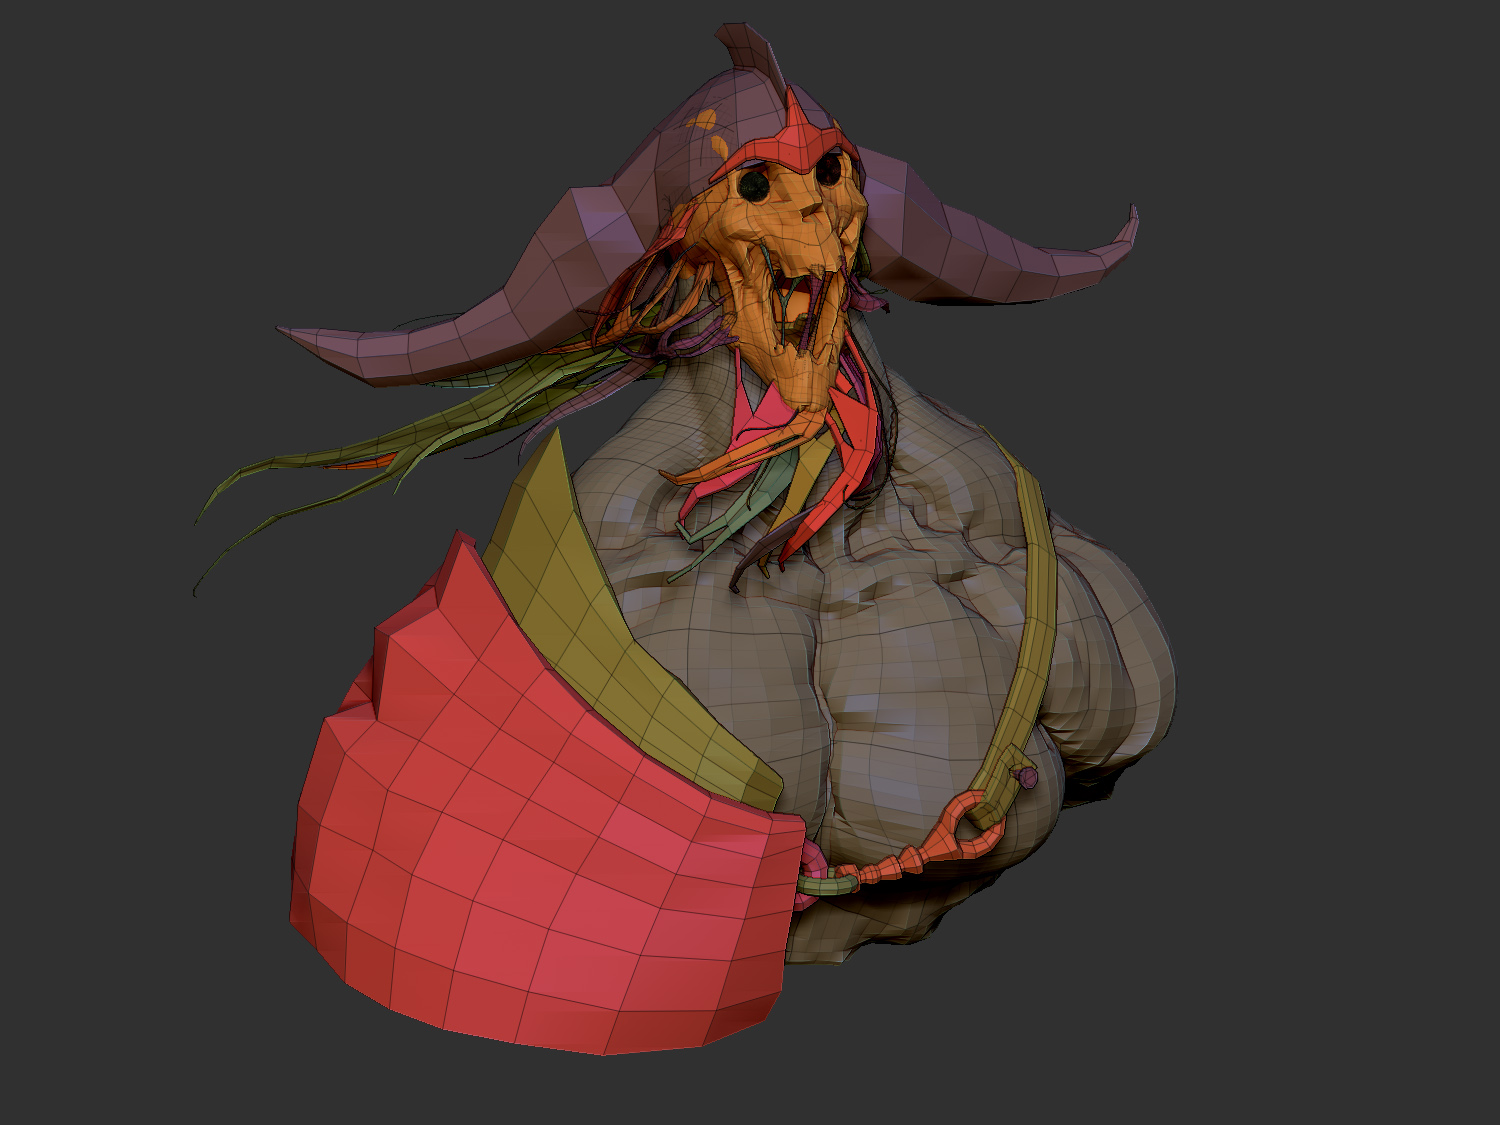
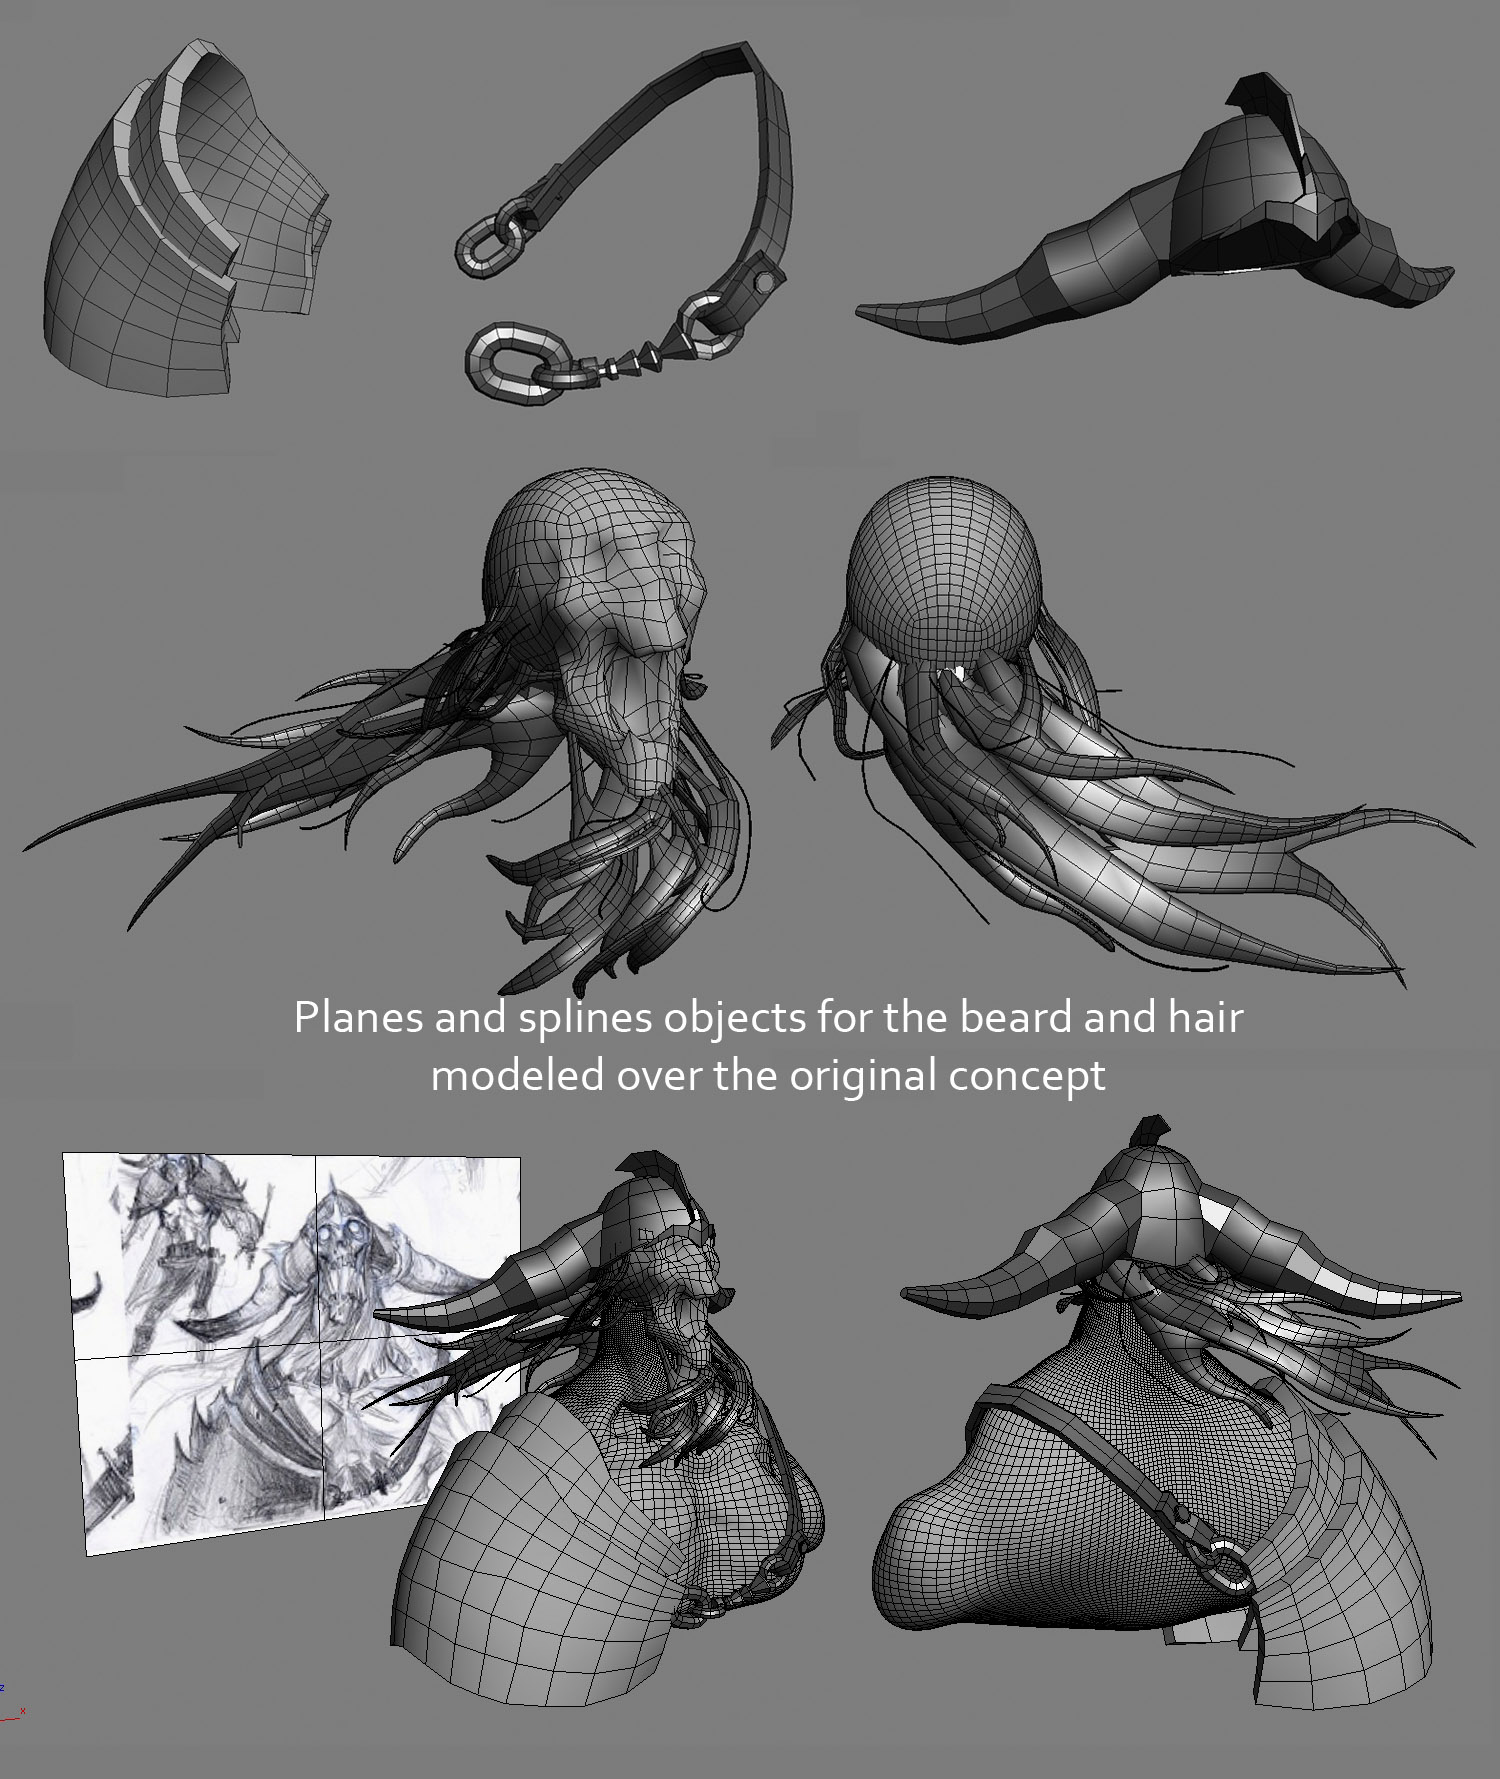
After That I started some props. All made in Max.
Using the original concept as background I aligned
everything in the same position of the concept.
Then Imported all the props into ZB.
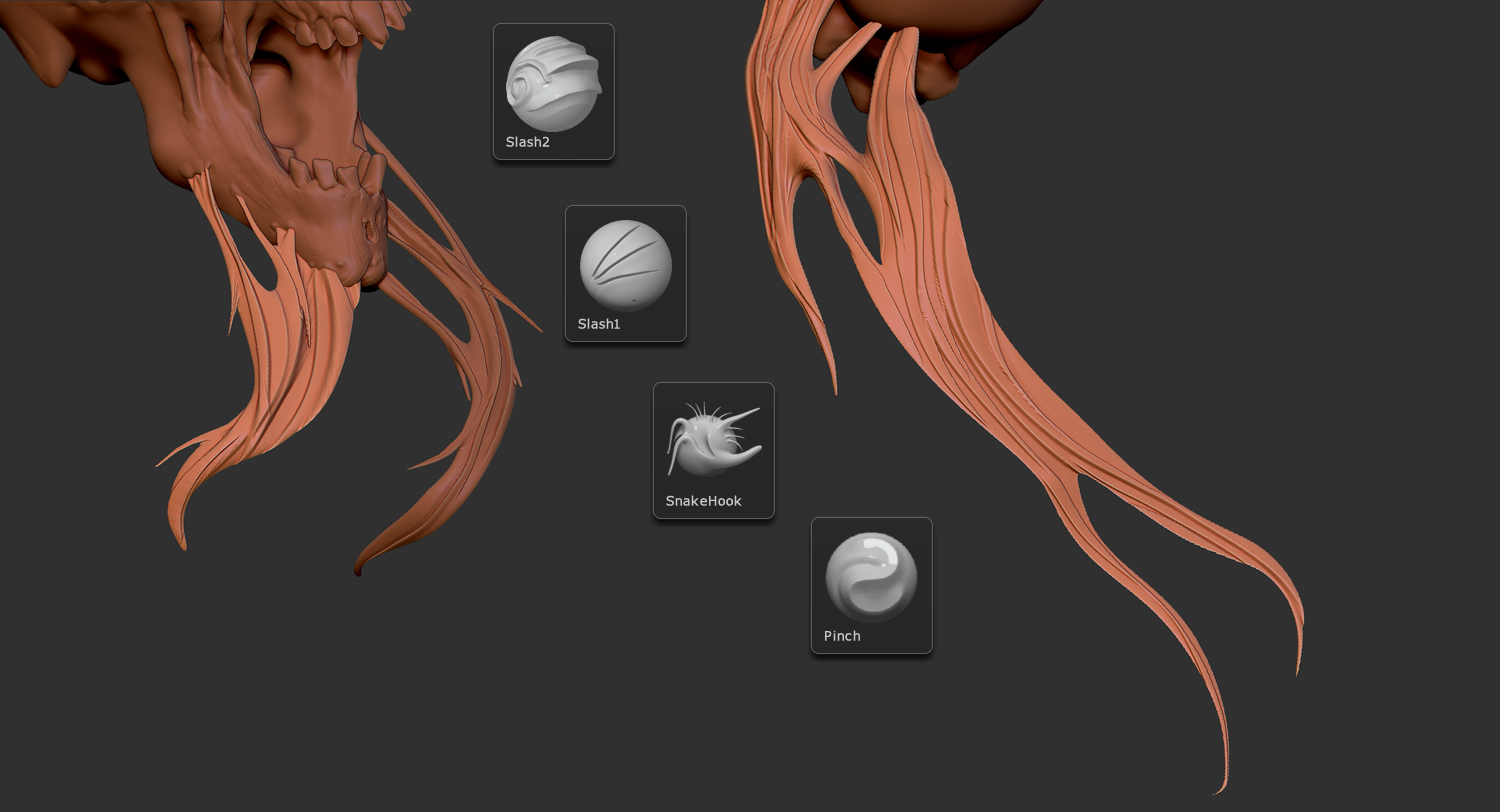
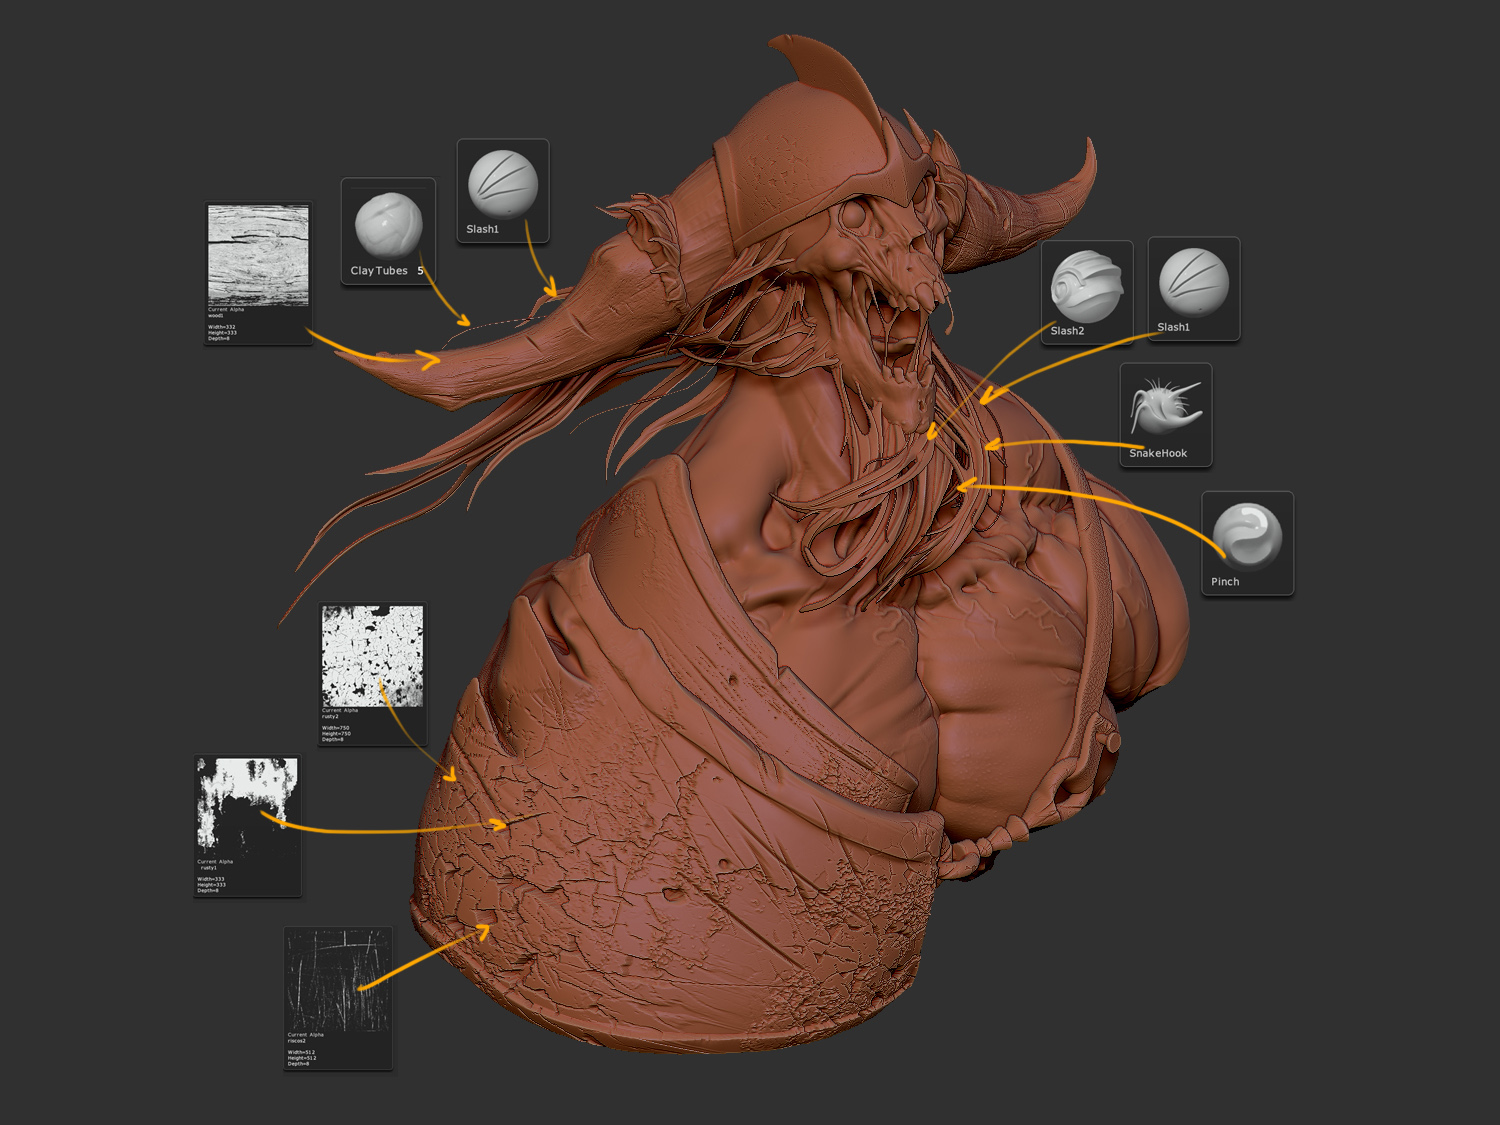
For The Hair I mainly used the slash brush, which gives the sense of layers on the same strand, and some pinch for the tips.
Same process for the beard.
The modeling of the props involded a lot of manual sculpting and alphas, the worse one was the helm, because it has diferent surfaces and I think I made the mistake of not making the horns and metal separated subtools,
I should have done this.
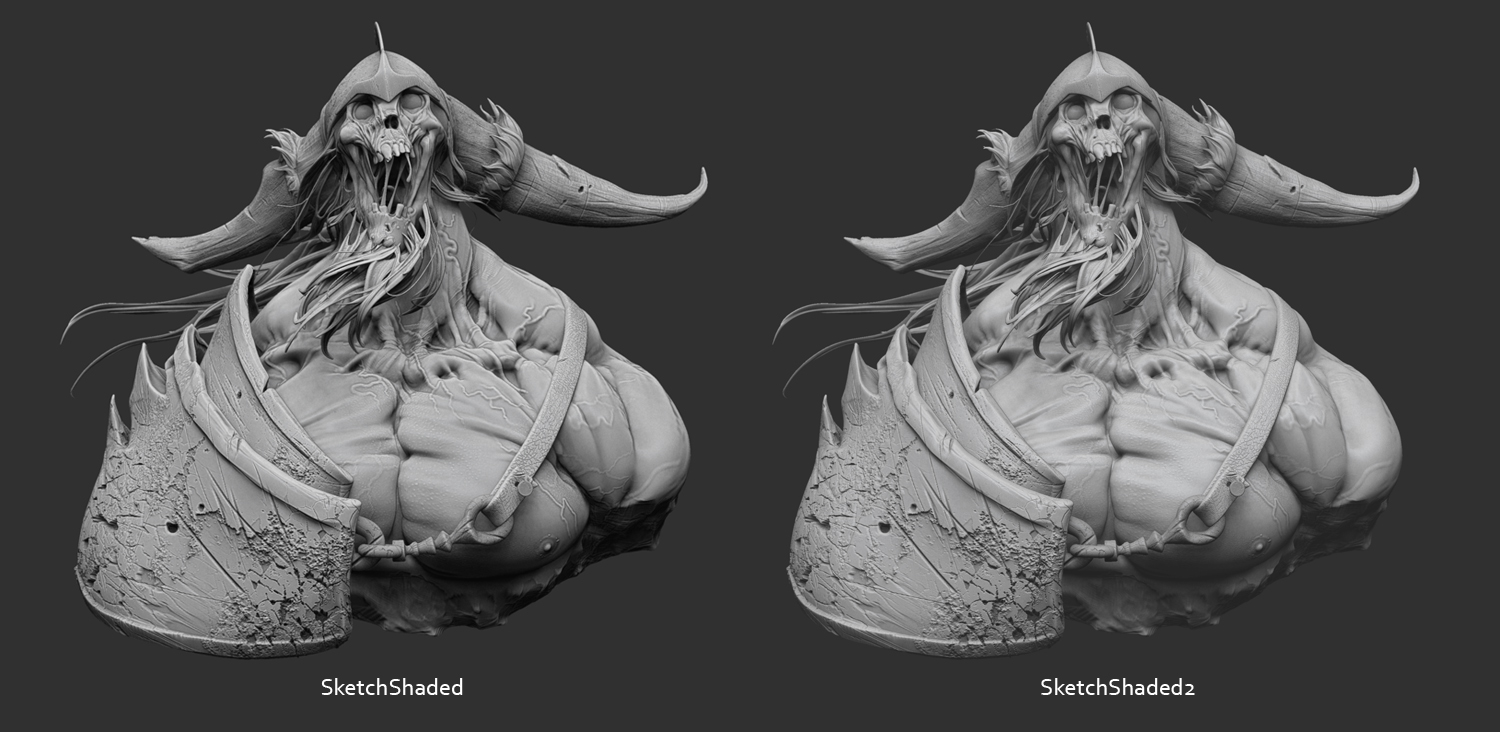
Finally for the render, it is the simplest possible.
I setup the document the double the size I want, so I Export the Antialiased Half size (AAHalf button) render.
Just used a combination of SketchShader and SketchShader2 matcaps.
I put the default light a little bit higher, on the top of the scene, so that I get more shadows on the bottom of the objects.
And I used a bit of Depth cue too. That’s it, Best Preview Render later.
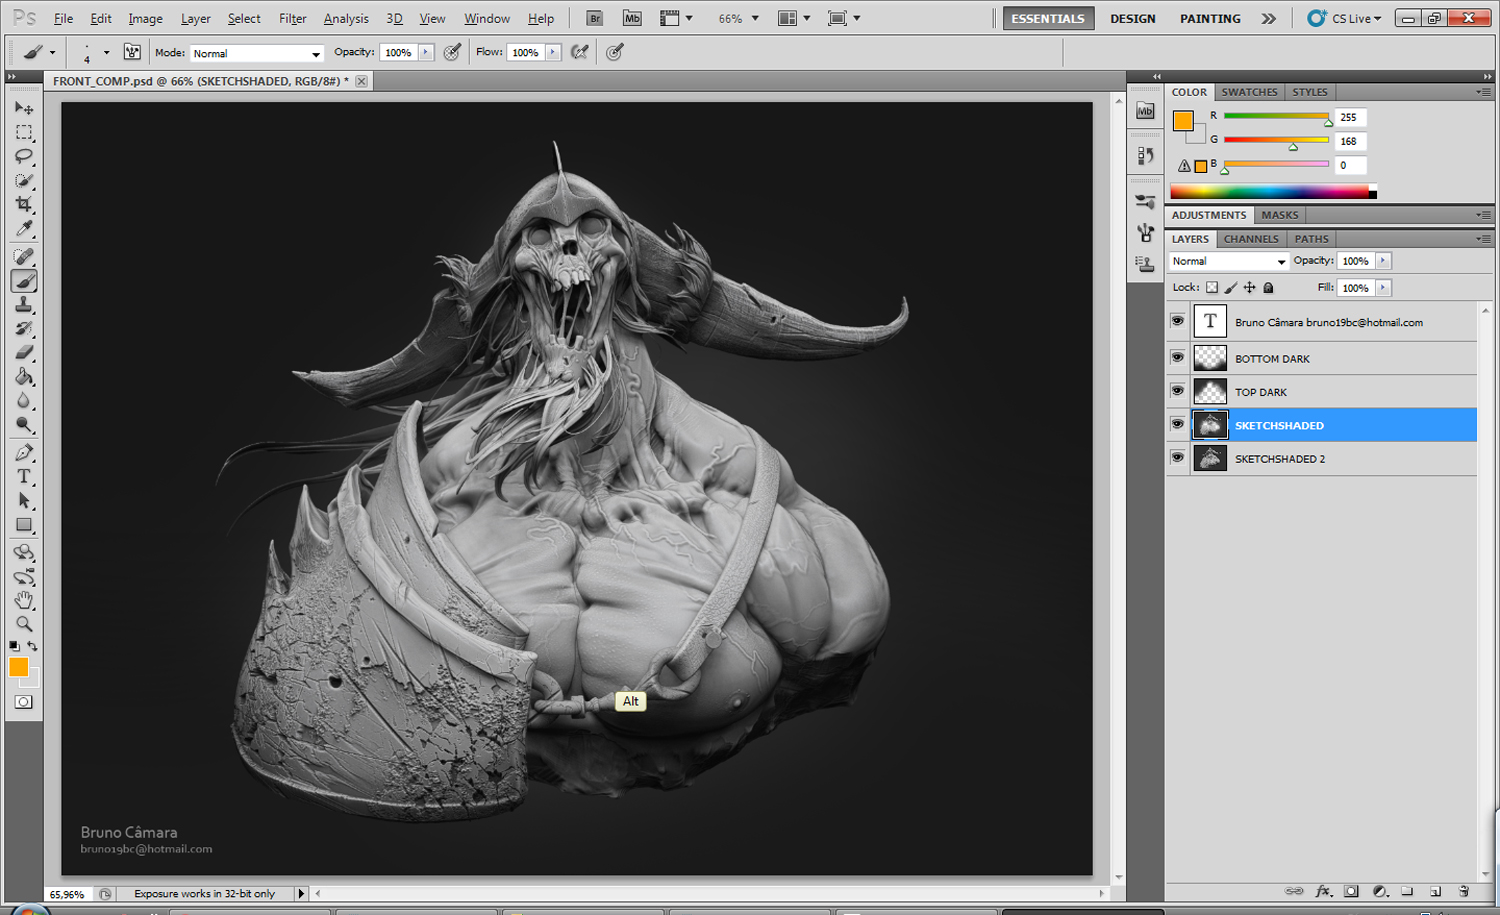
In Photoshop I put the SketchShader render over SketchShader2 render and erase some areas of SketchShader that doesn’t interest me like the chest, where I wanted a more clean area, that I got with the SketchShader2 pass.
That’s it, I’m making a turntable render now. by tomorrow I post it.
Hope you like it.
Thanks a lot guys.
All the Best.
Bruno.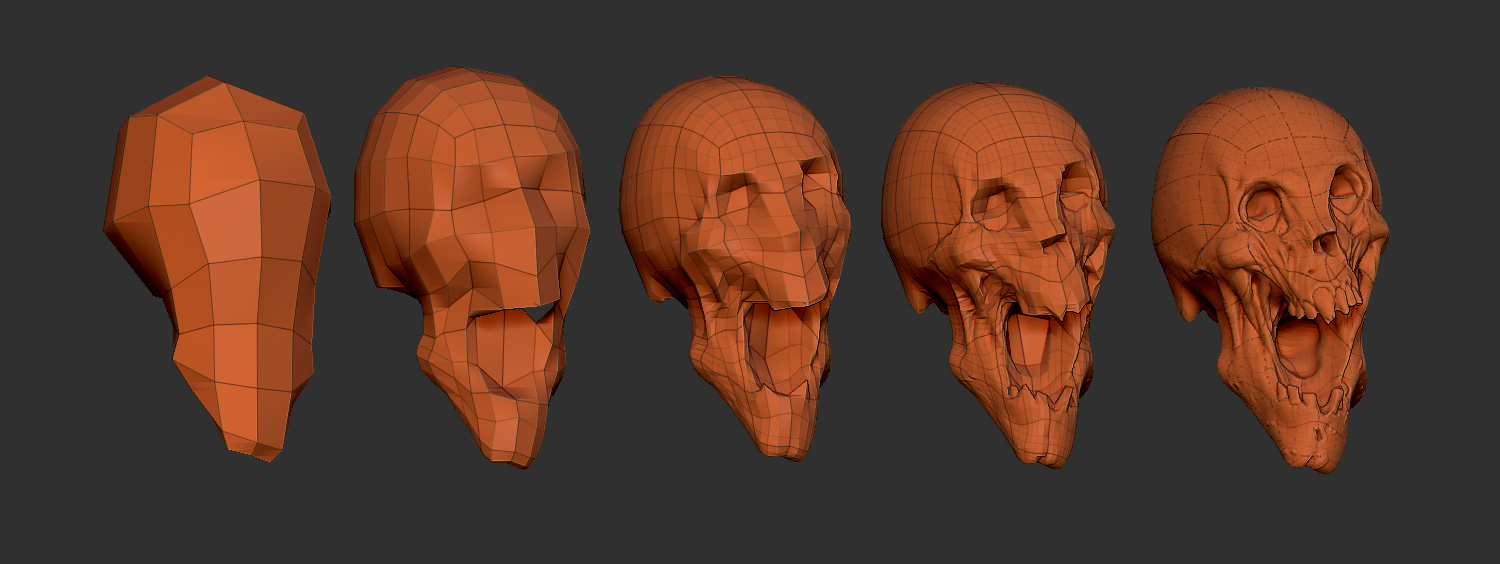

Attachments
 thnx for sharing all the process.
 ,Thanks for the workflow.