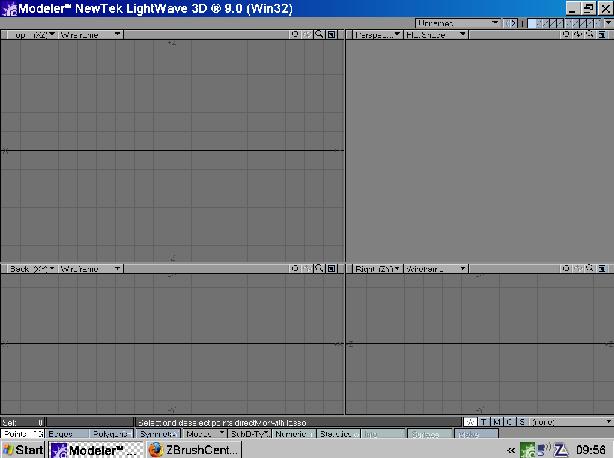
Please can someone tell me how to get the menu back in lightwave 9 modeler.
it dissapeared and i’ve looked everywhere for help! :eek:
Attachments
Please can someone tell me how to get the menu back in lightwave 9 modeler.
it dissapeared and i’ve looked everywhere for help! :eek:
bump and lurk
In Modeler, hit the <d> key to open the Display Properties window. Go to the Interface tab and uncheck the “Hide Toolbar” option. That will bring the menu and tools back.
Cheers!
Steve
I wish Newtek would seriously get off their behinds and integrate Lightwave with ZBrush a lot more. But I have a question about UVs. Currently I’m following Steve’s awesome tutorial, but I realized that I have to still take my UVs into Photoshop and paint textures. Since GUV UVs are impossible to read, how would i do this? Would I have to create another set of UVs in Lightwave? And if so, how would I swamp them with the UVs created in ZBrush?
One of the easiest ways to work between ZBrush and Photoshop is to use the ZAppLink plugin. This is especially helpful if you’re using AUV or GUV maps. ZAppLink allows you to transfer your model in its current orientation to Photoshop. You paint your textures, not worrying about UVs. Then save your Photoshop file. The results are transferred back to ZBrush and applied to your model. It’s a lot like working with Projection Master, only you get to texture with Photoshop rather than ZBrush.
Another way to do this is to avoid ZBrush UV maps altogether and generate them in LightWave. I’ve got a lengthy tutorial on my site showing how to do this:
http://www.stevewarner.com/html/uv_unwrapping.html
If you’re on a PC, use the the PLG tools. They’re free, and just as good (if not better) than the UV tools in Maya, Max or Modo. If you’re on a Mac, you can get good results by using Blender’s unwrapping tools.
Unwrapping the mesh yourself has the advantage of allowing you to visualize the “skinned” mesh in the UV space (rather than seeing a bunch of weird blocks which is what the AUV / GUVs look like). That makes painting in Photoshop a whole lot easier.
If you’ve already painted your texture/displacement/normal/bump/specular/subsurface maps with an AUV or GUV and want to transfer the results to a custom unwrapped UV (such as those created with the PLG tools), you can do so by baking the texture with LightWave’s texture baking camera or the texture baker shader. Just load your model into Modeler after you’re finished in ZBrush. If you created AUVs or GUVs, your exported OBJ should have these embedded in them. Create a new UV using the PLG tools. Save the model and load it into Layout. Apply your textures one at a time (color, then bump, diffuse, specular, etc.) to the color channel using the AUV or GUV. Then bake the texture to the PLG/custom UV you created. It works like a charm.
Hope that helps!
Steve
One word: Insane.
I cannot believe what just happened. ZAppLink is amazing, and so are the creators of ZBrush. Holy cow. Thanks a lot, Steve! And by the way I have ALL of your books on Lightwave. :lol: I really appreciate all that you have done for the community!
Thanks! Comments like this make it all worth it.  BTW, just in case you weren’t aware, I did a series of articles for HDRI 3D last year which picked up where the ZPipeline Guide left off. They help bridge the gap from ZBrush 2 to ZBrush 3.1 and offer a ton of tips and tricks that I’ve discovered for getting the best results with LightWave. They’re definitely worth checking out if you can get ahold of the back issues.
Cheers!
Steve
Steve thanks for your kind help and for being one of the lightwave KINGS. Keep it up. 
Thanks, Sampei! I sincerely appreciate it. The ZBrush tutorials I’ve made are starting to show their age. I’m teaching ZBrush at the Digital Animation and Visual Effects School in Orlando and am planning on doing new tutorials for LightWave users very soon.
Cheers!
Steve