do you have any tips on how to remove creases on a edge like the one I circled with out losing the creases on the edges that run horizontal ?
Attachments
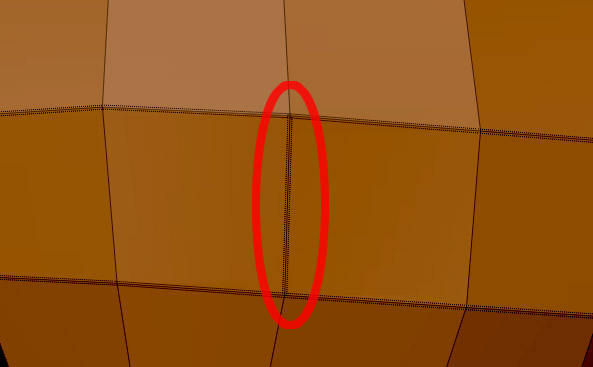
do you have any tips on how to remove creases on a edge like the one I circled with out losing the creases on the edges that run horizontal ?
Hmm, yea this is maybe one of the downsides of zBrushe creasing method, as it requires selecting faces. Not sure how to crease just some edges. I have run into the same situation a couple of times, but they were in simple areas where it was just fast to remove all crease and select faces again for adding them back to right places. I’ll do some tests, maybe masking works with creasing (?) This is the first time I use creasing in zBrush so Im not actually that experienced with all the functions. I’ll try to find a solution without needing to remove crease on all edges on the face. If someone reading this knows a solution please tell  I would like to know also.
hide everything but the polygons attached to that edge, crease>remove crease
hope this helps.
Beta_channel: wont that un-crease all the other edges on that face too?
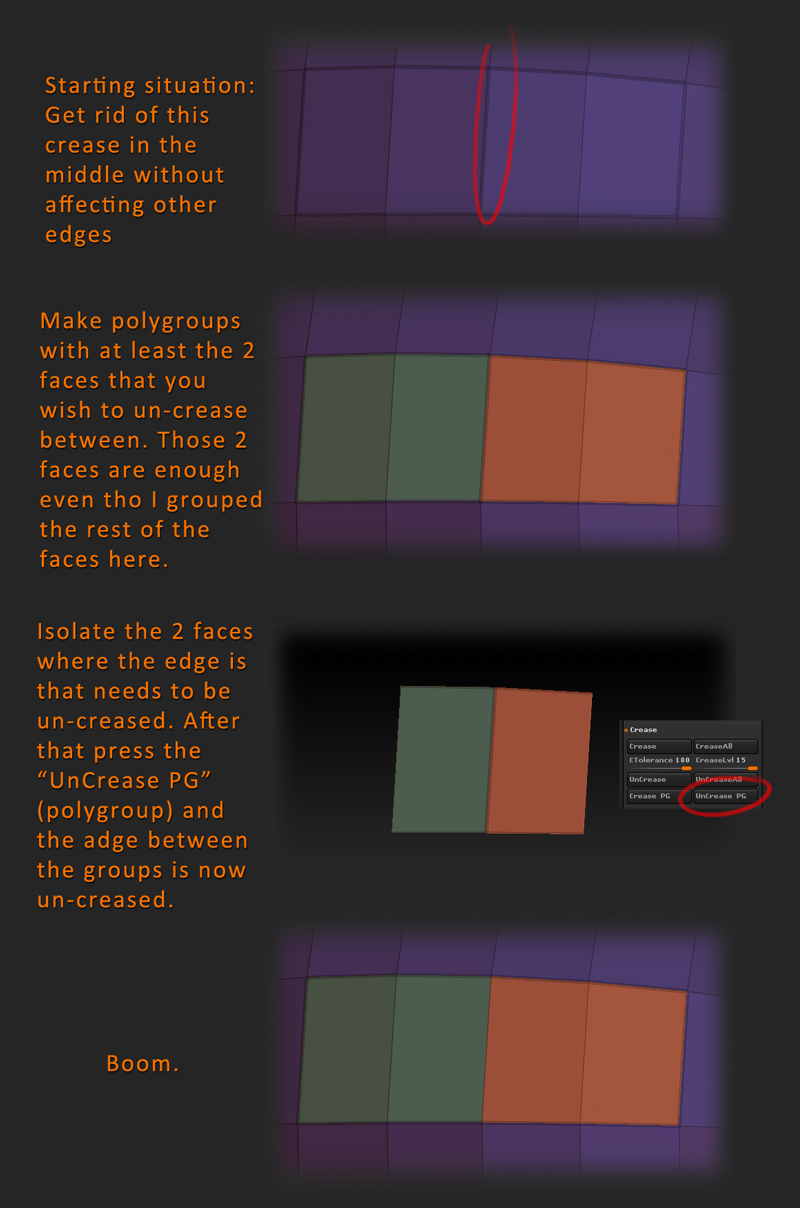
Anyway, found a solution my self after experimenting. zBrush has this function to crease and un-crease with polygroups ofc. So actually your workflow could very well be to make polygroups for creasing all together from the beginning. But anyway, here is how you un-crease in this situation. Make note that this example would be easier to just un-crease all and crease the faces again, but that might not be the case with other situations where the creasing extends to a bigger more complex area.
Great work Dancuka! I’m wondering about the step after you have your helmet modeled and finished - what the process is to take it into something like 3dsmax is and render it or want to bring it into Marmoset?
Any insight into the process would be great! Keep up the awesome posts too!
Cheers
wow! thanks for taking the time to figure that creasing problem out! That will be a big help to a lot of people I’m sure.
Thx for the comments!
Yes, so the plan is to make this game-res also in the end. As for the workflow, I’ll make some steps posted here probably too. But in a nutshell the plan is to make a “lowpoly” version of this with UV:s and then render it realtime in Marmoset2. Im gonna retopo in Blender, it has some really robust tools for that.  Blender is my main program for 3D besides sculpting anyway and I use it at work too. Im gonna keep the final res of the retopo quite high still so that the quality stays as good as possible. Modern engines can run a significant amount of polys these days anyway The final hires is going to be for projecting normals and other maps. I could also make some other renders with it in Keyshot for example I guess but without textures, just to showecase the final sculpt.
Looking forward to the final piece - and if you get around to any of the work flow explanation, that would be super kind. If not thanks again for what you have already done!
Just a small update on the helmet again. Man, progress is kinda slow, dont have too much time to work on presonal projects these days  but I need to get this done and test the new Quixel Suite that went beta a couple of days ago! It looks so sweet ~
Great work man! I love the shape edges, I’d love to get some feedback on how you got everything so damn clean looking?
Hi! Sorry for not replying sooner! Didn’t get notified for some reason from the thread :o but anyway, to answer your question: Some of the techniques I already posted on the previous pages so check them out. Basically its clean topology and using crease with high-subdiv Not like I invented this or anything but check the images I posted before with some of the workflow. Hope they help!
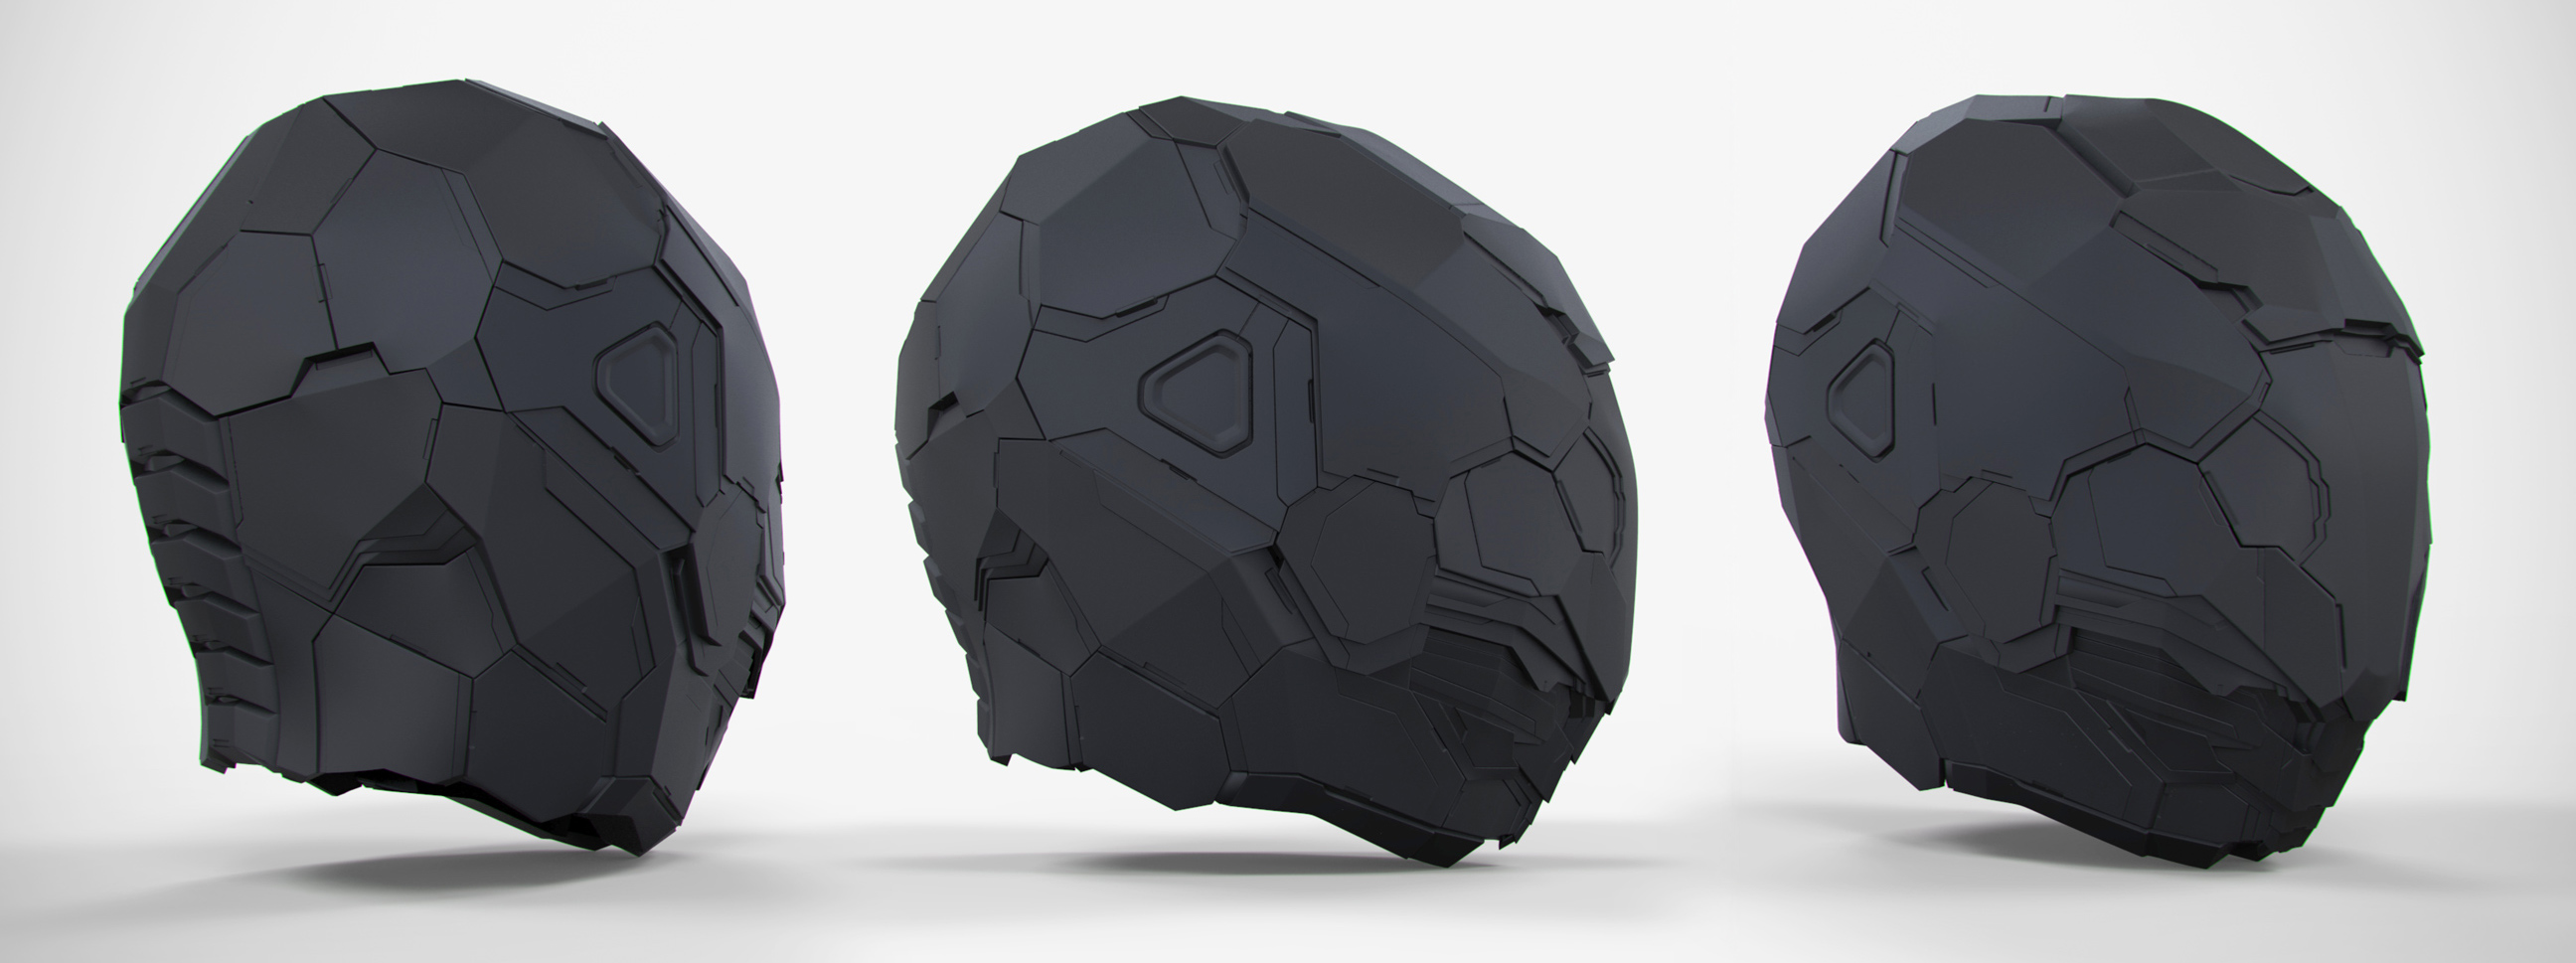
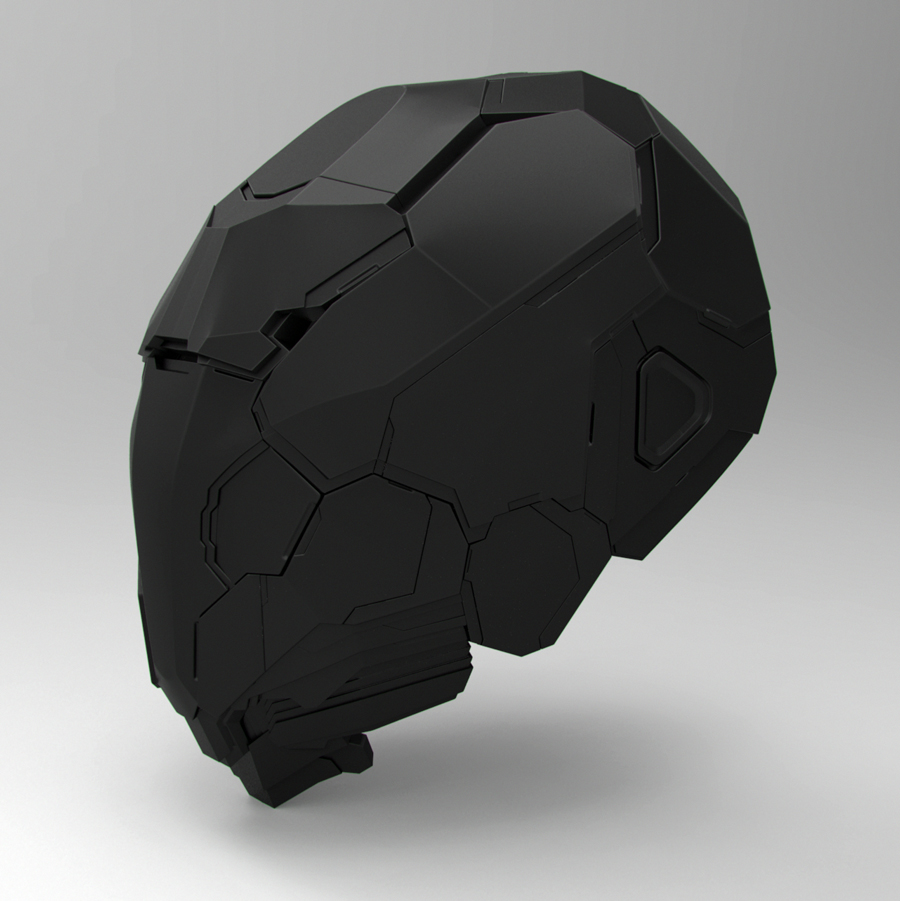
Long time no post. Had a little brake from this project during my vacation but finally picked this back up and finished the high-poly sculpt just recently. Now the thing with this one is that I plan to make a lot more details like screws, bolts, holes etc. BUT I’ll do them in nDo because it saves a lot of time and polygons. I could sculpt them but that would take a lot more time and it would require a huge amount of polys to make them perfectly smooth. If I add them in nDo i can rearrange and concept them with 100% freedom and change stuff if I want to later on. They are also 100% pixel accurate and dont rely on the resolution of the sculpt ofc, only on the resolution of my normalmap. So here is the sculpt that is for baking the maps later on. I already started to model my lowpolymesh and it should be done shortly.
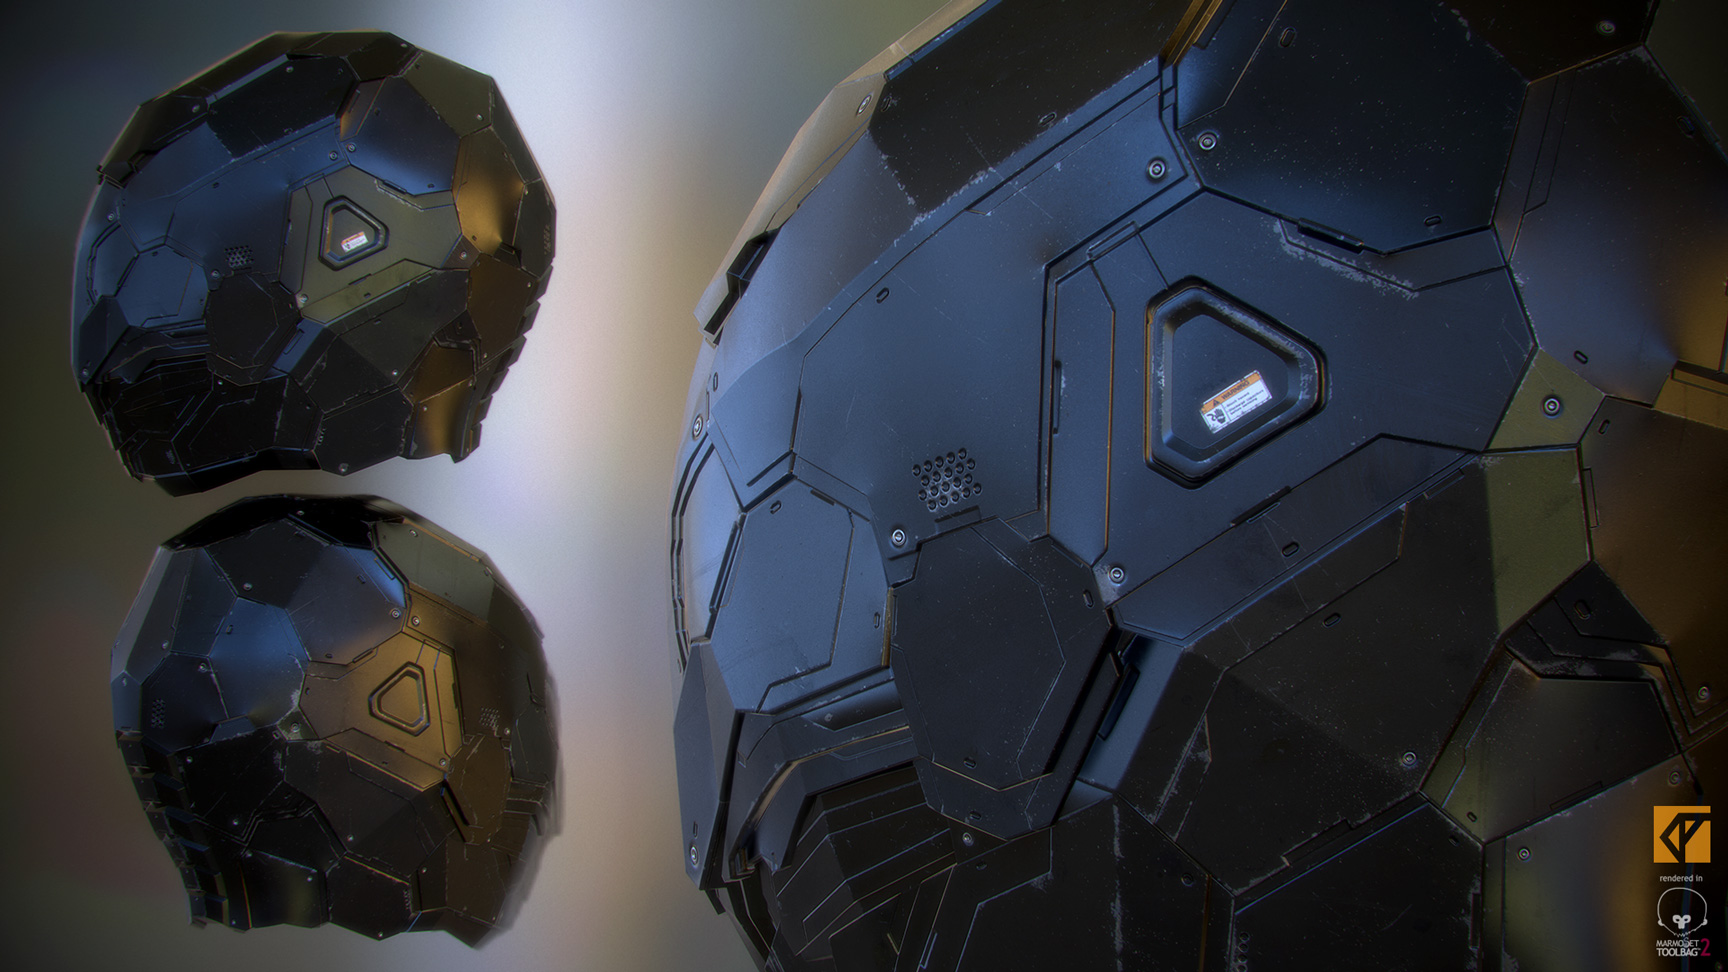
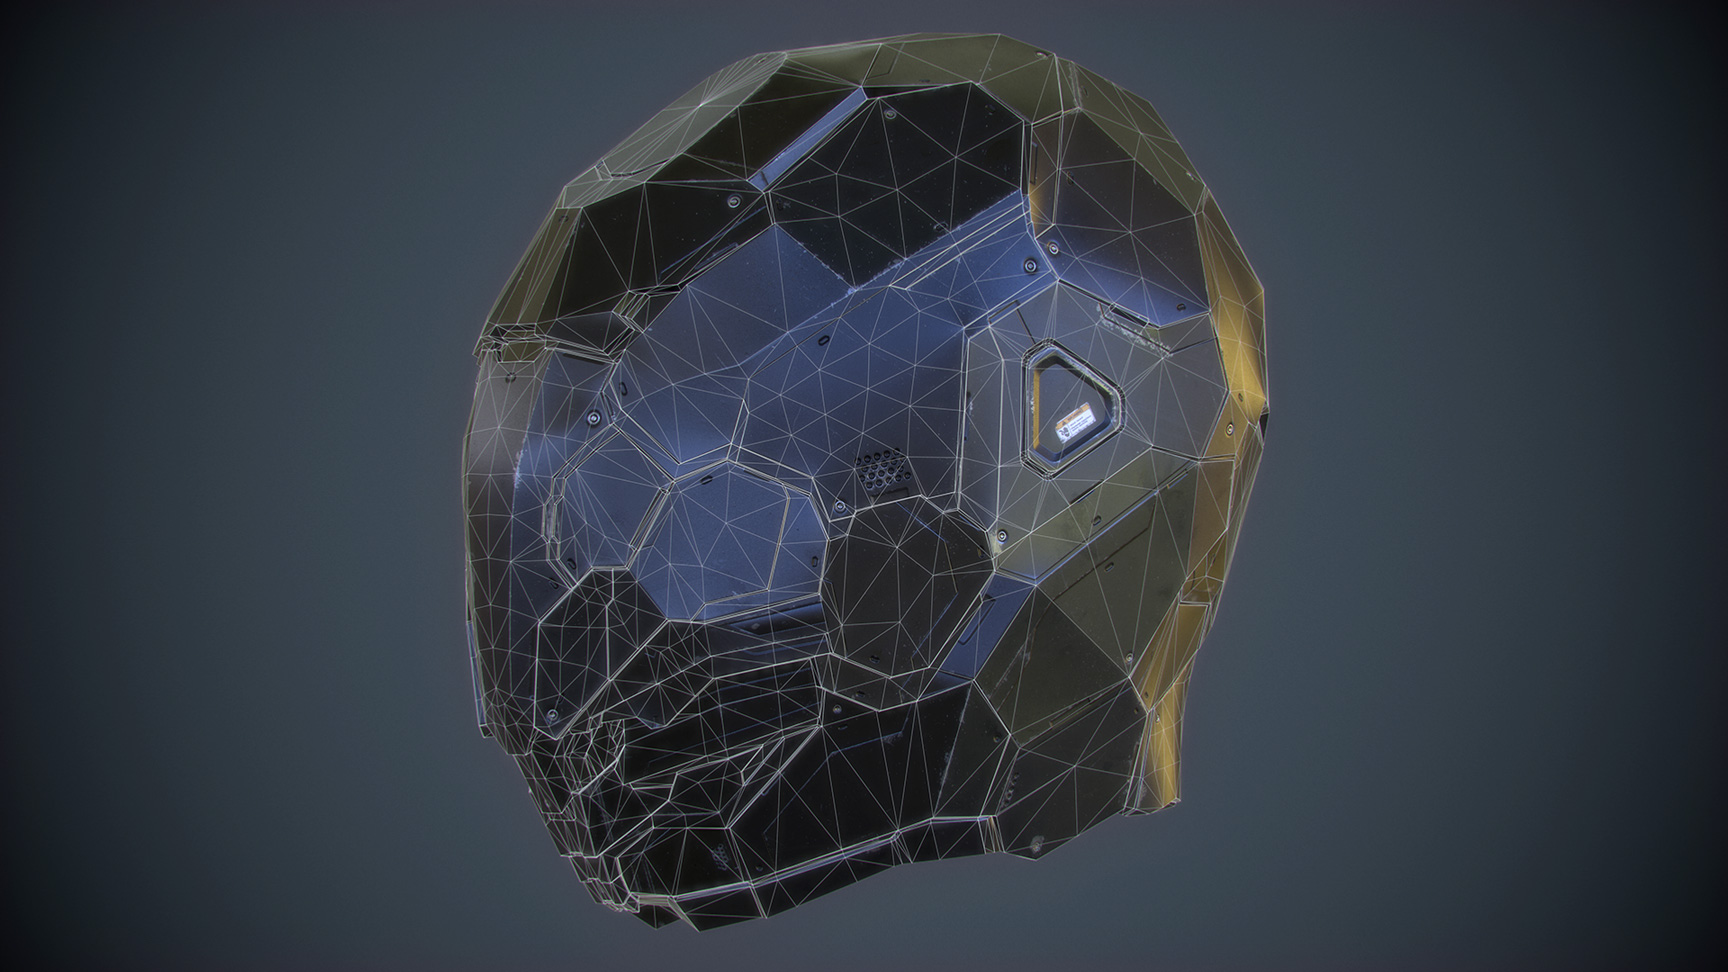
Ok time to wrap this helmet up. Here is the final game-model rendered in Marmoset2. Final polycount is 4930 triangles. Did the retopology in Blender and Textured with Quixel Suite.
Go check out it in Artstation also: http://www.artstation.com/artwork/cyborg-helmet-hard-surface-study
I can do some brakedown steps later if someone is interested. Pretty basic stuff after sculpt: retopo, uv, bake maps, texture and render 
Hi y’all.
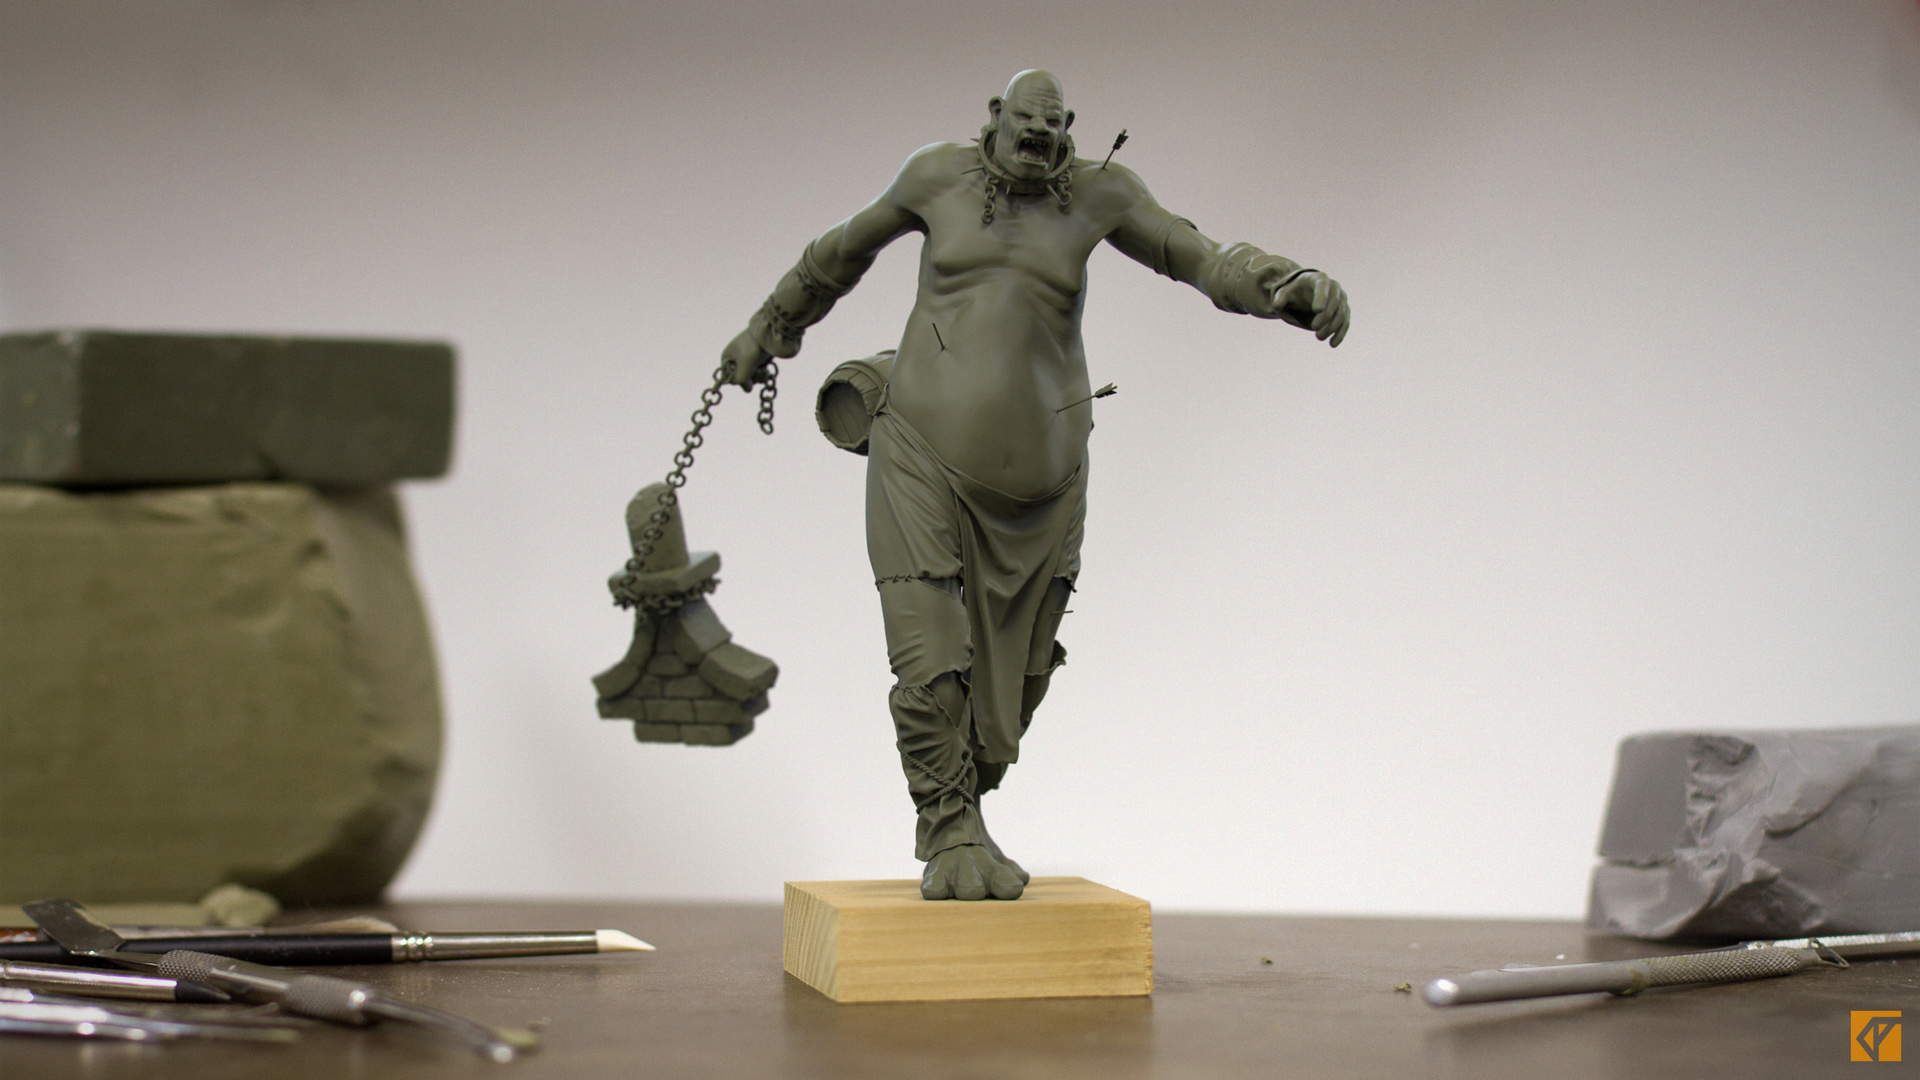
After all that hard-surface stuff I decided to do something different and started a new character. Darksiders 2 fanart-ish stuff to be exact.
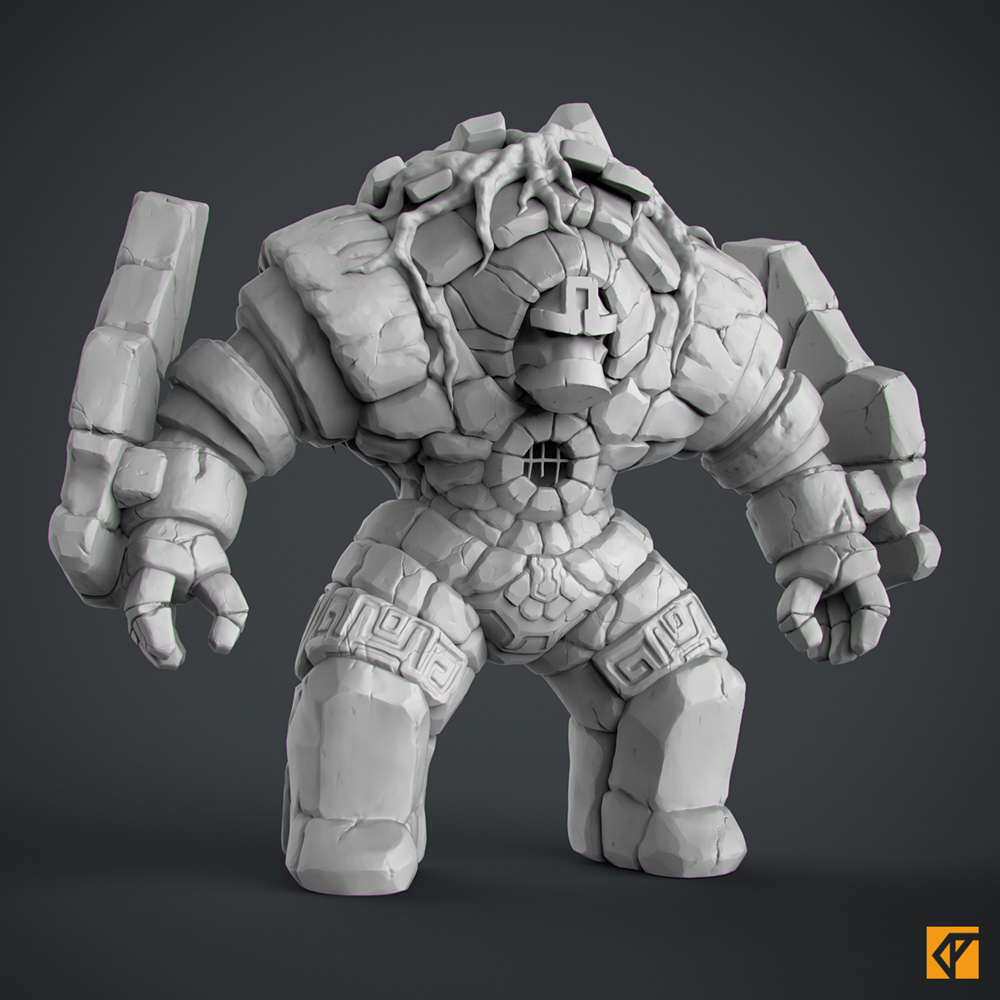
Its Stonewarden from the game, not the exact copy but something similar. Love the stylized look and the art-direction of this game ^^ So here is the first WIP image.
Rough blocking in most areas like the roots and some other rocks. Plan to make this a game-model as aways
So the highpoly is pretty much done now. Next retopo and texturing :U
Amazing work man ! 
Thanks Tomato! Love you fold-brushes btw! Super useful!
Hi! Haven’t posted anything in a while but here is something I finished a just a while ago. Rendered in Keyshot:
Also at Artstation: https://www.artstation.com/artwork/giant-warhammer-ogre-kingdoms
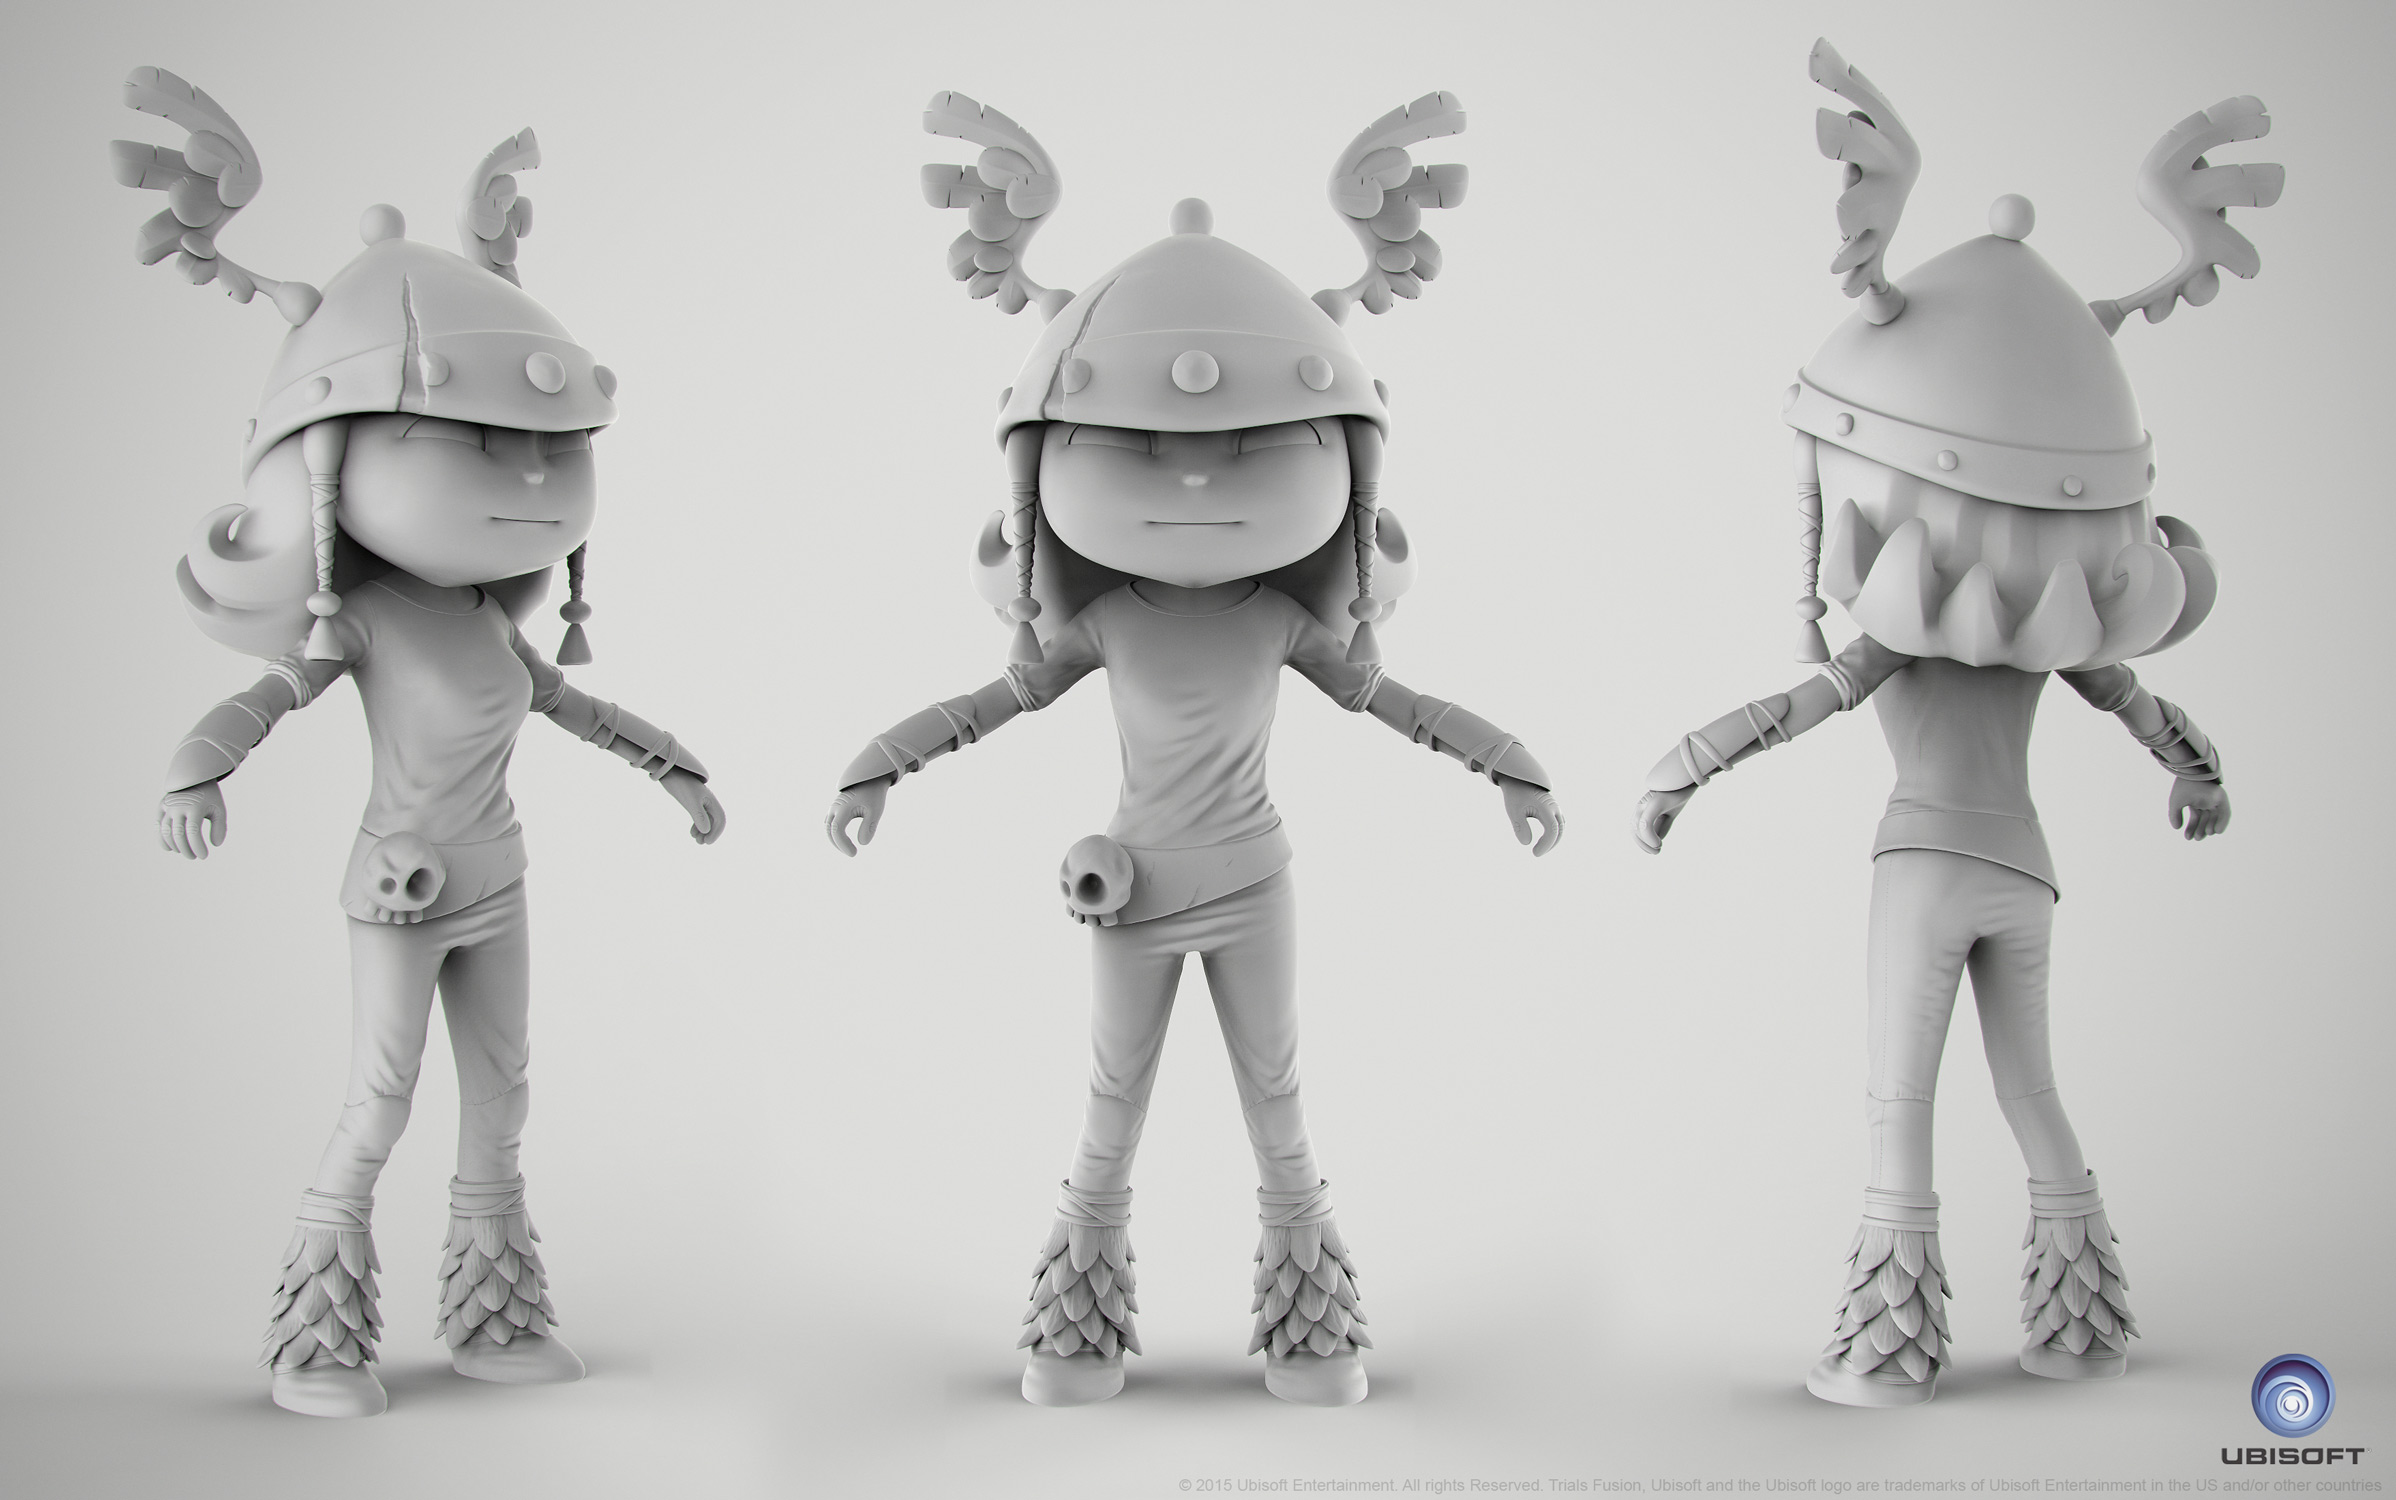
Did some outfits for Trials Fusion. Here is Barbara from Rayman Sculpted in zbrush ofc  Final textured lowpoly rendered in Marmoset Toolbag 2.
nice
,i
like