Question; isn’t this kind of model too heavy to be used in an animation or game? Or its just for still rendering.
Hi the model is around 9 million polys after it has been decimated.
This model is not for games its purely a concept sculpt although It would be suitable for rendering.
The idea is that you can quickly knock up concept hard surface models in ZB and then retopologise them to target medium after your art director has signed off on it.
Thanks Jim, giving your familiarity, how much time have you spent on it? I am reluctant to learn many of Zbrush features due to the real job constrains, the sculpt and paint and project is all I can manage.
I like the Macross goodies
This is beautiful. I never think to use zbrush for hard surface sculpting. This is a superb example. Keep it up.
Hi guys,
After getting the basic shape of the parts of this model , Here are the brushes I used to refine the surfaces. Hard polish brush is by far my favorite 

freakins awesome work man. nice workflow.
Really nice and thanks for the pointers on the workflow 
Hi guys,
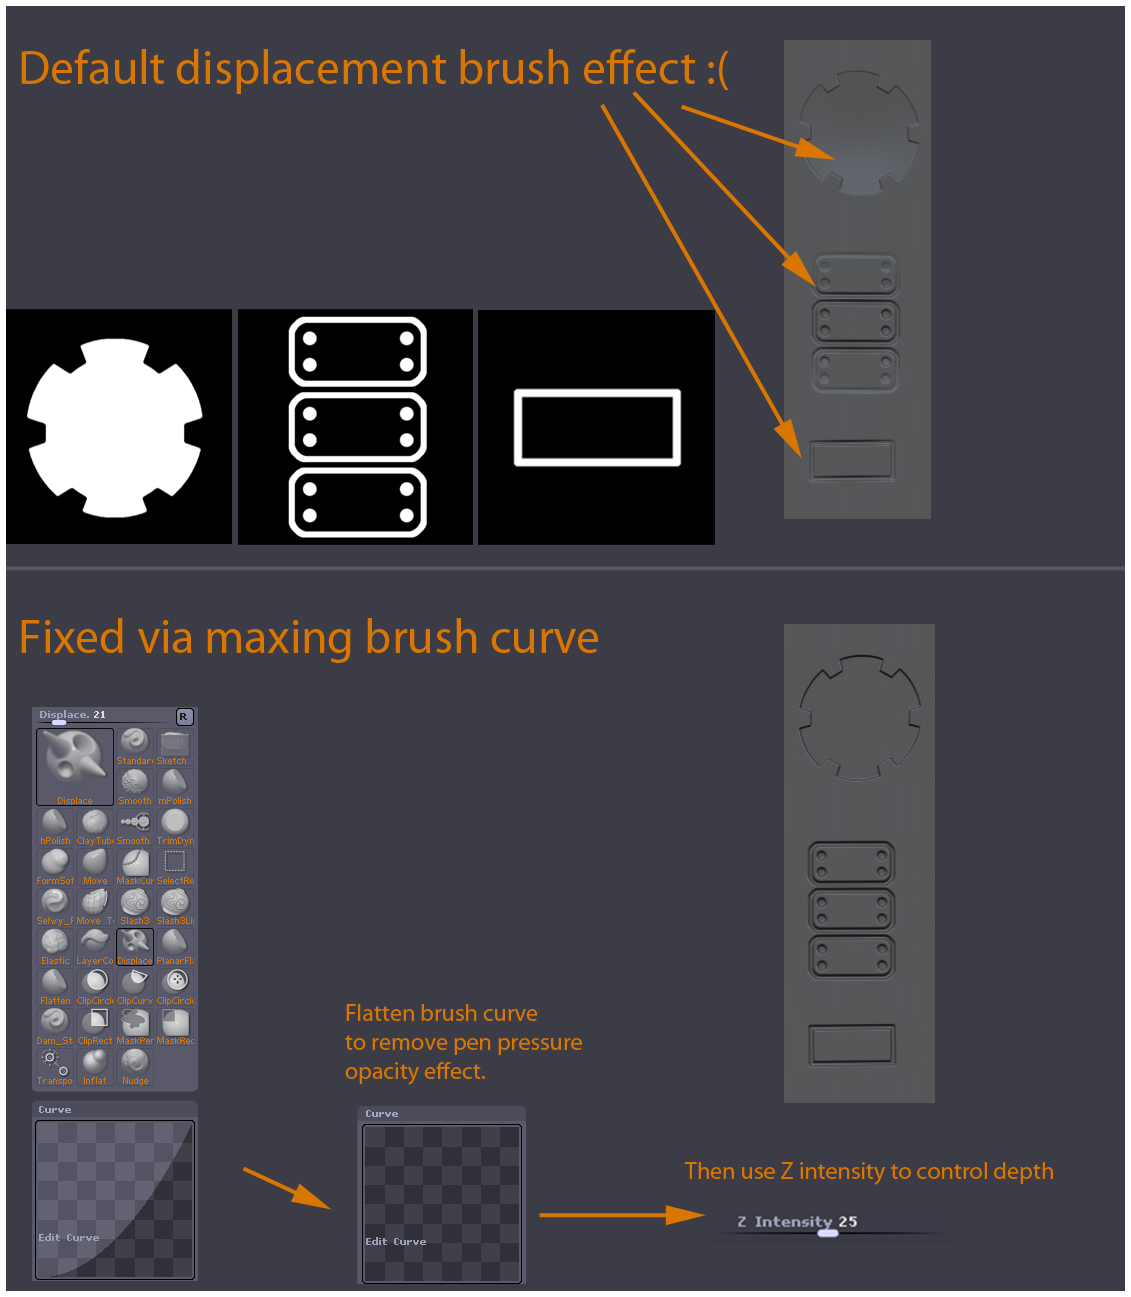
I tried a few methods to project details onto this model and they all had some issues. Displacing through a spotlight image crunches the alpha to a low bit-depth when projecting , Projection master was better but a little too unpredictable and not really interactive, Stencil maps gave a good result but I was frustrated by the fact that my model was partially obscured by a grey film. And the Displace brush with draw rectangle stroke was interactive and easy to use but left me with a partially rounded gradient to the displacement !! Until I figured out the problem to to trial and error … Personally I think Pixologic should set the displace brush to default to settings similar to the ones I have indicated. It is a bit counterintuitive to use brush pressure and a intensity z curve when projecting displacement details … dunno ?
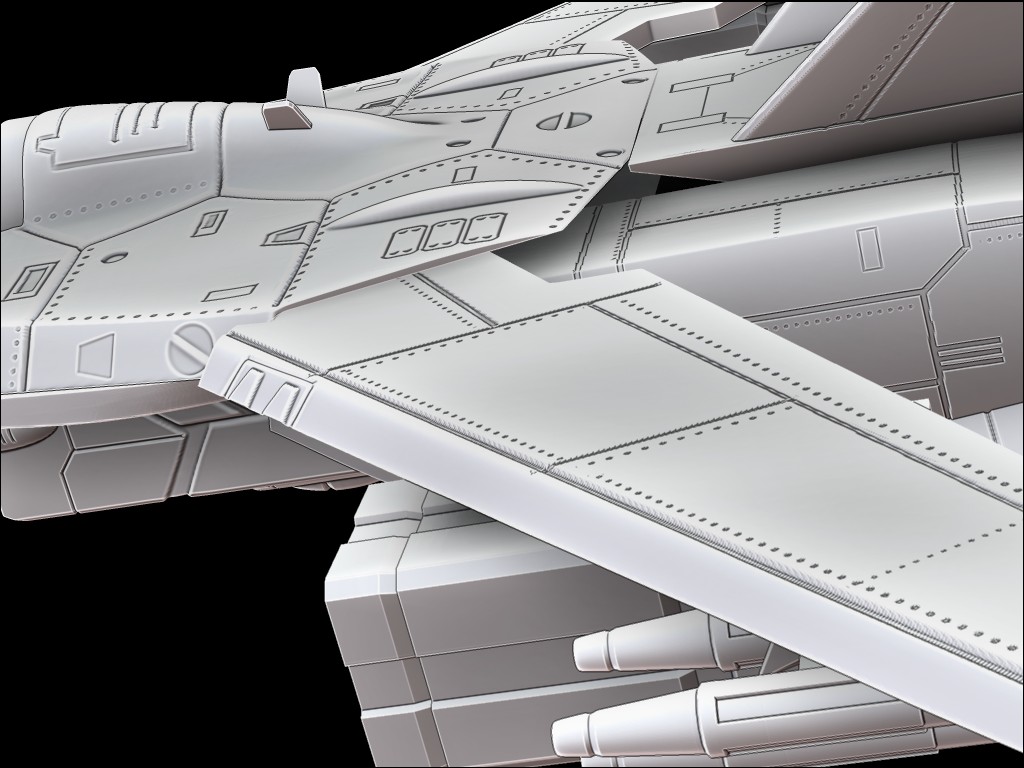
Detail shot
(the details are a bit rough, but the model was not made to be viewed this close :))
Attachments
Thanks a lot for sharing, very usefull for me.
Nice, thanks for the sharing from someone who is keen to get his head around hard surface modelling in Zbrush. 
this is really interesting and good work! Firstly I thought youve imported your model to zb in order to paint or add some details, but then I figured out that entire model was done in zbrush!
WWon Impressive !!! you can make video tutorial ?
Did some poly paint texturing / zapplinking YAY! I’m thinking of doing 2 images based on this model (one in the air an one in a hangar).
Still keeping it all Zbrush and photoshop!
Here are some wip renders out of ZB.
Lots of work to do ! 

Attachments

Keep it up mate, this is shaping up to be a great piece of work
hey man! it’s a awesome work =) you hav a super control of the mesh! =) congratssmall_orange_diamondsmall_orange_diamond
nice just saw this for the first time, thanks for telling us in a simple way how you did it
Jim,
When using the displacement brush, how did you achieve the straight lines?
Hi I use the Slash 3 Line brush with the standard square Alpha 28.
Other for more complex shapes I mask the area, invert and do a slight negative inflate.
Ohh and the divets are using the same brush with a circular alpha and the Roll effect in the stroke settings.
Not too exicitng ,
Pilot WIP
