ZBrushCentral

Introducing the new Zbrush to Maya bridge mel script

I love the script…very easy to setup…
I’m still not getting the kind of results I need though…

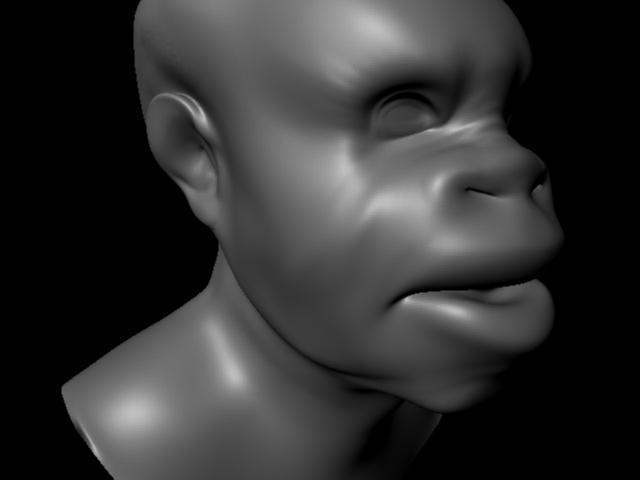
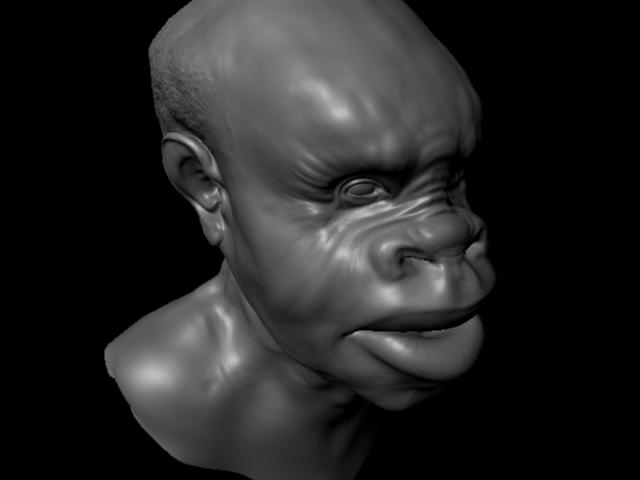
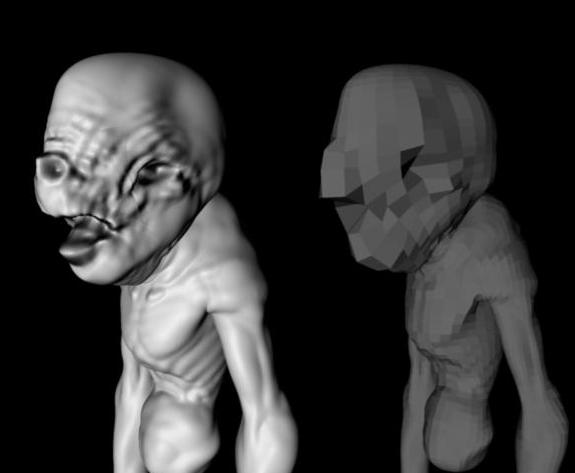
The only way I could get any detail out of the displacement was to smooth the mesh unstill it had so many polygons I could barely even rotate in 3d.
If I have to subdivide it that much…I might as well just import the thing from zbrush…

Should I convert it to subdivision surface and do it that way?

When I did that the results looked no better than the displacement on the unsmoothed polygon head…

what am I doing wrong?
-tiktok

Attachments

head.jpg

I disabled bump…
then punched up the alpha gain to like 9…and the detail suddenly popped out!!!..

thanks for the script!..
-tiktok

Attachments

success.jpg

Also check this out. It helps to explain poly count at render time. :slight_smile:

I didn’t have lots of time to work with displ. in M, and was quite demotivated by this, but this sounds more than good. Excellent documentation and effort from both of you, ashaiad and ryan. You are speeding up my animation by 10 folds. This was the only major thing what I was thinking will not function very well.
Wonderful and crucial job

I used the plugin in maya 6.5 and it worked awesome. I have no clue how the program works so this helped me out ALOT!!! thanks a ton to the person or people involved in this!

I put it on the gotter? settings. this is a WIP by the way. one is with the disp applied and one without. I dont even think it renders this good in zbrush. look forward to learning more on maya and how it works.

Attachments

plugingood.JPG

hey diety
looks good…I think you still got the bump map on maybe…make sure you go into hypershape and disable that…the displacement can do all the bumping you need…

This script is a step forward for us traditional guys eh?
I was thinking it was the end of the world for me and displacements…
-tiktok

Hey Tiktok, I checked to see if there was a bump map and there wasnt one on. I rendered it with some lights on it and I changed the color of the shader. what makes it look like a bump map is on? I never seen one rendered and to tell ya the truth dont even know what a bump map is haha.

I really love this plugin though! it just saved me a crap load of time. sense I couldnt figure out displacement maps before. I was sculpting in zbrush, exporting the low obj, rigging and reposeing it then putting it back in zbrush to work on one side at a time. that wasnt to fun. now I can finish it in zbrush and apply the map in seconds and repose the model. stoked now!!!

now whens the script coming out for the texture mapping :smiley:

Thanks elfufu…this is going to prove very handy :+1: :wink:

you guys are welcome, on one note though i do recommmend you learn the setting of the approximation editor, as this script was written over a year ago when i didnt know much as to what i was doing as zbrush was still preety new, and i hadnt the experience i do now… if i can get jimmy to rewrite it i would make it alot better and more precise… my settings are not optimal aand no 1-2 settings can really represent the infinite amount of variations to the settings that can make rendering your image more precise, detailed, and faster…

again theres no shortcut to the fundamentals…so learnn your approximation settings kids

hope to have a new version soon…
cheers

This script is a time saver when working with Zmaps!
Will this script work / or still be usefull in Maya 7?
thanks:)

wow this is the only thing that has actually worked so far for me to get displacement maps to work. thank you so much for actually making somthing that works. the only problem i have is that i cant seem to get fine detail out of it. i cranked up approx editor and turned on feature displacement but that just makes maya crash… that or its just taking so long that no sane person would render it. can you pleeease help me someone. is it a zbrush problem or maya? i cranked up the size of disp map in zbrush i dont know what to do.

i recommend you use 32bit maps, read scott spencers guide its amazing… highly recommended the days of this are numbered…

im having a problem with my render using MR. i brought my mesh into maya as an OBJ and set up all the settings the way they should be, in the app. editor and the alpha gain and what not. i saw that i had some artifacts in the render so i smoothed the mesh to straighten that problem out, when i did this MR stopped working. in the output window i get an “error: invalid topology” message. after this i tried importing a sub level higher from z brush, sub level 2. and it will not render either, with the same message. why will it render with the sub division level 1 obj but nothing else?? very strange, ive never ran into this problem before…

Does anyone know if the killer script has been recompiled for the latest versions of Maya? 2008 or 2009. I would love to check it out. Looks like it’s a great time saver for the basic setup.

this script is not really usefull anymore, its just much too simple now adays,
just export a 32 bit map displacements, add an approximation node, and set your texture alpha gain , alpha offset to 2.2 -1.1 and youre done.

this script will probabaly never be updated.:cry: