ZBrushCentral

How to use Decimation Master on HD sculpting?

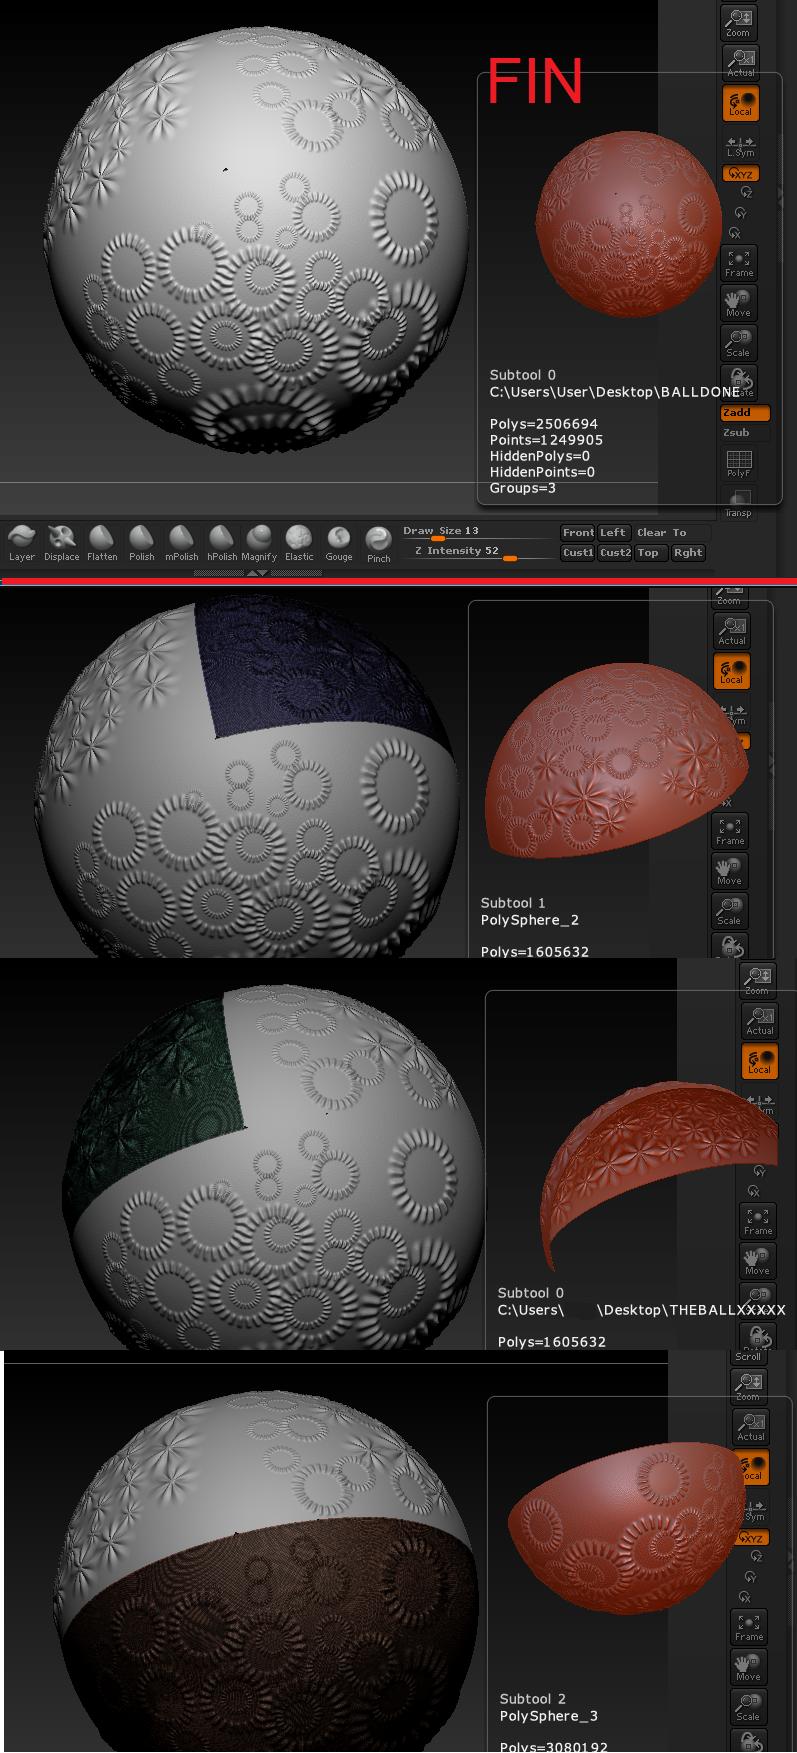
I was able to do more test with HD sculpting and DecimationMaster.

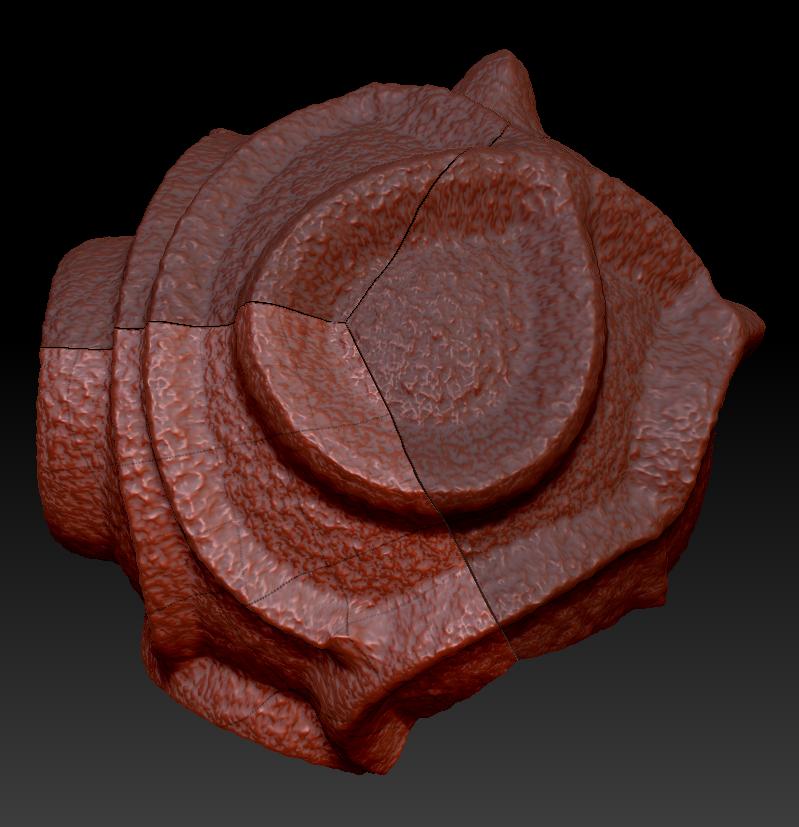
I have a pretty good work flow now. I sculpt to the highest Sub D level that my computer can handle and then I add two new HD sub D levels. From here I can separate my model with polygroups and sculpt in HD in very exact and precise regions. When done with the model I can go into HD sculpting using my predefined regions.

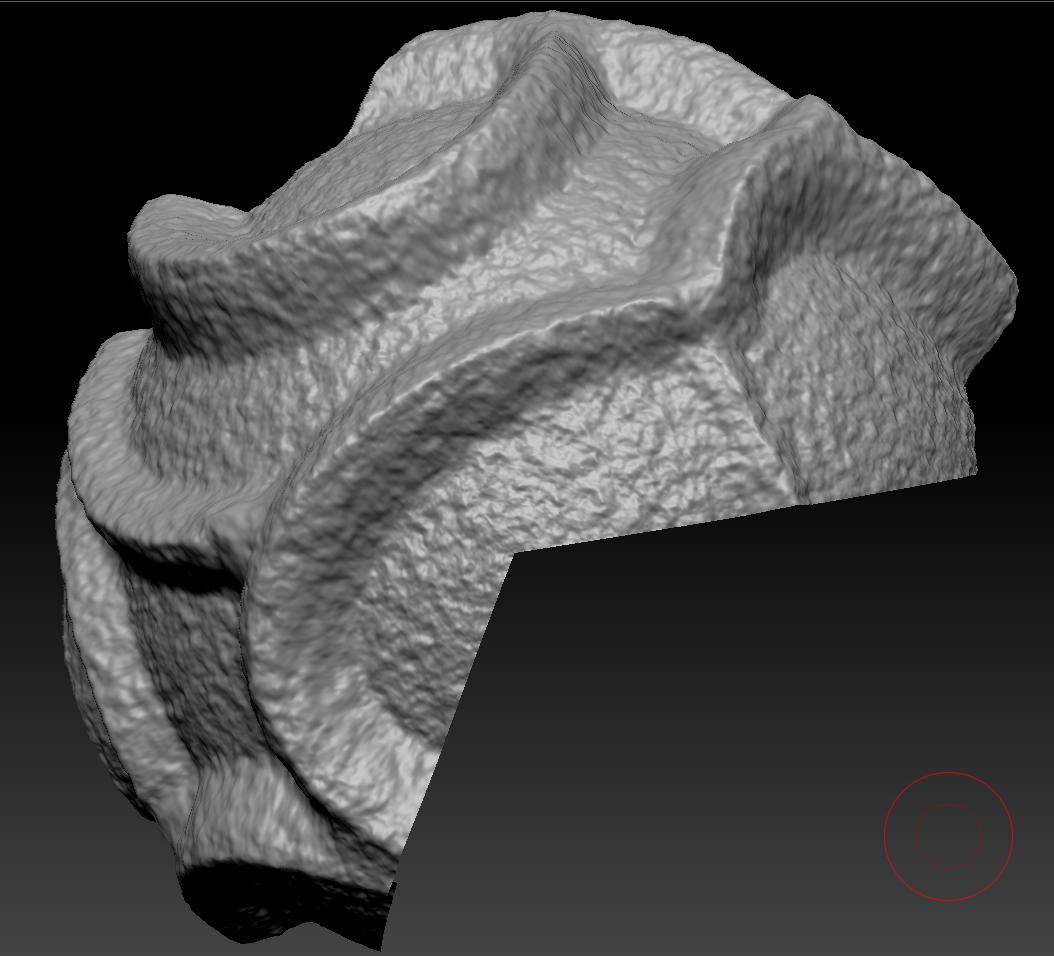
If I then clone my model in this mode it will make a new model of the HD sculpt that I can decimate using DecimationMaster. From here I use a threshold that gives me a low poly count and retains as much detail as possible. I have been using the “Freeze Boarders option”. Very awesome and powerful tool you have there.

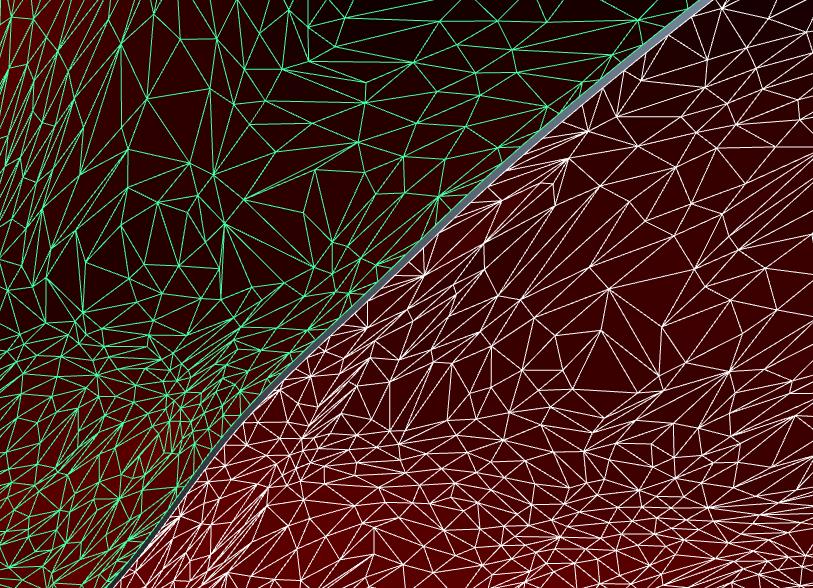
There is only one problem, I am now able to move my meshes outside of ZBRush into Maya for rendering and normal map/AO creation. (I know this is possible in ZB but for our pipelines we us Maya to generate this informaiton.) all due to the power of the new HD sculpting capabilities in conjunction with DecimationMaster. But there is an issue that I am having with seams between my generated pieces.

[![heavyDemon_front.jpg|1200x720](upload://v4msAcfKowV8nBmtYJfqxojcuTB.jpeg)]![vertForVert.JPG|821x748](upload://yGSemD6J73Txo5SIo0eNxlYS7SU.jpeg)

Could someone from support explain to me if I am doing something wrong here? This work flow will work great for moving hi resolution HD sculpts outside of ZBrush for map baking purposes.

Thanks,

NickZ.

PS. I even suppose that you could use ZBrush to join all of your pieces together with the new Merge Visible and Weld tools in the Subtool area.

Attachments

heavyDemon_back.jpg

perfectSeams.JPG

Hey Nick

Yes you could just do a Merge Visible with Weld on. I think what has not been answered yet is this. You can not take HD out of ZBrush physically. What I mean by that is the HD sculpt can only be taken out of ZBrush through a normal map or displacement map.

When you go into HD mode you are entering just that a mode. Once you live the model is not in HD mode so when you export the model there is no HD there. Now the HD sculpt will affect the levels of your regular geo but the only way to get the detail that you are sculpting in HD mode out is to transfer it to a map in ZBrush. If you export the model from ZBrush there will be no HD.

Small not for you. When you clone a HD model you actually lose the HD part of the mesh.

Paul

Paul,

I understand that you can not get HD sculpting out of ZBrush, I also understand that it is just a mode that you enter into.

What I am trying to do is get a mesh out of ZBRush that represents the HD sculpt, but to do so at the lowest polycount possible.

So in order to do this I am:

  1. Using predefined polygroups to show very specific regions of my model to enter into HD sculpting mode. (This gives me perfect clean boarders and also lets me enter into the HD sculpting mode so I can see all the HD sculpt for that specific regions. My computer can handle a head region, an arms and hands region, a torso region, and a legs and feet region. If I use these regions I can enter into HD sculpting on this mesh at an HD sculpting sub D level of 2.)

  2. Once a region is entered into using the HD sculpting mode, I can then clone that model. (Yes I loose all the "“HD” Sculpting abilities at this point. This is OK because I am just taking a snapshot of that model in its current state. I am just trying to capture they model for the next stage. Same thing as exporting out an OBJ.)

  3. I then take the cloned HD sculpt region (My new static snapshot model of the HD sculpting region.) and then I run DecimationMaster with the “Freeze Boarders” option.

  4. After the model is decimated, I then export this out as an OBJ into Maya. (I can not use the .ma file format with models with large poly counts, it will crash Maya every time.)

  5. I repeat these steps to decimate and export each region until I have a fully formed model imported into Maya.

This work flow is working very well except for the gaps that are present between the regions that are imported into Maya. My question is, is there a way to make these models water tight for this process?

I know this isn’t a typical work flow that you might be expecting but it is a way to move a model that is well over 6-10 million polys in ZB into another program for render or baking purposes.

The only other work around that I have is to make additional poly groups that overlap the pre defined regions that I set up.

I would then have to follow the said steps listed above and then take all regions and run separate bakes for each region and then combine all the resulting bakes in Photoshop to generate a final map for occlusion or normal maps.

Thanks,

NickZ.

I have done a real quick test in ZBrush to determine that DecimationMaster and the export process are not playing a part in the formation of the gaps.

So I:

1.Took the Polysphere that ZBrush starts up with now.

  1. Reconstructed subdivision levels all the way back to a cube.

  2. Assigned a polygroup to each side of the cube. (6 poly groups)

  3. Moved up to the highest sub d level and then added new sub d levels (all the way up to sub d level 9)

  4. Added two HD sculpting sub divisions.

  5. Drew large strokes across all the polygroups (regions) and then I added noise to the entire model.

  6. I hid all regions on the sphere but one by using the polygroups that I set up. (Ctrl + Shift click on a poly region to hide all the model but that region.)

  7. Put my cursor over the geo and hit A to enter into the HD sculpting mode.

  8. Cloned my model while in the HD sculpting mode.

  9. Repeat steps 8 -9 for other polygroup regions.

  10. Once done I picked my first cloned region and appended all the other clone regions to it.

Follow these steps and you will still have a very small gap in between each region.

If these gaps were eliminated you could get a perfect representation of your entire HD sculpt outside of ZBrush.

[sphereTest_01.JPG]clonedPieces.JPG

Cloned Pieces with visible seams (Above)

Nickz: aaah, I understand now…

Gabo, you are right, but your comments are working when you exiting the HD mode…

Nickz: If I understand correctly, you are cloning when you are in HD mode with the preview (it’s what i successfully did), and you have enough memory to have all your polygroup visible when you are in HD mode, right?

Then yes, in theory, you can work on each polygroup and clone them when you are in HD mode and then, doing your decimation… Good trick if you have small polygroups with a low HD.

For the gap, we have to check…
i’m sending you an MP for another subject :slight_smile:

Oups, you replied at the same time (well, I didn’t got your reply notification until now)

Ok, it’s what I thought for the process and I can reproduce your steps too with the same gap.
I guess it may come from the smoothing. Perhaps trying to crease the border may help, but it won’t help your sculpting. I have to test that too…

Hello Nick

The biggest issue is here that when you enter HD mode there will always be a seam. This is because That is were ZBrush is sperating the HD geo from the non-HD. At this time there is no way to overcome this.

Now you could do a Mege Visible but most people computers will not even be able to do this test. I will think of maybe some other steps we can try. It will take some playing though.

Paul

So if these gaps line up vert for vert, you could in theory do this process for the entire model. And using the weld verts options you could reassemble a super detailed mesh at the right poly count that your computer could handle.

From there you could run a new decimation master pass on the entire model and get it into a good poly range for export with the most detail possible.

If only the process could be automated somehow…hmmmm…hint…hint! :wink:

Think of an HD DecimationMaster!!

:slight_smile:

Thanks again guys for the help! It is much appreciated!

NickZ. :slight_smile:

Try adding the following steps between step 7 and step 8…

7.1. Press Tool:Geometry:Crease
7.2. CTRL+SHIFT+Click on the group and proceed with step 8

YES! This does the trick. All the verts line up vert for vert. You can even use the weld and merge visible tools.

I have done this and I can even sculpt across the merged and welded surface and there was no holes. There was only a barely visible line between the surfaces. I think that might just be because the normals might not line up after you break the surfaces apart. I don’t think this will be a big deal because in Maya I will be adding a smooth normals to the mesh.

I did notice that the corners of the meshes were pulling apart slightly. I think I need to run the crease on all surfaces before I enter into the HD mode, I think that will solve that problem.

Oh yeah, one last thing. If anyone is going to try this take your clone pieces and make sure you delete any lower subdivision levels they have ( mine had 3). Other wise when you use the merge and weld feature it will run on the lowest subdivision levels and not the highest.

I’m very happy this works.

Now like I was saying… If only someone could write a script to automate all of this that would be aaaaaaawwwwwwwssssssooooommmmeeeee! :slight_smile:

sorry for the typos… On an iPhone.

Here is the final test.

[finalTest.JPG]

And here is a real run with my sculpt I am currently working on.

[twoDecimated.JPG](javascript:zb_insimg(‘170641’,‘twoDecimatedWire.JPG’,1,0))
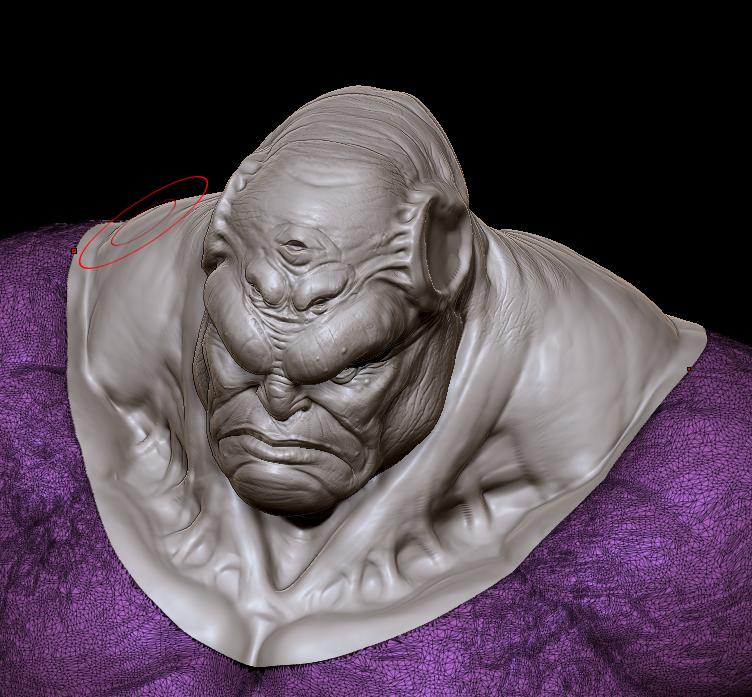
Here is the proof that it is working!!!

You GUYS ROCK!

Attachments

twoDecimatedWire.JPG

Here is a test render in Maya. Perfect! :slight_smile:

[

](javascript:zb_insimg(‘170645’,‘renderingInMaya.jpg’,1,0))

Xelent model!:slight_smile:

Thanks for all the help with this guys!

I have successfully moved all pieces over to Maya. YYYYEEEESSS!

I’m so glad this works!

I now have a model in Maya that represents an 18.352 Million Polygon model. If that doesn’t rock I don’t know what would!

[renderingInMaya_ALL.jpg]

No I can go to town now that I know all the technical parts!

Thanks again Pix. team!

Congrats Nick.

Great job my friend. I am glad we could help a little on this journey.

Paul

Hey Nick,

First off you have been real helpful because I seem to have run into the same issue!

One idea that I had (and i’m not sure if you have tried this yet), was to:

(you know all these)
1.Have an already UV’D mesh
2.Take the lowest subd version of that mesh out for export
3.Clone parts of the HD mesh to be broken down for normal mapping.

(but then try this)
4. Export each map as a separate normal, while still occupying their original UV space.
5. Re-assemble the Normal maps within Photoshop, and apply that to the original complete non-broken UV’d character.

Not sure if any of this will work, but I’m definitely going to try it cause its worth a shot. Thanks for getting the wheel turning!

Example of a “Non Sculpt HD” HD result.

Original polyshpere on 3rd divide:
Broken up into 3 polygroups with crease added to each group.

Final model cloned.
3 clones appended into a new project.
Click on single polygroup in each appended tool.
Delete the other hidden polygroups.
Rinse and Repeat for the other clones until you have 3 seperate parts of the objects that equal the original tool.

Take these 3 different tools and divide the 5 more times.

cough
It would have been wise for me to divide them with crisp turned on rather than smooth. I wouldnt have that hole there.

Add your high def details to each tool- try to avoid the edges. Then precalc
each sudtool in decimation master with “Freeze boarders” selected. Decimate the tools.

Group visible the final result- Export as obj.

Import this obj with “Mrg” on and Weld set to 0.01

From 6,291,456 polys to 1,605,632. It’s only a test. I’m sure on my other rig I could have divided each part once more before decimating.

Attachments

woah.jpg

THANKS!!!

I’m building a kilometer long starship that needs to be fully detailed and textured and able to zoom from a wide shot all the way down to human sized detail(or smaller). I’ve spent at least 35 hours working on the workflow and this was the final piece I needed…

So happy you all figured this out!

:+1: :+1: :+1: :smiley:

Hi!
Are there any solution to save the uvw of the cloned objects? Because when I cloned the HD parts they’ve lost their uvw. Must I re-uvw the whole object?
Thank you!