Thanks for your efforts and time posting all of this. A lot of us are going to benefit from everything you’ve shared. Actually I think a lot of us have already including myself. Thanks. Looking forward to your next updates.
I love this process, your work and working on the grid. I think its a very effcient way to develop games. One of the Studios I was working for adopted working on the grid and definitely improved the process a lot.
I do have a question since I am new to Zbrush.
I am wondering your process to bringing the Zbrush brick back into 3DS Max or in my case Maya. I say this cause when I was going thru this process I realize I can only bring in 1 brick tesselated that high.
Is that your displacement map or is that actual geo that you are able to build that wall?
again thanks for anyone who can help with this.
Thanks for the comments.Always more than I deserve.
My tutorial images are a little misleading, although I deformed those hipoly bricks in them, I normally do not do that because it is very hard to manipulate and prone to crashing max, it does not like real tris, i likes nurms or turbosmoothed quads which aren’t as big a strain.
I use a 2.66GHz , Quad Core with 2gb of ram on win XP at home, the PC I used when doing the Hospital set at work was slightly less powerful than that.
This is easily powerful enough still to process all the hospital stuff and some of the locust stuff I’ve shown, but path deforming a million tris or so isn’t a safe thing!
In the case of the brick and metal support in the hospital theme, I did force 1.4 of those bricks to bend and then instanced those mor heavily, counting on the metal work breaking up the obviousness, along with whatever additional normals were generated by the texture artist later.
The repeat is still too obvious to me when I look at the renders now, but its not something people were noticing ingame and thats what counts. It’s also smart to know our machines limitations and work toward being frugal when we can.
I have a more powerful machine at work now, but I still try to be frugal for its own sake, so I get to choose when I put more of a strain on the thing, for a reason, rather than just because sometimes I know I can get away with.
Who knows when I will reuse a piece from before, if I’m always thinking toward an assets potentional for reuse, I tend to get caught out much less later one when I’m in a tight spot at the end of production and need to start banging things out 4 times as fast.
Markkens: I will find a way to make it clearer what steps I took.
Thank you Kevin for answer my question! Cheers!
hey kevin!
just realised i haven’t replied here. this sure is some amazing work. love all the details.
and thanks for the walk-throughs.
-r
Thanks for sharing these. I hope to see more Gears postings in the near future. You guys are crazy.
Thanks again for these continuing updates. So insightful!  !
!
This stuff is awesome!! Great Job… Im waiting for your home page to be up and running 
thanks for your process run down. Beautiful work man!
thanks share !! very nice !
Hey Folks,
thanks for the comments, sorry for the large images, I was a bit tired that night and usually i scale those down to 1200x900, anyway some more Locust pieces -
Scorpion : I’m trying to get there, I’ve got the layout done and its all planned out but it’s either pimping the Gears2 stuff, work or family that always ends up taking precedence 
Jblack: Yeah the grid use is a real no brainer but most places I’ve worked ignored it too, its a hard sell sometimes as artists feel like someone is enforcing more restrictions on them.
I tend to get my stuff back out of Zbrush by firstly subtooling and then polygrouping each piece into chunks of what Zbrush reports as 250,000 polys which I know is half a million tris back in max. I use those numbers as a hard limit, but often the pillars in the Locust set would have about 4 million polys in zbrush for each chunk and I would have to mask select the pillars to polygroup them into chunks below 250k so I could export each of those chunks seperate as OBJ’s.
The reason for the hard limits is for ease of optimization through the polycruncher plugin, I beleive it is available for Maya too, I think there will be other really cool options in the future also.
Polycruncher has a Batch Optimize function, it allows you to just point to a directory full of your exported OBJ files from Zbrush and it will chomp its way through everything in that folder without requiring you to open anything in maya/ max and slow it down. It’ll neatly export the optimized versions into a subfolder within that folder named ‘results’
I often go as far as to optimize by 80%, its amazing how much you can get away with when its concrete. When its metal or super clean forms with only the occasional splots of damage or noise you need to be much more conservative with how you optimize as it doesnt do quite as well.
When facing problems with low power PC’s, you can just export sections from zbrush in smaller chunks, I used to have to do this in the past. Sometimes even with a super ninja pc like I use at work now, I still end up having to export more chunks or split into multiple render files.
ie sometimes the scene is too heavy to process everything, so I split a pillar into 3 files, the base the top and middle and process seperatly when there is less of a drain on the system from holding so many tris in memory.
You get to read a lot more books while you wait for the the PC to render and process and optimize with next gen editing, I love that 
Liam: I just set the pivot point on the base bricks I made to be locked on to a grid set up on the 16 times table, sometimes 8. Then I can just put the grid snapping function on and from the front view I can drag them across into different locations on the grid.
Doing that makes it obvious where it might be cool to add a different material to a line of bricks, or delete out a line and put in some bold or fine deco details, you make one, its on the grid, you can work out how many times it can be instanced in a straight line across the wall very easily with the grid as a guide.
You just learn to start thinking about designs on the 16 times table this way and it makes a flat tiling texture very useful for a level designer to only use part of where they want to as well as the whole thing in other areas.
So I carried over that mentality from when I did 2d art in the last generation of technology, now I build on the grid so the 3d designs work on the 16 times table so the whole design can be thought of as a modular thing that can be cut into different configurations where it has a variant of itself that has the blocky base and the top outcropping on a pillar cut off, this allows the level designers to place the middle beam of a pillar on top of some other pillar or base structure they prefer.
So this is what I call ‘variants’, designs where the base elements can be recombined in a different layout to process a new design, or designs that work as a collection of elements on one texture, that can be seperated into multiple designs by subtracting some or 1 of the elements, while still using that one texture.
It aids the speed of the games rendering time, because althought there might be thousands of objects in many of the scenes in gears, often they are only using a handful of texture smaller than you might guess.
The fine details on the staff, often I just draw splines in max on the grid based on sketchs Ive done or designs on other buildings or in books. Once I’m happy with the line work, I can make those splines renderable and control how many polys they have by changing the interpolation. I get an good base with which to then hand model part of it or skew and change the thickness of parts , maybe apply bend modifiers or twist to part of it.
As always, once I have one piece, I can instance on the grid or rotate around a pivot point and very quickly finish out a design.
With the door, well a lot more of the floral stuff had to be built unique , some elements are instanced duplicates of a simpler form that I warp into new forms by skewing, bending, path deforming, twisting modifiers and partly remodelling.
As you go forward, you beging to build up a larger collection of design or deco elements that you can group together in one file so you can merge that file with new assets and pick and mix reuse parts. We call it Kitbashing, its just a collection of bits that end up being reused to speed up production.
Why model the same bolt every time you make a model?
Same deal in zbrush, if you make a nice design element, press the grab alpha button in the alphas rollout, take a shot of the element you liked, tidy it up in photosho, black around the edges of the design part in the center of the image, resave it, build up a collection of cool design stamps to reuse for the sake of speed and also continuity.
Good environment design, like most of design, is built largely from the repitition of forms, so re use is good.

Personally, I like the big images. I can see all your nice little detail work.
Nice job!
Hi Kevin! Again, so unbelievably kind of you to post these pics and such a detailed comment! !thank you.
Hey there, thanks for all the sharing of knowledge and pictures! I rarely have to pay for games, but I’ll buy another copy of Gears2 with my own money - and I don’t really have any money at all - in the hopes that 1 Cent of the price goes into your pockets
Thanks for the comments, and sure, buy more Gears2 heh 
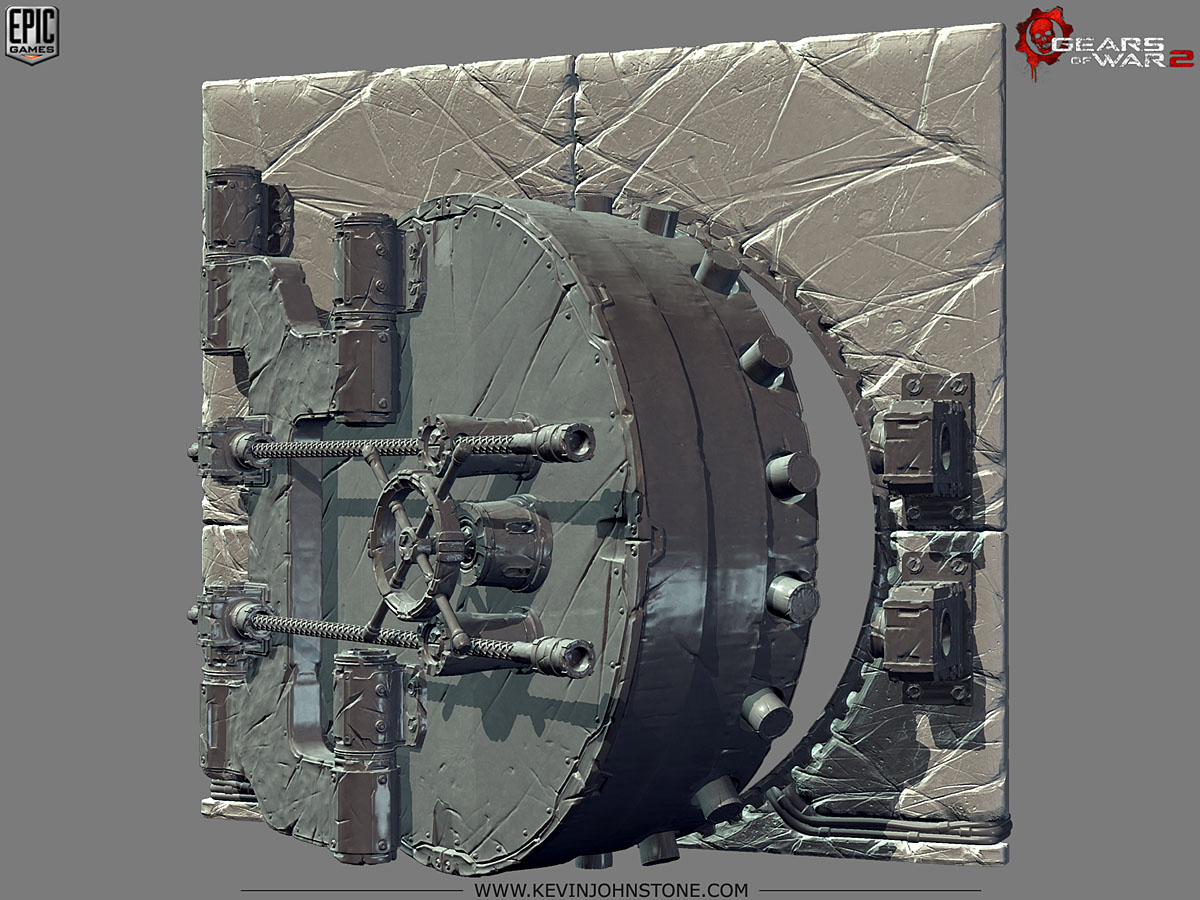
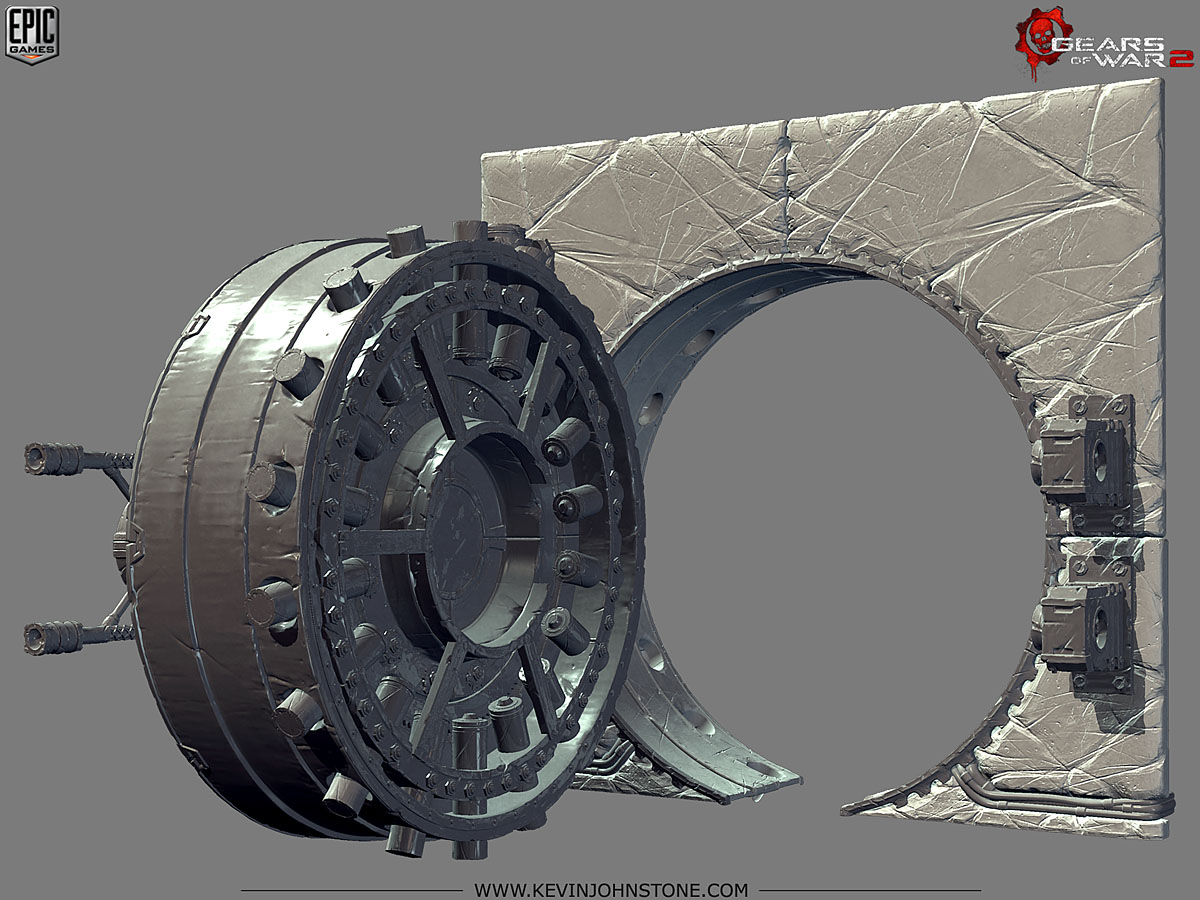
Below is the Outpost level security door. Outpost was probably my favourite level to look at and play, Demond & Adam did an amazing job with it, I must have spent 3 times as long playing that level due to reveling in the detail and atmosphere of those rank Silent Hill2 like corridors.
Attachments
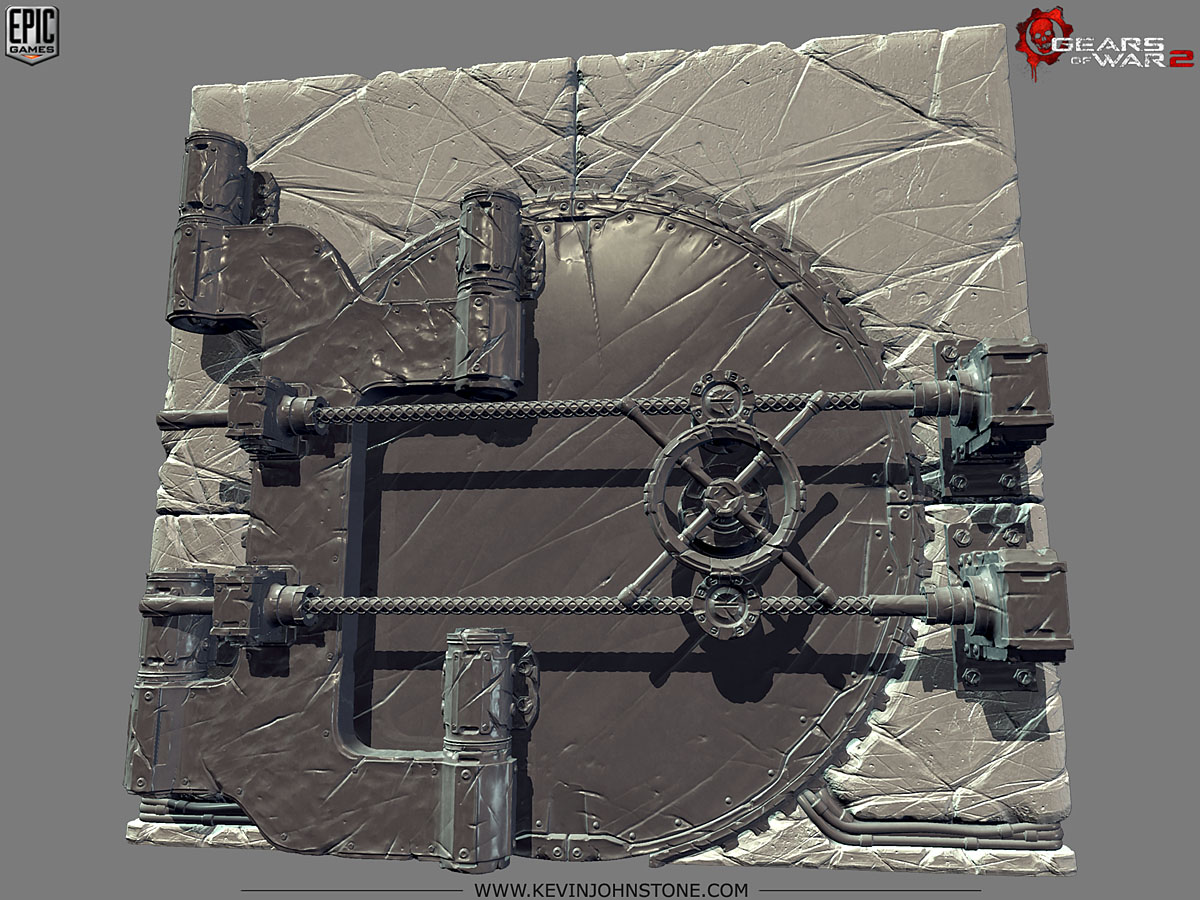
cool vault. Is the cement block part of another piece of work just duplicated and mirrored? Or was it all custom built just for the door?
I wanna play GoW 2 REALLY bad (loved the first one) but unfortunatly there’s no PC version (yet :P…hopefully).
Yeah, I wanna play, too… My x360 should get back from repair/replacement by wednesday, good old red ring of death^^
Was that vault door animated to rotate the wheel and have the cylinerds move or is it a static piece? If it was animated, would there be a way to make like a demo reel of the animation or something?
It was very considerate of those fighting, not to damage the threaded parts of the door locking mechanism.
It was all custom built for the scene, it all had to be on one texture so I made the mirroring concession in an area that I saw was shadowed and seemed likely to have a monitor there and thought it would be less obvious ingame than in max where I stare and nitpick about such an obvious mirroring effect.
It was built with the correct pivot points to support animation, I passed on the info to the LD’s and they made me jump for joy when I saw it all animated ingame
I’ll probably get around to doing an .mov file of it in action eventually.
“a monitor there” <- ?? Now there’s a monitor involved? You just lost me :o