How do I go from the UV created in UV master, to being able to get the colour id information from my poly paint (which is on the dynameshed object)
For sure! If I understand the question correctly: duplicate off your original high res object with the color-fill/polypainted verts, then dynamesh / zremesh / decimate that for your game res, UV it, then:
For a ZBrush bake, since you can’t bake arbitrary meshes (as far as I remember), subdivide your new game res geo and project all to your original high res (be sure to include polypaint info too), subdividing and projecting all the way up until you have all your original detail back. Then under ZPlugin > Multimap Exporter > and select Texture from polypaint to bake your polypaint to a material ID. Or I suppose really you can also probably go to Tool > Texture Map > Create > New from Polypaint as well.
Or!
For an arbitrary bake (xnormal for example), load in your high res original with polypaint, then load in your low res with the UVs, then in your baking options choose “bake high poly vertex colors” (down toward the bottom of the option list).
There’s a ton of different ways and programs to get your polypaint material ID, those are just a few~
Gross, blobby sketch! These are just my push around sketch shapes, using spotlight to position them to match the concept (see below)
I’ll also use spotlight to paint my concept directly onto my blobby sketch; turn your zadd off, rgb only on your brush, then just load up the concept as a texture, go to texture and click the “add to spotlight” button. Position the spotlight and ajust the opacity to taste, then paint through the concept directly onto the model. If you can’t see your model well enough after doing this, grab a white color, turn your RGB down in your brush (say 30 or so), then do a color > fill object with the white color. This will knock down your projected concept polypaint bit by bit, keep hitting color > fill object until you can see both your model geo and your concept drawing (a little more faintly). You can then use that to determine where your secondary shapes need to go, directly from the concept!
If you’re working with a more “relief” type of model, feel free to paint through spotlight with zadd turned on-- it will use the RGB values as a mask, super useful for environment work I’ve found (just putting wall panel detail directly onto a dynamesh concept piece, then refining from there)
Also, use spotlight to line up your model with the concept. Drop the opacity down in spotlight until you can see your model and the concept, then use the move brush to move your model around behind. Don’t forget you can save views-- document > Zapplink properties is useful for saving views (just line up your model, and hit the front / right / cust1 button (whichever applies). That way, you can sculpt and move your viewport around however you’d like, but if you need to snap back and see if it still matches the concept, just go to document > zapplink properties > and hit the corresponding button.
If you want to get even fancier, have your concept views (in this case side, front, and back) in spotlight loaded and fully visible on your viewport, then go into movie > timeline > show. At the top of your viewport you’ll see a timeline with a bunch of tick-lines–move your model behind spotlight, and match up the first view (probably need to turn perspective off if you’re working with orthographic concepts, as in this case). Once it’s lined up, click in the timeline–you’ll get an orange dot. This is a saved view! Now, move your model to the second position, and click further down the timeline. This will create a 2nd dot. Finally, move your model to match the 3rd view, and click once more in the timeline–this saves your third and final view.
Now, if you drag in your timeline, you will see your model snap to the front, side, and back view! Feel free to turn off spotlight (shift + z), get in there and model however you want, then when you want to “check” your work against the concept, simply hit “z” to bring spotlight back, “z” again to toggle the widget off, then drag in the timeline to resnap to your views. EVEN BETTER, use the right and left arrow keys to snap between your orthographic views!
starting to rebuild and refine my forms, using zsphere retopology and creasing edges
Get my final forms nice and crispy, dynamesh them, add all sorts of greeble detail, slice up my meshes if i need to (see videos here for more precise instructions on this):
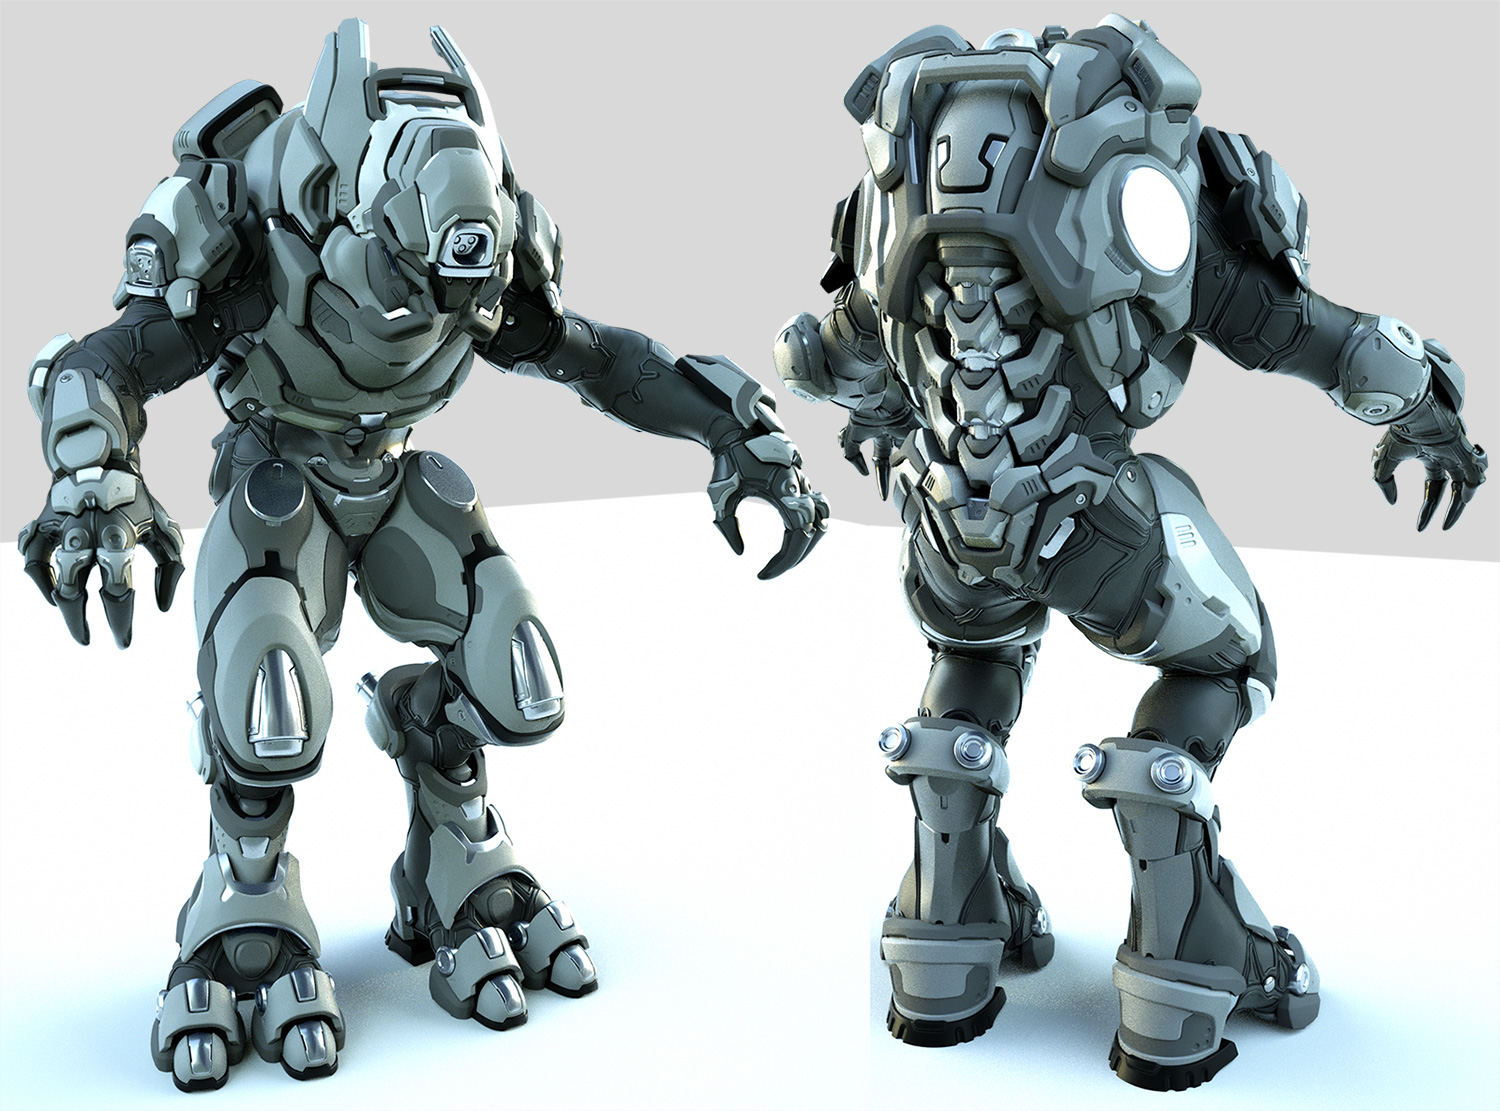
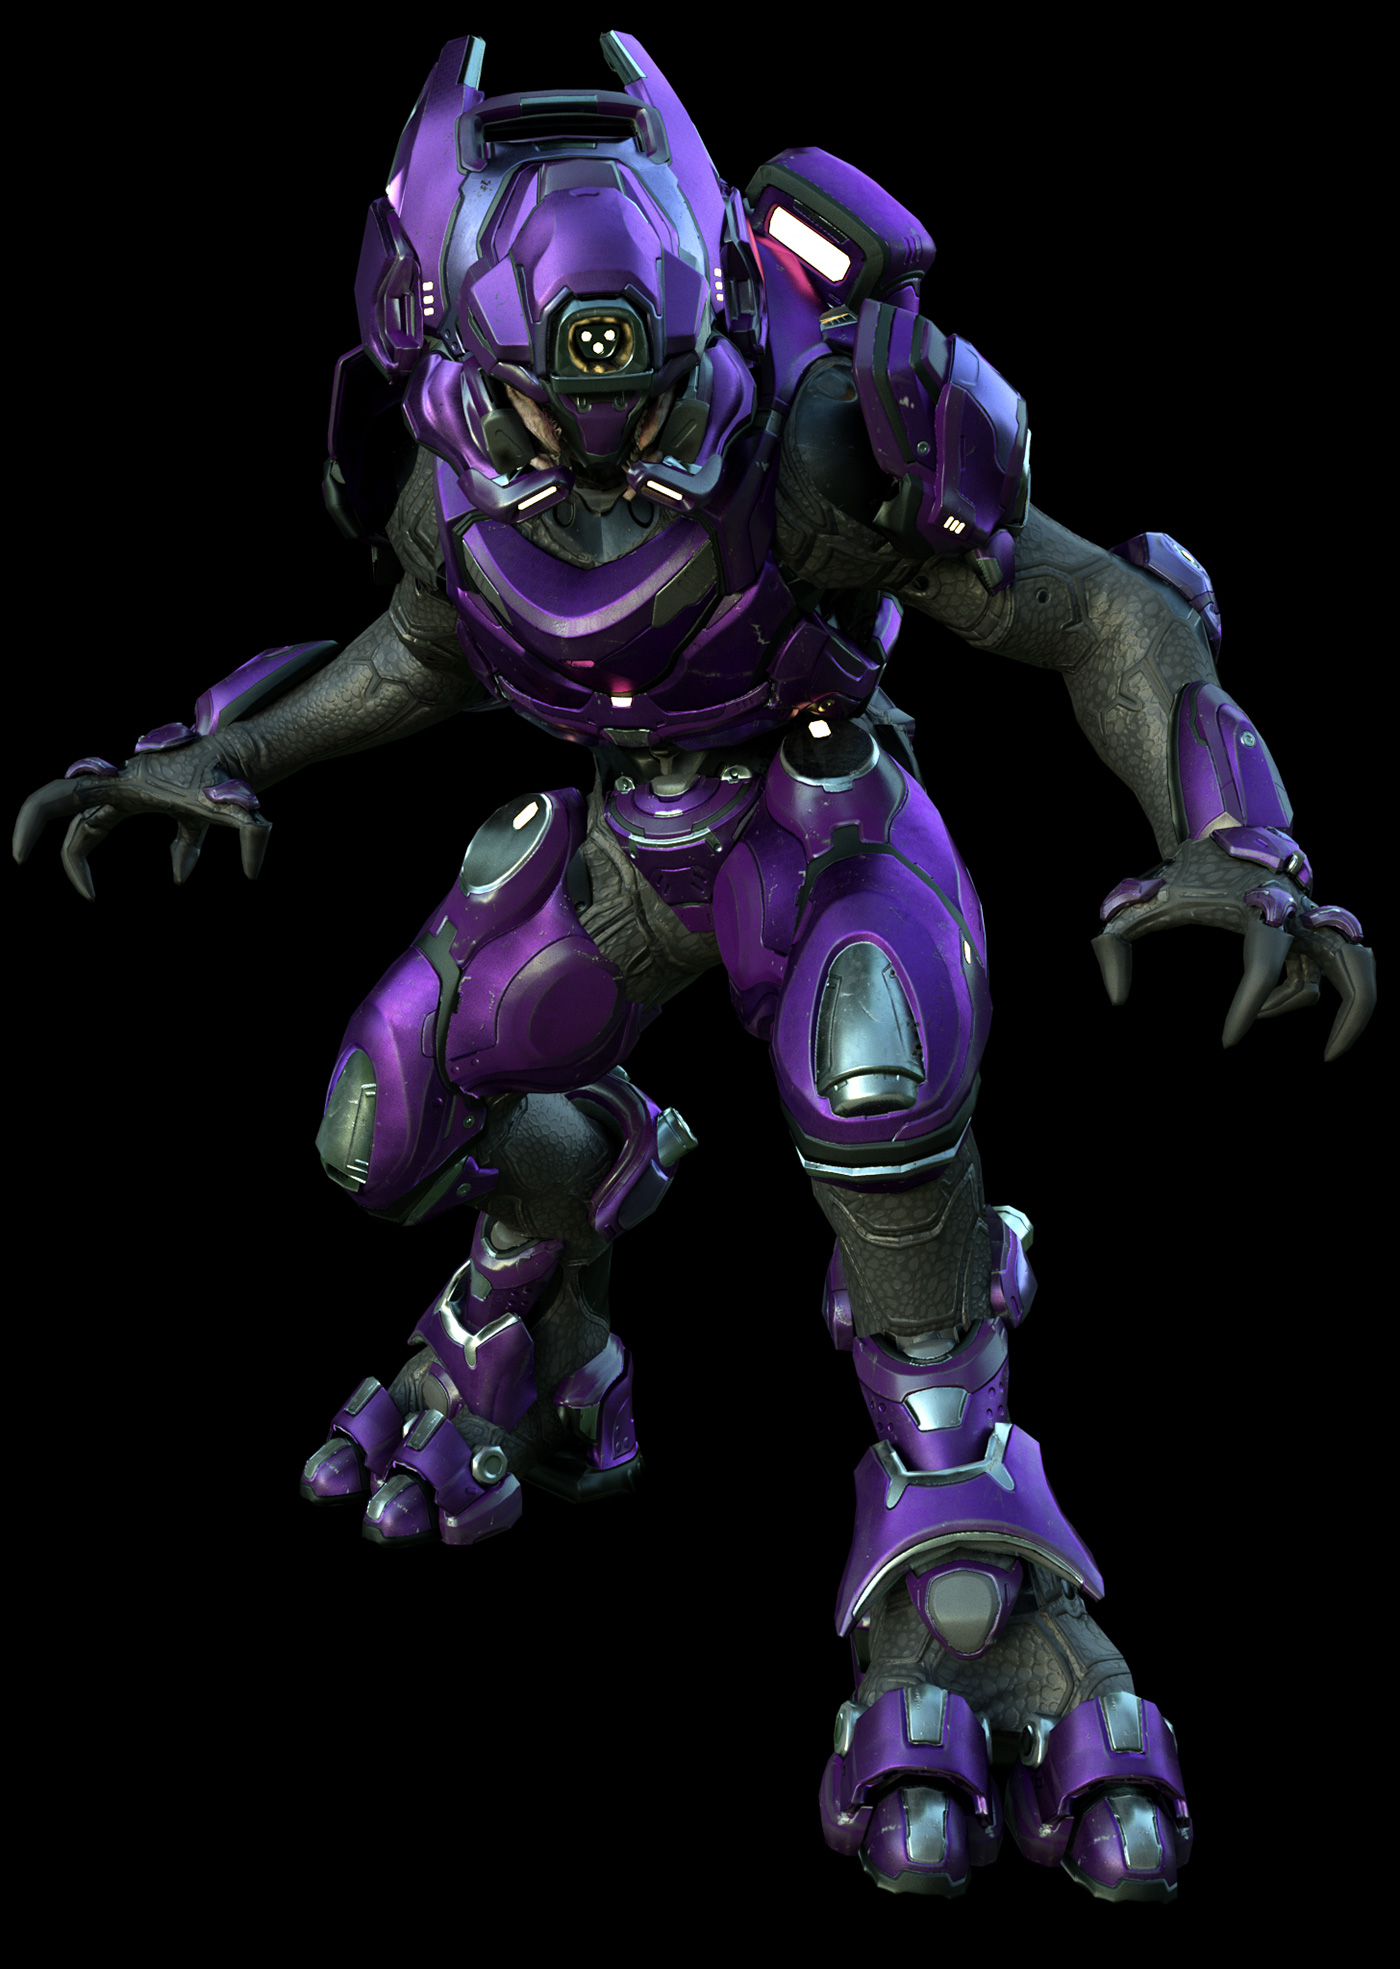
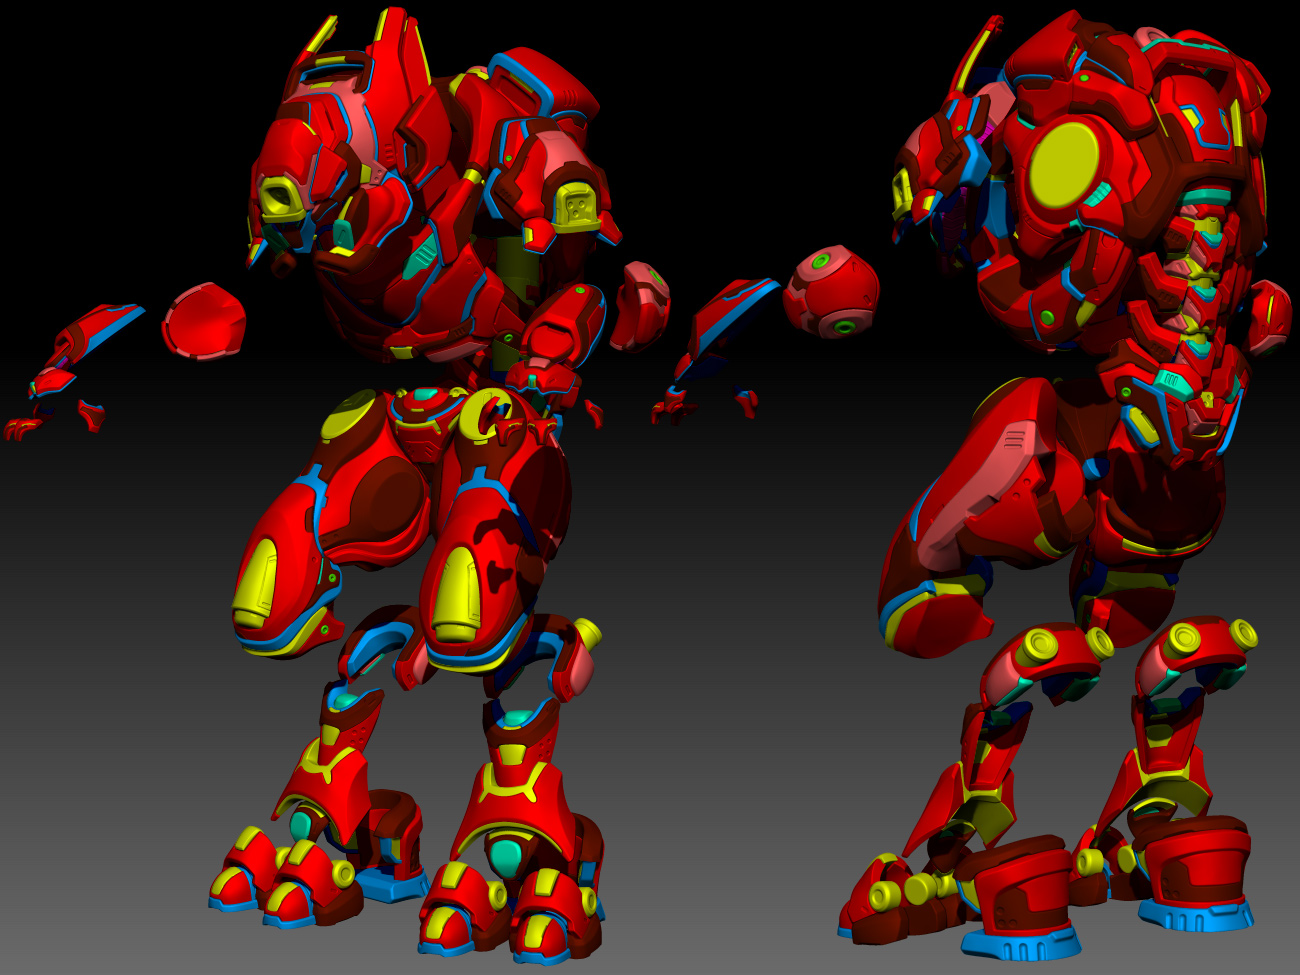
The elite was a bit trickier-- Only had a 3/4 front view concept sketch. To match this up, I again loaded up the concept into spotlight (see the spartan post above for specifics on this), the positioned my model behind it. I had to turn perspective on since the concept was in perspective, and I also had to play with Draw Menu > Angle of View to match it up even better (see below image for the draw menu)
Just like the spartan, once my sketch is lined up I can paint through and project either the polypaint, the zadd, or both to determine where the concept details need to go!
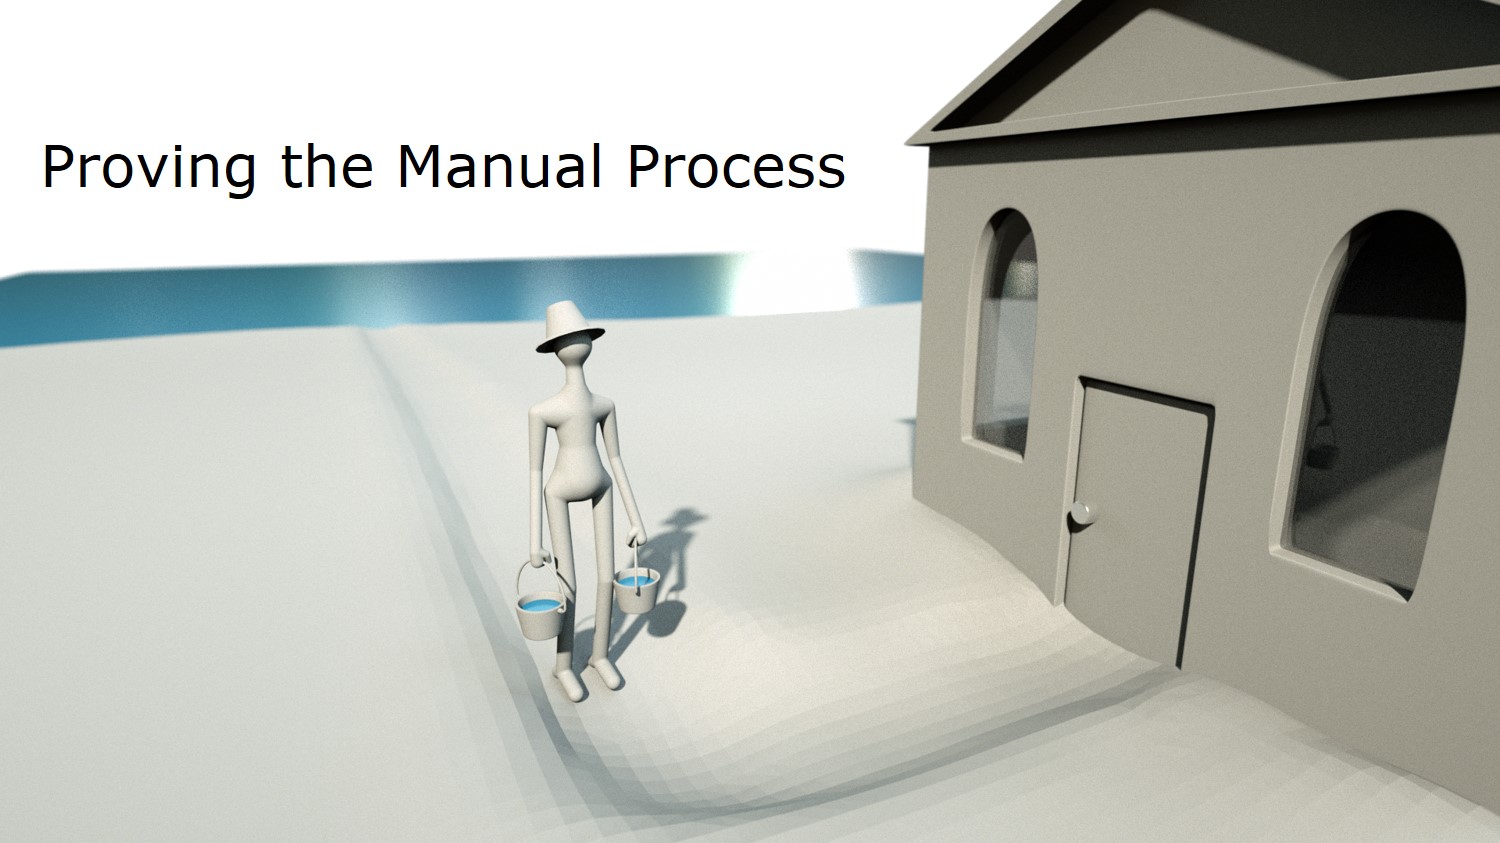
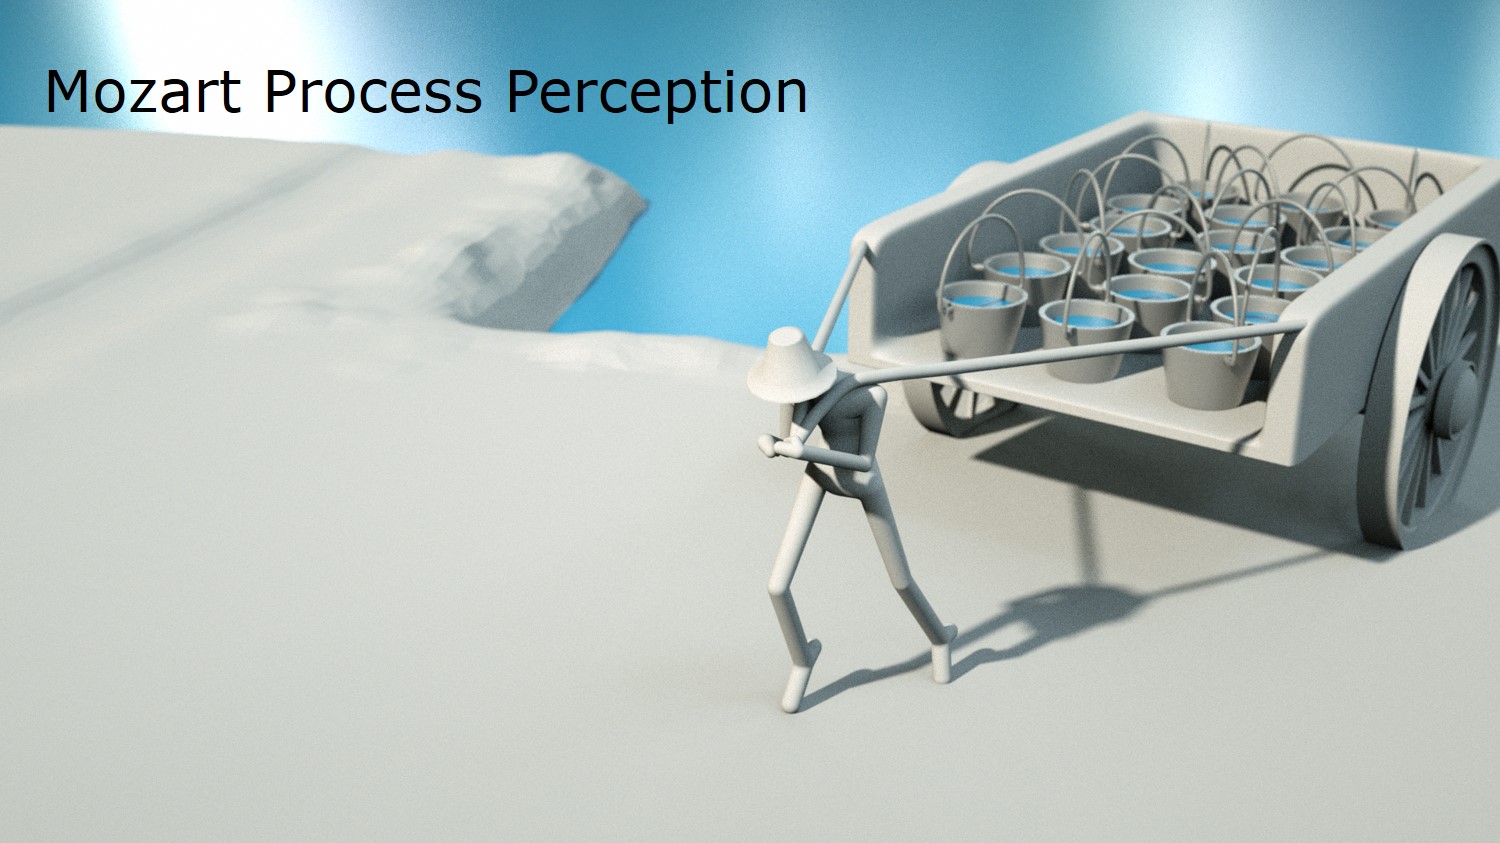
And of course, to make my life easier, I’m going to fill each area of my model with a corresponding material ID color so I can quickly texture this using substance painter / designer, or quixel suite ddo (see the video at the very beginning of this thread to see why this is an important step)
The flashbang was a simple zmodeler brush process, see the Joseph Drust Pixologic videos in the ZClassroom (and right underneath the front page posts in the video section) for more on this! I also have a quick overview on my youtube channel:
Don’t look at the handgun too closely! This I decided to just sketch out really quickly…if I was doing this “for real” in production I’d go ahead and rebuild these forms to get it nice and crispy (especially if the end result is going to be full screen in the characters hand), but since I knew it was going to end up in a holster on the back of her leg, I just left it in “quick sketch model” mode, and baked that off. Bet you didn’t even know how lazy I was!
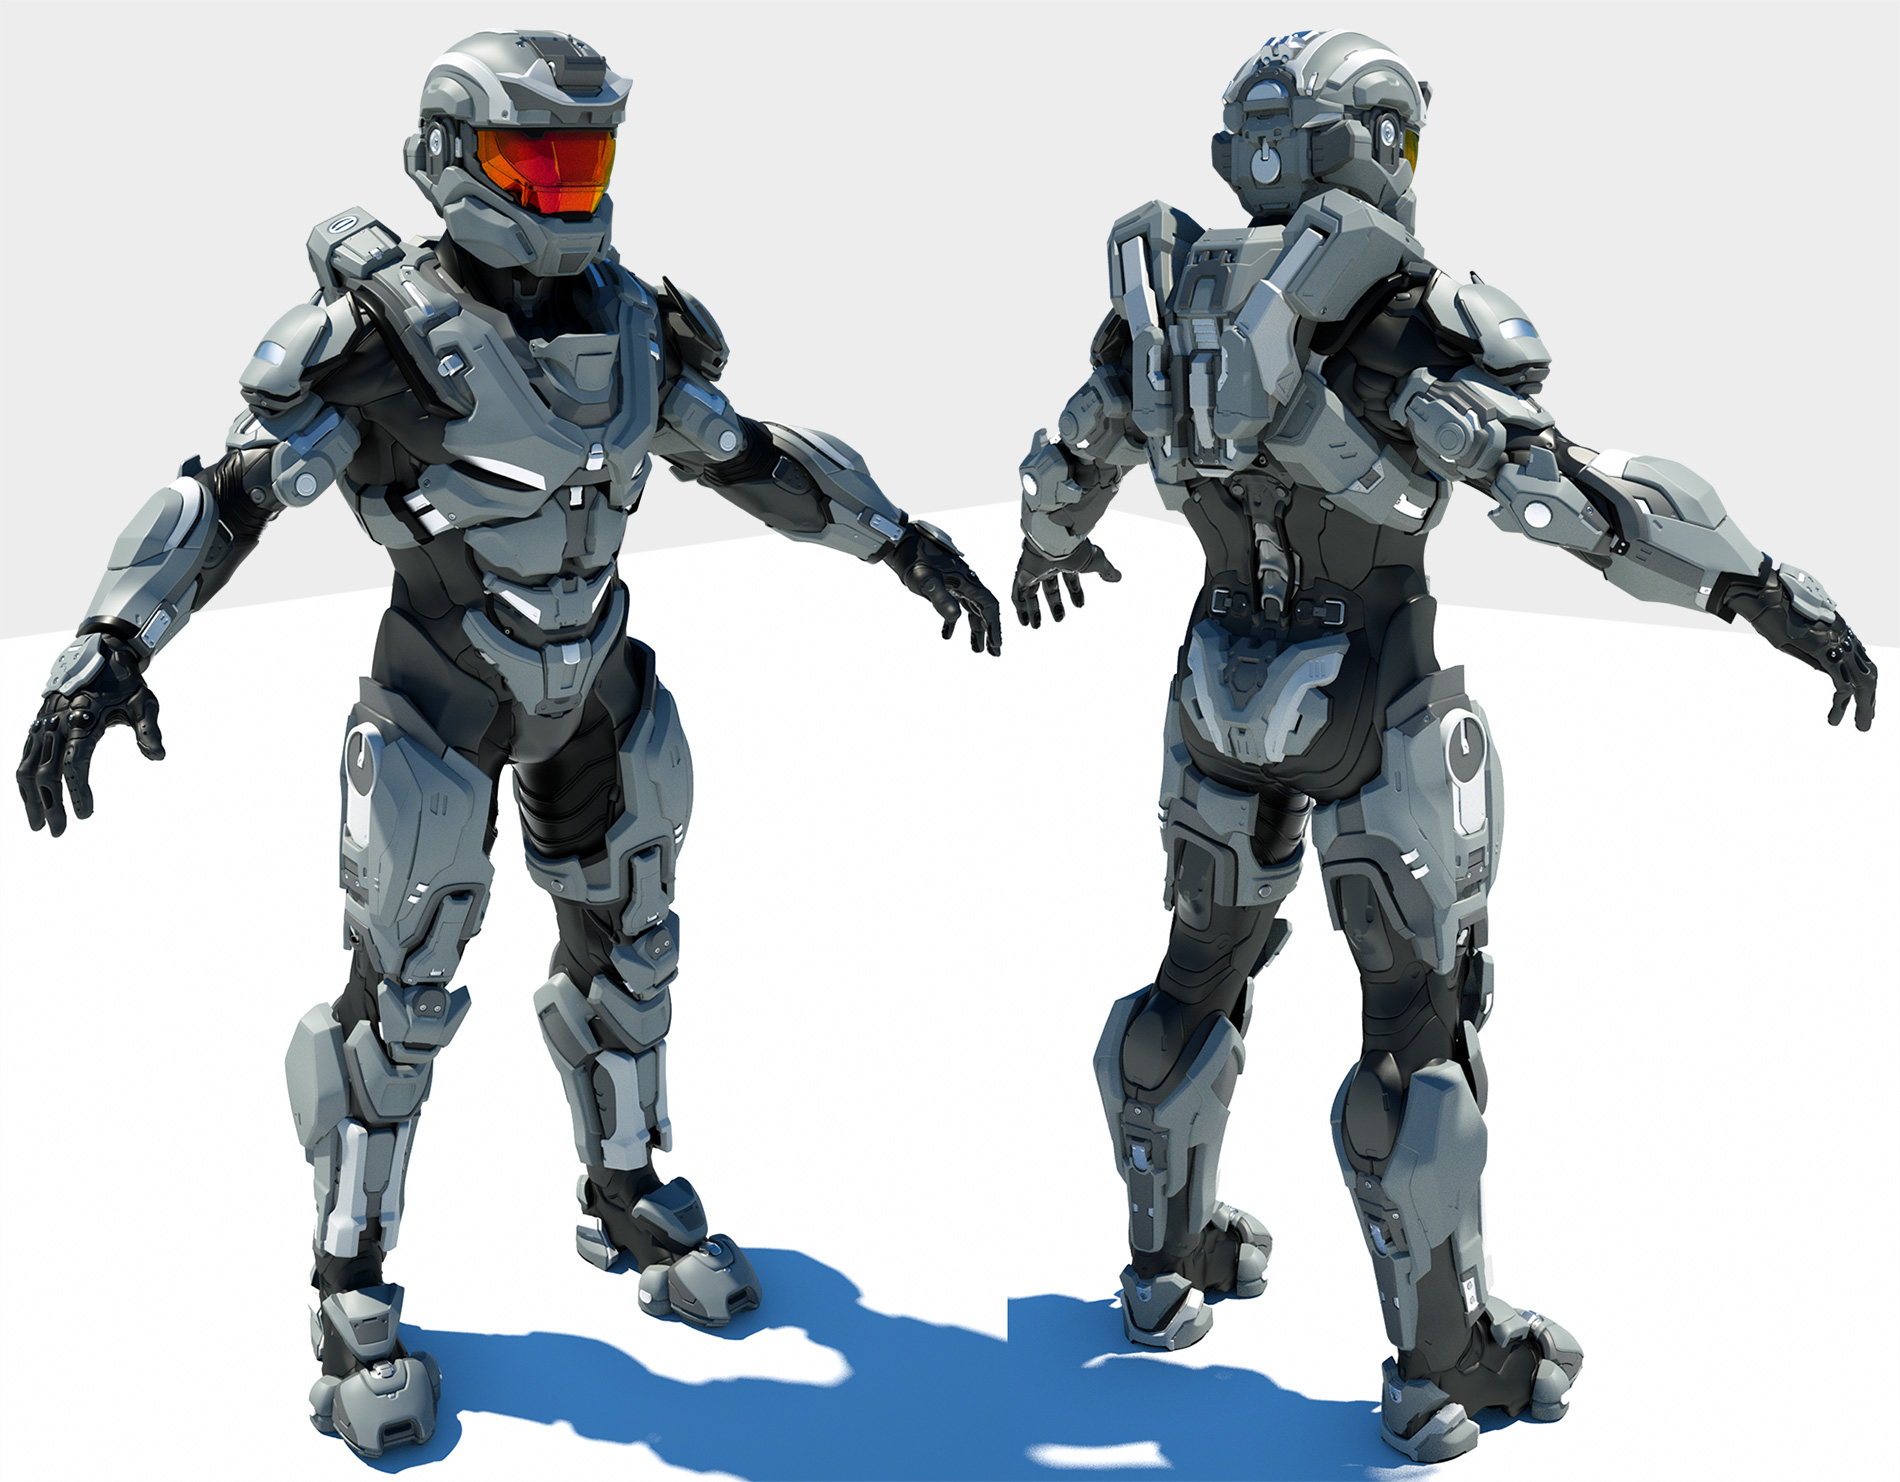
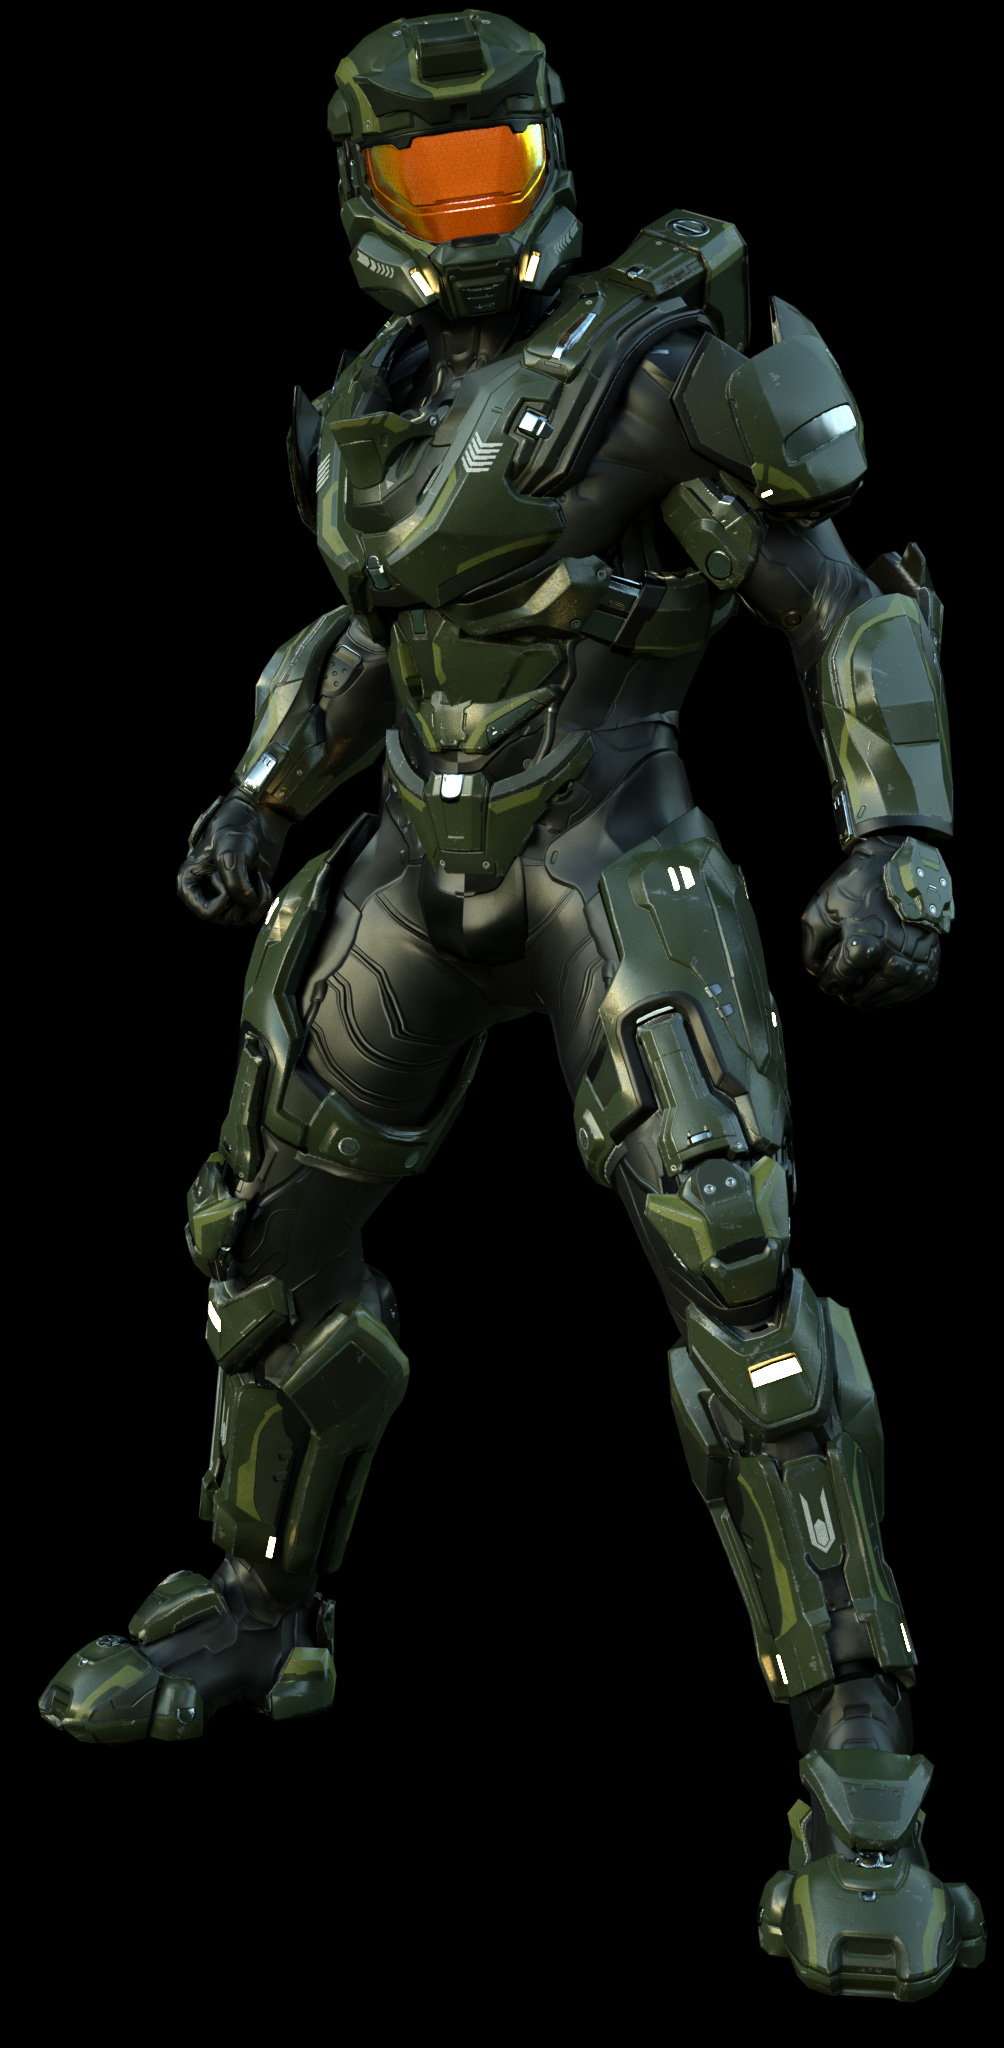
Just like the elite and the spartan, after my initial sketch on my GDC female character (see way earlier in the thread), I sent it through a “form refine” stage. My favorite part about this stage is the fact that the entire character you see here weighed in at about 10 MB when I was done (ZBrush dynamic sub’s keeping my file sizes insanely low!)
close up of the form refine head; you can see there’s not much detail, but all the forms are in there and nice and smooth
After that, dynamesh the meshes you want to detail out (at a high enough resolution so you don’t lose your nice crispy shapes), cut them up, alpha stamp, lazy mouse, mask and inflate, all your zbrush tricks to get this thing all greebled up. Once you’re done, decimate them back down (just enough to not lose any detail) unless you enjoy working with 3+GB files
You can now divide up your mesh into the different material parts, and throw it over to keyshot for the wow-factor (Render > External Render > Keyshot), and drag and drop your keyshot materials onto your different subtools. Or, if you’re into the whole game res and bake thing, game res it up, bake off your material ID, then throw it into substance designer / painter, or quixel suite > DDO for some quick material assigning and texture wear. Then make sure to throw it into your renderer of choice (Marmoset is a good one for this!) and get those shots set up for your portfolio.
This was a fun one…I don’t remember which level he ended up on, but him and his buddies are floating in some tanks in a hallway somewhere in the Master Chief Collection: Halo 2 Anniversary maps. It started out as a quick concept sketch by Mike Pedro (see far left), but you could easily start from a dynamesh sphere and start pulling shapes out (if I had to guess I’d say that’s where Pedro started), or use zspheres / zsketching to get you a quick base mesh. Check out the Pixologic zclassroom for good video’s on quick base mesh creation, and I’ve also got some on my channel:
So, starting with the concept sketch, I just continued to refine the shapes
This mesh actually had to work as a bunch of different creatures, so I ended up making a number of different appendages and tentacles that could be swapped out / posed differently to create a number of different variations in game:
Then, it was just a matter of polypainting him up so I could get some nice creatur-ey skin on him. Red where the blood pools, some vein buildup, blue-white where the bone gets close to the surface, deep red where he’s got some open sores, yellow for the formaldehyde membrane skin flaking…bleah!
Then, use a fancy shader in game to make him float around, and have his tentacles ripple in the fluid-filled tube!
Holy crap your GDC presentation is awesome and scary at the same time lol. Not sure what kind of job I want to work towards getting now concept artist or production artist or is it both. I would love to do both if I can get to that level of skill to do that. I’m still trying to learn all the software your Eat 3D dvds were very helpful for me so far I’ve watched all of them about 10 or 20 times over the years and I always go back to look stuff up in them. Not sure if this is a good place to ask but is there a chance you might do more eat 3D dvds on substance designer? That program is so confusing to me have no idea were to start, I would totally buy that one.
Thanks for putting out all this information out there I’d be lost without it. :D
That’s a lot of info. and a lot of scrolling. Saved these entire thread page(s) as a PDF’s for easy viewing and reference. Pretty amazing you took the time to go so in depth and post so much info. Basically an addendum to your GDC discussion.
Thanks guys! I was doing some spring cleaning this weekend, found some forum stuff that’ll probably never see the light of day, figured I’d just throw it at the bottom of this thread:
Quick cloth sim in Marvelous Designer, then topology brush to create a section of quads to work on (zproject brush and subdividing for fidelity). Mask and hit ctl + w to make a polygroup, or polypaint what colors you want, then choose polygroup > polygroup from polypaint under the tool menu, then use the ZModeler nanomesh face option to drag on whatever mesh you’d like to repeat (in this case, a simple thread stitch mesh). Play with the rotation / width / height / distribution settings to get the look you want, and if you want your nanomesh to inherit the polypaint color, make sure you go to the colorize options and click the mesh color button (that’ll automatically fill your threads with the underlying polypaint colors). Of course once you’re done you can delete the nanomesh temp mesh (Inventory > one to mesh first), and it’ll just sit on top of the original dress mesh.
The other decorations are simple insert mesh brushes / insert curve mesh brushes (and after looking at the closeups, it would have behooved me to play with the brush > Depth to make sure they were sitting on / in the cloth instead of above it, oops)
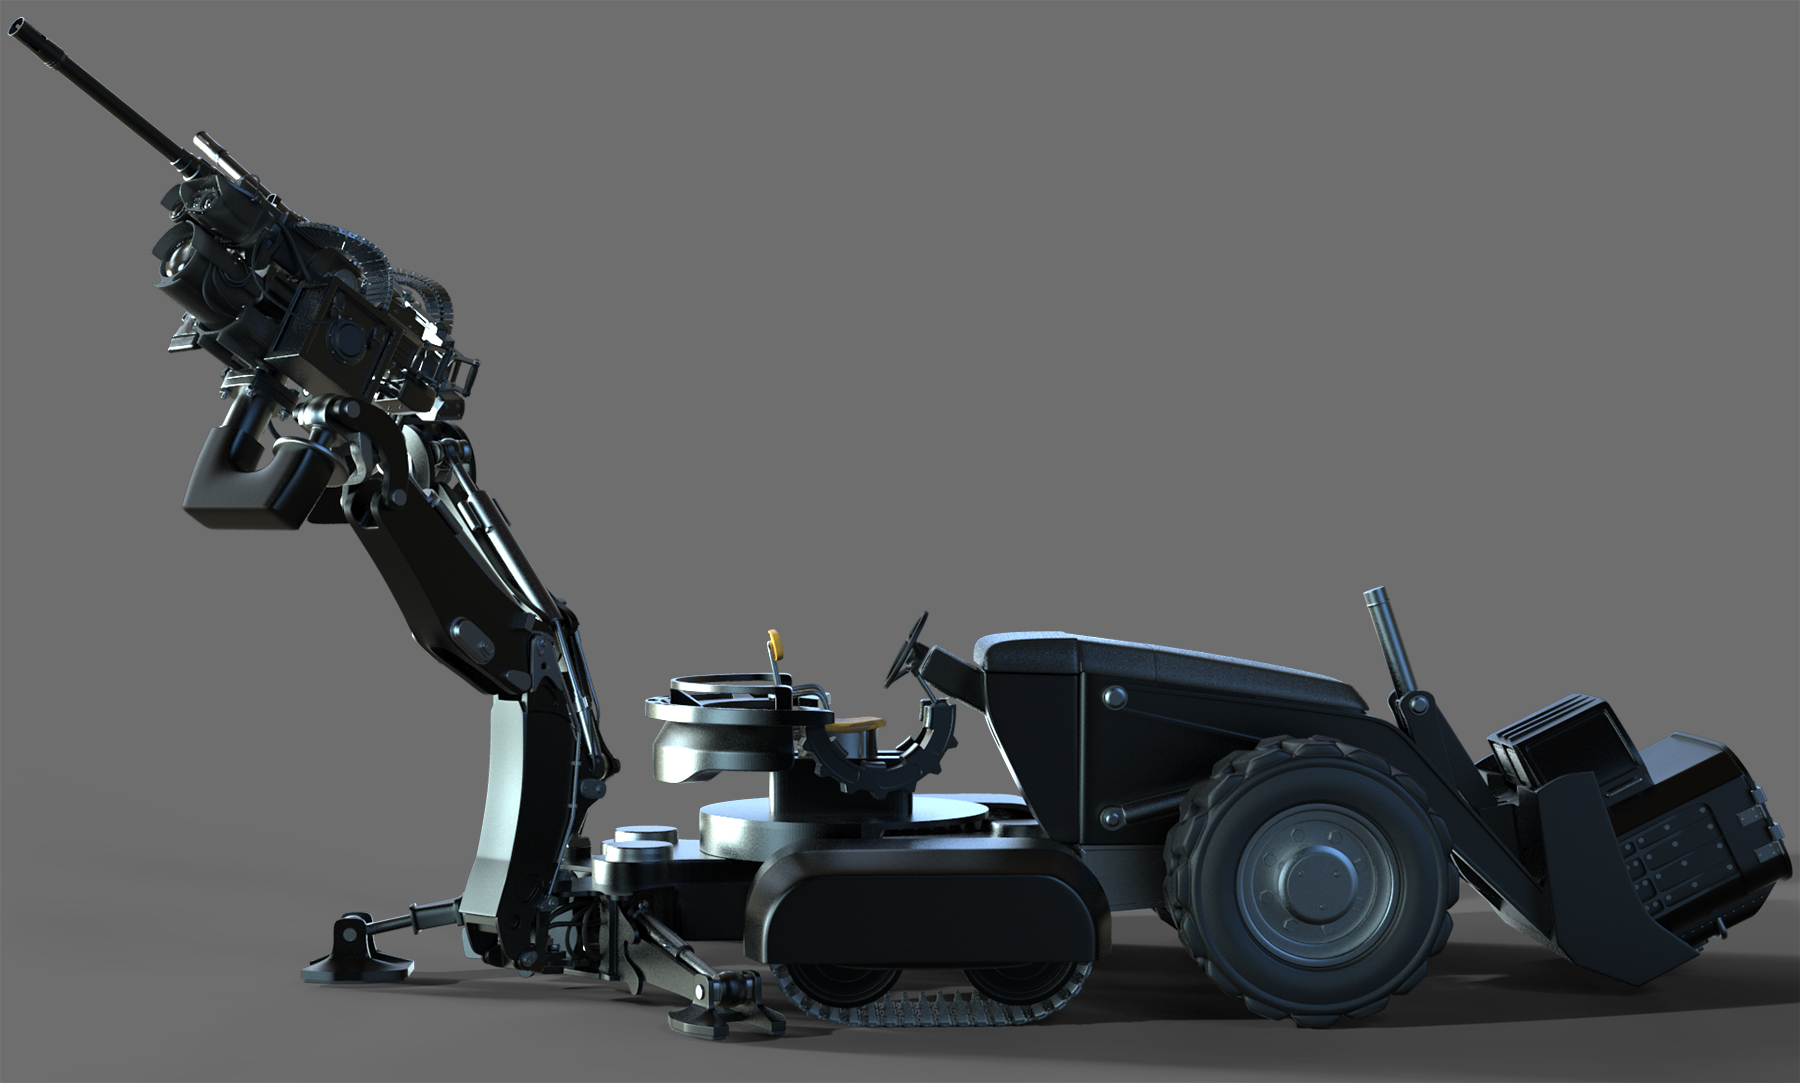
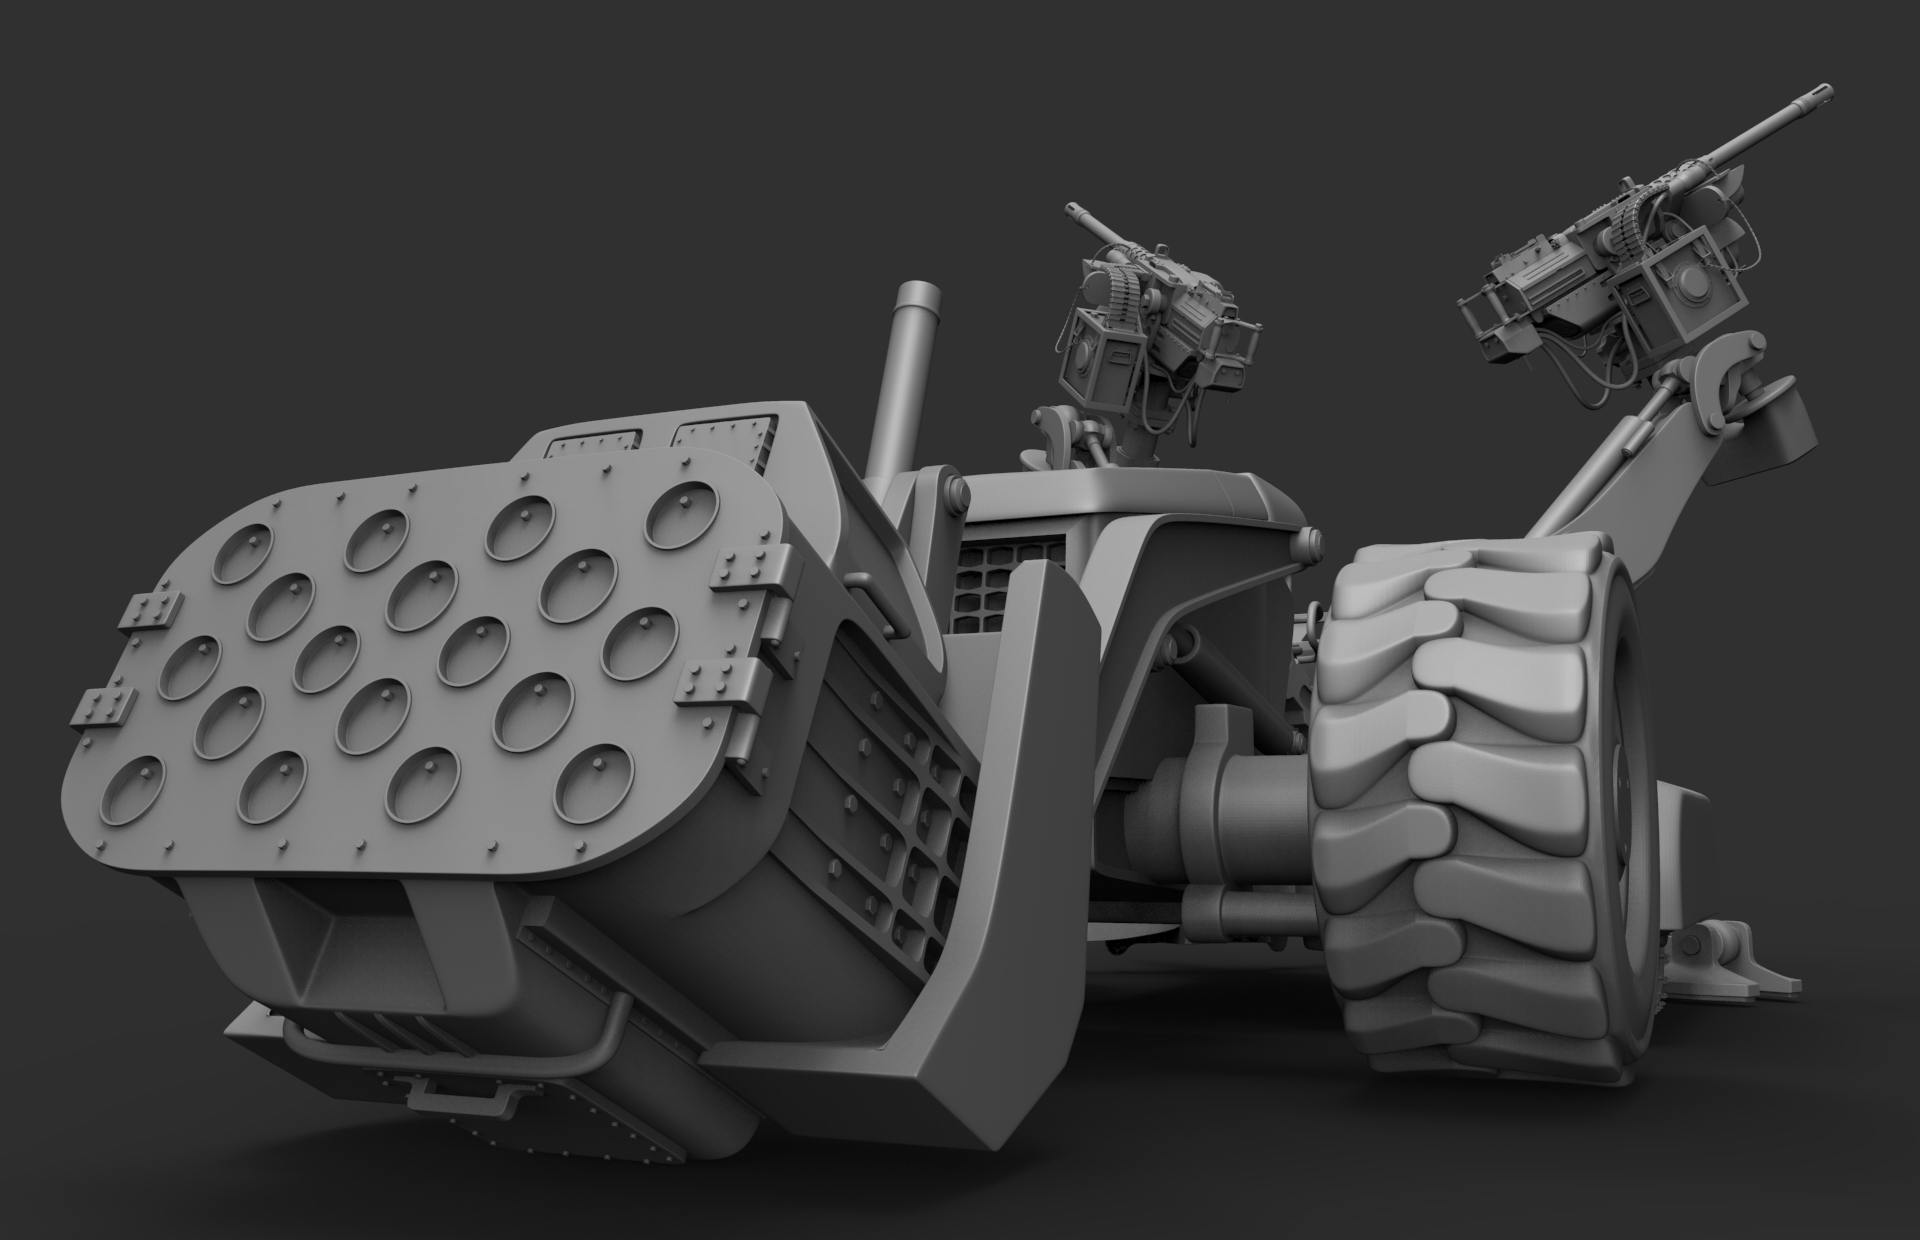
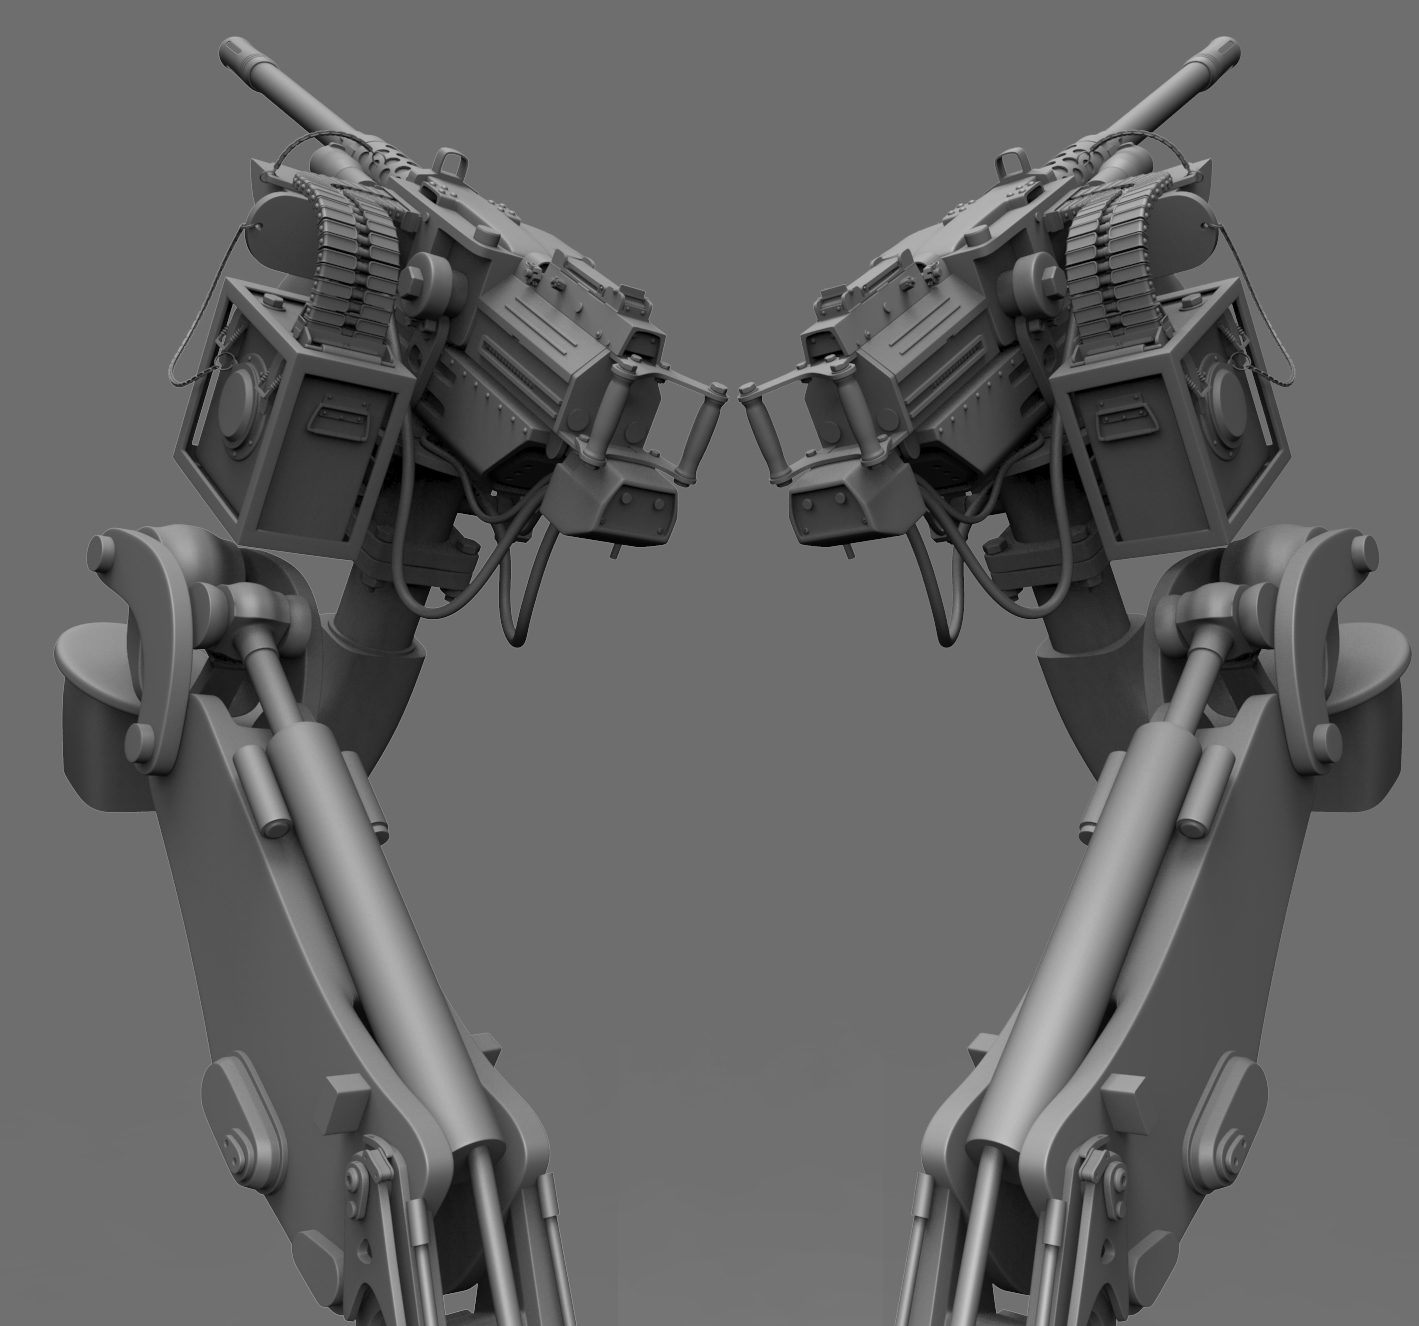
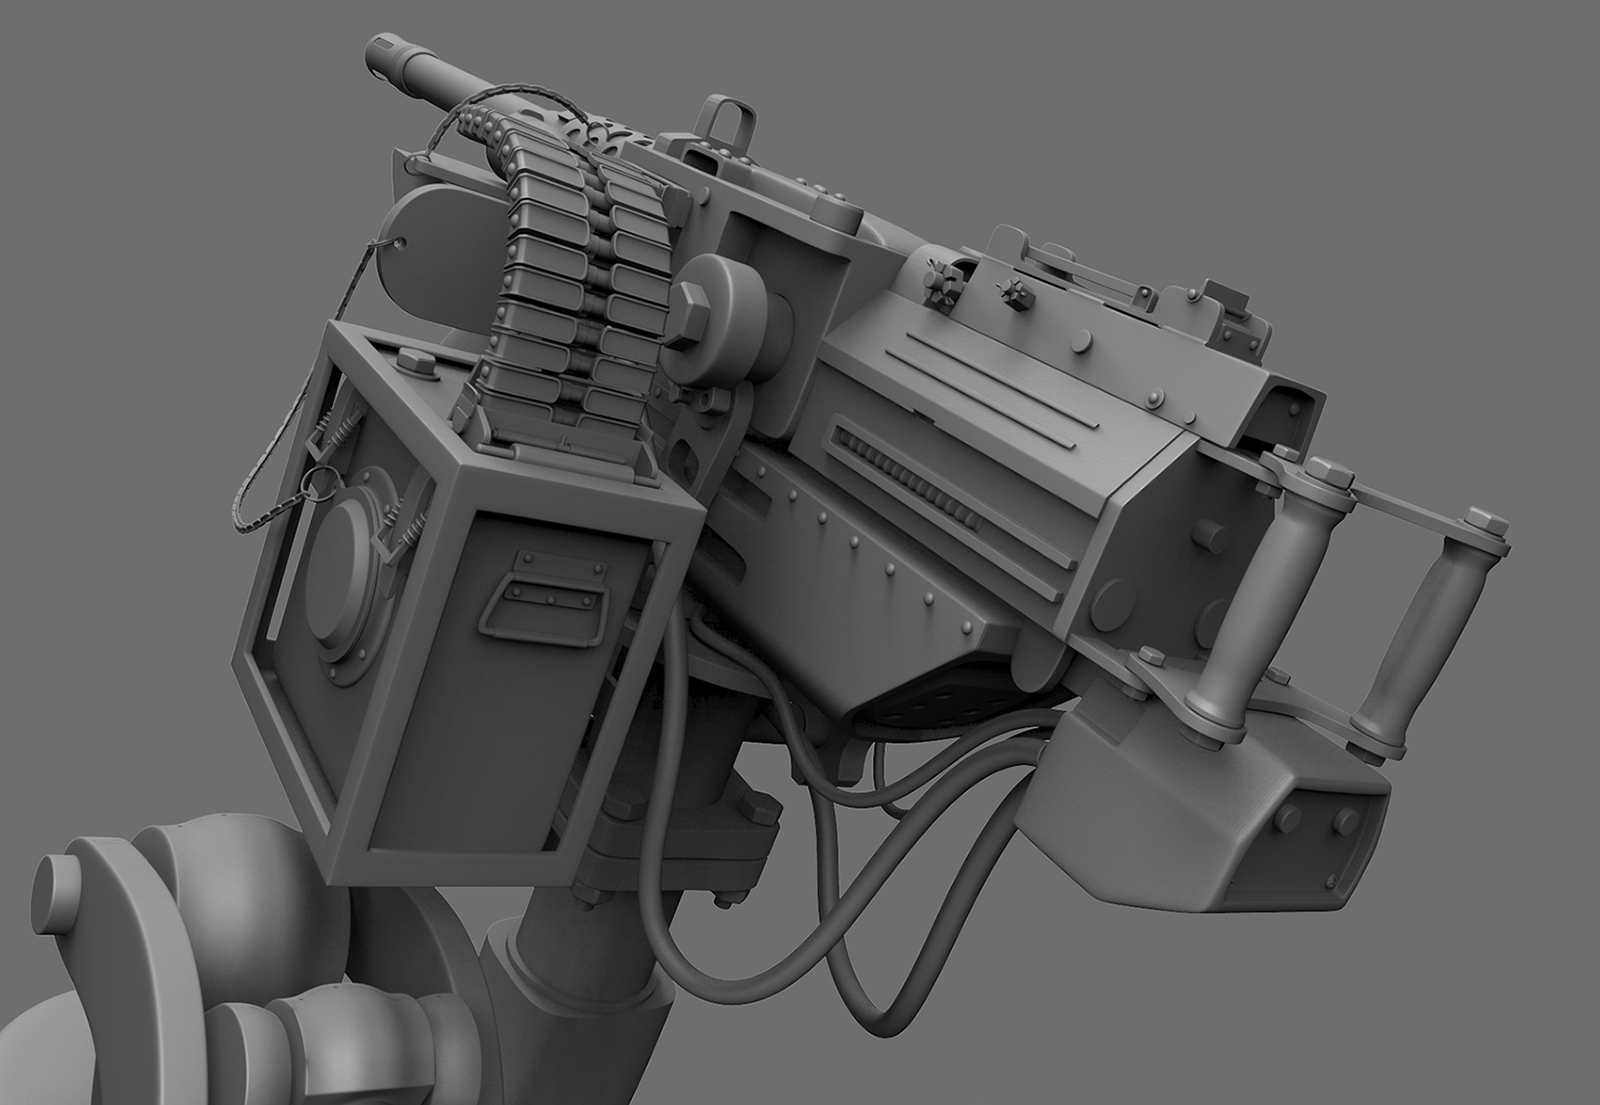
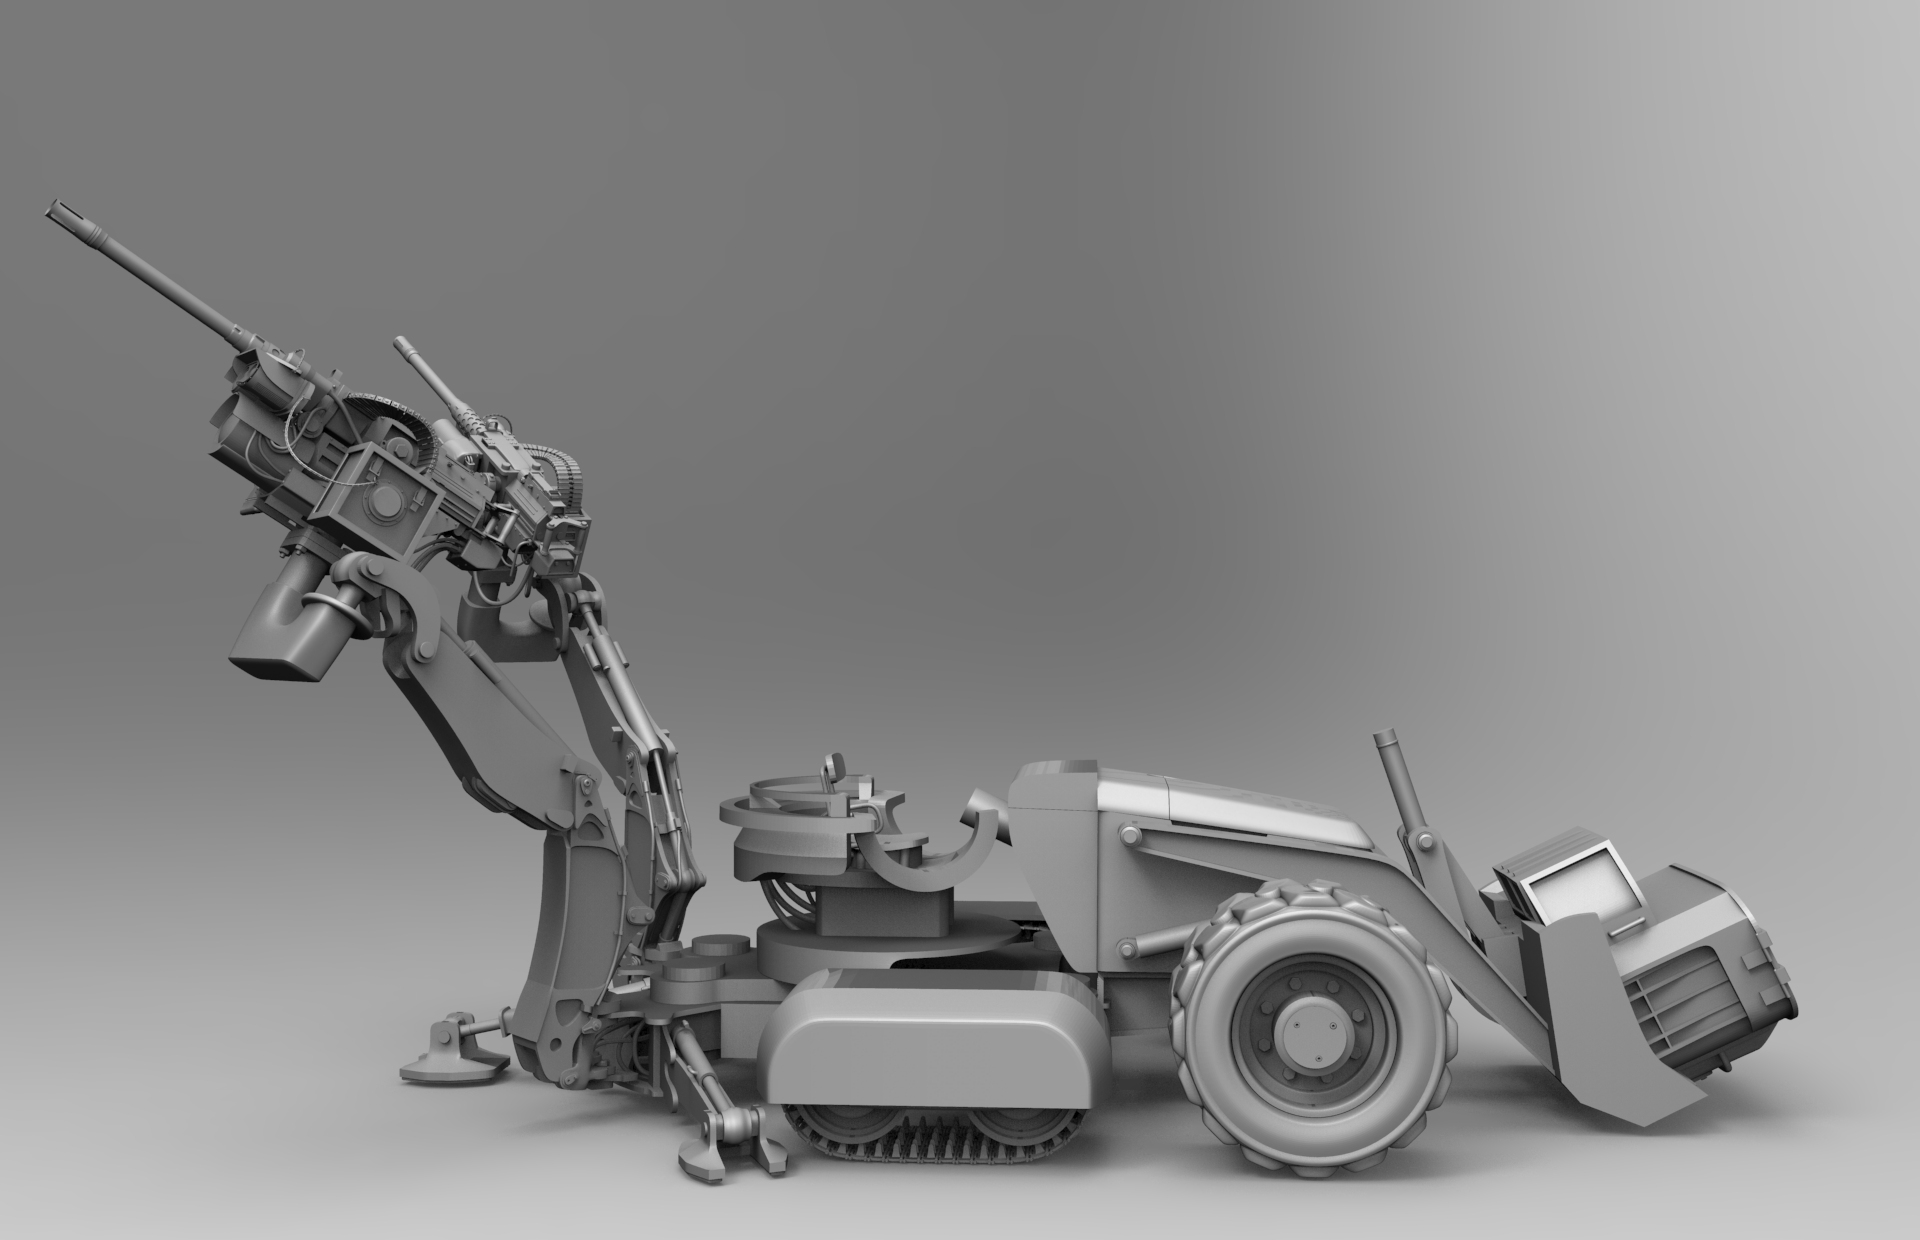
Here’s some old ZModeler stuff…I’m not much of a box modeler process guy, but it was a good learning experience, and I’ve gotten (a little) better since first starting.
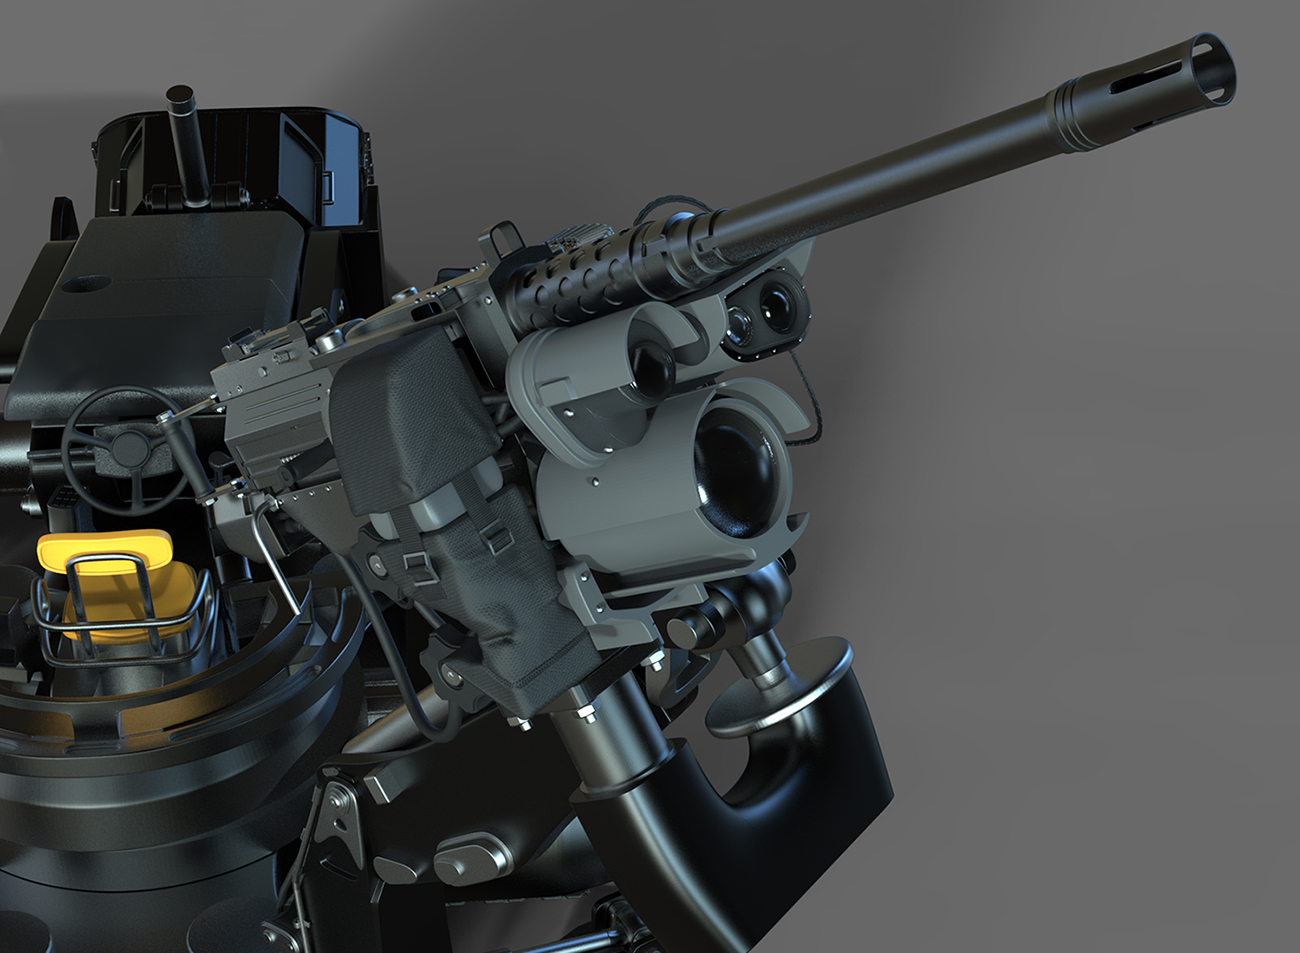
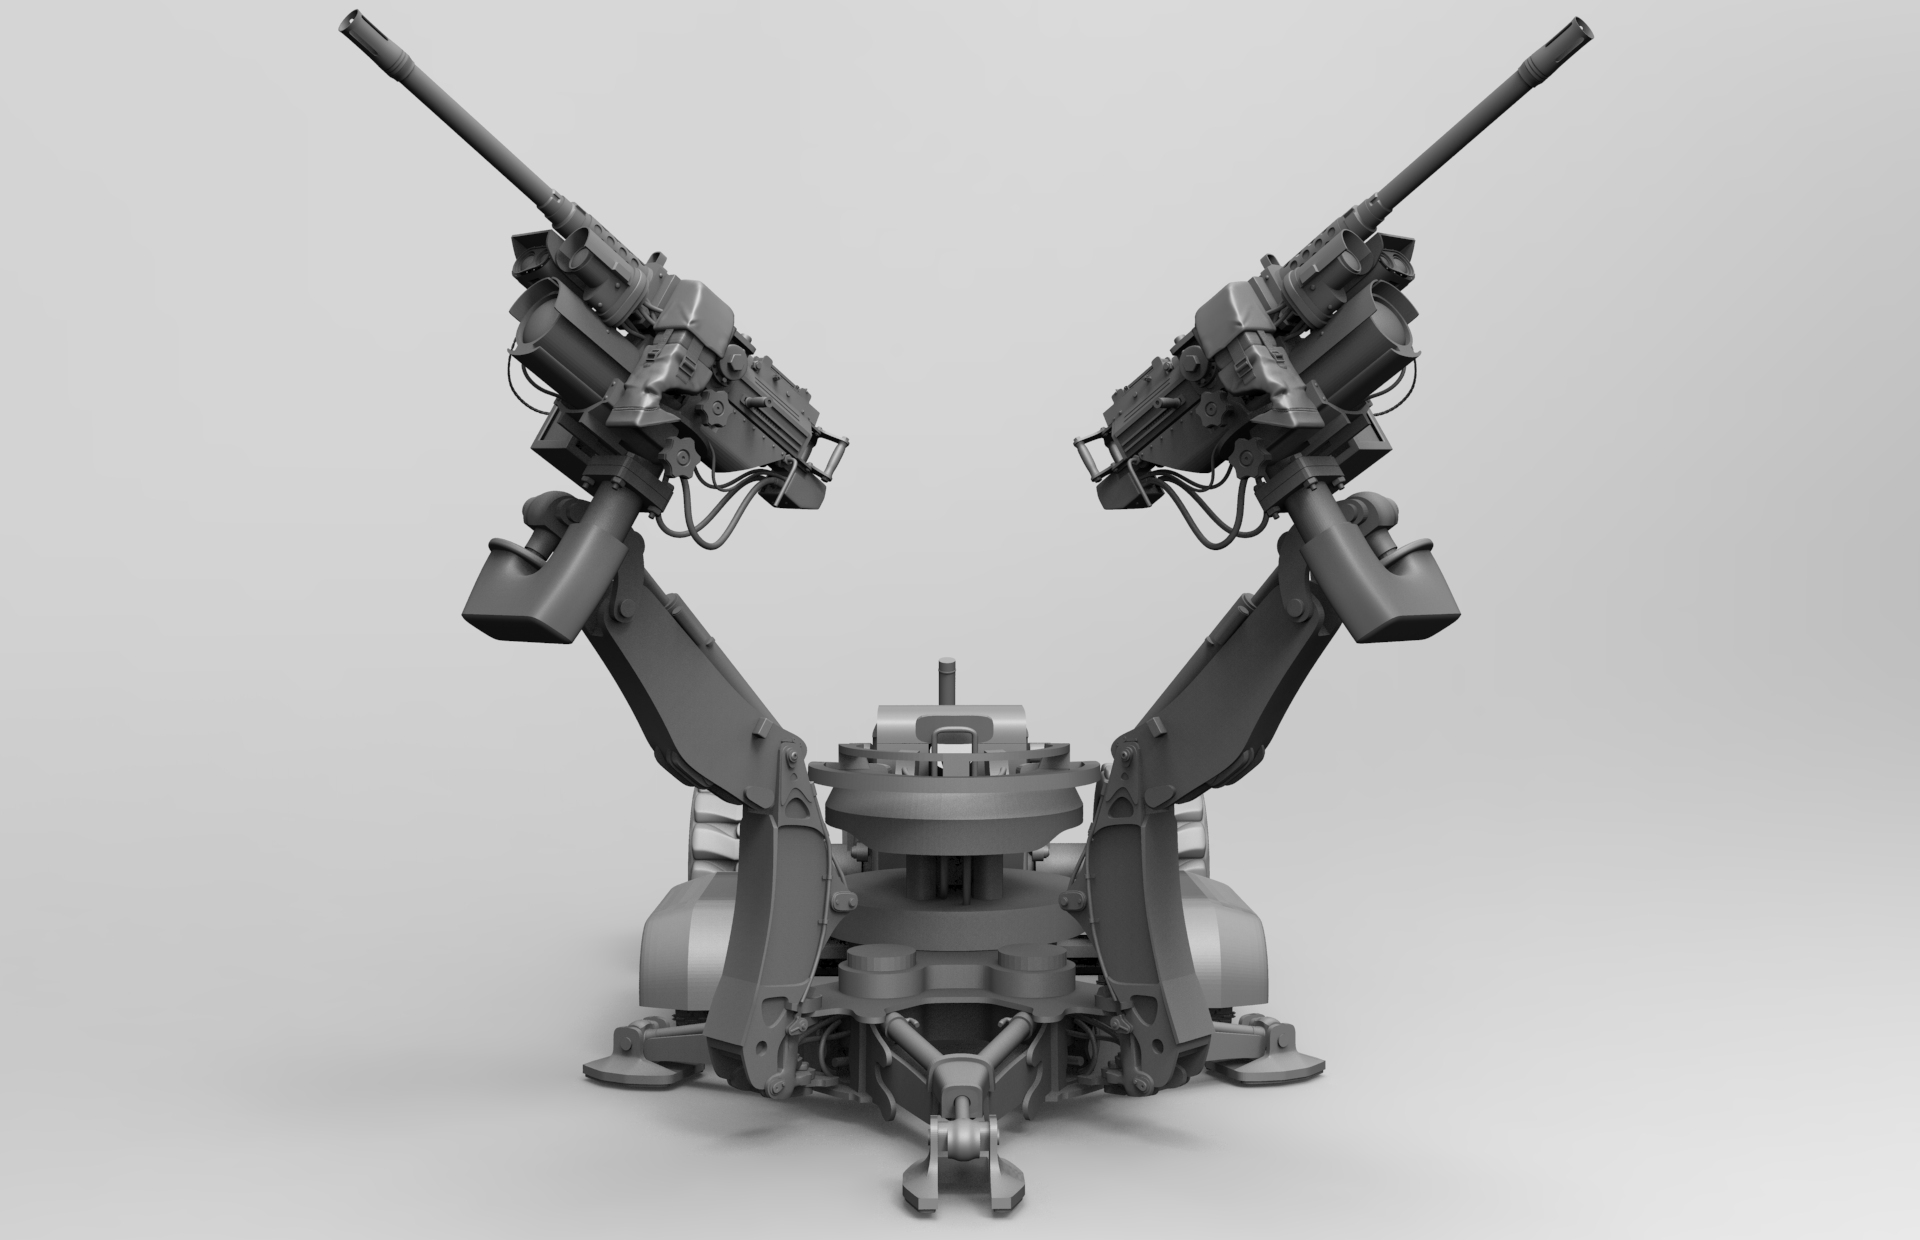
*edit: figured I’d try and throw at least some helpful info in here if I can think of any…the bullets here are just an insert curve tri brush, just strung them along; there’s a little stretching and warping on the curved areas but I wasn’t overly concerned about that, if I wanted to alleviate some of that I could play with the Brush > Max Bend Angle to ensure that it doesn’t bend too much.
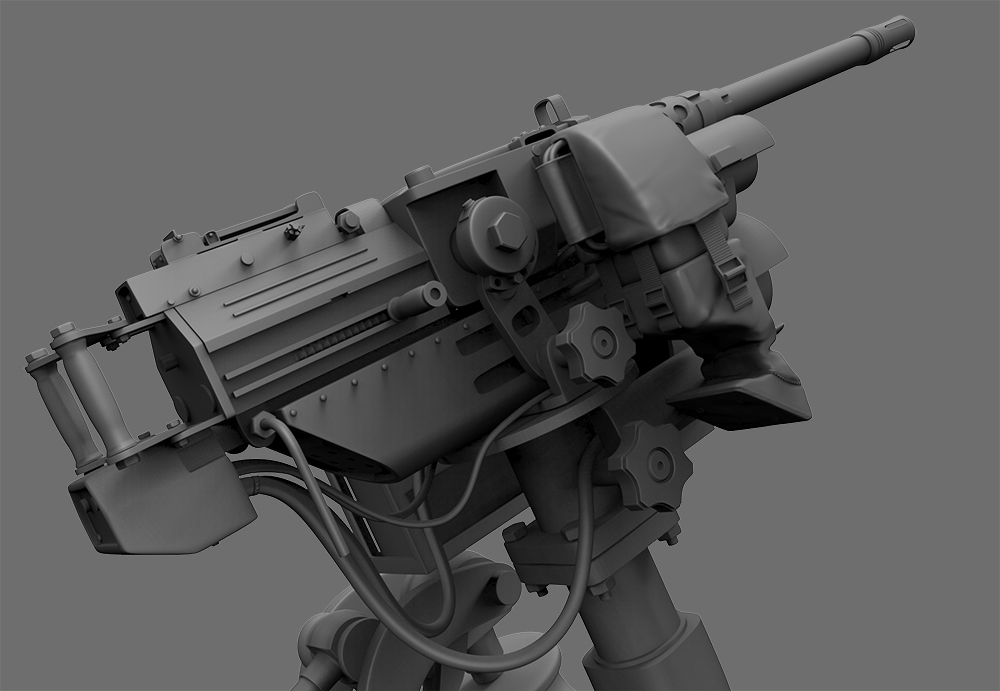
All the little stick-on stuff is just simple insert mesh objects, some of them were uniquely made with the ZModeler brush and added to a new custom insert mesh brush (put your object on screen, oriented toward the camera how you’d want to attach it to the object, hit “b” to bring up the big brush menu, at the bottom choose “create insert mesh”, then as you have more insert mesh objects oriented on your screen, you can hit “b” then choose “create insert mesh”, then choose “append” instead of new to have them all saved to the same brush, with variants being selectable using the “m” key with the brush selected)
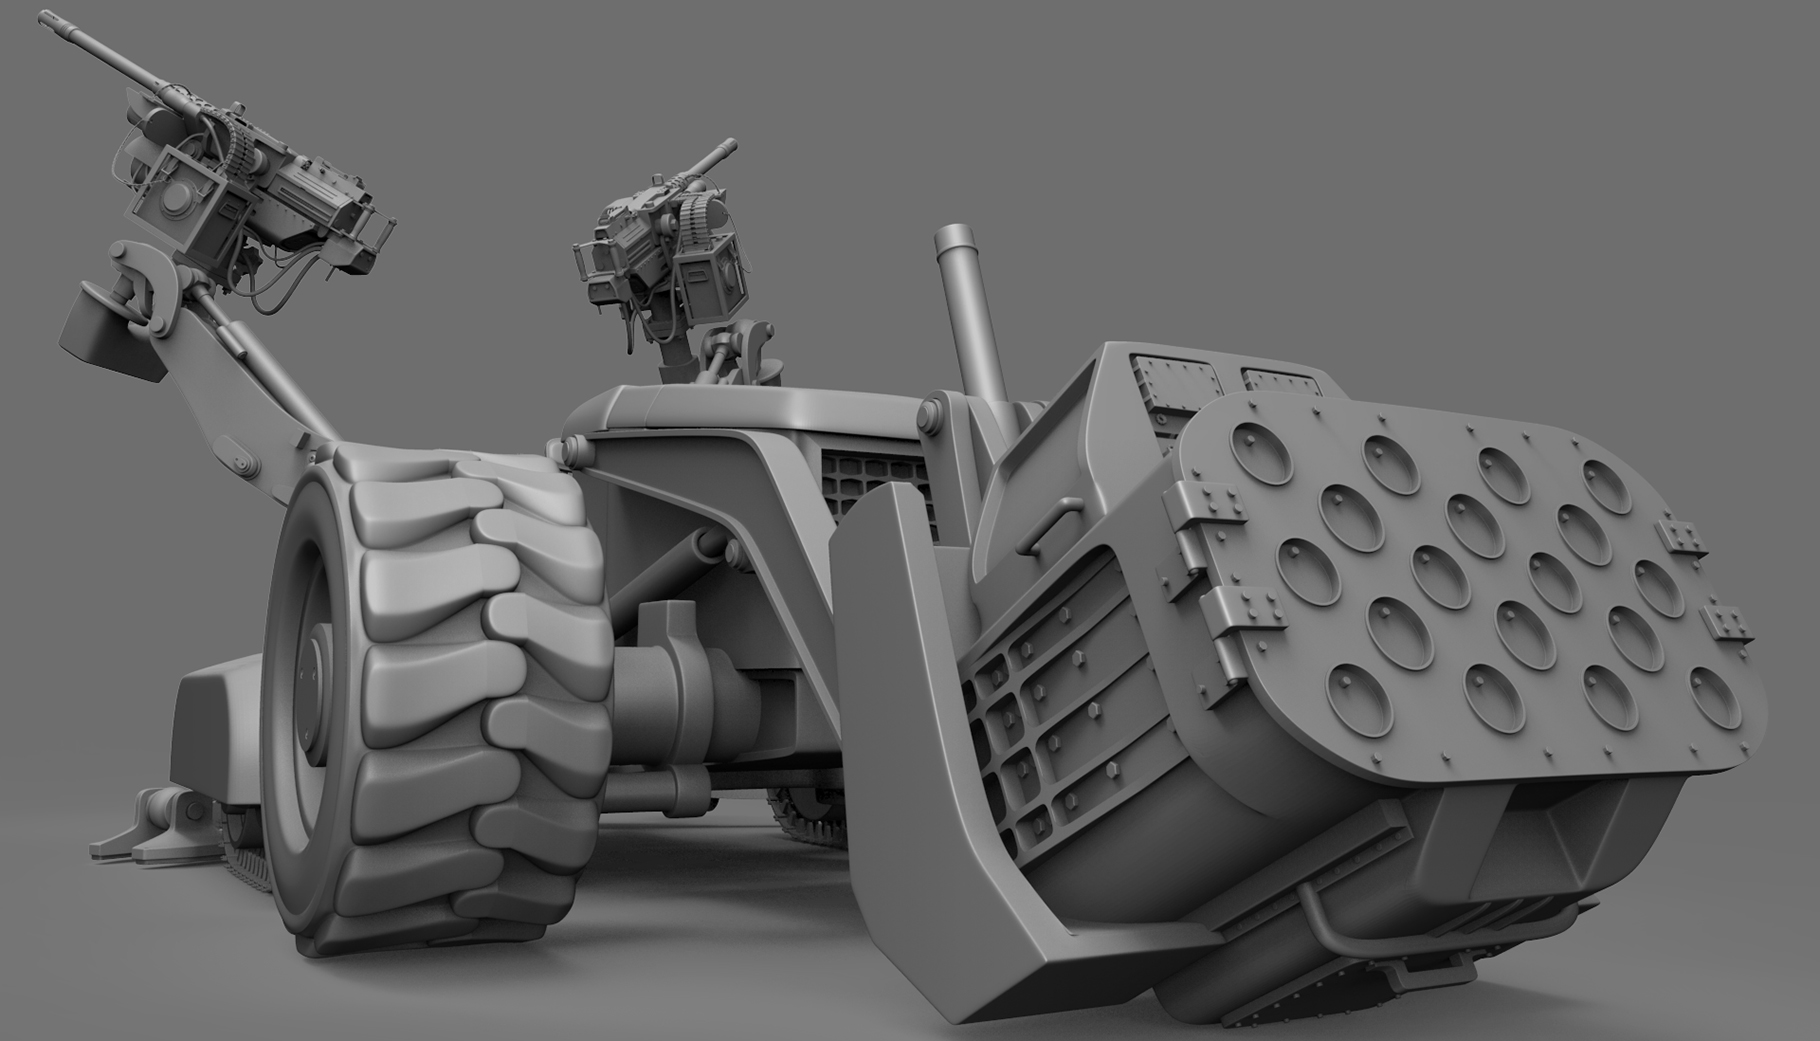
Or, you can hit “b”, then “i” to narrow it down to the default zbrush insert mesh brushes, and browse through their defaults; as you can see here I got a lot of use out of “IMM ind. parts” (even come with handy polygroups and creasing, great for dynamic subd’s under geometry > dynamic Subdiv > dynamic button > and move the Smooth Subdiv slider if needed; use d and shift+d to toggle between subdiv preview and your unsubdivided mesh)
Other than that…just normal ZModeler box modeling shenanigans.
Almost forgot! These little goobers were made in Zbrush as well, the guy himself is actually just ZSpheres, and hitting adaptive skin preview with a preview subdivide before rendering (made it easier to move and pose him around)