ZBrushCentral

Game Art : RAINBOW SIX VEGAS

Seb, your work is some of the cleanest and tightest I have seen at ZBC. You definitely know how to push the envelope for detail.
It’s just great to see how much control can be achieved in zbrush.
Thanks for sharing and congratulations on the release of the game.

j

i have been blown away by the amazing quality work u done for Vegas…
truely fantastic…:+1:

Beautiful Architecture stuff !!!

yopu really need to do a tutorial ;] You seem to be taking zbrush to a new level ;]

Wowwwwwww… :o

Beautiful faces…:+1:

Sebcesoir,

Great gear Seb! You’ve definately got skills that inspire.

~BW

Also more semi organic stuffs…

A spare of boots and more suprising, a full hemet, made in zbrush. Finally it was never used…

![boots.jpg|1100x953](upload://xz4RjtCJBnTDFkWZHleA3rkIbGc.jpeg)![helmet.jpg|744x480](upload://AhQLQpuJtrxrh6QSBs9q2xruefF.jpeg)

Attachments

boots.jpg

NO MORE WORDS --------GO - ON -------------- ZBrush

Oh gosh, how do you achieve such a result ?
Can you give us your tricks ?

These are so awsome.
I have some questions I hope you will answer, I know everybody wants to know your high poly workflow. I do too, But I really want to know how you get such crisp normal maps. Do you just use Zmapper? or are you using the Nvidia photoshop filter as well? Great work man, that jacket and those archetectual pieces are very inspiring!

Ok the archs I wont even ask how you did it. But you must be using a differnet method to an alpha. Then the shoes and the helmet sort confirm it. Because I never see any drop off on you geometry it would be hard to simply make these using projection master.
Off to the mind chalk board!!!

I think it can be done.

Right use of right alphas and lot of pinch and smooth brush, it can be done should I try one ? lols

I was talking about the helmet only

Here are my incomplete efforts

Last 3 hours I have tried learning hell lot, how to get that shape and tried many techniques, at the end understood which gives the best result. Though it is still not the same.

Now I even understand how to create armour and all directly on human zspheres as well. :wink:

I am still staring at that shoe, Seb you used bump material to create those fish net like details or simple noise increase for the brushes?

[]sunnyhelmet.jpg

I too would love to see how you’re modeling that gothic architecture in Zbrush. I assume this is for Assassins Creed.

Please post a tutorial/zscript it would be very much appreciated.

Actually you are following the steps I did for the jelmet…

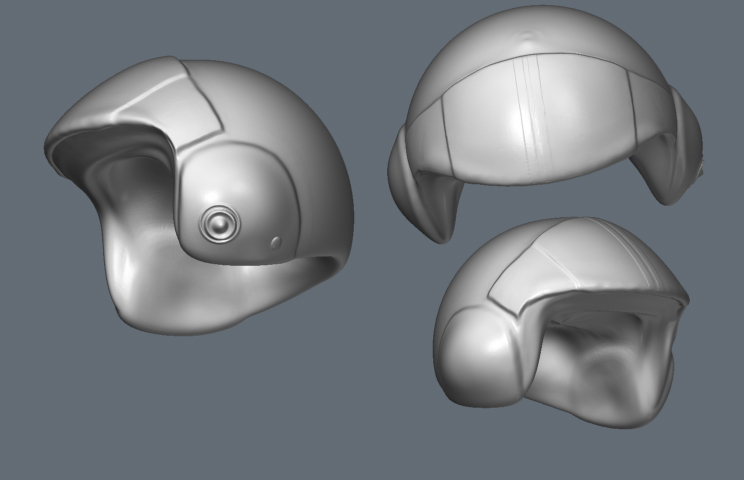
But wotk forst on the global shape of your helmet, your low res. Mive was build on a guy head, to be sure it fits.

Turn your helmet in every hangles, to be sure its rounded, here’s some good refs:

My low res had a helmet shape, with the goggles protector extruded.

I created some polygroups to hide/show specific areas. I also did some Creasings in some parts to maintain sharp areas when subdividing.

I use a lot the layer brush to have very clean lines.
You have to be patient and work slowly to maintain the better quality. I mostly use all the time the mouse average to have a smooth line flow.

Don’t forget you can mask the areas you dont want to sculpt, to concentrate more on other areas…

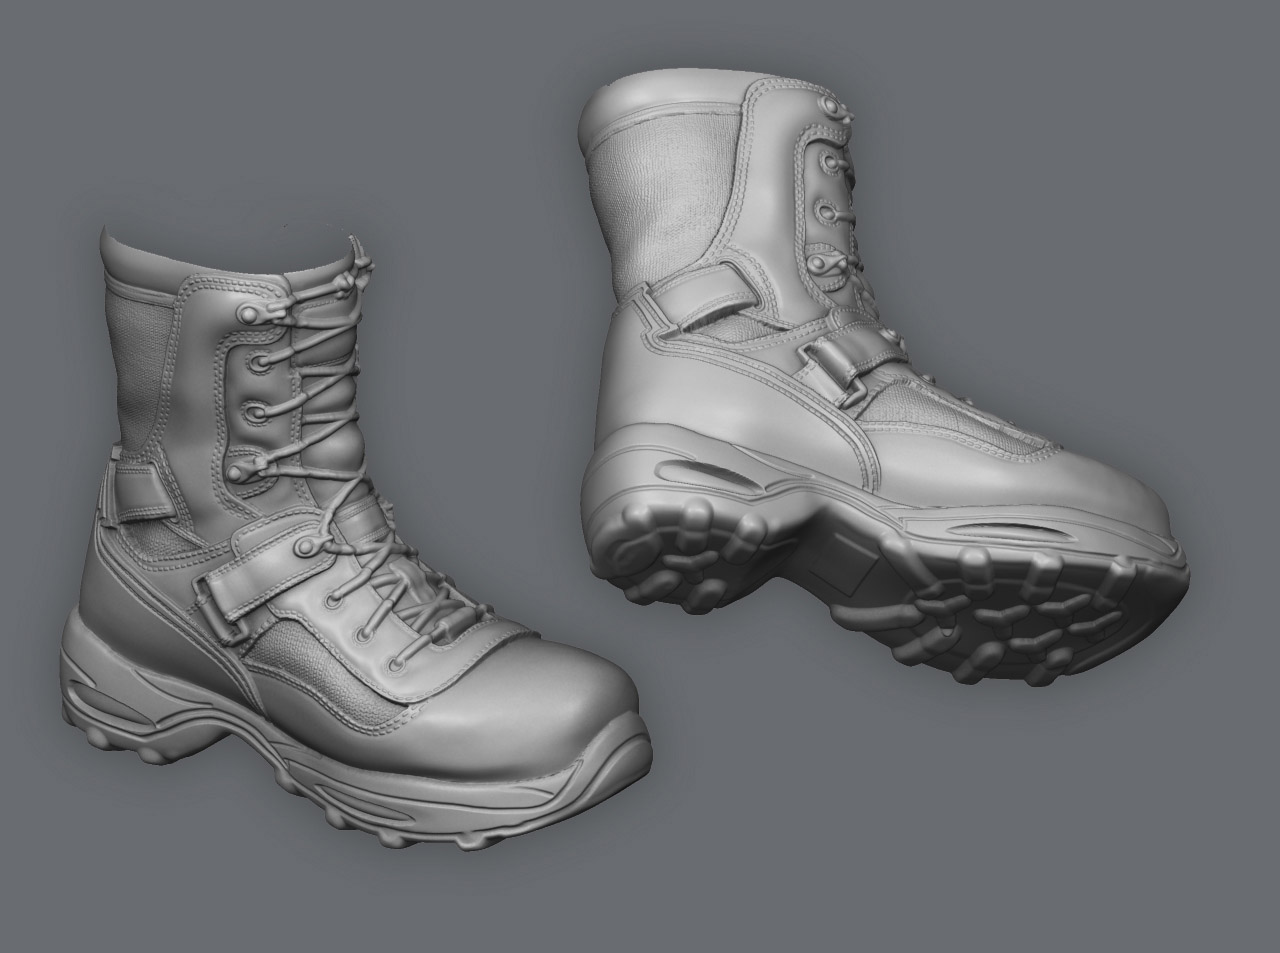
The shoes is not a bump shader. I got 1 gig of ram more (2gigs) so I could reach a high polycount on simple meshs like a shoes.

My low res mesh are EXTRELY simple, only a global shape, made of quads, nothing more.
Something like that:

But with more regular quads, I try to have the most squares possible on my low res, it makes a more homogen model, same details everywhere.

Sebcesoir,

The helmet and boots are stunning. Worth every minute spent on them.
Do you have any Zscripts I could watch to see you work? That would be nice.

PS congrats on the top row!
~BW

Hey MrMonster :wink:

I have only 2 video tutorial, pretty poor now…

a simple face sculpting (but nothing to learn for you in it)
http://sebleg.free.fr/2005/video/sleghsculpt.avi

A cooler one, for a terminator sculpt.
But its basic sculpting, nothing very advanced, and the model is pretty “has-been” now…

http://www.zbrushcentral.com/zbc/showthread.php?t=3464

Hi Sebcesoir,

Real nice work you have going there.

I’ve got a question for you. Do you guys have any problems with normal map seams ( zbrush extracted normal maps ), within the game?

If you do, what’s the work flow you guys have to fix that?

We’ve been getting visible seams on our game and it’s bloody frustrating, especially for hands. You can’t really hide the seams anywhere on bare hands.

Regards,

Mark Soon
Team Bondi
Sydney, Australia

Can’t remeber big issues with seams… Try to put Uv’s seams in a less visible area, and reduce the specular, spec always use to break on uvs seam areas…

Thanks Seb, that layer technique is going to help a lot.

Till now I wasn’t using a lot of masking and that is why I was not able to create proper details.

That helmet I sculpted out of a ploymesh sphere and that is why it isnt round lols :):lol:

I need to invest my time on getting better base meshes and then edgelooping, thats gonna help a lot I think.