ZBrushCentral

Finished Zplugin: ZQuickMask

One thought I thunk was…

an extra option to allow the tools that will create the stencil to also interact with the normals of the under layers may be nice and would allow further possibilities.

At the moment the default is all tools pull out straight on to the canvas.

Just a thought.

Here’s another thank you from the little Princess that lives in my shoe - whom is also quite delighted with your plugin.

thanks_marcus.jpg

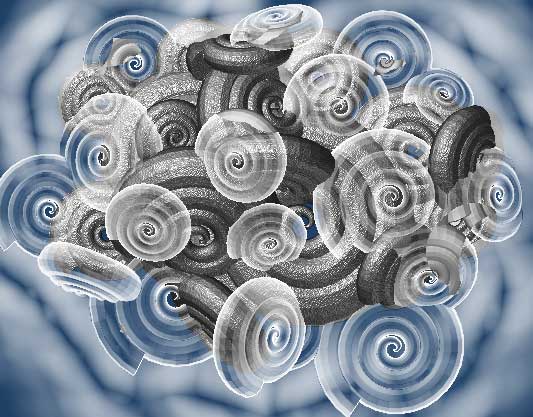
She thinks creating some lovely Batik effects next would be a fun way to use your plugin.

Regards

Boozy,

Wonderful picture! Many thanks. :slight_smile: I really love your original and imaginative style.

This is possible without difficulty:

  1. Press the ZQuickMask button to create the mask layer.

  2. In the layers palette, click the Displace Z slider and enter 4096 (push the slider all the way to the RIGHT).

Now you will be able to draw 3D objects on the mask layer which will interact with the pixols on other layers.

ZQuickMask works by creating a transparent 3DPlane and placing it in front of everything else on the canvas (at -4096 ZDepth). This is how you can draw a flat mask. By moving the mask layer backwards in ZDepth (positive values in the slider), the other pixols will poke through the plane and new drawn objects will interact.

Hope this helps,

Pilou

This is possible without difficulty:

Music to my tiny ears.
Once again many thanks indeed.

Pilou :smiley:

"ZQuickMask works by creating a transparent 3DPlane and placing it in front of everything else on the canvas "

Marcus would it be difficult to create a plugin that would easily allow photoshop style layer paintings (using for example the simple brush) by creating temporary transparent under layers at key z distances for each layer added?

Am I making sense?

This would be a great addition.

would it be difficult to create a plugin that would easily allow photoshop style layer paintings (using for example the simple brush) by creating temporary transparent under layers at key z distances for each layer added?

Am I making sense?

This would be a great addition.

Perfect sense.

I’ve thought of this and I’m working on it. There are drawbacks but it’s not difficult. Would you test out my efforts before I launch my next baby on an unsuspecting world? :slight_smile:

Fantastic news.
Very exciting.

Ofcoarse I’d be delighted to test it.
Send a pm when your ready.

Great, OK, will do.

ZQuickMask works by creating a transparent 3DPlane and placing it in front of everything else on the canvas (at -4096 ZDepth). This is how you can draw a flat mask. By moving the mask layer backwards in ZDepth (positive values in the slider), the other pixols will poke through the plane and new drawn objects will interact.

Ah! that is how it works. Perhaps you could add a shortcut button that you could press and read a point on the canvas to set the Zdepth for the mask using PixolLook. That way you could control which portions of the canvas to interact with, much like the Fog sliders.

That’s a great idea, thanks Digits! It would be very useful as a starting point for shifting a layer back and forth. You can actually cycle layers 16 times forwards or backwards before they loop (16 x 4096). Not sure exactly how that relates to Z depth.

[EDIT: now I am. Never looked closely at Z in PixolPick before. Because of the layers I’d always assumed that ZDepth ended at -4096. I see it doesn’t. It’s -32576. At least, according to the command reference, though 8*4096 is 32768. :slight_smile:

Certainly fog-like effects are possible, though more than one layer can cause problems of visibility/transparency. I’m still playing with that…

Attachments

fogshells.jpg

Thank you very much . This is very usefull.

The mask is [...] with no [...] soft edges

Marcus, I tried it out and am eager to use the plugin, though if it is restricted to creating clip map style masks Ill have to pass on it. Im surely misunderstanding the usage here: there has to be a way of making antialiased and gradient-edged stencils with your plugin, hasnt there? Otherwise youll end up with texture and mesh jaggies, no?

Cheers,

R

geccko,
Thanks, I’m glad you find the plugin useful.

Rory_L,
The plugin is designed for 2.5D work rather than masking 3D models. You can mask models in the way you want by using alphas, painting with Ctrl pressed, and so on. Having said that I do intend to update the plugin at some point and will certain improve it in the way you suggest, if it’s possible.

Cheers,

Thanks, Marcus: I`ll keep an eye out for updates!

Cheers,

Rory (gift-horse dentist)

great tool!!

Hey Marcus,

so I tried my hand using this, but I realized I wanted to work on my masks as textures so I could use projection master, zmapper, stencils, masks etc while I fine tuned my masks. great for doing texture work. I wrote the script as a toggle, but of course, I’m getting a syntax error. I’ve tried everything I could think of, but perhaps someone else interested in something like this might have some ideas what I’m doing wrong?

-b

Hi spiraloid,

I’m a little unsure what you want your script to do. As far as I can see the second part sets a mask based on color intensity and then converts a texture back to polypainting. This means that any areas you have masked won’t get the color from the texture.

I edited the script so that the first press converts any polypainting to a texture then clears the polypainting. The next press then clears the mask and restores the polypainting. Any masking you do would have to be applied - and used - between button presses.

HTH,

Hey marcus, thanks for taking a look!

so the goal of the script is to be able to press it a thousand times without creating thousands of 2048 textures. I want to keep all of my colors as vertex color so I can use symmetry, smooth etc. I’m trying to use the texture as a “clipboard” for the final color while I paint a new greyscale vertex color that I can turn back into a mask to use on the original vertex colors.

all this is because I want to use the masking tools to edit my masks.

(if you’ve ever used the q key in photoshop, this is what I’m trying to make)

I’ve got it close, but I’m a little confused about the next step. I have a mask, and now I want to reload the original colors as vertex colors on the whole object so I can use the mask to edit them. whenever I do this, the mask is active. so the conversion filters through the mask. is there a way to temporarily deactivate the mask so I can Txr>Col for the whole object and not use the mask?

-b

the pseudo code looks like:

//if quickmask state off

// save current tools vertex color to clipboard texture and hide it.

// clear object color to white, set brush color to black.

// set quickmask state on.

//else

// create a mask using current color intensity

// deactivate mask.

// recall clipboard texture and convert back to vertex color for whole object.

// activate mask.

// set quickmask state off.

//end

-b

here’s the pseudo code expanded to what I could figure out. it doesn’t run because I think I’m miss casting data types, typos, etc.

I can’t for the life of me figure out how to to keep the mask around but not active. I guess I can make an alpha, but then I’d be accumulating alphas each time I run it. so, fail. hmmm. this makes me feel like an idiot. perhaps zbrush can’t do this unless I write my own texture manager in zcripts. but since I’m allocating memory etc in the “scripting” language, maybe I should just write it in c++, jeez. who’da thought making a temporary mask editing mode would be so involved. I’m sure I’m missing something. suggestions, welcome.

-b