ZBrushCentral

Displacement Map Artifacts!

It’s Me again…
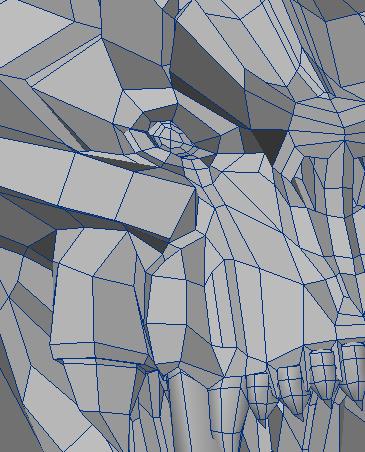
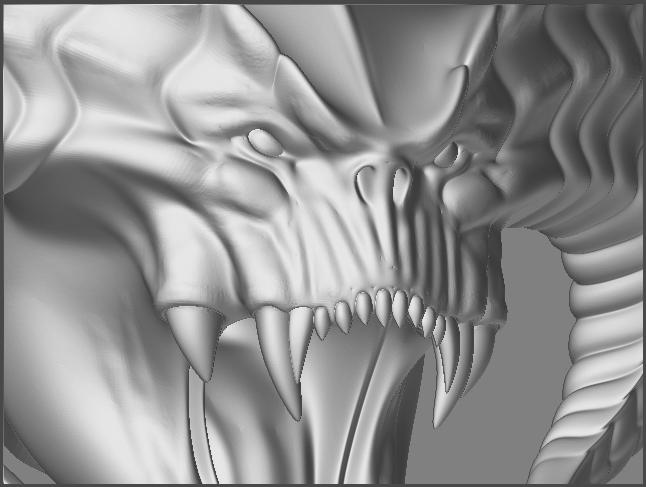
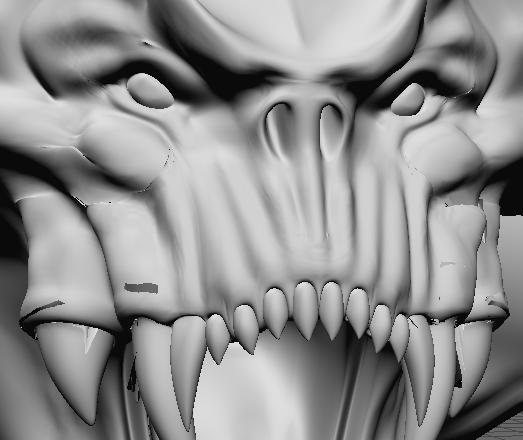
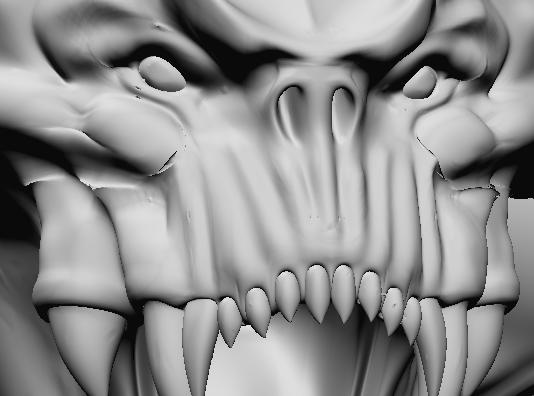
I’ve modeled the Balrog of The Lord Of The Rings in LightWave
Smooth.JPG

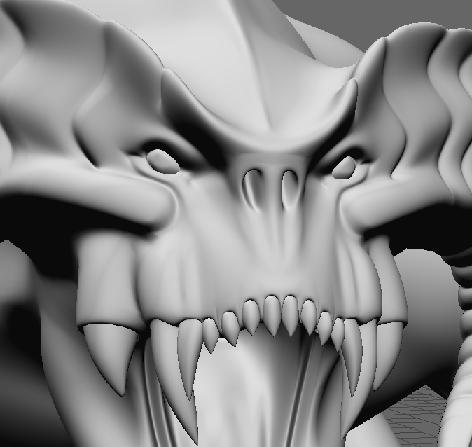
The mesh is no triangles, only quads, the max subdiv level i went was 5 and the mesh reached over 2.800.000 polys.

Do you think there are some incorrect topology in the mesh? can you see it in the cage picture?
I checked the UVs, I think that if the seams are all black it means that the UVs are OK, isn’t it?

thanks

Attachments

Cage.JPG

Details.JPG

Art1.JPG

Art2.JPG

have you tried the Displacement Exporter instead of messing with the alpha settings in lw or ps use that to set them for your lw needs and see if it works any better. It looks to me like you might be missing something in lw but I don’t use it so can’t help ya out there but am sure a search here might turn something up.

You can see the link to the displacement exporter at the top of your screen…top row. Check out the thread as someone might have posted a quick code already for use in lightwave, if not read the pdf that comes with it for how to use it.

Thanks for answering…
After eliminating a bad point that was lowering the disp map values I succeded to generate a no more grey map.
This time I didn’t have to input high displacement values to make the details show out, but the artifact still remains!

No antialiasing, neither pixel blending, nor MIPMAP were used.
I didn’t use Photoshop to edit the map and there are no alpha settings in lightwave.
I’ll try that displacement exporter even if I think It’s a matter of mesh topology.
Suggestions are welcome.

I’ll reply soon…

I’ve used the the multidisplacement and the DExporter with these settings:
DE_Settings.JPG

The artifact is still there. At this point I have to think that the problem is the topology of the mesh in that zone.
In the post above I wrote that there was an offset point in the morph target, located on the tail of the character. Maybe there are some other offset points on the face that I can’t see…Is it possible to replace the base mesh with the original mesh without loosing the sculpting?

yes as long as the point order has not been changed or any additions to poly count haven’t been made (to base level 1 mesh that is)

go to level one and reimport the original base mesh.

if you feel unsure…clone your model first before ya try it.

[color=black]Thanx a lot…you killed a great doubt to me!

I’m planning to make multidisplacement and multi texturing but reading the posts by Skycastle and looking at the Lord Of Darkness tutorial I got a Great bit confused!

If you don’t want to answer me by words, please do it by pointing a thread that would answer for you, or even suggesting me the right people to ask in the forum, cause I have many questions about that workflow.

  1. Those ones who do that way, they all do UVs manually in maya in order to make multi UVs objects, while I use Lightwave and my character is very detailed itself and also difficult to map in UVs manually so I wanted to use the ZB GUV Tiles.

  2. I read that the new Multi displacement 2 does export 32 float maps, so you don’t have to worry about scaling the alpha depth factor, but if I’d like to work the way KTyler did in his tutorial (do you remeber?), I have to leave a buffer zone to avoid artifacts, and if I want to continue painting on the adiacent portion of the model I have to apply the disp map that I painted over the seam in the previous session and continue the work, so I need to know which intensity has to be the map set up (which corresponds to the alpha depth factor) in order to avoid seams artifacts at render time.

What a mess!!!

Wish I could help ya. I can’t think of any lightwave oriented info off the top of my head and going thru my zillion links I couldn’t find any that would answer your problems.

You might want to take a look at the Making of the Lord of Darkness thread over at cgtalk. I believe I posted the link to it in the DE thread in this forum for ktaylor. I don’t think he used LW but he was very thorough in explaining his bumps in the road and how he ran em over or went around them and maybe something there will give you some ideas.

I read the LoD tutorial and i found a way to use multiple UVs even if LightWave can’t handle them.
Thanks anyway!