Glad ya like em Spaceman, hope ya can use em. Had some fun playing with them that’s for sure. oh yeah…forget which one it was now…maybe 02 plays nice with very soft colors too!
Well I had several cool ones that are derivatives of mine. I liked this one. Still have to find time to provide Spaceman with what he wants. 
Attachments
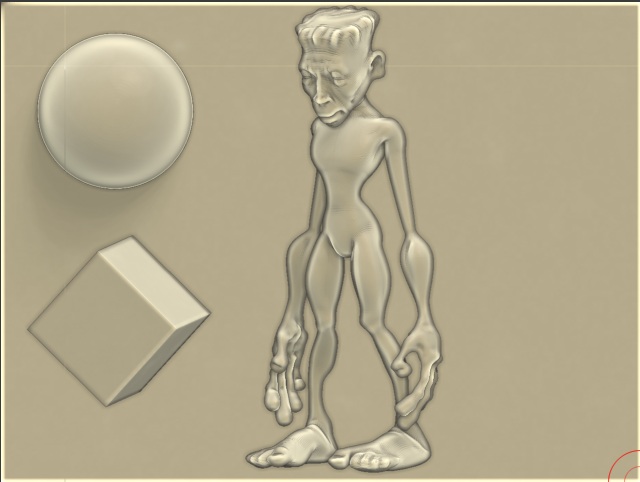
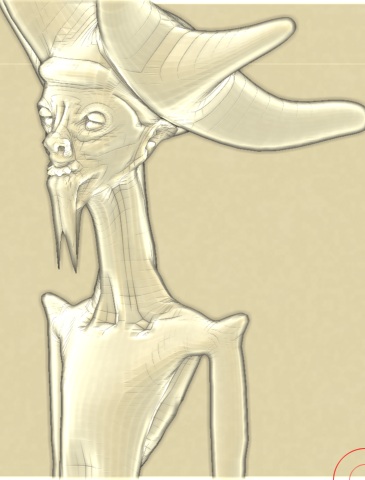
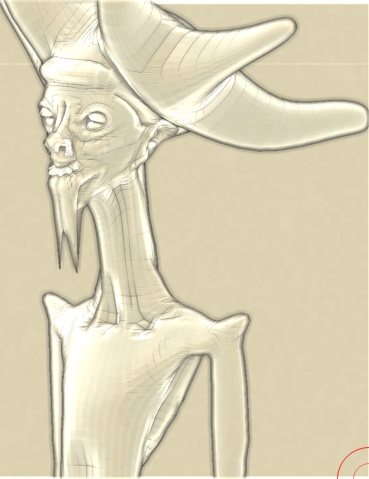
Cool stuff Spaceman. I have been playing with a ZMaterial, on and off, for a long time. This thread gave me the impetus I needed to complete it, at least to my liking, so thanks  Have a look and tell me what you think. I prefer the slightly thicker outline around the model but you can easily switch to a thinner outline.
[attach=23117]Zsketching2.jpg[/attach]

I have attached the ZMaterial below but there are some basic requirements and restrictions with this material.
How to use :
1) Load the material and fill the canvas with it, Ctrl + F, ensuring Zadd and M/MRGB are enabled beforehand.
2) Switch to Render > Fast mode before placing your models as the material makes them difficult to view in Render > Preview mode.
3) Place your models with the material assigned.
4) Turn off Render > Shadows and do your Best Renders and tweak.
 The material does not contain any modifiers that recieve light, so remember to render without Render > Shadows turned on. It will just take longer to render otherwise and the result will be the same as without.
Fill your canvas with this material before placing your models. You can of course also use the Plane3D tool to fill the canvas after you have placed the models but in any case this material is required to cover a certain area behind each model you want to sketch. That might also be why you could not succesfully combine 50’s and Jason’s materials?
The material will not work with vertex coloring so turn Tool > Texture > Colorize off.
How to tweak :
The Material consists of 2 channels, an Incidence Angle shader in S1 and a Basic Material in S2.
 To change the Outline and Fill color adjust the first and second color selector of S1.
The inner shading color is controlled by the Cavity color modifier in S2.
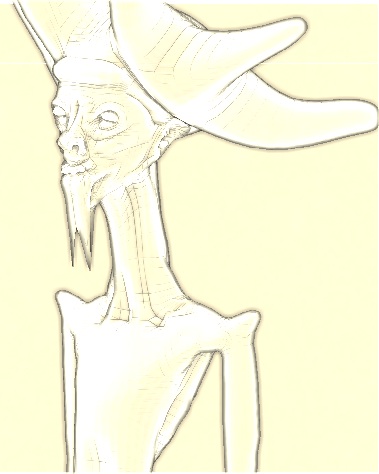
To make the outline thickness thinner try enabling Render > SoftZ first. You can also adjust the Cavity Radius in S2 to 0. If that is not enough you can reduce Render > Antialiasing > Blur. This will however increase the inner shading.
The inner shading is controlled by many things but mainly the Cavity modifiers. Generally you can increase the cavity settings in S2 to create stronger shading. But remember there are no light recieving modifiers enabled so the Cavity Diffuse and Cavity Specular modifiers will have no effect.
The S2 Noise and Noise Radius control how the inner shading disperses.
Remember to also adjust the Render > Antialiasing subpalette. This affects everything from the outline thickness to the shading. Don’t be afraid to increase Super Sampling now and then, just to see how things turn out in best render (Note: for some reason adjusting the Render > Antialiasing subpalette does not result in an instant rerender of the scene (when in Best Render mode), instead you must press Render > Render to update (or Ctrl + Shift + R))
If you are creating a scene with this material then remember to have multiple material slots loaded with this material. It does not suit all models and like all ZMaterials will probably need fine tuning all according to the models shape and size on the canvas.
Thanks again 50’s Kid, Jason, Fouad B., Jaycephus, Aminuts and SpaceMan for the inspiration.
Attachments

Excellent! Wow, great thread…
Interesting stuff

Attachments

Another material that gave interesting results

OMG TVeyes your examples are awsome!!!
Kircho
yeah Tveyes…glad ya got inspired…very cool can’t wait to play with it!! Imagine what ya coulda done if Meats brought back a couple!
Hi TvEyes ! I’m glad to see you my friend (Frrrrouad ??!! grrrr ) 
I like your models especially the colored one (I know it’s not the goal of this interesting thread …).
nice samples and search all
Heya TVeyes, thanx 4 sharing your zmt… My example shows, how I change
the results with different blend-curve positions only … awsome, mate

Very cool!
Attachments
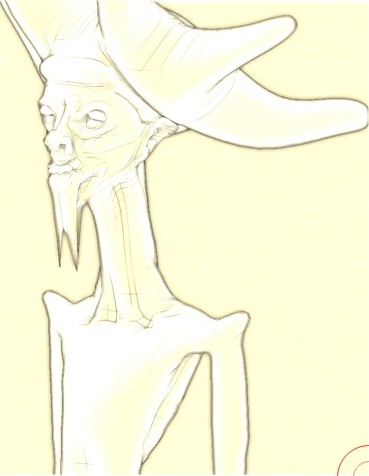
the mystic looks really beautiful in this render, I love it.
As always inspiring work, Arturo
thinking on the mystic, It copuld be wonderfull to paint ti on photoshop like water colors.
Arturo
Thanks Kircho, Abyssis and Fouad B. with no R. Cheers Aminuts, it took me a while to figure out what you were talking about  Looking forward to seing what you come up with.
Abyssis, earlier I was going to write not to adjust the Blend Curve in S1. I find it fits perfectly right now. To get more pronounced inner shading you should adjust the cavity settings, especially the Cavity Radius in S2. And don’t forget to do a Best Render 
Looks very cool Sebcesoir, especially the Mystic. Which material did you use? Just so we can get a better picture of the pros and cons of the materials in this thread.
Same Hard Outline material as before. Only change is in S2: Noise modifier at 0, Cavity Intensity at 3.28, Cavity Radius at -7 and Cavity Colorize at 89. I also set Render > Antialiasing > Sample Size to 2. The model is the one supplied with the ZMapper plugin.

Just what I was looking for the robot i’m doing actually… I will have some mixing to do in photoshop indeed…

excellent thread seem s like Zbrush has infinite
possibilities on rendering to make the figures seem real drawings 
aminuts
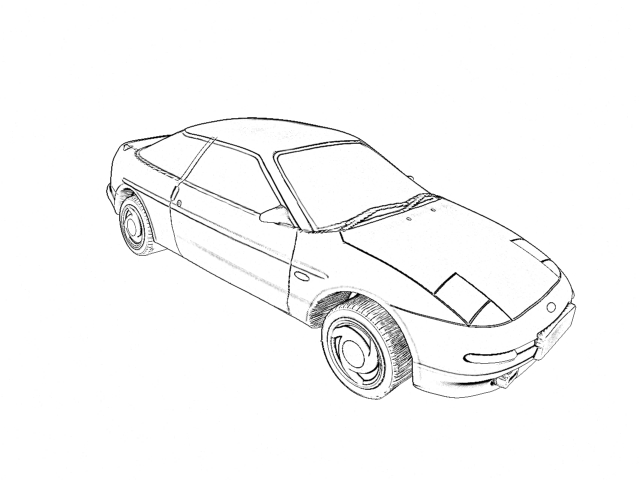
Here are some images using your shaders thanks for posting them
Jason
I like the use of the color with white highlights and the black lines
TV Eyes
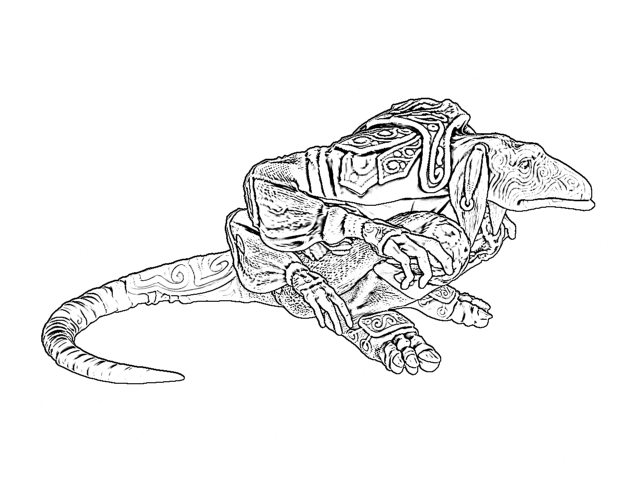
Thanks for the material/shader and the how to use guide . I like both the b/w and the color with paper texture
Here is an image using your material/shader as is.
Blaine91555
cool images and thanks for the tip
[font=Times New Roman][font=Times New Roman]Sebcesoir
Both images look good - from the tech to the imagination I like mystic thanks for posting them
Attachments


OK Spaceman…
Here is the modded shader, just alter the occlusion in the fourth part of the shader, sorta like exposure. All the other commands are in this one, to get most of the effects I have done past and present. Enjoy.
I like everybody’s stuff so far. It’s nice to see a variant of my old thread reborn.
Note: I have been doing these in 50s cool file supplied earlier in the thread by Spaceman.
Attachments
Thanks Jason
ok I see in the material s1 the two colors - how do you get colors there?
Attachments

Click on the colour patch and keep the mouse button down and drag to the colour palette and let go. This should put the colour in.
Also increasing the blend adds color, decreasing removes it.
Glad you like.