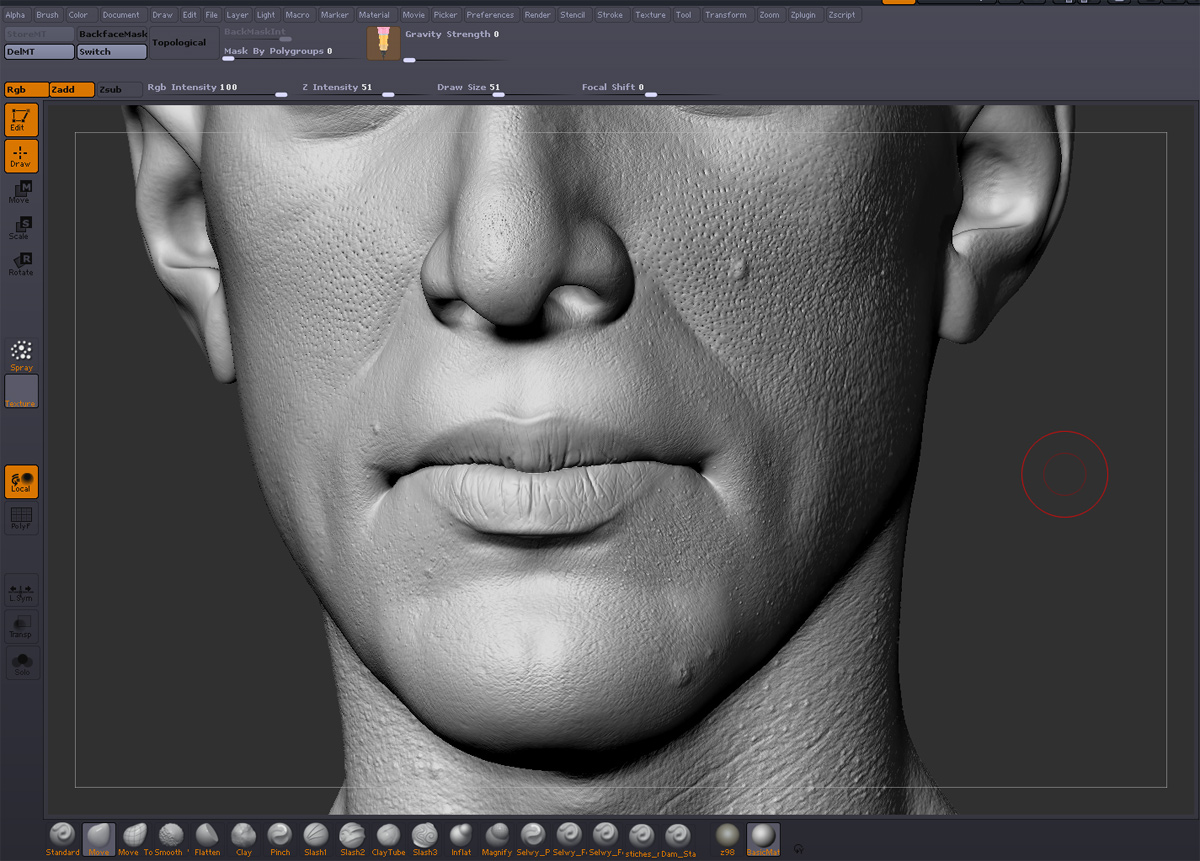
I am missing a step or a method between 4 and 5. After I GroupLoops, how do I hide the outer shell? Using GroupLoops seems to deselect any part of my mesh. Is there a way to select by poly group?
icaba1:Thanks
LOad:Thanks,looking forward to see your result:)
Etcher:thanks,you are welcome
BlueAppleStudio:if u press shift+F , you could see the poly groups then crtl+click on them to hide the part of the mesh.hope it helps,if you have a problem ask me again.
HOLY SMOKE!!! 3mm, your a life saver (well not exactly LIFE, but most certainly a ZBrush saver- ). I have been attempting to do the same for nearly a year now and just could not get the information I needed until now. See this original post by me titled “How the heck?”:
http://www.zbrushcentral.com/showthread.php?t=95181&page=17&pp=15
Thanks a million 3mm… thanks a million.
Best.
3mm- Thanks for this. I had no idea you could hide by poly group. This is very useful.
Great Tutorial! Thanks for sharing. That’s exactly what I were looking for right now 
Don’t you think it’s easier to mask by alpha and use mesh extraction?
Hi Mohammed
very inspirational work , your akuman model is my favourite.
I was wondering if you could share what size maps you used and what different maps you used. I would also appreciate if you shared your render techniques and settings.
thank you keep up the amazing work!
Dragon:you are welcome mate,glad you’ve find this useful
J.B.G:you are welcome,very appreciated
jramauri:the quality of Subtool extraction is not that accurate comparing to this but maybe extracting working too:)
iamlegion:thx man,the akuman project is an old project but i remember some of my map sizes,for head i used a 2k and for body a 4 k,and use color-subdermal,epidermal,normal maps,disp,spec i use new techniques and new render after that(currently using Vray).i will work on mini tuts on my rendering lighting for sure but i have to figure out vray setting first for myself LOl,
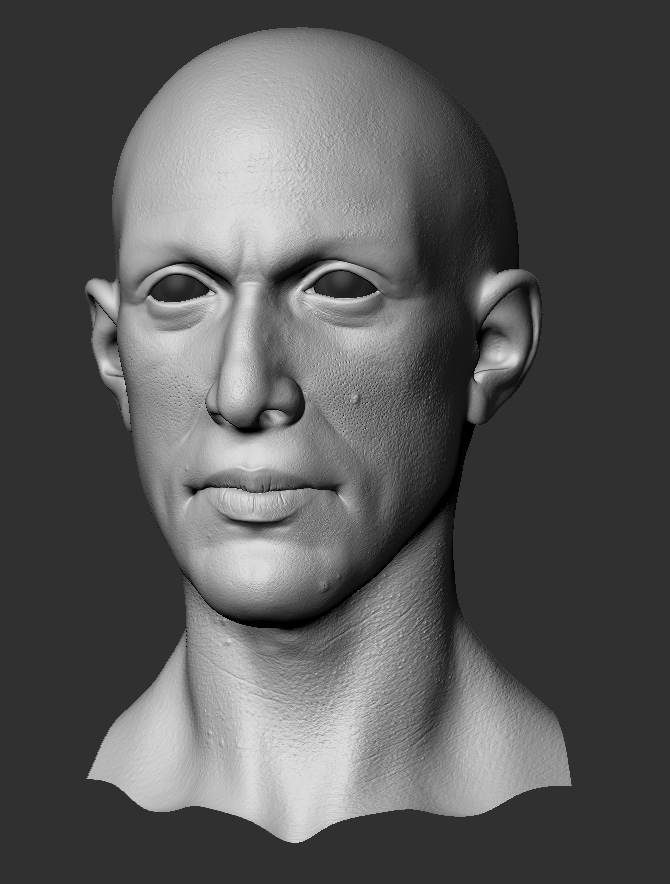
ok i’ve worked on his face details and change the head proportion a bit also reworked on boots details,probably my last update before going to resurface it for low poly version and add hair’s place holder.(and create his saber)
comments and critiques are mostly welcome
[d_nihl_thumbzb1.jpg[/ATT]%3Cbr%20/%3E%0A%3C/font%3E"] ](http://%3Cfont%20color=%22#9a9a9a%22%3E[ATT=263944)
Attachments


Hi Mohammad!
Great technique with alphas!!!small_orange_diamondsmall_orange_diamond
Cristian Rio:Thanks Chris,love your works,glad you like the tut:D
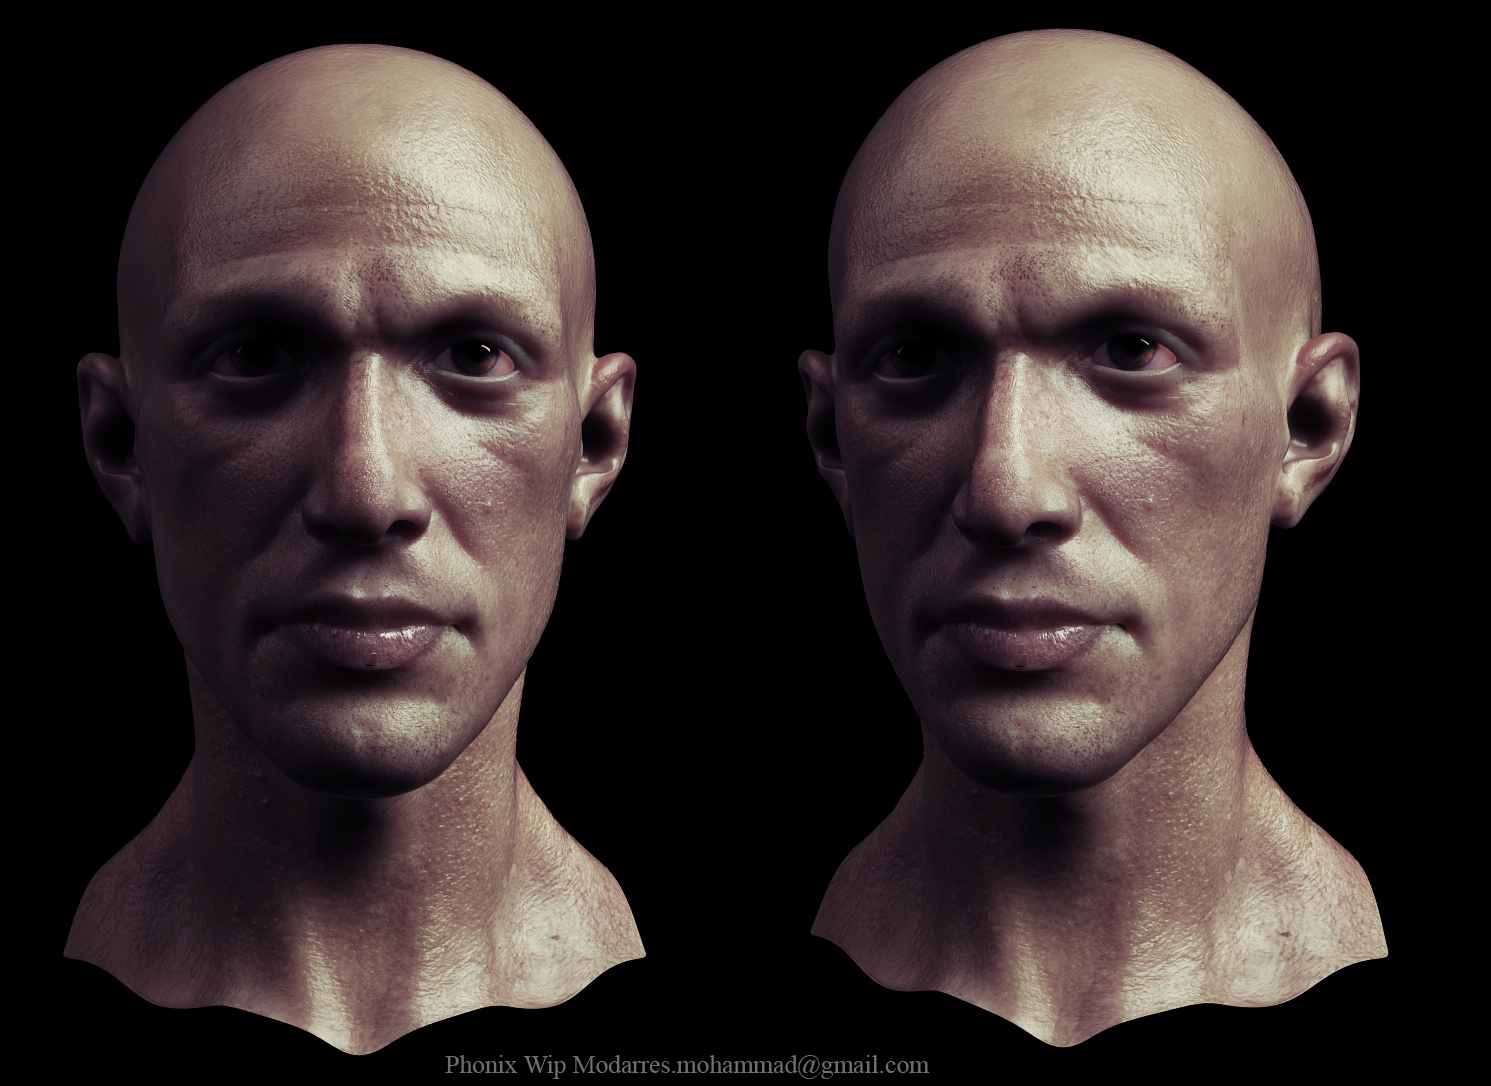
ok i started this bust to testing and learning Mari,the Mari part is the first projection(honestly this software is great),then working on texture on ps and Body paint,and my first real try to test skin shader with vray2,still many thing need to be fixed.
[ph_thumb_zb.jpg[/ATT]%3Cbr%20/%3E%0A%3C/font%3E"] ](http://%3Cfont%20color=%22#9a9a9a%22%3E[ATT=265773)
Attachments

great job. You might want to tone the specularity and reflections down a little. What are the key benefits of using Mari over zbrush polypainting? Thanks
Great detailing:)
Love the second lighter skin render.
His cranium mass seems to be too small -but the more you look at people from observation you see that the eyes in the middle of the head is indeed just a guide line…many people have their eyes above the center of the head.
Keep it up.
Eiad:thanks,yeah i agree with you about specular and reflection,as for mari i think it’s not comparable to poly painting in zbrush,mari use projection and could handle over 30k textures on a model and very good in projecting.
Tazn:thanks
Lucky_1:thanks man,yeah i agree about the proportion issues and have corrected some of them in my new update,thanks ,love your works so much:D
here is new update,working on displacement ,shader and render more:
[ph_thumb_zb1.jpg[/ATT]%3Cbr%20/%3E%0A%3Cbr%20/%3E%0A%3C/font%3E"] ](http://%3Cfont%20color=%22#9a9a9a%22%3E[ATT=266436)
Attachments

I would look again at the division of his lips.
This is terrific.
now his looking more real.
Mari> what are the maps you’ve exported from mari? Only color? or other maps as well? can you share snapshots of those maps?
Thanks for sharing
the eyes seem to be gloowing, the sss is way too strong ;] But good work so far
Framedworld:yes,you are right i will work on that.
EricShawn:Thanks so much
Eiad:i’ve just exported the color map and wok on it in Photoshop,i will post the color screen shot of texture
slocik:thanks,yes still not satisfied with the eyes
actually i did this while ago(real first test with Zbrush R2),i hope to find a time to finish it.

it been a Long time since my last post,many things have happened in last two month,but i still try to ,this is a Sketch that i started last night and my intention was to study more on posed Model and using Dynamesh without any symmetry,i have learned so much things after attending Anatomy and Ecorche Class At academy of art,so in upcoming Sketches i try to Incorporate more of my new lessons:)
still is wip and i will post the Timelaps video tonight:) hope yo like it.
