ZBrushCentral

3.1 Displacements Are Still Broke

THANK YOU E

I was trying to apply a tiff or psd file to my displacement map on standard materials in Max 9 using ZBrush 3.0 and was only getting insane hair like geometry displacement.

I had been following tutorials in the help menu, wiki and on the forums for a week now. I’m new to CG and was getting a little upset with myself. Once I read this and tried using the steps the displace modifier works great! Thank you so much!

My only problems were with units…Does Zbrush use International units?
To convert tris and quads its just one more point per poly so I replace 3 with a 4 in the formula?

I’m going to be reading tutorials and such so the main point of this post was to thank E for telling me to use dispalce modifier not to ask questions.

Thanks everyone!
ttyl
MB

I used your steps and it is still not working. My displacement maps are coming out solid white and grey… with no details.

Also when I import my character as an OBJ into Max it has errors, it gives me the following errors.

So when I first import it everything is fine, Max doesn’t give any error messages. Then I try to render it with MentalRay and it gives me this error message:

[error01.jpg](javascript:zb_insimg(‘75122’,‘error02.jpg’,1,0))

I’m am at wits end with ZBrush.

Attachments

error02.jpg

If you use 32 bit displacement map, it stores the displacement values in floating point format, that means that the data stored in your map will be exact values in world unit.

In XSI I tell the shader that it must translate the image data into -2 and 2 interval, I don’t know how to it in max. Same for Maya.

I think you should check your max manual, how to use displacement in MR for MAX

Don’t know if anyone else has mentioned this here already, but the wrong Photoshop color settings can really mess things up.
Before importing the Tiff in Photoshop:

Edit>Color settings
Set the Working Spaces RGB to sRGB IEC61966-2.1
Set the Color Management Policies RGB and GRay to OFF

Open the TIff

Convert it to 16-bit RGB (Image>mode>RGB) and save.

This should avoid loads of problems.

no, i’m not editing these things in photoshop… just a straight from ZBrush 3.1 to Max 9/2008

This whole thing is driving me crazy!

Look at this thread and video I attached:

http://www.zbrushcentral.com/zbc/showthread.php?t=53027

maybe someone can help me!

A few things I noticed:


  • Your base mesh at sub d level 1, looks pretty jacked up, there appear to be overlapping verts and other extremely stretched out parts.
  • You appear to have the wrong import settings into max.
  • You are also exporting out two displacement maps, you only need one.
Be sure to turn off the other settings in DE Options that you aren’t using.

I would try creating your displacement map at sub d level 2 or 3 since your sub d level 1 is so, so low poly. and try these import settings into max.

Also, what do your UVs look like? UVs play a huge roll in getting decent displacement map results.

[img]http://www.ericblondin.com/zbrush/obj_import.jpg[/img]

my maps are still all grey… no matter what level i export them at

see this
http://www.co2andyou.org/zbrush_to_max/

also how could my base mesh get so messed up… I created it using zSpheres all from scratch in ZBrush?

can you post a shot of your UV layout?

zpsheres aren’t the best way to make a base mesh. They can easily become screwed up through initial placement and modeling.

fun, now i find out about spheres! how does one go about getting at the UV Layout? Pixelogic really needs to get the manual together for this program…

So, you’re trying to create and apply a displacement map and you have no idea how to display your UVS?

You need to take a step back and learn some fundamentals before you start jumping into the deep end :smiley:

With your model in max, throw on a “UVW unwrap” modifier and hit “edit”. it will display your UVS in another window, you can then save out that image of your uvs.

I think the UV’s are messed… this is what I have??

[wierd.jpg
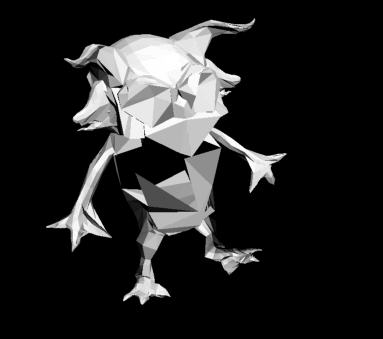
](javascript:zb_insimg(‘75135’,‘wierd.jpg’,1,0))

Yeah, no that doesn’t help me. Please follow my steps in my previous post. And post a shot of your uvs from max.

ok followed your steps above and this is what it looks like… wacked?

notgood.jpg

Yes, extremely whacked. :smiley: All of your uvs should be inside that black square. But instead, it looks like they are all off into oblivion. Which is why your maps come out all grey or all white. It’s because there are no uvs there to project anything onto.

If you know how to unwrap your model, I would suggest unwrapping the low poly version in max.

If not, you can use the “tool > texture > AUV tiles” feature on sub d level one, on your mesh in zbrush. Before you create your displacement map.

You will then of course have to re export that mesh to max because it will now have correct uvs on it.

Something really strange is going on… I tried created another simple model from scratch… just a ball in ZBrush, and followed all the steps. Same thing, I get a grey displacement map?

So it doesn’t matte what I do… I wonder if there is something up with ZBrush?

Yeah there must be, everyone else can do it with their zbrush, but yours is messed up :wink:

Did you try using AUV tiles?

Displacement maps are suppose to be gray. Sometimes its really hard to see any detail at all in the displacement map, but it is still there.

well object scale can also affect the outcome of your alpha. Like E said you may still have detail there but it might be hard to see.
When you export, try setting scale to “auto” instead of “auto+A.D.F” that you have now. That should normalize the displacement scale so it’s clearly visible gradient.

I just want to add to this for any one else that comes across this thread that moneymans problem was that he basically had no uvs. It is not possible to create a displacement map on a mesh that has no uvs, or has really messed up uvs.

He sent me his .ztl and I put an AUV tile on it. And the displacement map created just fine.

Of course in max, the parts of his model that had overlapping verts did not sub divide the same as zbrush, so the displacement on those areas did not come out correctly. But other than that AUV tiles worked fine.

So as I stated in my first post in this thread…

Hope that helps. If not, then most likely your UVs are jacked up
:smiley:

no dice, i tried that too…