Well, I did! I think sometime next week will be a great moment to post (Busy weekend…) I’ll contact you 
awesome
@JulianK
A silly question:
Where’re the deep cast-shadows of zb4? The density shadow slider seems to affect the casted shadow on the background only. There must be a way. When using the old method for lighting.
What about the lighting material editor. This also cast shadows. Pale shadows though.
Another one, trying to add a rim like lighting in lightshader. I like to add this light, not to make the front lighting darker. How to stop this automatic neutralizer?
Watching carefully all these wonderful works in beta testing forum. I didn’t find even one case with this lighting solution, a three spot or something method, with precise hard deep shadows. The easier for any external raytracer. An inconsistency of smooth shadows on sculpture and hard shadows for background only. Very noticeable on hdri backgrounds.
The shaded faces of a mesh look darker than the near cast shadows. Typically wrong for non globalillumination render engines.
Just render the same mesh under a decent renderer and come back in zbrush to fix all these wrong parts, guessing… and guessing what a correct camera will show. Zb camera lenses are for the birds.
BTW. Exporting render passes in Ps didn’t help much, as shadows pass is full of wrong information and the shader pass is not antialiased. (what’s this for?)
Hi Michalis,
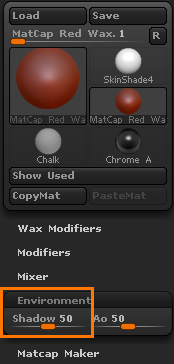
You can adjust the density of shadows cast on your model per shader in the shader>environment menu. have a look at the attached image.
as for render passes, - sounds odd -but I haven’t tried them yet.
if you want to add a rim light which doesn’t make the front darker, simply turn of shadow for that light. or did I misunderstand?
if you want to add a rim light which doesn’t make the front darker, simply turn of shadow for that light. or did I misunderstand?
I know Julian, this metod is physically and esthetically wrong. I won’t.
Light is added, now shadow is added. There must be a mode like “screen” for blending a second light pass or map.
This issue is odd and happens in zbrush only. Other render engines may have this feature but you have to ask for it.
I’m asking not to have it then. LOL
Thanks Julian. Please post some more work. Anything, even music. 
Hi Julian !!
hahaha bust from zbrush logo awesome idea !! hahaha love it 
actually, in all my tests the shadow cast from the back to the front works a lot better than previously in Zbrush. I always had it on, also in the bunny renders here.
in regard to turning it off being incorrect; -seriously I realyl don’t care about correct and if you render in 3dasmax with Mental ray or Vray for example you also have these options of not having every light cast shadows and trust me, that is a trick often used.
I really don’t give a rat’s tail if that is physically correct, as long as I get the look and mood I want 
I really don’t give a rat’s tail if that is physically correct, as long as I get the look and mood I want
Indeed, when I asked for an advise I didn’t mean to give your blood. :lol:
Great help though, thank you. I’ll find a way to handle this, sooner or later.
Awesome work as usual Julian:D. I have a question, how exactly do you use you toon shader material? Do you fill the object with it then paint?
Thank you Mudpitt.
Not necessarily. if there is a another different material I also want to apply to one of the subtools, then I might fill it, or fill just the one subtool with the different material.
hi Julien,
Awesome Tutorials small_orange_diamondsmall_orange_diamond, especially the use of Dynamesh and many thanks you for your explanations and downloads , as a newcomer there are indeed enough problems.
christian
You are very welcome Christian.
Julian_K - Great sculp man and great tutorial…If you don`t mind can you a step by step how you creat the brush of fur? I´didn´t undestand how you make the brush…Thanks and Cheers!
Thanks for the tutorials ,! i have learned lot of things from you…! thank you…!
great stuff !!! : )
great work of yours . Im wondering what settings did u set with the curve tubes in zbrush hair growth video to grow the hair with the curve tip?
All works so inspiring.
Thanks for the overview Julian K
Can’t see the time to start using the 4R2
Hi there,
It’s been a long while since I last posted. Sorry for that, but times have been extremely busy recently.
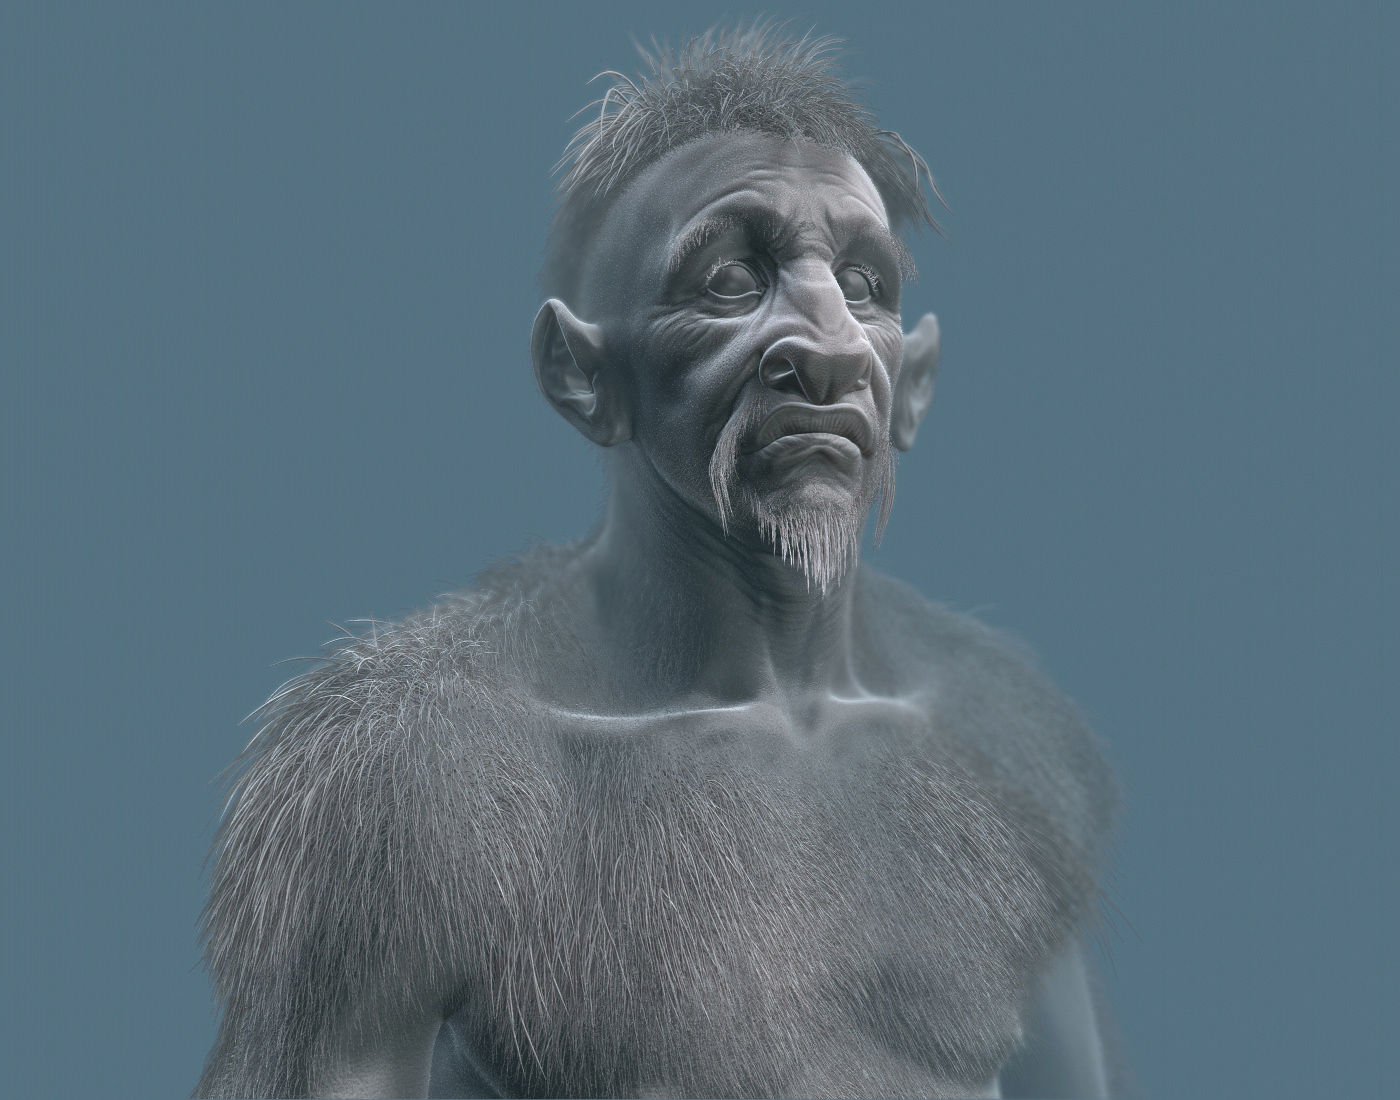
Anyway, here’s my first feeble attempt at doing hair with the new Fibers. There was not much tweaking to the many various Fiber settings and I certainly need to explore it more, but it’s quite amazing what you can even get without making a scientific study out of it
The render comes straight out of Zbrush. I wanted to make a point out of only using Zbrush Filters for post work and not going to Photoshop at all.
If I get any spare time I’d like to explore that guy and his hair quite a bit more and also texture/polypaint him.
Cheers and thanks To pixologic for yet another amazing release!
Sorry man, haven’t been in here for quite a while. I’ll try to manage to post a step by step next week if you still need one, now that Fiber-hair is out