zbrush just gets better and better. i never stop learning new, and useful techniques
only got as far as my geo error, and then seeing this answer you gave. off to sculpt, thx again :] 
I have all of my settings the same (Double Sided, Deformation, and Normalized with no Fade) but the effect stops at the edge that I drew on instead of wrapping around the object. What am I doing wrong?
thank you
I think you will need to go into your ZTool and go to the display section and turn double sided on and then do your projections. Hope that does the trick!
Yes! Thank You!
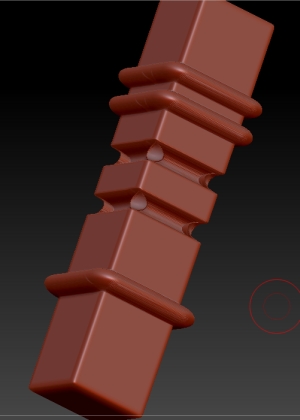
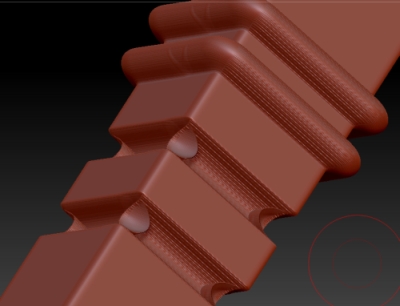
I did exactly what 3djock and nickz said but the final tool has very ugly geometry.
Still no luck.
ZBrush4R6_p2 win7X64 Intel i7 6gbRAM nvidia gforce 250s.
Anyone else with the same problem or a solution.
It seems to me I can’t follow the “Project Master techniques” tutorial any more as it is…<label for=“rb_iconid_9”>![]() </label>
</label>
Stamatis
Is it ok with everyone else or no one cares any more about the Project Master Techniques!!!:rolleyes:
Stamatis
yeah, i have a similar question, after making these meshes i like them to all be 1 continuous mesh, i was hoping it would tell us how to merge the subtools as one continuous mesh with no breaks
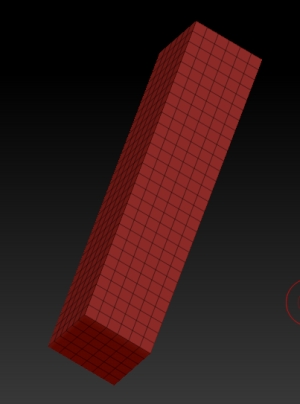
1.After finishing the pillar would you be able to export that as an object into 3ds Max and how would you go about doing that.
Anything can be exported as an .OBJ file.
all be 1 continuous mesh, i was hoping it would tell us how to merge the subtools as one continuous mesh with no breaks
After you have all your subtools in the SubTool palette, click Merge in the SubTool palette. In that sub menu you’ll see Merge Down, just keep clicking that until all your subtools are merged together.
Great tutorial! You obviously know what you are doing, I have learnt a lot from you
Using 4R6 and some parts of the video do not seem to carry over,
e.g.
the part where the arc is created. I follow along exactly, stretching it so I get the doorway-format, but then masking does not give me a clear mask (I can’t make out how clean the one in the video is) meaning even after sharpening the mask, there is a one quad high line of half-masking (50% grey overlay). Then trying the Deformation -> Size action does not work. I thought my axis might be different, but no matter which one I use, I do not get the same result. What exactly is happening? Does the lower part get pushed into the surface?
Also: Masking out the plane to cut out the doorframe - is there no easier way? The way applied in the video seems quite unclean. Half-masking of the stretched part as well.
Thank you.
The tutorial is 6 years old (see first post). A lot of the features in 4R6 were not yet introduced in 2008. New features in 4R7 will make much of this thread obsolete. 
I noticed it’s an old tutorial. The parts in question however seem to me like basic functionality that wouldn’t make sense to erase from the application in newer versions.
Like the size-functionality, which theoretically should work the same, but does not, which makes me think the mistake’s in my side. That “half-masking” also stays a mystery to me. While on it: Does 4R6 bring any more accurate masking functionality to not guess around where the mesh’s middle is like Sebastien seems to do in the video?