Härligt! Själv är man Stockholmare  Ska dock till götet på torsdag!
Santis: Stockholm i våra hjärtan. Hade gärna vistats oftare där.
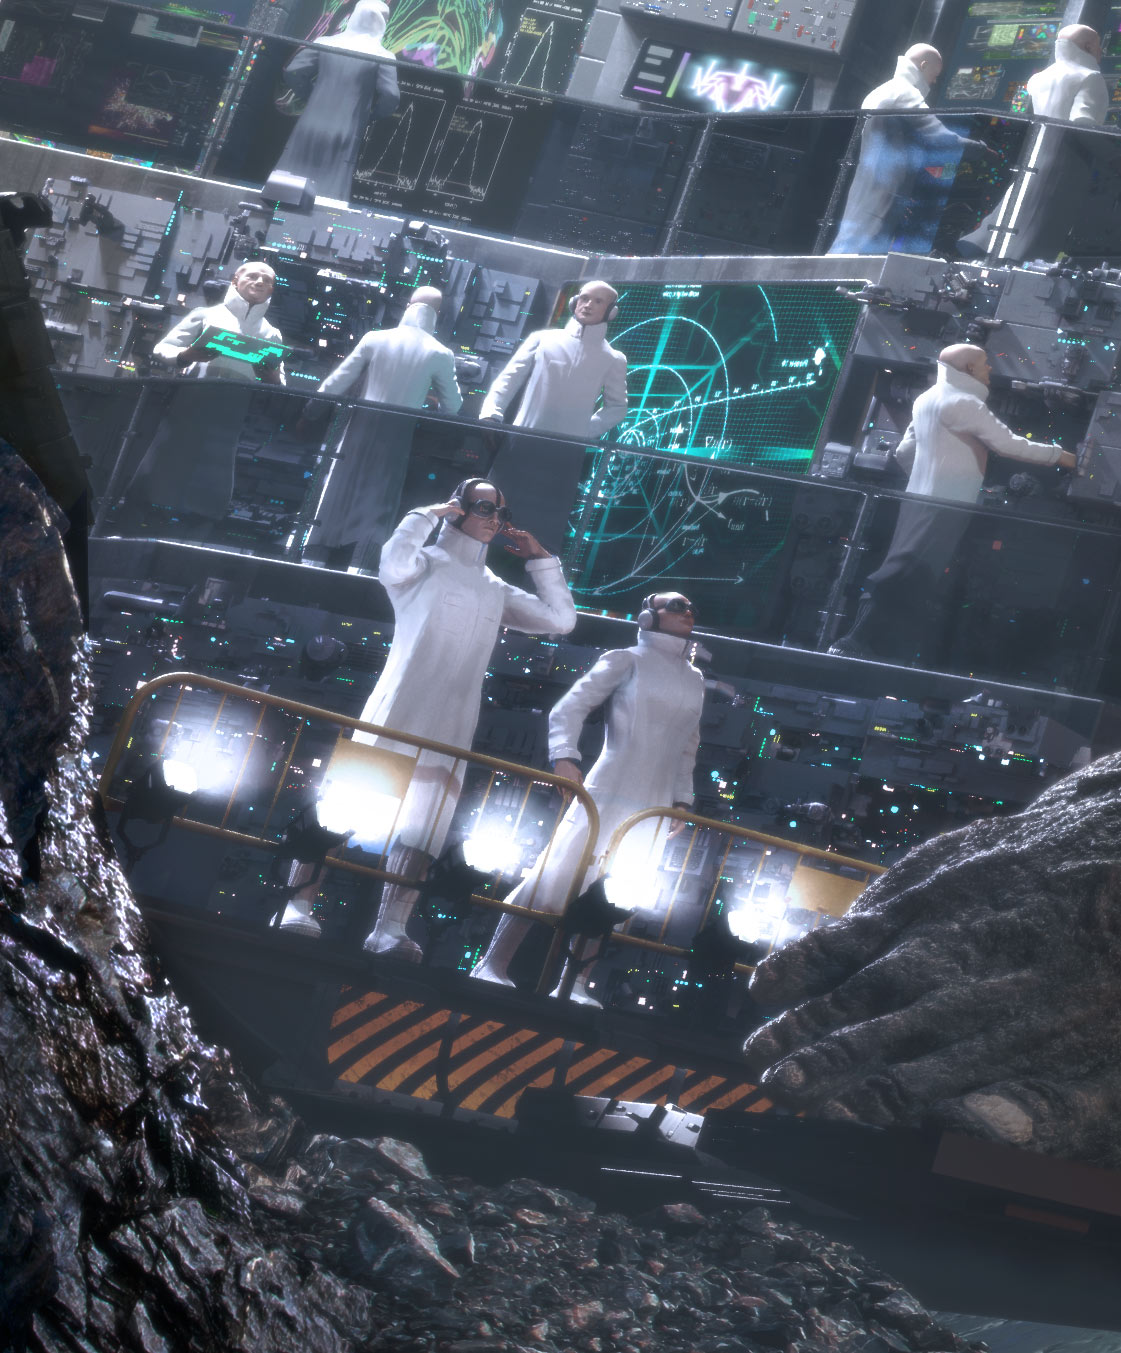
Finding the jpg 500k limit a little frustrating. A few fullsize crops:


Man you are incredible! Speechless 
Holy sh*t
absolutly amazing attention to detail. the whole image is very dynamic and makes me think about a bunch of different stories about this scene. epic! congratulations!
Great piece, top raw for sure! 
Wow. This needs to be on the top row. Amazing attention to detail. You’ve done a great job of giving your character a sense of power in this image. small_orange_diamond
Incredible. That’s going to make the top row for sure. Inspiring image, thank you for posting it.
I’d love to know more how you did the matte painting for the exterior though, if you would be kind enough to give any advice?
Crazy work man.I really like it.
Thank you all for the encouragement!
Rikk: Amazing work on the boy and Walt. Completely missed those threads before.
Sbmongoose: Matte-painting started with this rather crude render to get some basic texture and space:
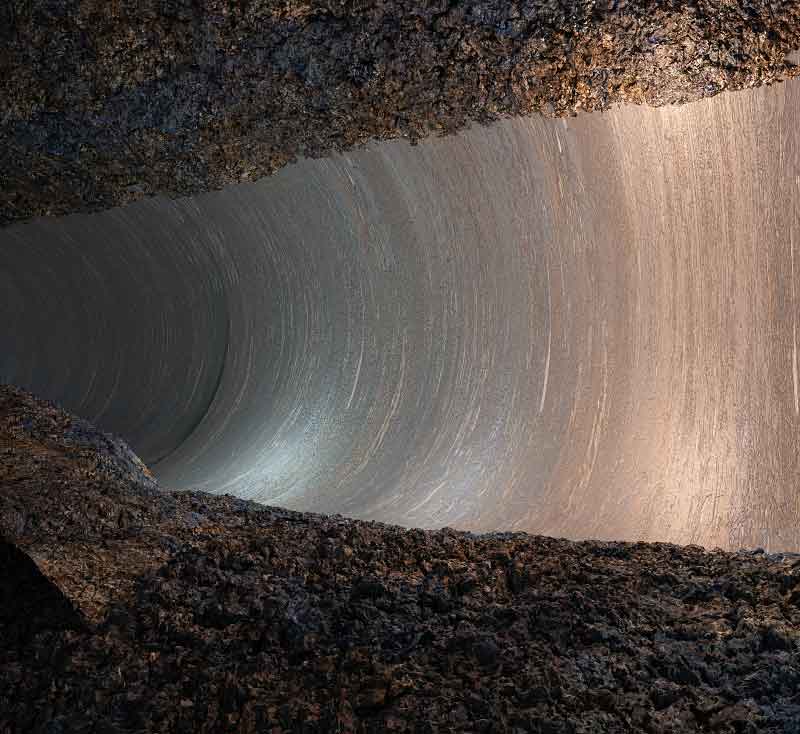
On top of that, I overlayed elements from various pictures: snaps from a quarry I visited at some point, but mostly I relied on rock formations found on CGtexures.com. The process was basically trying to find overall shapes that seemed to work in terms of structure and lighting, and then work from that using cut&paste, colour-correction, transforming, masking. A rather painstaking process, as with anything containing a lot of high-res structure. You want to avoid the dreaded spray-look in fade-zones and weird ghost artifacts. I found that overlaying secondary images with photoshop’s “blend if”-function was useful to create scattered highlights on the rocks, and to “fractalize” areas where the rocks seemed too smooth. So, layer upon layer of rocks and adjustments, until things got too complicated. Then I flattened the whole image and continued adding layers, and so it went. The final image is in it’s 5th flattened incarnation. Sure wish I knew of a quicker way of doing it 