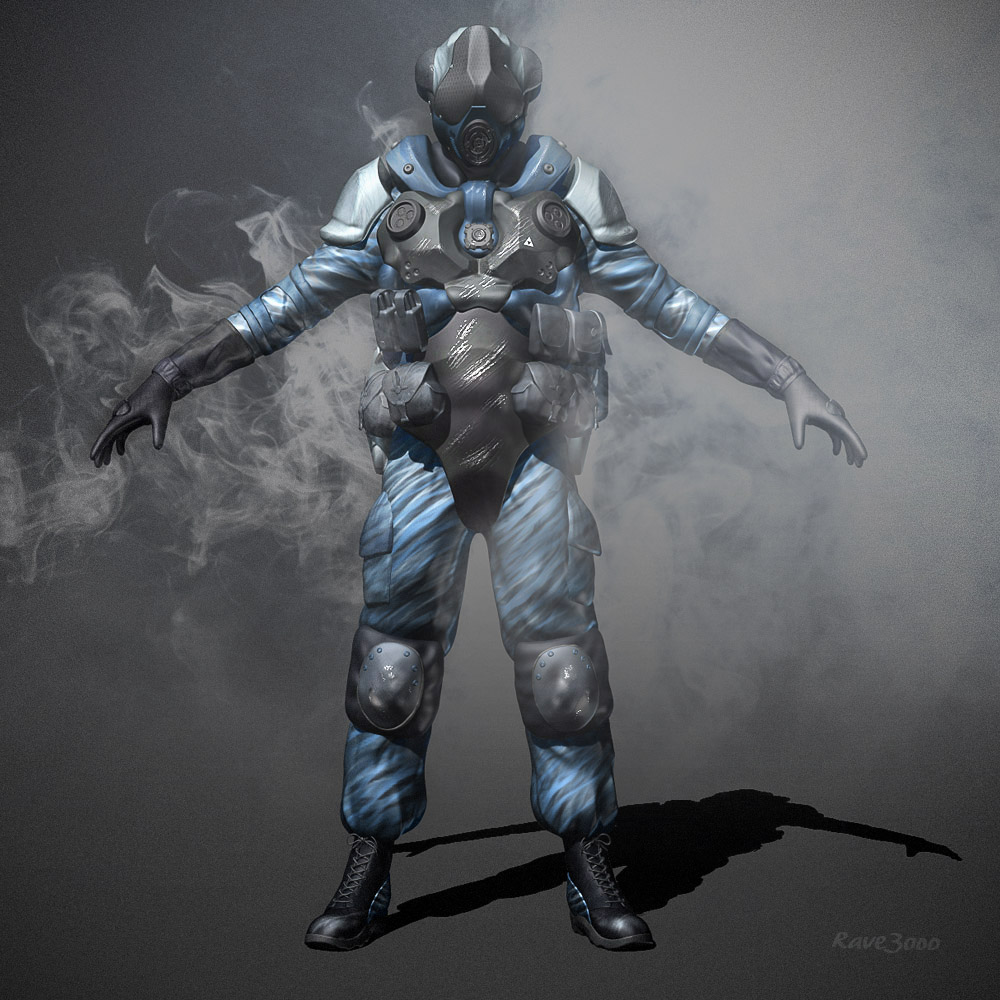
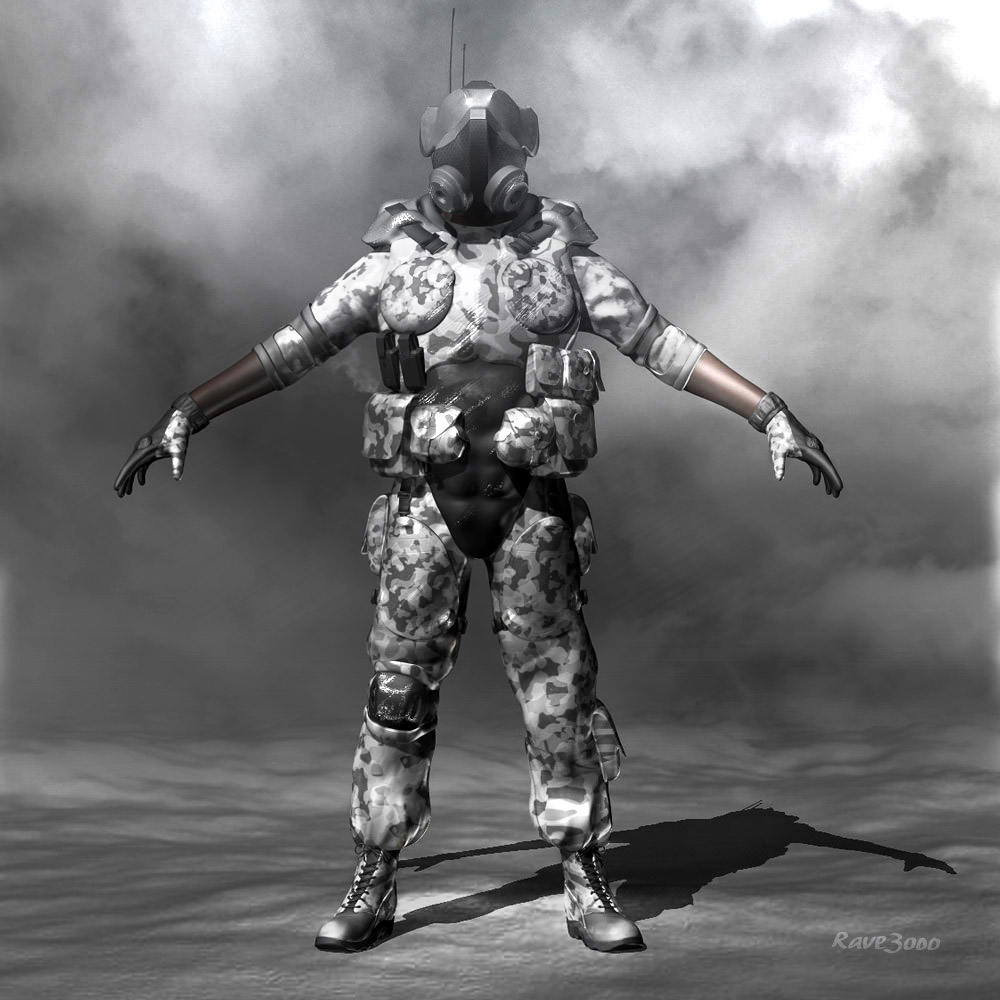
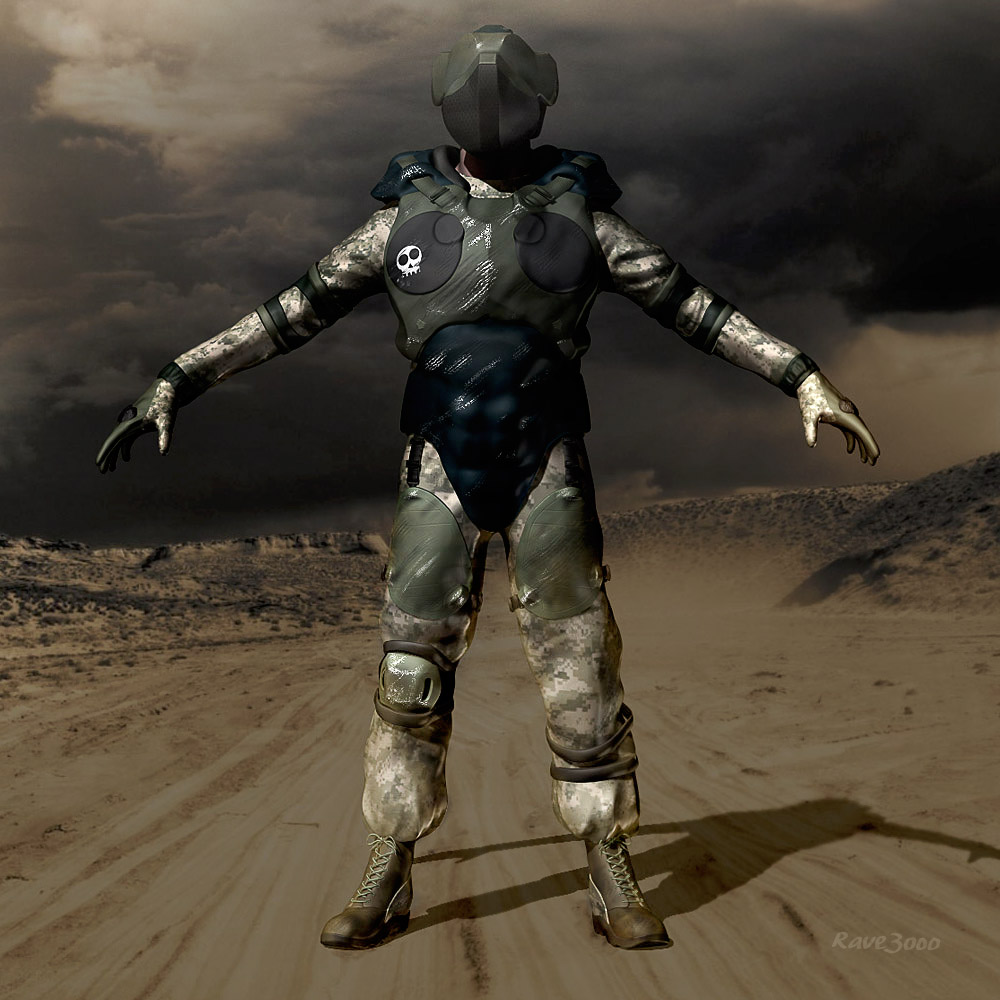
Thanks for the comment. I kept on going and created two more. I think I might look more into your comment and try to create a more established blue pattern similar to the other two guys I just did. I got some good comments on ZBrushHangout on the gloves - so I made them two toned, and I think it helps a lot.
Imagine, just a few months ago I didn’t know ZBrush, nor did I know how to sculpt…
Nice work mate
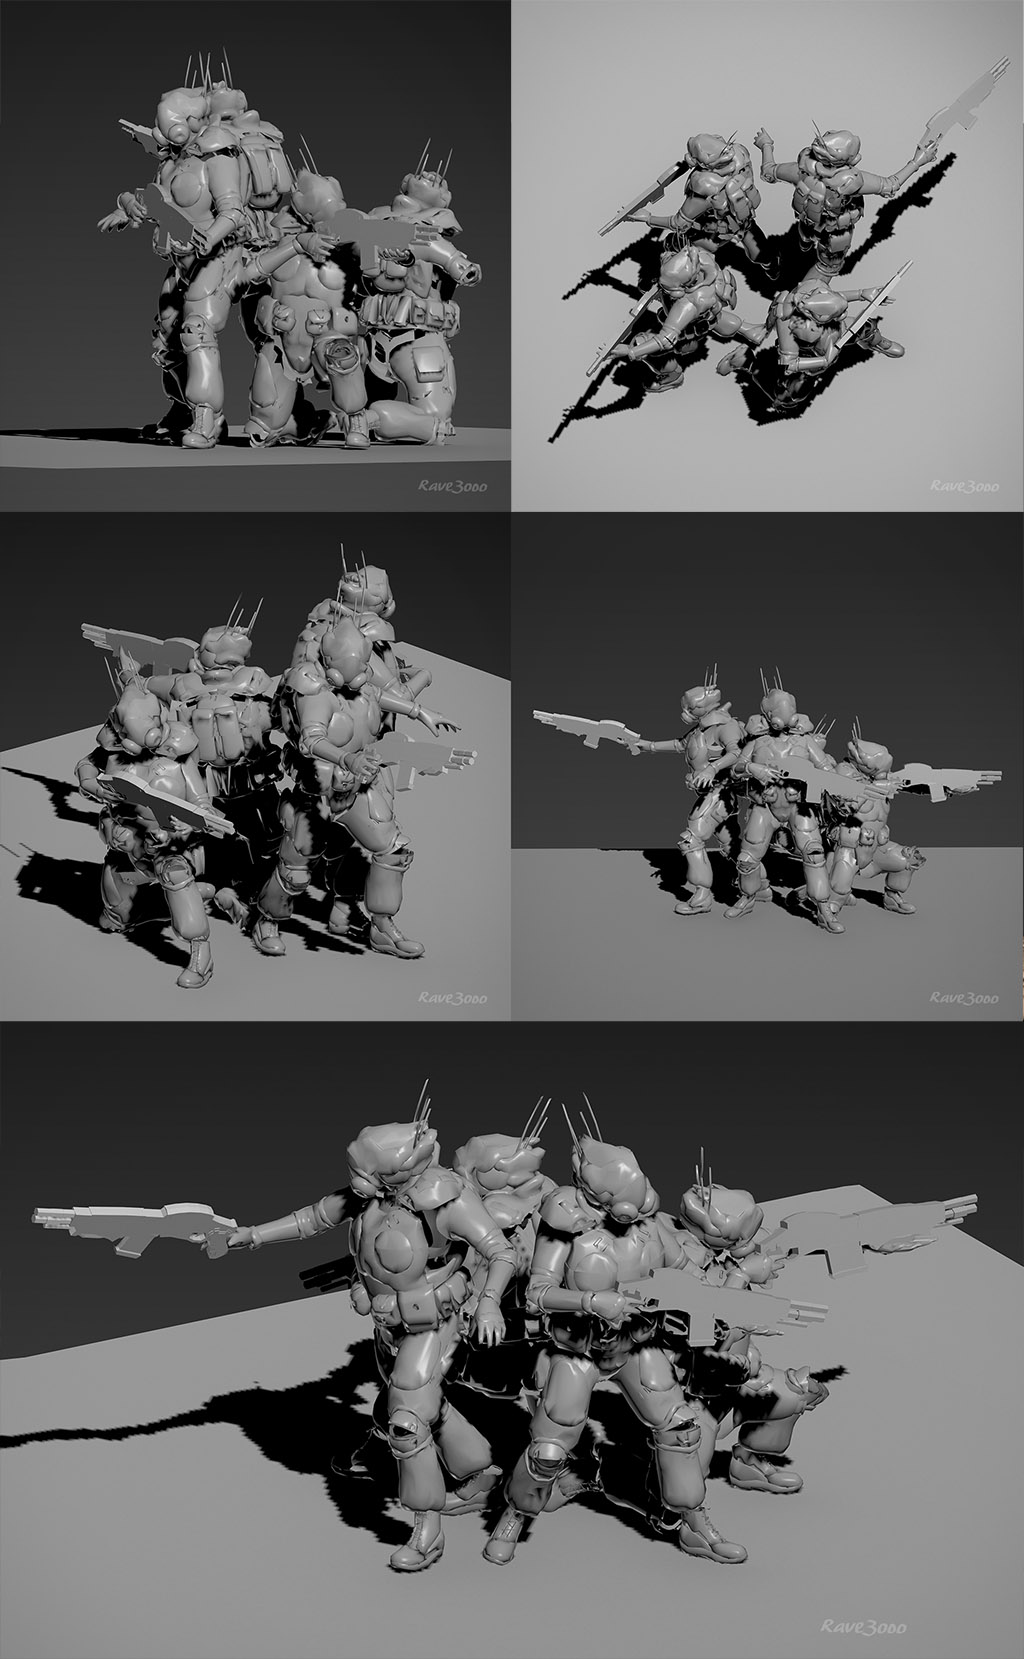
I’m learning Posing a character in 3Ds Max now. Here’s my progress so far. Lo res models.
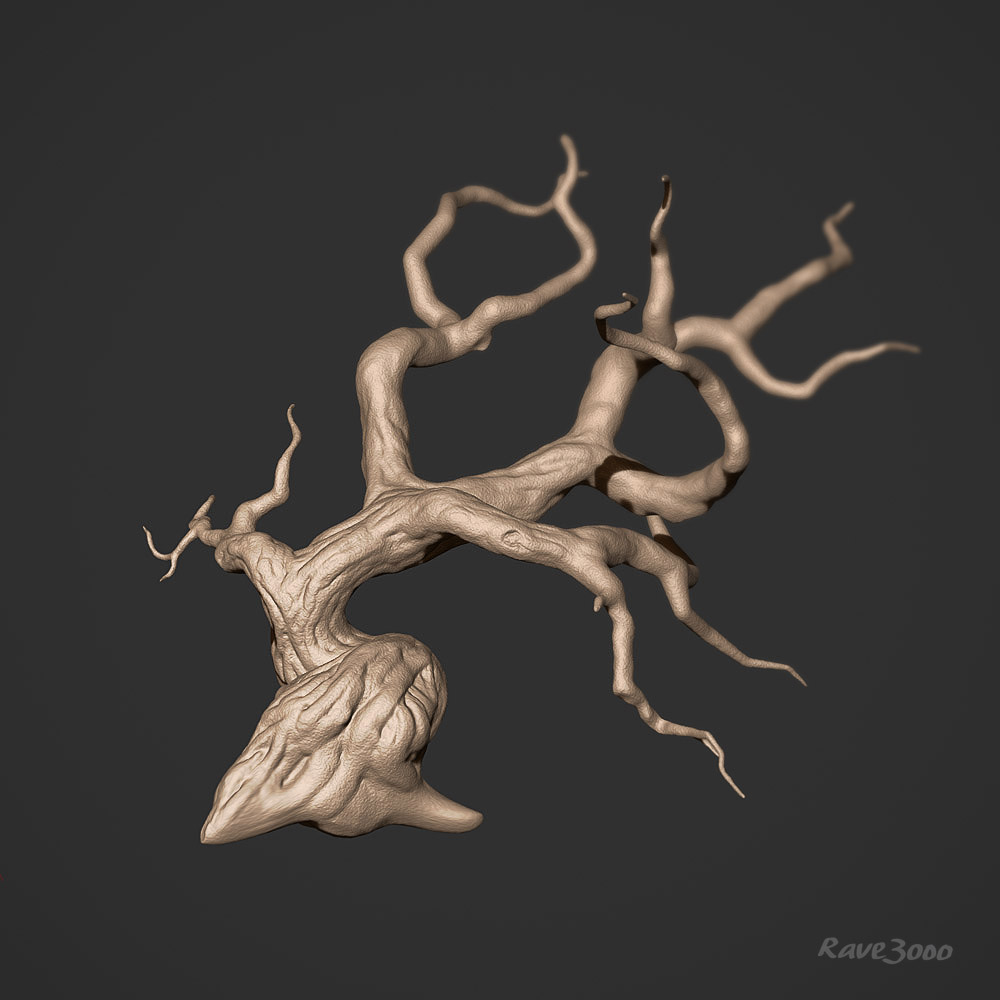
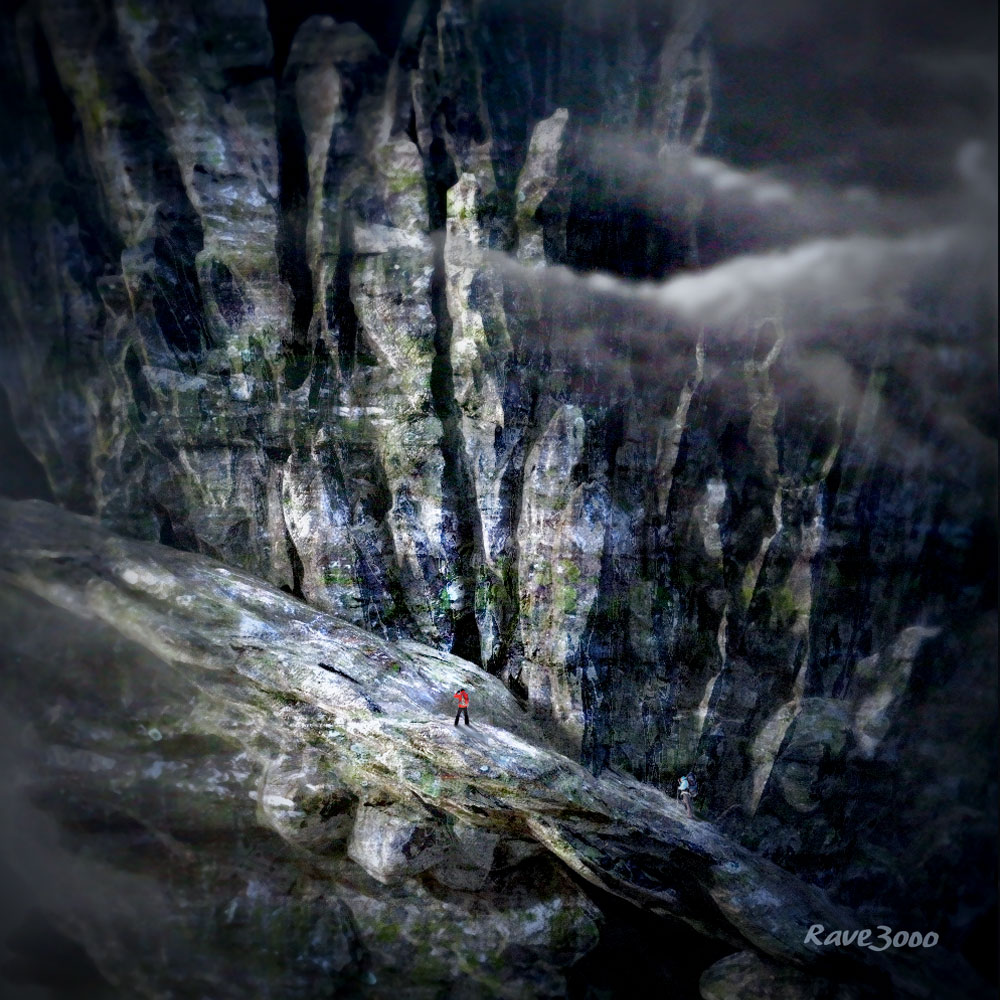
My first environmental peace, and my first tree. This is from my studies at ZBrushWorkshops.com / Gameartsacademy.com.
david Lesperance class.
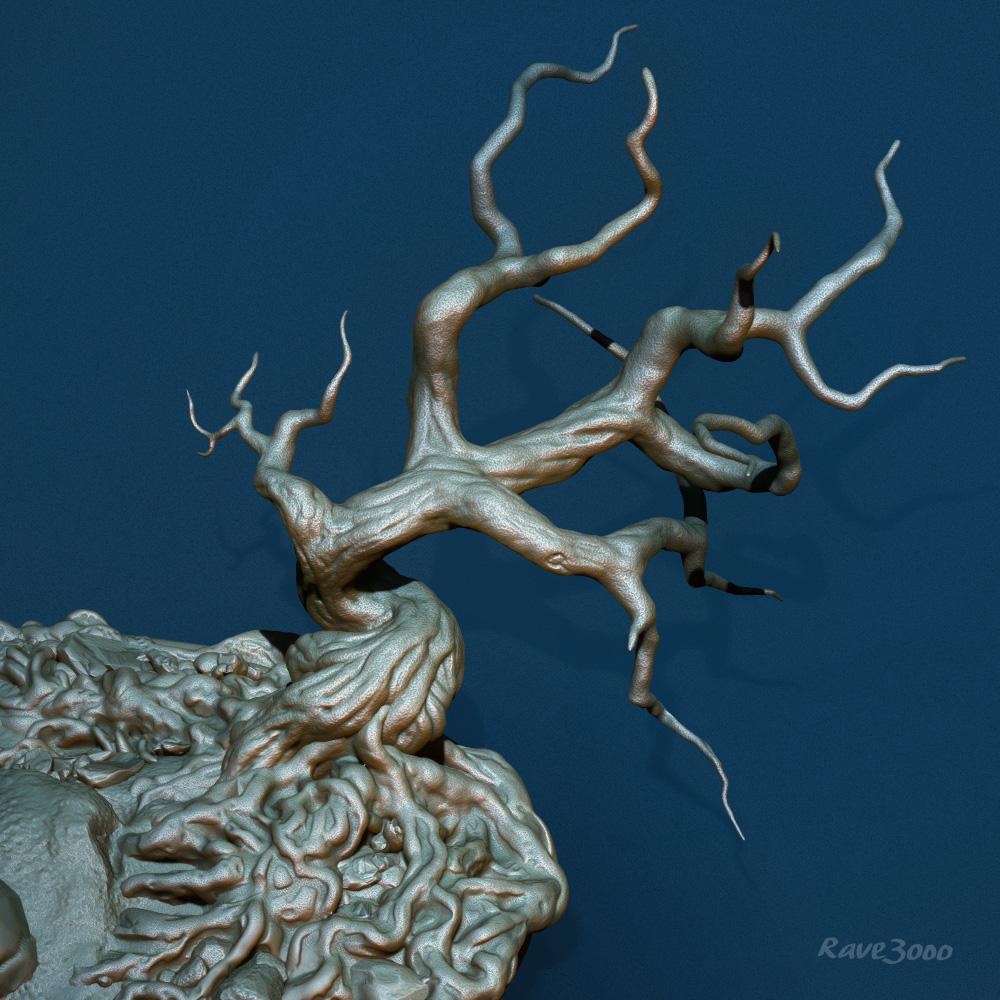
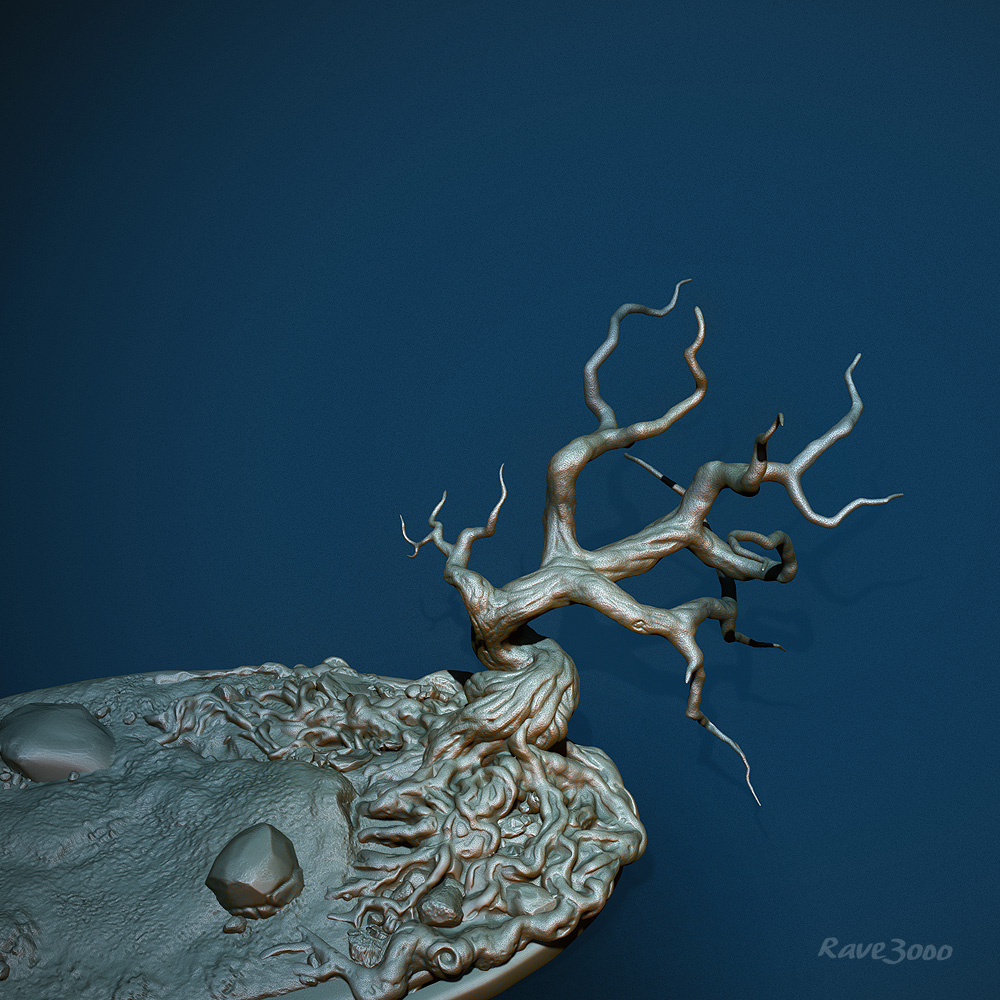

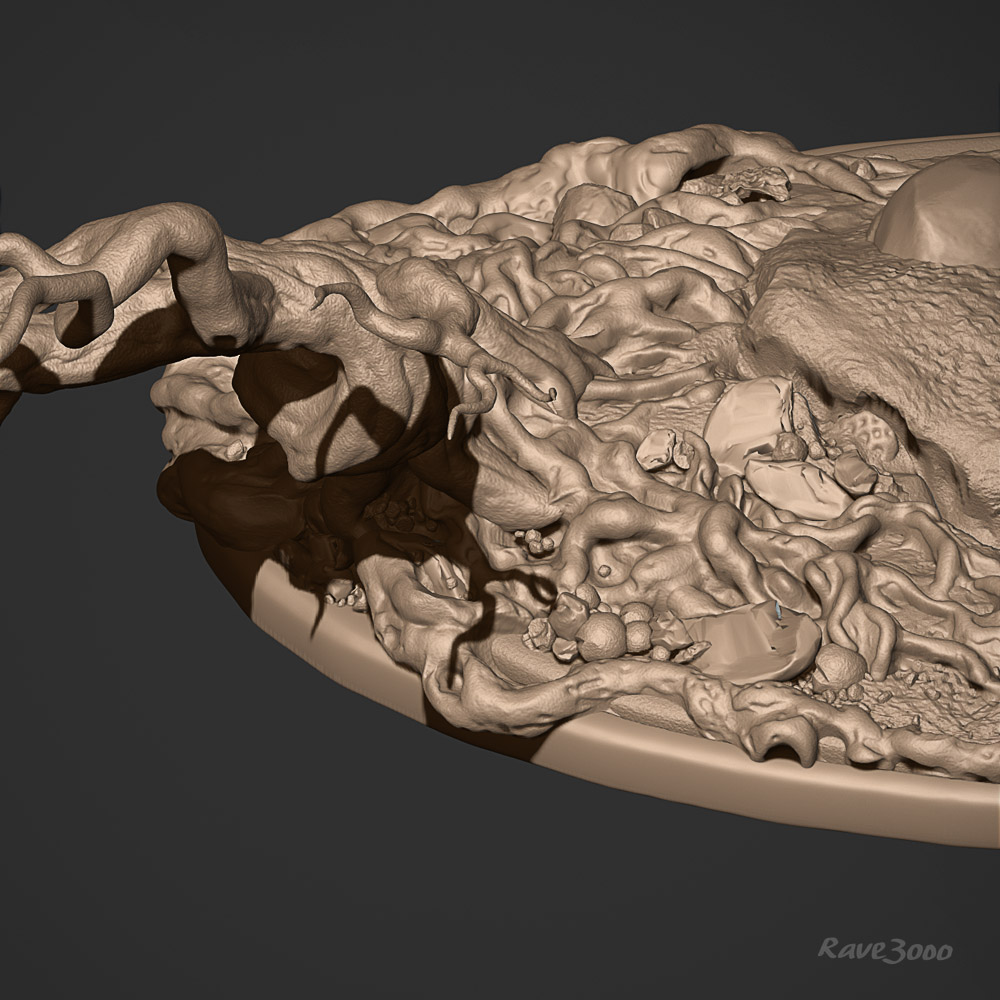
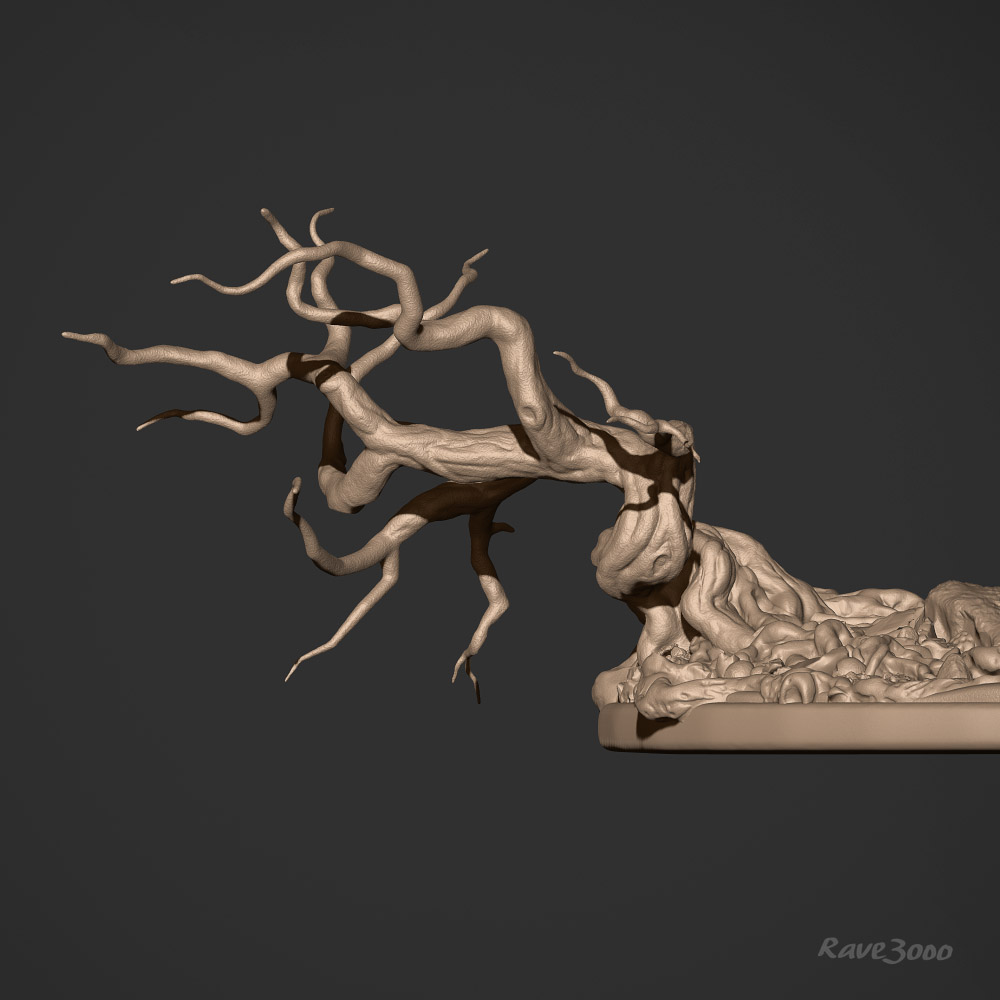
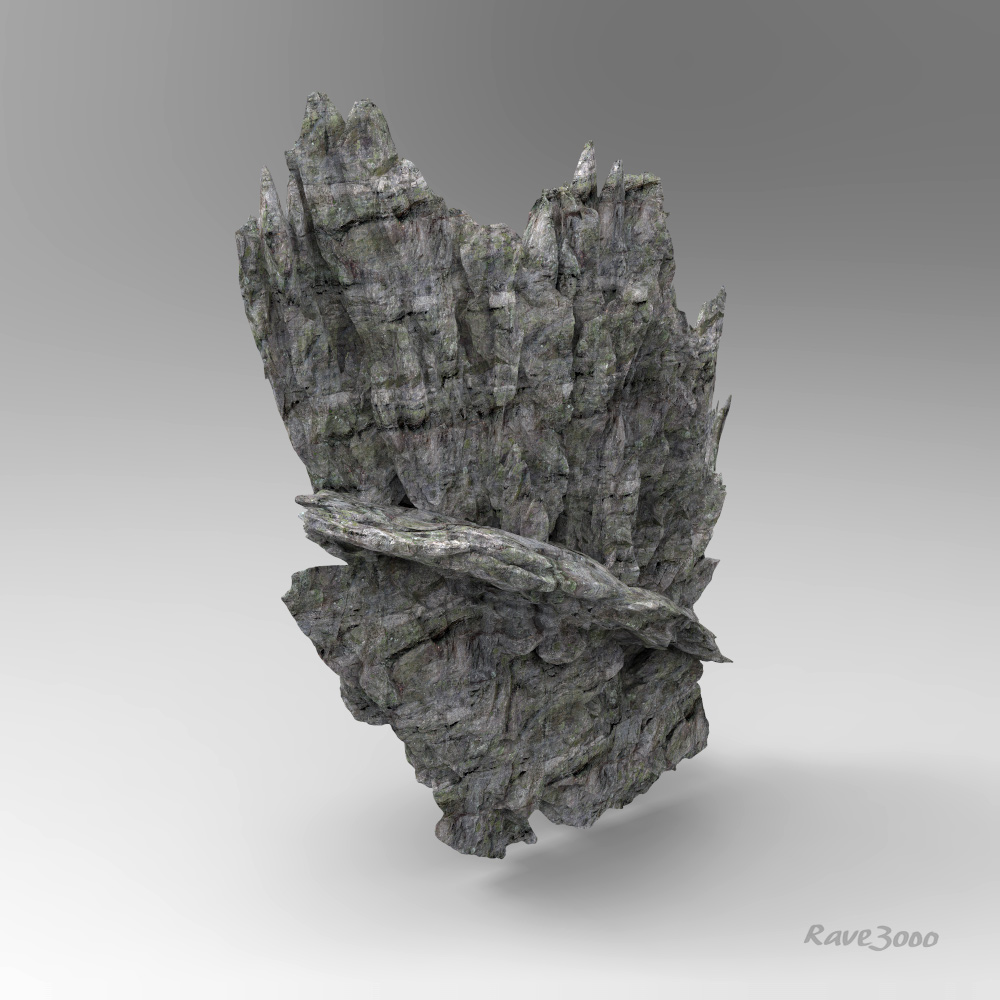
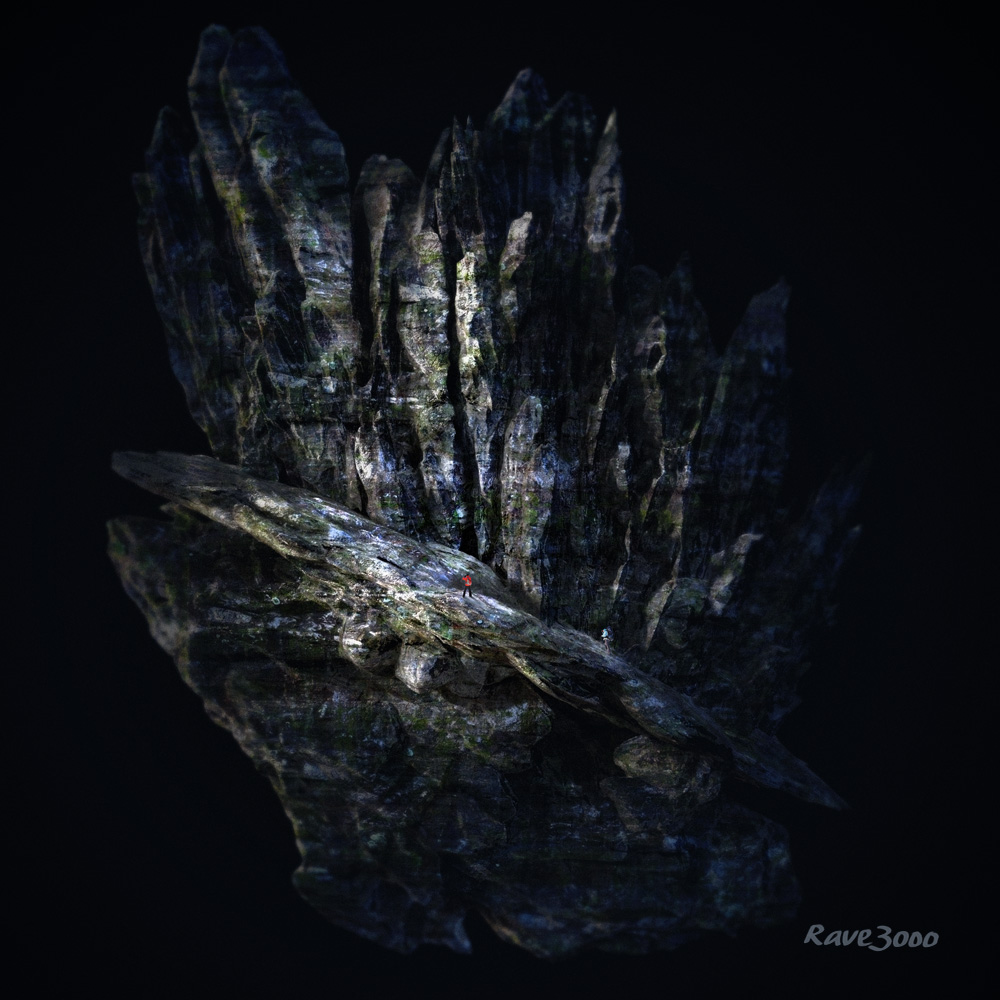
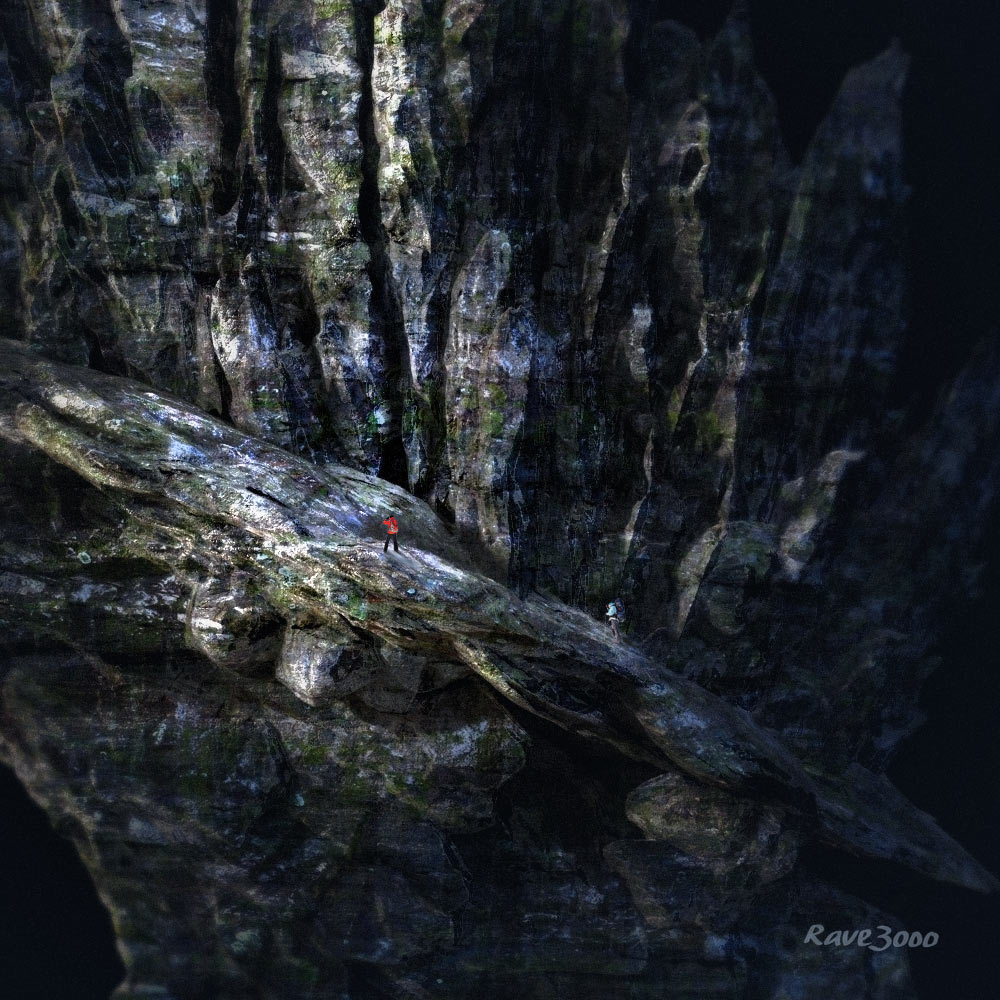
My first rockface done in the class Environment Modeling for Games with David Lesperance. I’ve not been modeling for long so this might look a bit silly to many but I’m posting my progress as I go along.
My first rockface is a ZBrush rock - multiplied and decimated to create a small rock face. Rendered in Keyshot.

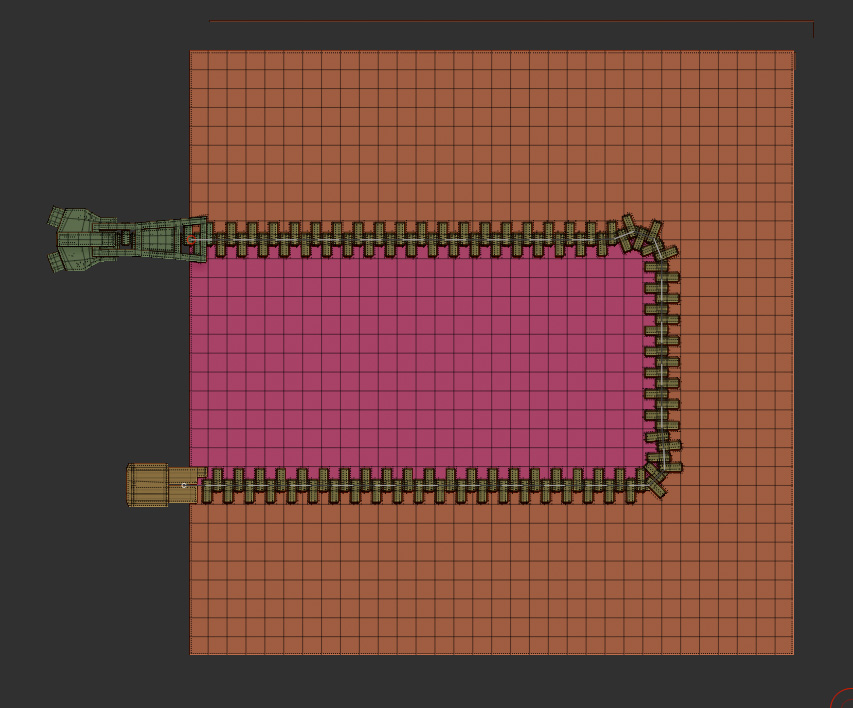
I was watching Josep Drusts excellent tutorial on how to create molle straps, and drawing them onto surface with the help of guided lines - created with the Frame Mesh command.
I then could not replicate what he did. This was driving me nuts for awhile but I didn’t give up. A few days later a wrote David and Paul about this problem I was having and just after I sent my email - I gave the problem another look.
The answer just came to me. Off course, it’s simple and extremely powerful.
I want to share my findings and the usage It could give you.
1.The command under Stroke - Curve Functions - Frame Mesh: is just what it sounds like, it Frames your Mesh.
To be able to Frame Mesh, you need to choose your option Border, Polygroups or Creased Edges. Each gives you similar results.
Border.
Creased Edge
Then the Polygroups (nothing happens)
Now - creased edge gives you a certain result, but is a bit confusing to use for bigger tasks. But what is more interesting is the Frame Mesh with Pollygroups. The reason nothing is showing up in the example above is because it’s just one pollygroup. The command needs more than one polygroup to give you any results. Lets try out two polygroups.
Frame Mesh - Polygroups
Now we can easily notice that we created line in-between those two polygroups.
Frame Mesh - Polygroups: (With more polygroups) Gives you more intersection lines.
Now this is really powerful stuff.
We can frame everything with the Frame Mesh - Border command If we want to. Giving us this example.
What we get is multiple lines, and cross sections.
Lets say we wanted to create some guided lines for our insert brush - stroke. But we don’t want to use all those lines. We want to be able to control those lines.
The answer is the Topology Brush.
Choose the Topology Brush and use it with the Alt key to delete those lines you don’t need.
Continued in next post.
Then just apply your stroke to the lines you chose to keep.
Now use your imagination to create paths for your insert brushes.
Hope you find use for this.
Great explanation on the use of the curve frame options! Thanks for taking the time to share!
-Joseph
Raven san, sumimasen. Okidokei ni wa nani wo kaitearimas ka? Wakaranakatta.
(Raven, I’m sorry, I did not understand what was written on the clock?) 
In Japanese or Chinese?
Raven, your works is gorgeous!
great info and contribute to the forum - helpfull !! small_orange_diamond
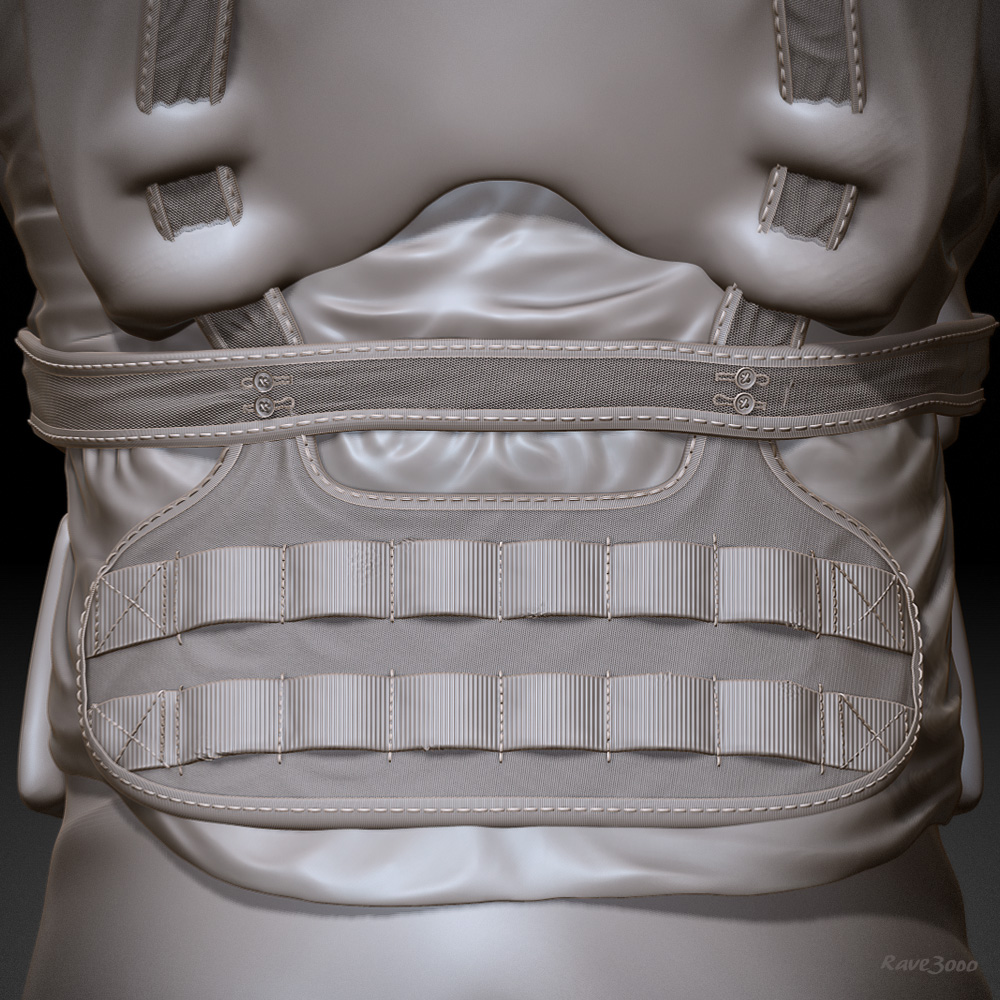
I’m working on a Molle vest for my character I’m doing at the Game Art Academy / ZBrushworkshops.com. Josep Drust is teaching. I’m blending together techniques that I’ve learned to create the vest.
It’s in progress so more details on the straps are coming, the seams are not showing up as good as I’ve hoped. They are made from a insert mesh brush I made.
But oveall it’s coming together nicely.


Hi Raven Ravenson, thanks for the info!
I had one question about using Frame Mesh. I did it on a mesh to end up with many curves at different places and non-connected. When I apply my brush to one curve and click on the next one, the first brush stroke disappears. How can I apply to many curves?
Thank you!
Hey Raven,
Cool tutorial on the FrameMesh functions. Using the Topology Brush to eliminate unwanted curves is especially smart!
I wonder if framing with the qRemesher Brush will bring any benefits to qRemeshing? Hmmm, well, I know what I’m trying tonight!
Oh, and the detail on your vest is outstanding!
My WIP for Josep Drust’s class. I’m way behind, trying to catch up, but not gaining much ground. But I like what I’m doing 


Love your work… Nice details…
I’m happy with how the vest turned out, though I’m sure I did some things the wrong way the vest looks convincing.
Changed the stitching, to more visible / readable pattern. Added new textures (noise maker). Added padding on edges and more.
I’ve added similar molle attachments to his backside, and attached the strappings together… I just noticed that my left side buttons are flipped, darn.
Hope you like this.

hhmm, this is getting good, looks pretty much like a real one… way to go 