Hi scooter23
It was printed on an Objet machine which has a layer size of 30 microns so you get less of the “stair case” affect. Getting the support material off was the tricky bit!
niiice print!
I have a tool I want to export as a wrl file, including the vertex colors. It looks like the mesh is scaled up and moved across the y and z axis. If I export the mesh as an obj, it looks ok and everything is in its place. However if I take a look inside the obj file with a text editor, I find this commented lines:
#Auto scale x=484.894409 y=484.894409 z=484.894409
#Auto offset x=-0.000000 y=-71.564354 z=0.206564
I guess it has something to do with ZBrush’s internal measuring units and I don’t know if it has something to do with the wrl exporter issue.
How could I export the tool as a wrl, having the EXACT original vertex positions, as I’d exported it as an obj?
I’ve actually found a method for fixing the vertex positions, by exporting the obj mesh as a wrl from Meshlab, the manually editing the wrl I’ve exported from ZBrush and replacing the wrong vertex positions with the right ones from Meshlab, and actually keeping the vertex colors from ZBrush, but it won’t work on a mesh with 20 million vertices…
You know what would be really cool with this, if the export had the ability to not only choose the size of the model (which I think it does already) but also have the ability to hollow out the model to a set wall thickness.
This would save a ton of time, and money of course!!
Rock on ZBrush. 
what you need is not 3d Print but maquettes since they are artist they should build the form by themselves and not relying on one button lazy function. :rolleyes:
Hi!
I have a problem with the plugin.
My Ztool have 23 subtool.
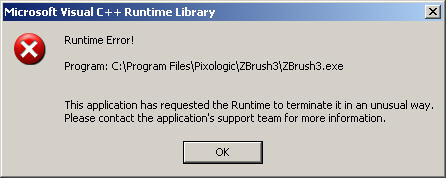
I did each step and i finished by clicking on STL binary. Then after 1mn i get a message error (i did a screen shoot) and zbrush shut down.
[attach=160708]Prob1.jpg[/attach]
Can anybody help me please?
For information : i already execute the vcredist_x86.exe application (that said in the .doc with the plugin.
Is therez an other way to get a stl from my ZTL?
thanks
Attachments
Sinz’s work ! Yeah Matt !
Regarding the error…
have you set the executable to run as administrator?
Right Click icon, properties, Compatibility Tab, Run As Administrator…
then Apply to make sure it ‘always’ does this.
Might be the issue, might not, but I hope this helped.
Also, make sure that you installed the correct version of the C++ software…
I know I wound up installing like 3 versions to get ZBrush and some other apps running straight for me.
Thanks for advices LWAddict!
Yes i ran it as administrator and i have the correct version of C++.
I did some test on simpleZTL, it works pretty well. But still don’t with my big ZTL…
Can you tell me if you’re sure there is no polygone limitation for the exportation?
thanks
Well…
I haven’t really push that envelope,
instead I use deformation maps on low poly objects.
I do more organic work with ZBrush and Lightwave…
not too good using it for much else, yet…
so I need the low poly object so my animation rigs will
work effectively.
Please do post when you find the cap though…
would be good info to have.
And when you find that cap, also post your system specs
for cross reference as well. Thanks.
Hang in there,
LW
Wait a minute…
I just saw that you’re fairly new…
at least to the boards.
Did you know about using the low poly object and then applying final deformation in your 3d app?
Which 3d app are you using for your final?
Sorry I missed this the first round, tired I guess.
Can’t wait to try this. I was just turned on to this plug in by a professor friend of mine who I took a maya class from. The wife and I are starting our own 3d print - rapid prototyping bureau and are waiting on the finalization of the delivery of our zcorp 650. I’ll be killing many hours with this!
-ryan
Great news!! I’m bright green with envy for you!!
Please send me details of pricing and such when you get set up.

Sure thing! It’s chaos right now as we get things arranged, but very soon!
Thanks
Ryan
Any chance you might have a release that will give the .stl shell thickness? An internal wall thickness? I purchased a VFlash 3D printer 2 weeks ago and this printer will build solid models unless you have a shell wall thickness. The material cartridge is $850 and that holds 1.75 liters of resin. So I am trying to squeeze as much out of one cartridge as I can.
Currently I have to export from Zbrush, load into Meshlab to cap holes, export to Modo and do a thickness on the poly’s to gain a wall thickness, then out to Meshlab again to save out as a .stl file. A pain in the butt I can tell you!
Thanks in advance.
Will
The problem is that creating a thickness is not an easy task, because on basic shape, it’s not hard to do as you explain: a constant thickness on all the surface.
But when you start working on a more complex shape, like a 10" full figure, and then let say you want to apply a 5 mm thickness, what will happen on the fingers? On a software like modo (which I’m using), your internal thickness will go through the opposite part of the finger and then, you will have a topology issue. Not so easy 
But we know this problem
I totally agree. I printed a head last night and what i did this time was take a lower division of the head and export it with my high res version. In a 3d package (I used Lightwave) I capped the neck opening on both pieces to make them solids. I placed the lower res head inside the full res and shrank it to fit inside. You then have to do some editing and stretching to lengthen the neck of the low res so it sticks out the bottom of the high res neck. I then did a boolean subtract and subtracted the lower res head from the high res. This gave me a hollow head with a thickness. Now the good thing about this, if you were doing a figure, you could choose to make the hands/fingers or any other part solid by editing that part away from the low res “incert” before you did your subtract. There does not seem to be a “push this button” way of doing it…but with CG is there ever?
There does not seem to be a “push this button” way of doing it…but with CG is there ever?
I dunno, Pixologic have some real wizards out there. I bet they could find a way. If anyone can.
Restart ZBrush. You should now have an Poser Scaler subpalette in the ZPlugin palette, with a PoserImport button, a PoserExport button and a ScaleFactor slider.
Unzip the zip file to your ZStartup\ZPlugs folder making sure the folder structure is preserved. The PoserScaler.zsc should be outside the PoserScalerData folder; both should be in the ZStartup\ZPlugs folder.