Thanks all! I agree that the sphere texture looks better. I composited that one in Photoshop and can’t see to get the same look with the ZBrush renders. I guess it’ll just be more trial and error.
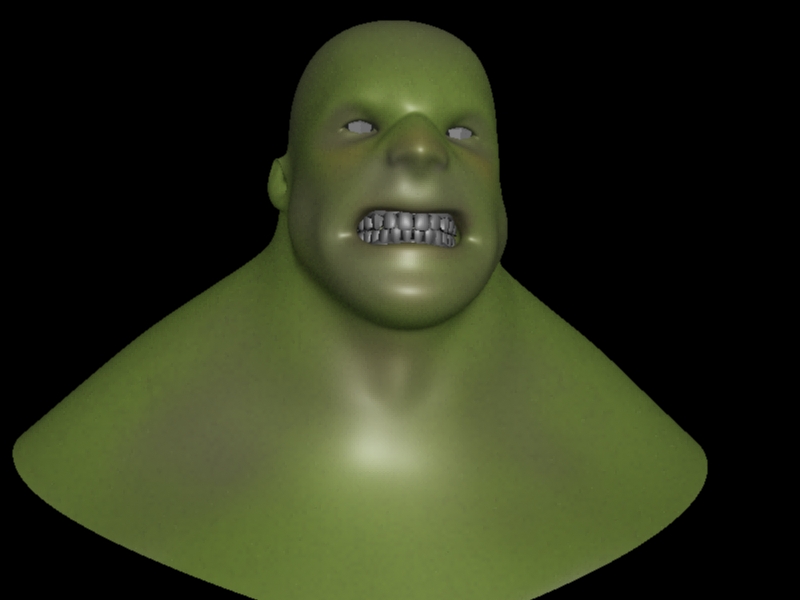
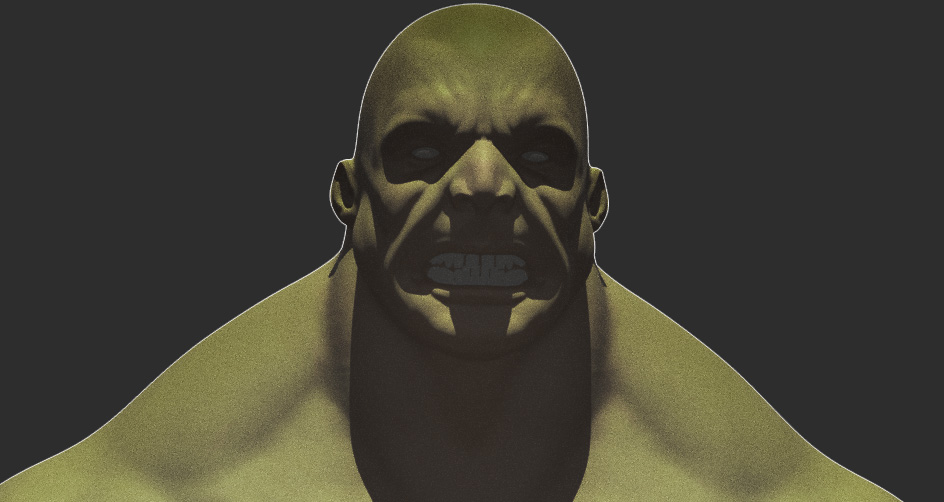
So, I thought I’d dive head first into Maya and start trying to render this guy with the Mental Ray SSS skin shader. I read and watched a bunch of tutorials and I think I have the right ideas of what to do. The biggest issue I’m having is when applying the mental Ray shader, I lose all of my displacements. I Googled it to death and couldn’t come up with any clear cut answer. I’m sure it’s an easy solution (hopefully.) Can anyone help? I’m attaching the render right out of GoZ (no bump mapping applied) and then with the Mental Ray shader applied (with some quick subscatter maps in there just so I could see how they work.)
Attachments
Welcome to the club! I’m dying to find answers to many of my questions regarding character rendering setups. There are some cool people who are willing to help but it falls back on me because I don’t have something ready to show I guess.
Anyhow, I would advise you to quit using GO.Z because one it does something to the UV’s and changes the vertex order at least to my experience inside 3ds max. Try again by simple saving ma or obj files and exporting the maps directly from zbrush.
first try to render your model not with sss material but normal one, to see if textures are ok, if yes then it is all about settings of sss material. There must be on internet tutorials how to create displacement maps that work in Maya. I have tried in Max and it worked well for me.
Try first only normal map, maybe you wont need displacement.
Hope this helps, but I’m a huge novice when it comes to the Maya rendering stuff. If anything, I hope it leads you to the right path:
Try this: create your normal, texture, and displacement map in zbrush at once. Then, export the ztool as a maya*.ma. When you open the file in maya, everything should be plugged in for you.
When you include an sss shader, I know there is a way for the material to read your settings from previous, so they get adjusted properly. Something to do in the node hypershade window. I am so sorry that I can’t be more helpful, but I hope this at least give syou direction. Good luck!!
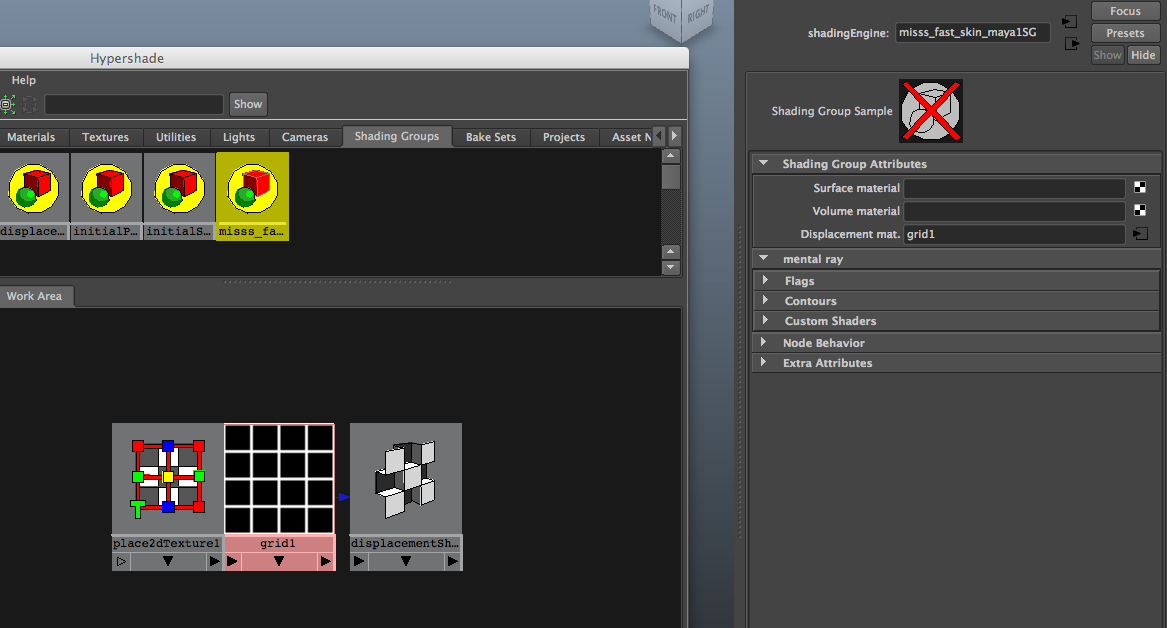
okay so one of the biggest problems when applying displacements in maya is that they attach to the wrong shading group. Go into your hypershade and NOT ON THE MATERIAL, but in the shading group tab find the one thats named your material and then in hypershade attach the displacement shader. This worked for me, I hope it does for you too.
Thanks for the replies about my Maya issue everyone. I’ll give them a shot! I really like the way BPR renders out of ZBrush and don’t mind comping in Photoshop, but there’s just something about doing it in Maya with Mental Ray that fascinates me and I’ve always wanted to learn how.
Ah geez, I give up on the SSS_skin_shader thing. I can’t figure it out at all. I still like some of the results from Maya rendering though, so I’ll keep at it.
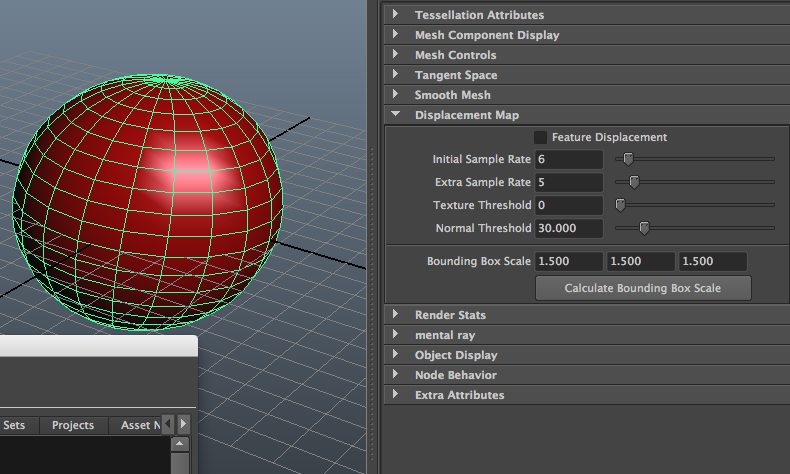
FINALLY figured out what was up with the displacements with the sss_skin_shader in Maya. This is probably a really Maya-noob-ish post, but maybe it’ll help someone looking for the answer. I wasn’t sure where to add the displace map, so I added a screenshot of where I put it to make it work here in my test. Also, and very important…you have to select the mesh and uncheck “Feature Displacement” for the displacements to show up.
Like I said, this is probably basic knowledge for experienced users, but maybe it’ll help someone like me.
Attachments
lost most of the work I did on this model somewhere along the way. Experimenting with Modo renders tonight. Nice and intuitive and the maps come over great from ZB.
Hey, see if these help with your sss issue in Maya:
http://www.3dtotal.com/tutorial/maya/makingof_close_up_portrait/portrait_01.php
http://www.mrbluesummers.com/tag/sss
http://www.youtube.com/watch?v=CFRZDRFOoNc&feature=related <-- pretty good tutorial I thought
Thanks a lot Sankar82! I’ll look into those. I know Maya is a great tool, but it’s just so intimidating sometimes. Especially for someone who is just interested in the illustration aspect of 3D.
Attachments
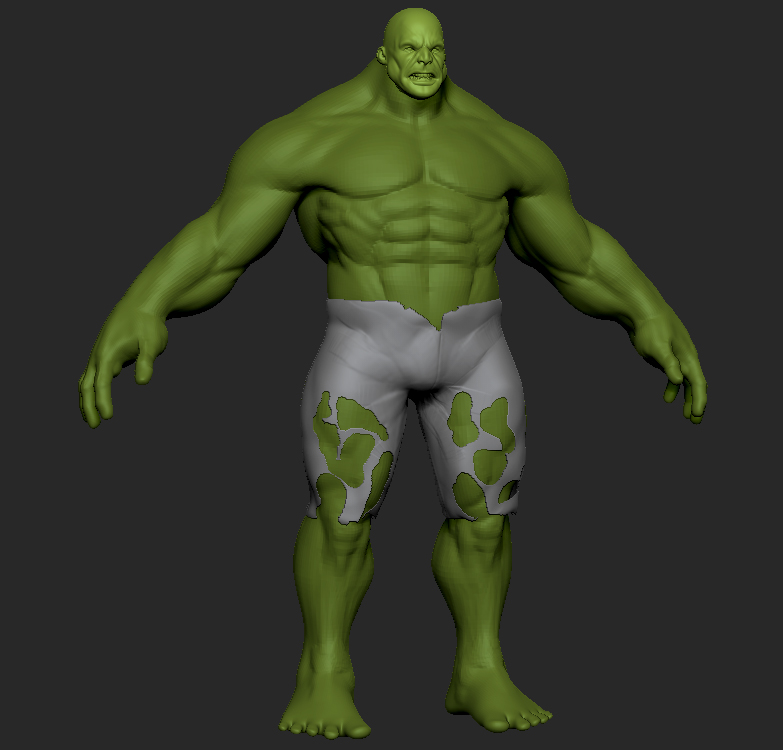
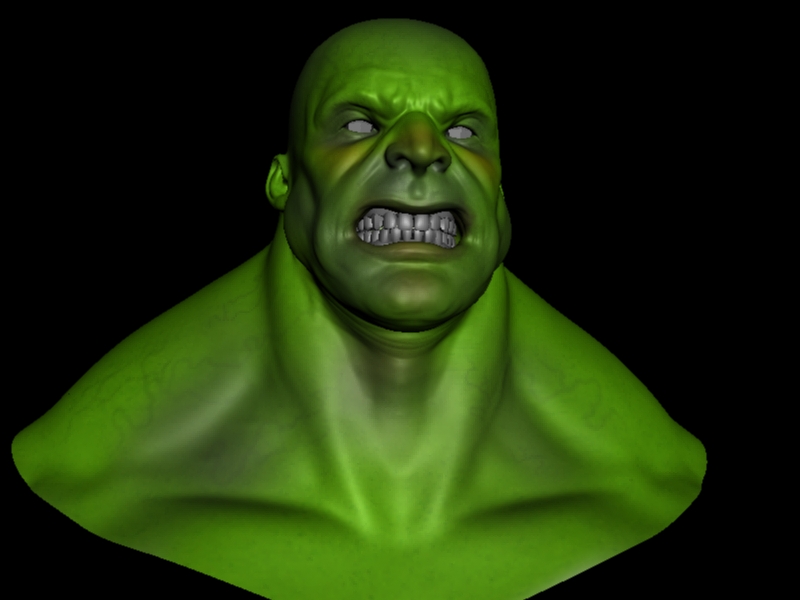
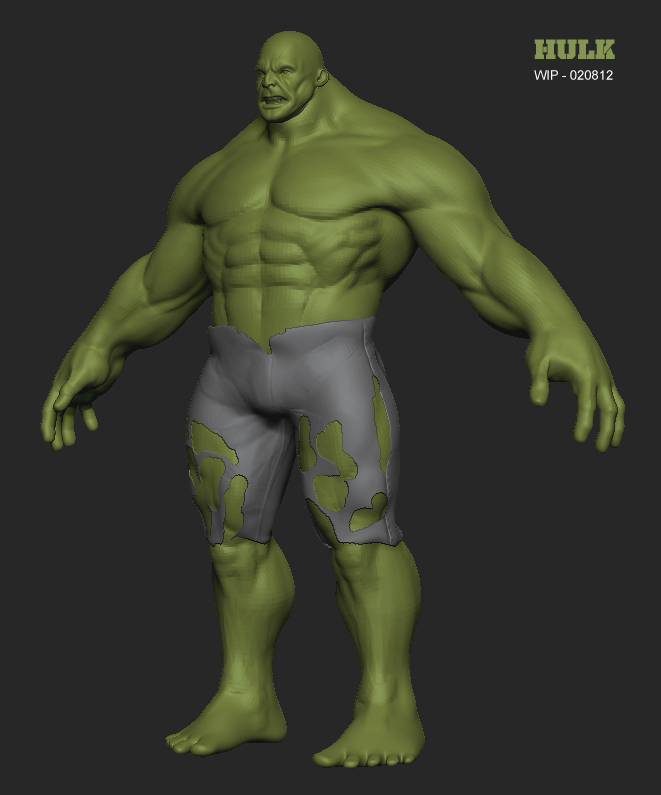
Looks really good man. Face color looks differ from body lol
Great work on the hulk, solid anatomy going on!
cheers and ahve fun,
Kenny:)
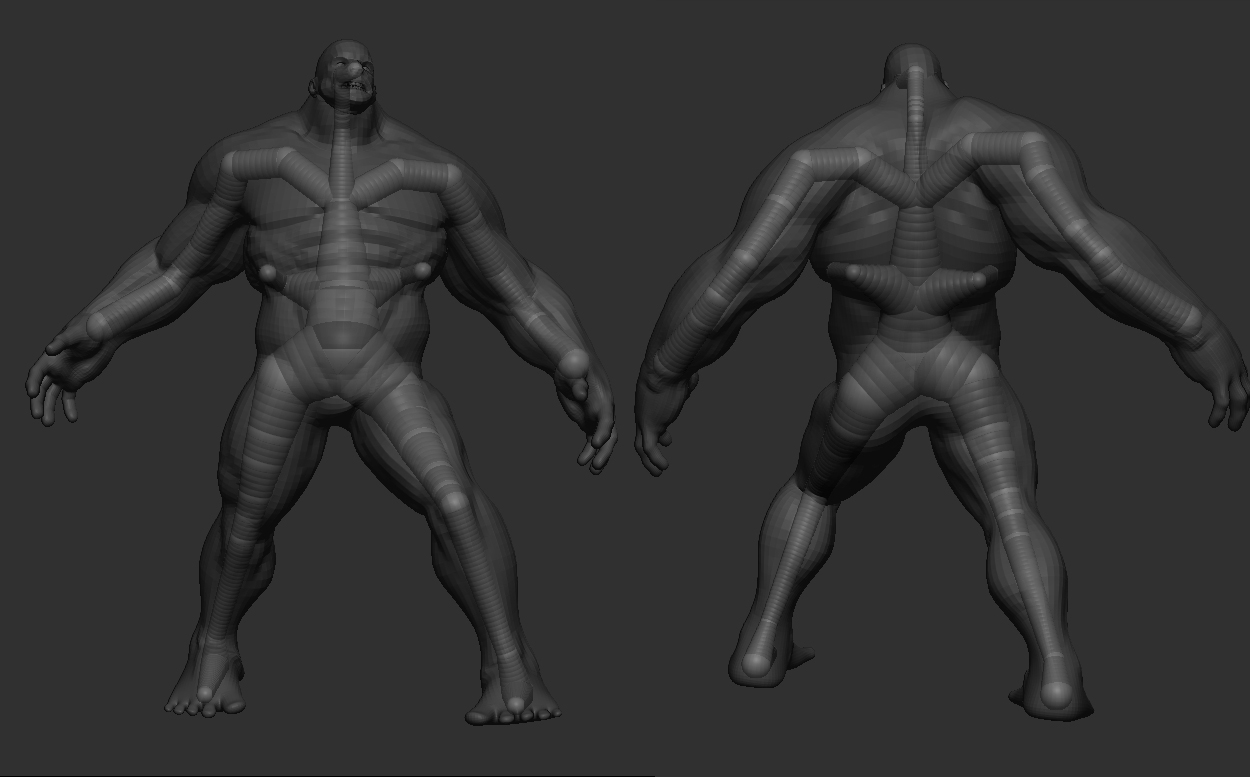
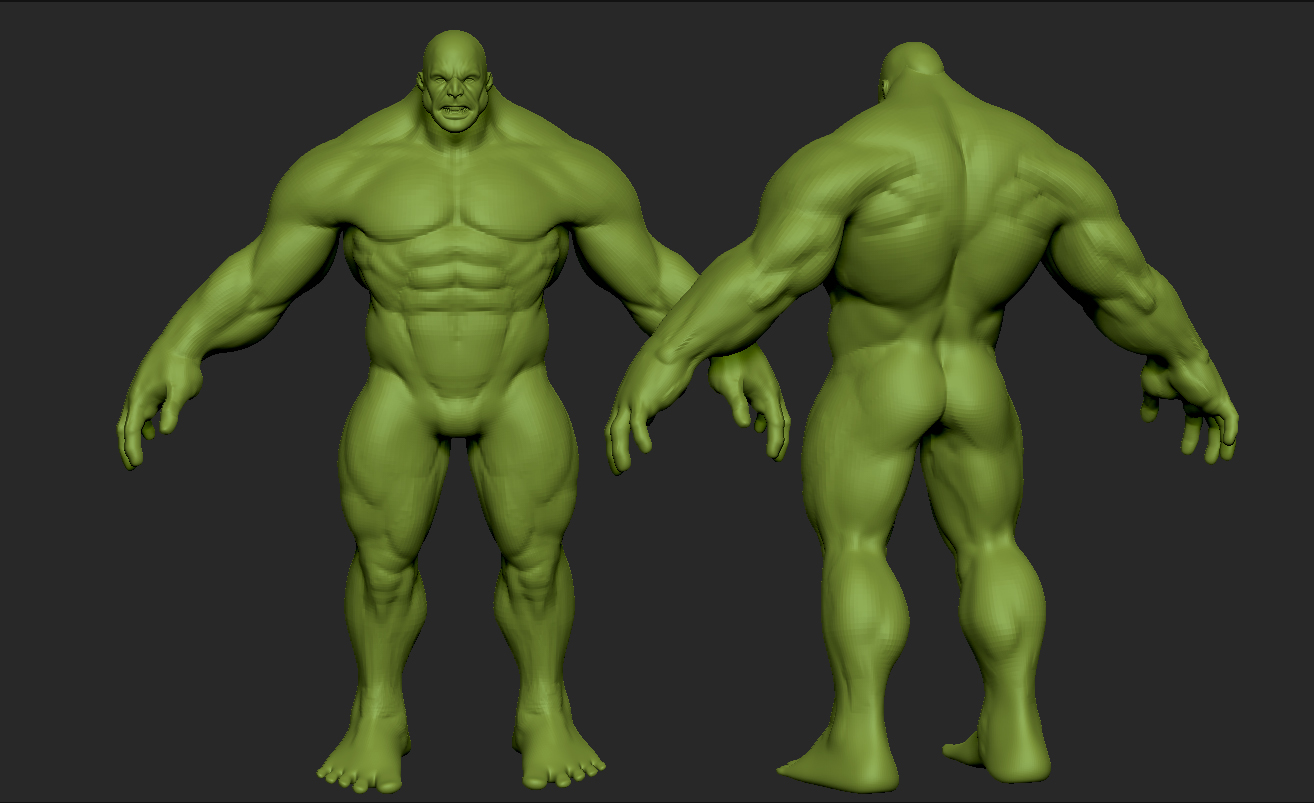
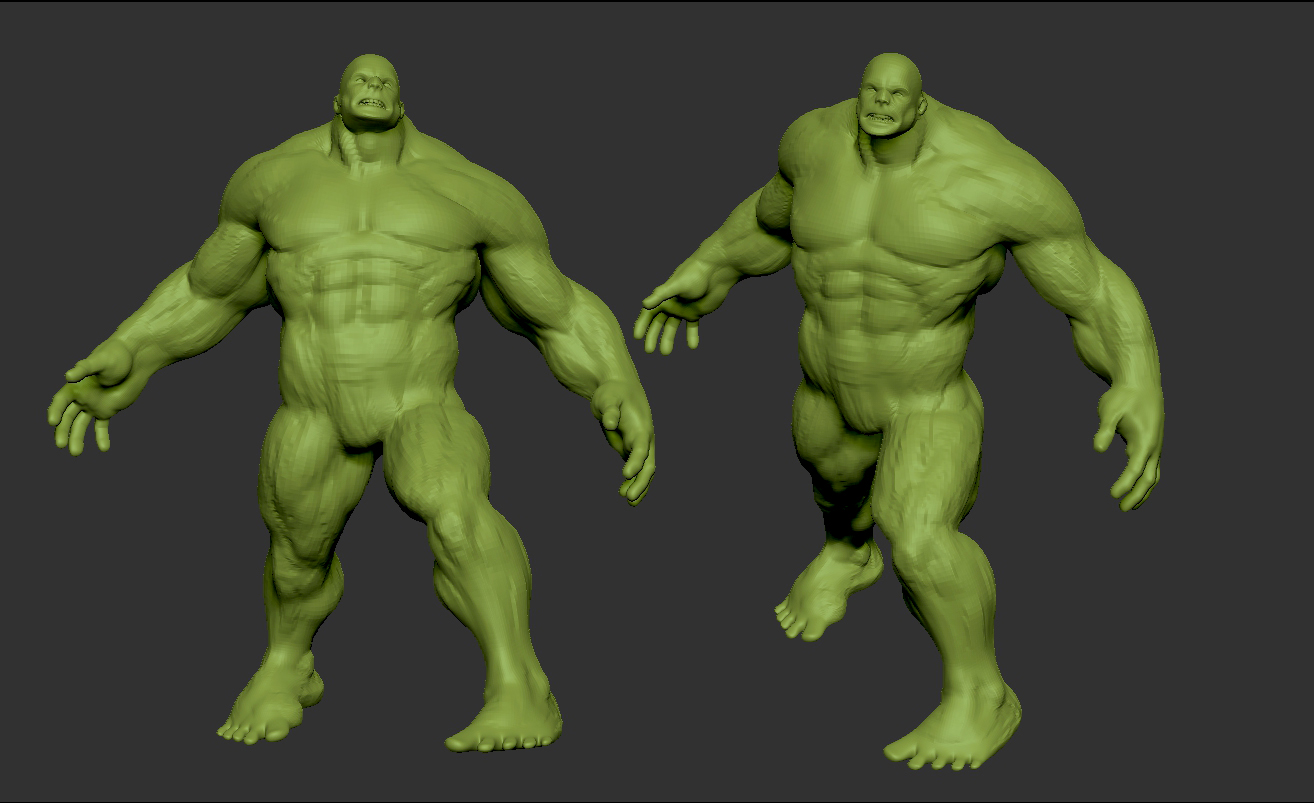
Just learned how to rig with ZSpheres. So fun! Big green is going to be squaring off against a certain friendly neighborhood hero. 
this is really good!  i think the hulk is an amazing character to start sketching and learning anatomy, i keep him as a bench mark, had sculpted him twice and the next time it will be better this hulk here is amazing would love to have a ‘all hulk contest’
Really like the design you have, but I feel like his legs should be bigger
Wonderful pose, maye you could show the zsphere rig screenshot :)
Can’t wait seeing this Hulk done made!
Happy sculpting
- Kenny


Thanks guys! ZSphere rig shot below. I just followed the tutorial on YouTube here: http://www.youtube.com/watch?v=cmury2eT_io&feature=related
That made it very easy! However, the only issue I’m having is, now that he’s posed, I can’t seem to transfer it to the high res mesh. It’s not a huge deal, but I wanted to have the teeth and eyeballs as separate subtools not everything combined as one piece as it is now.