this was my favorite on the challenge. great sculpt!
i wish to see this one textured, too.
Wow… I really like skin textures…
You controled contrast and wrinkles on the legs and neck … even bottom part very well. I really inspired… great!!
Hello everyone,
Thank you very much for the comments and compliments and many thanks for this really warm welcome:)
Actually, this is my first try with vray so It was not perfectly displaced in the render image but I will write the steps that I did for displacment map ( with vray 3dsmax ).
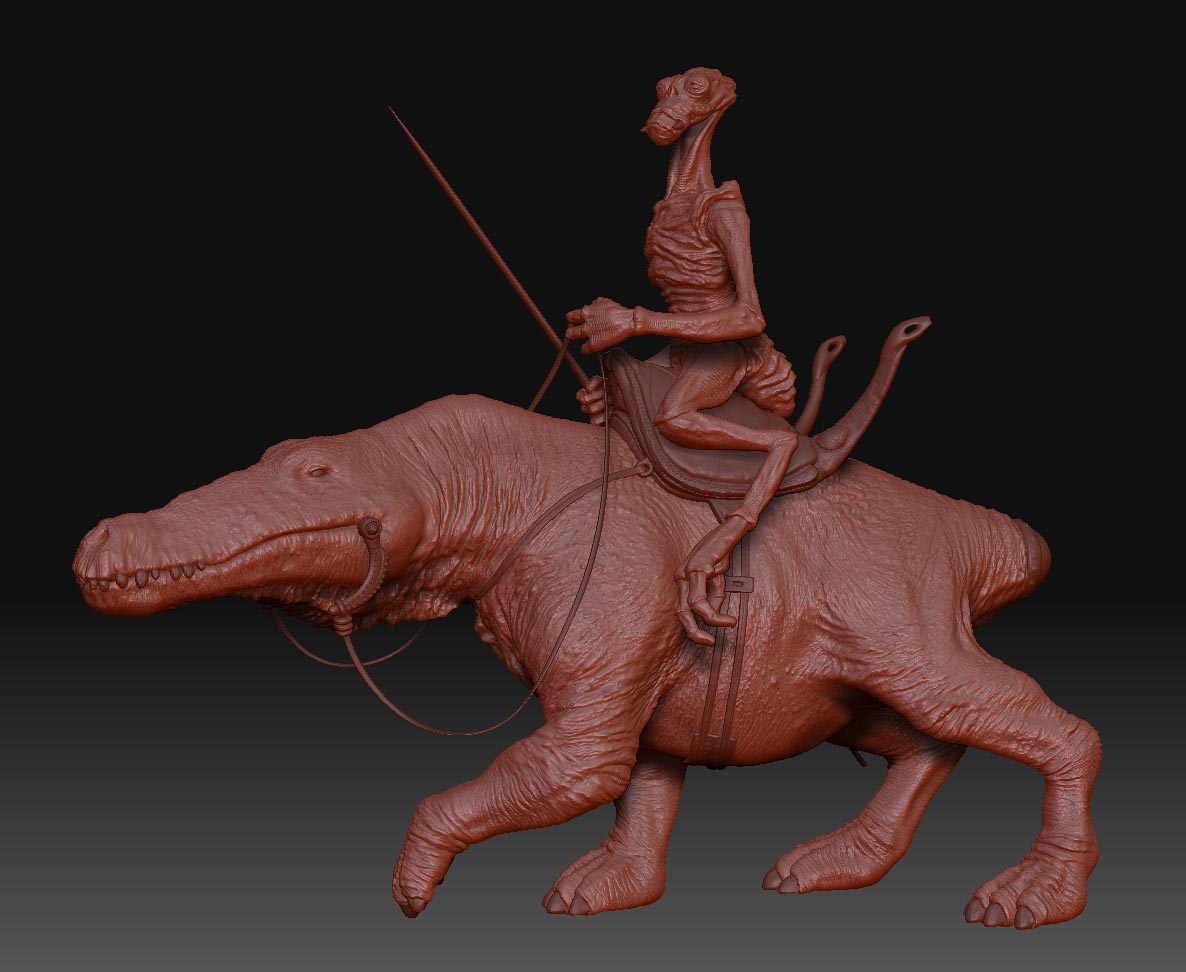
According to the fold skin, I mostly sculpted the big fold in lower subdivision in Zbrush. For the fine detail fold I used alpha map applied to the model in higher subdivision but I also used small brushes to sculpt those folds along the lines or curvature of the alpha map that I already applied
Here is the alpha maps that I mostly used for the fold skin.
http://download.cgsonic.com/alpha_brushes.rar
Hope it’s helpful for you guys  and Thanks again for the welcomness.
Thee-
Ahh, brings back memories. I worked on the flesh and muscle sims for the orray, the reek, the nexu and the acklay. Your camera angle reminds me of the galloping orray that the nexu attacks when he comes bounding out of its cave.
Your sculpt is great. I would really liked to have seen some of the tensing musculature under the skin that would make it read as a believable creature.
This is beautiful work! I also like fantasy creatures… How long did it take you to complete sculpting this using Z-Brush? I am just planning to get on ZBrush… Only experience in Clay sculpting… not digital sculpting. Based on my background, how long do you think would take me to get the hang on this and complete my first digital work?
Amazing piece!!!
p.s.
We are waiting for tutorial for displacement.
Excellent work, great model
best,
Anderson
Amazing! well done!
Really cool creature! nice work on the textures! Could you post your lowpoly cage for this? Thanks.
Great modeling!
Nice design, i just think that the anal plug on the creature is a bit weird.
Thank you. I spent 2 weeks on it.
Since you already had sculpting skill, It would not be too hard to get to digital sculpting. Once you get used to it, It will be a lots of fun. ![]()
Cheer!!
Hello, everyone
According to laying out UV, I found that Unfold UV option in Maya is really do very job for organic model. But still need few manually tweaking.
I spent a lot of time laying out UV. People reply me and recommend using
RoadKill http://www.pullin-shapes.co.uk/index.htm
Headus http://www.headus.com/au/uvlayout/
Thanks a lot for infomation! I will try them. Hope they can speed up my workflow.
I seperated my layout to 4 main maps according to the type of material such as leather, metal,and skin.
Also, I tried to utilize the resolution of the map according to how big of the objects.
Here is my uv layout
Cheer!!
Thee-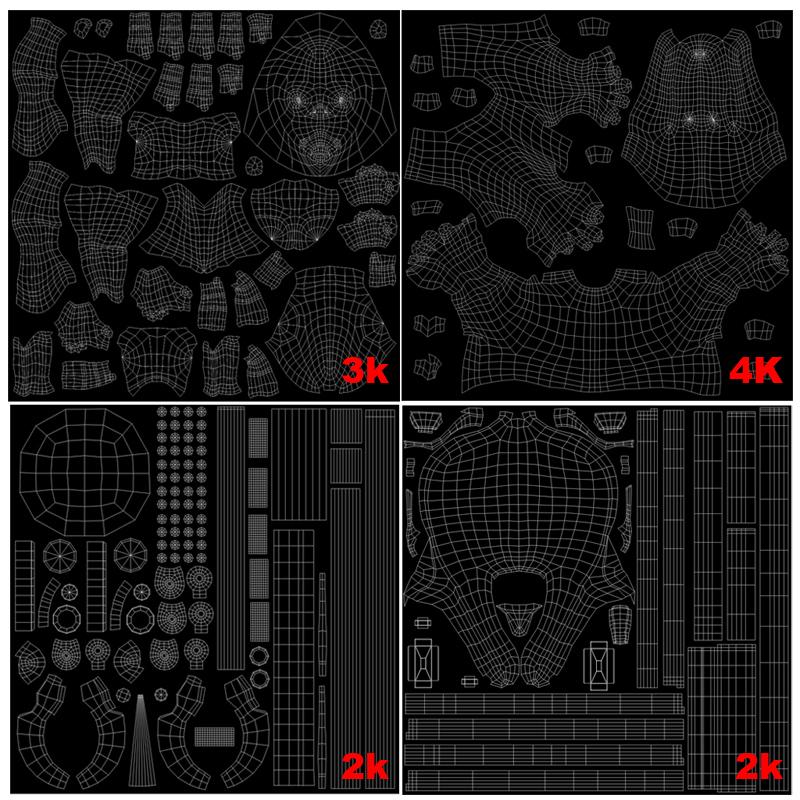
Additional to Laying out UV, I aways use Uv check option in Zbrush. It will check your UV and see if you have an overlaping uv that can cause problem later on.
For example, I had hard time generating a maps out of xNmormal software due to I had an overlappng UV.
Cheer!!
Thee-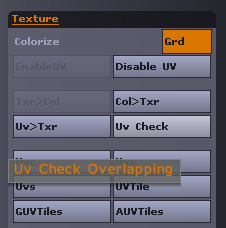
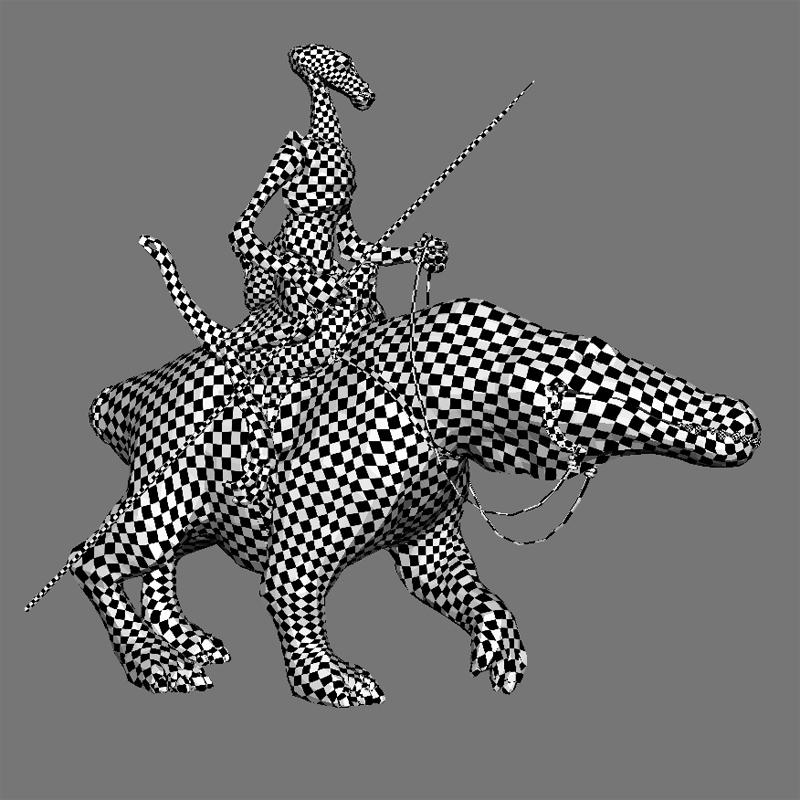
Here is my base geometry in Maya. I try to make it as clean as possible and try to have the edge loops that good to the deformation.
Hello everyone,
Actually, It is my first time for the rendering displacment map in 3dsmax with Vray. So If you guys want to add something or correct this info would be helpful for us,
Keep in mind
the model that export to 3dsmax need to be the same level of subdv as it used for generating displacement map in Zbrush.
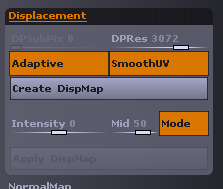
- Get displacement map from Zbrush
Nothing fancy, just go back to sudv 1
set the resolution and select Adaptive then Create DispMap.
-Export the model to 3dsmax
-Smooth the model
in modifier list, just click the drop down menu and select smooth
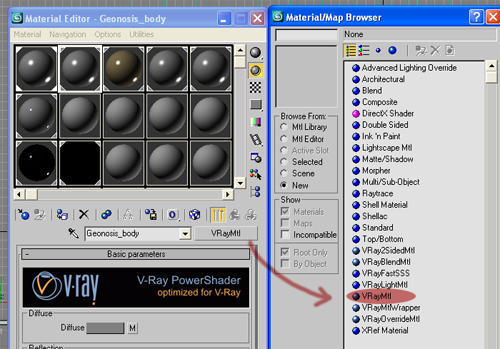
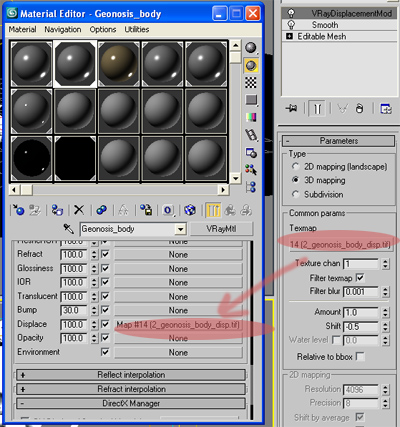
-Create VrayMtl in Material Editor and assign to the model
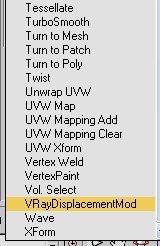
-Select the model and assign VRayDisplacementMod from the Modifier List
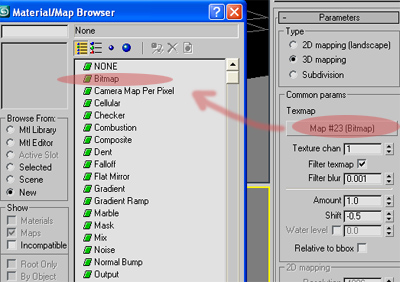
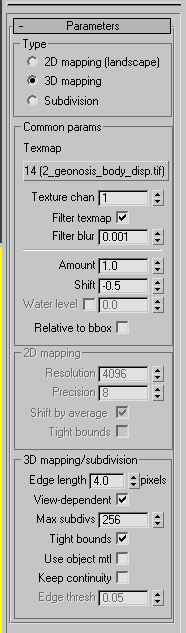
- in VRayDisplacementMod Parameters,
click the blank slot under Texmap and select Bitmap then browse to displacement map that created from Zbrush.
- Click hold drag the slot to VrayMtl in Displace slot ( also select instance )
-Set the Shift value
at this point I just use the default setting as you see in the photo below. I only adjust Shift parameter untill I get a good resault. It was such a timeconsuming precess here due to test rendering.
Hope it is helpful for you guys. Then again, If there is additional useful info about this, please let us know.
Cheer!!
Thee-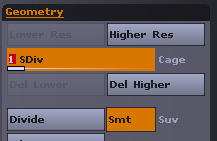

Attachments
Hi !
Great modeling !
For Vray I think that in parameters, the type of displacement should be set to subdivision with displacement map done in zbrush.
Thank you very much for the info.