Amazing work McAllem
i have a question about your Custom UI … does the Totalpoints count and active points count disappear when you relaunch Zbrush ? because i have this problem
Thanks
Amazing work McAllem
i have a question about your Custom UI … does the Totalpoints count and active points count disappear when you relaunch Zbrush ? because i have this problem
Thanks
Ive been doing a Tmnt version my self, but I have to say Hats off to you my friend yours made me jealous  the amount of detail you put in there is just beautiful regardless of its completion. The female character is quite amazing as well. cant wait to see your next update.
Muhmet -> thanks for your comment, about the UI, everything works correctly for me 
Ralramahi -> thanks to you sir! dont give up on your turtle o/ updates will come often!
good evening people!
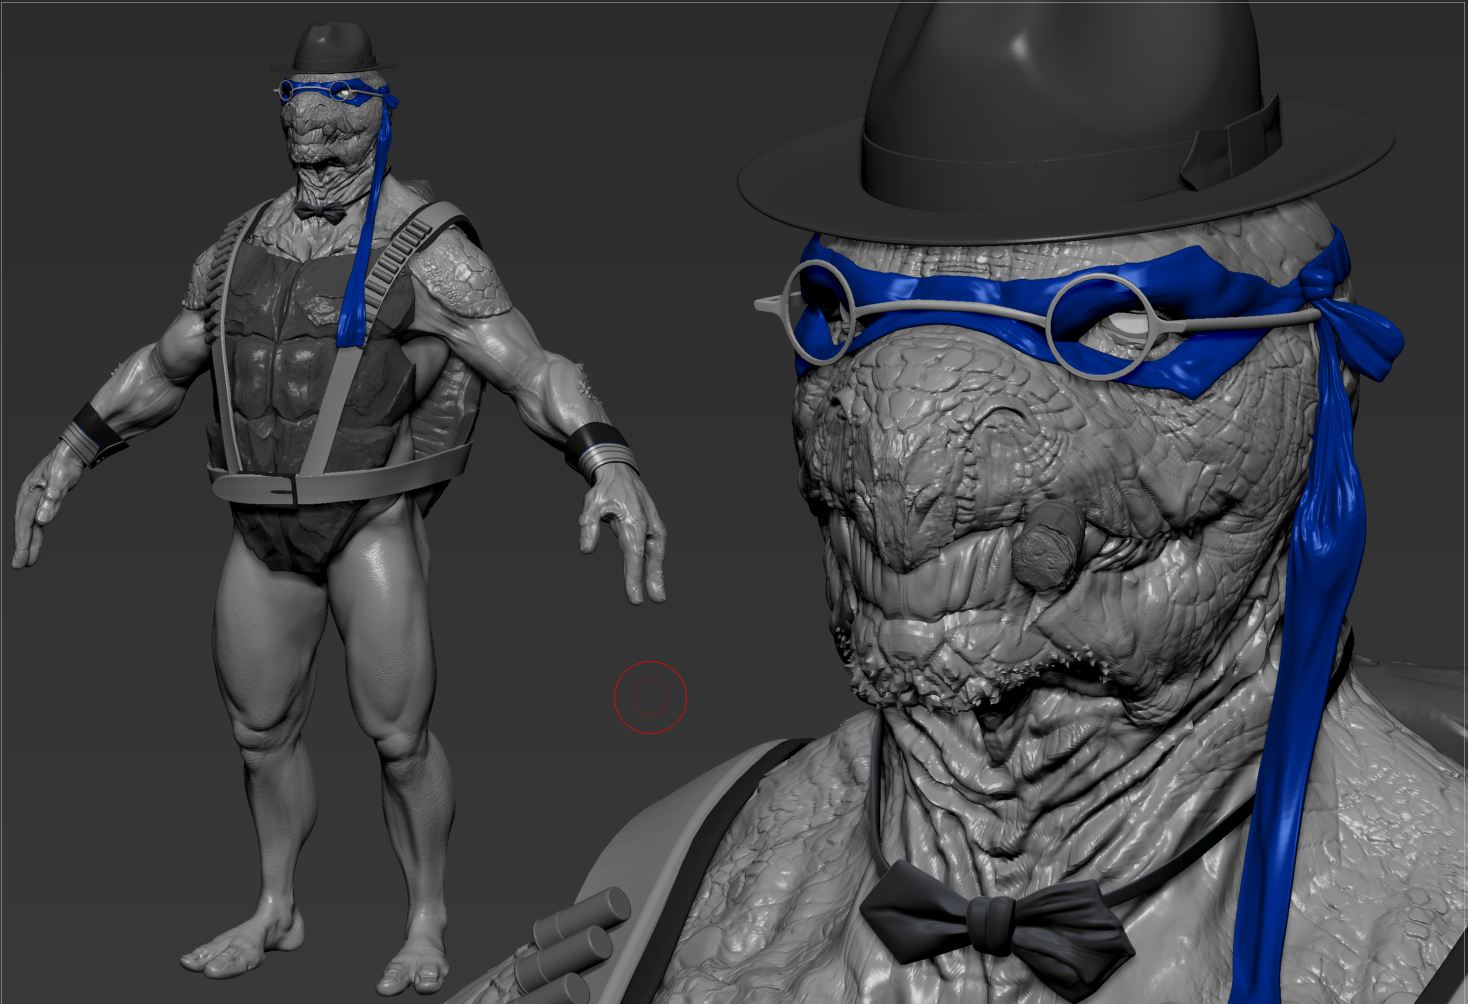
so here are my last updates, i could have done way more, but you all know that: 1 girlfriend happy = 0 zbrush
i would have opened his mouth a bit for the cigar, but i will rig him for animation, so this king of deformation is not interesting right now!
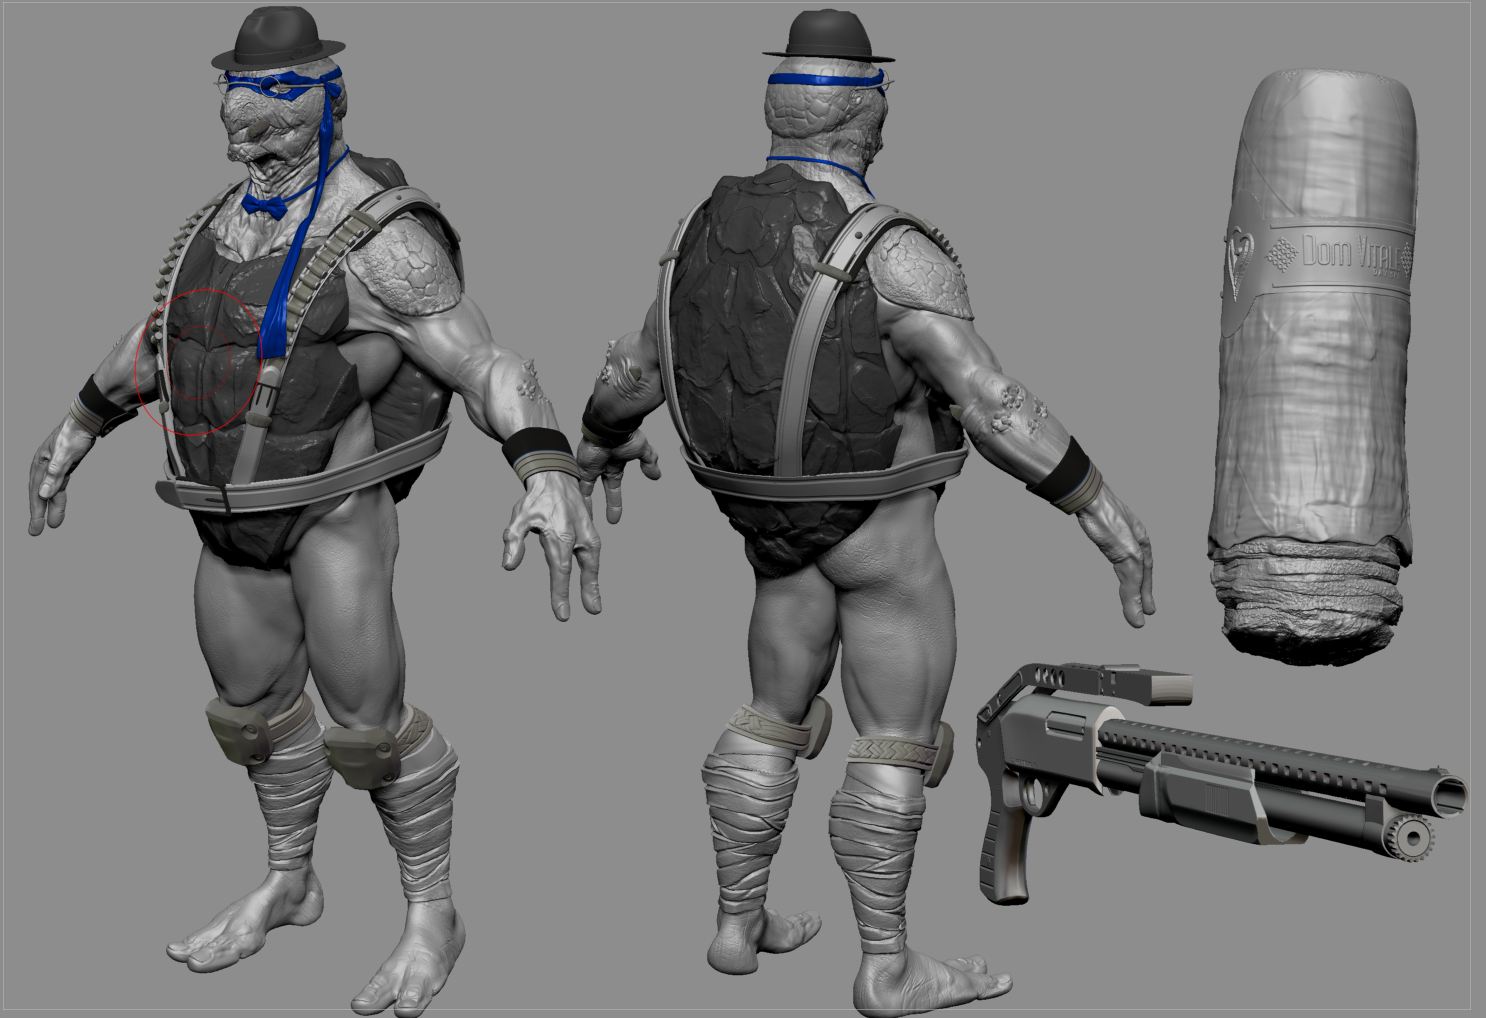
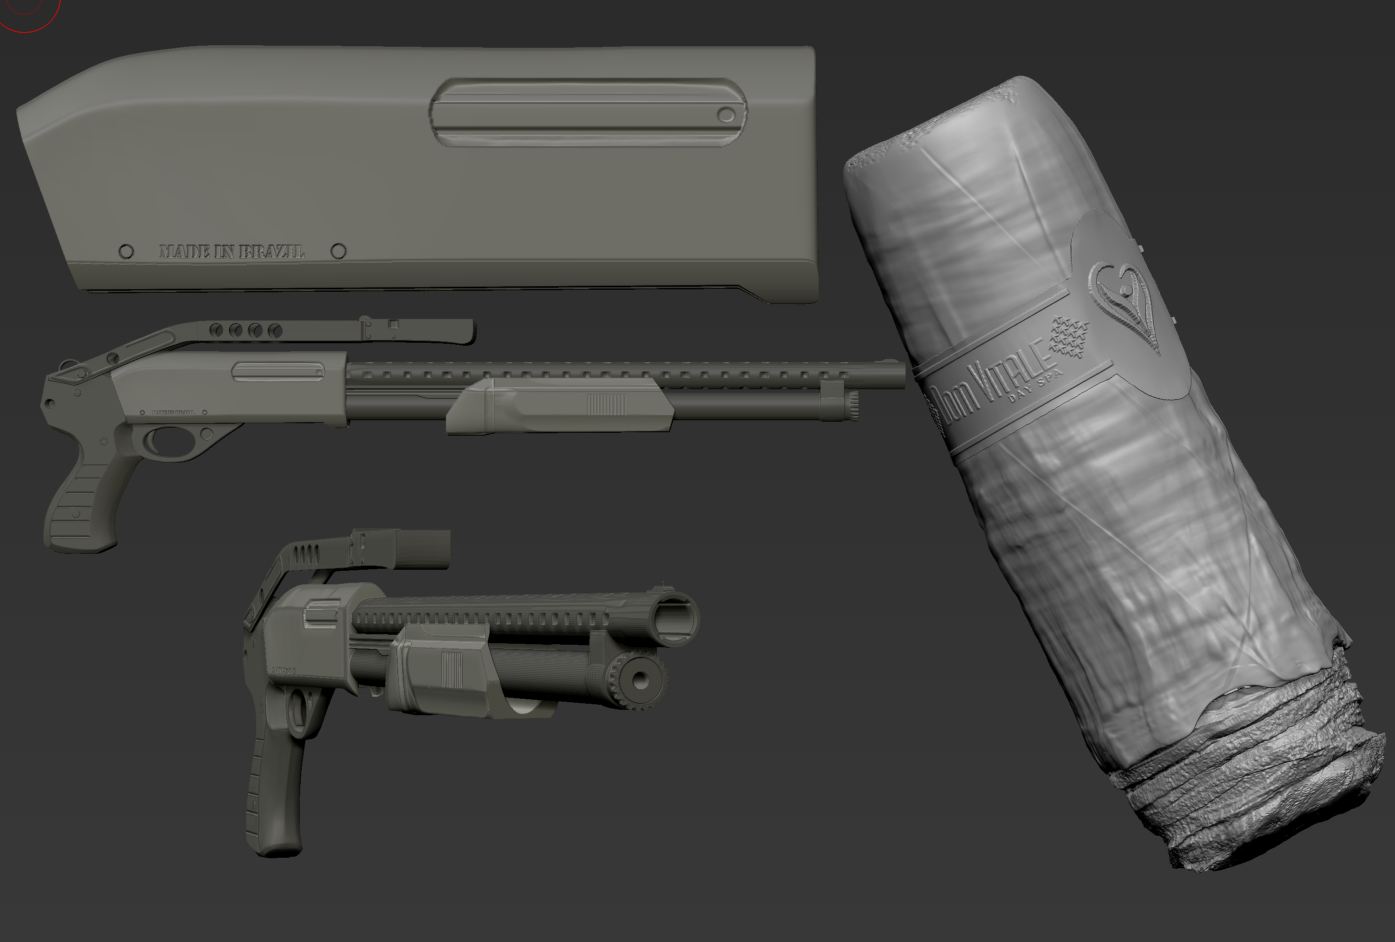
i have sculpted a shotgun for him and on the right, i am showing the logo of my mother’s company that i added on the cigar as a easter egg (i love creating them, specially as a personal publicity)
bye!
oh man , keep up the good work! like a sir
any chance posting a mini tut hair?
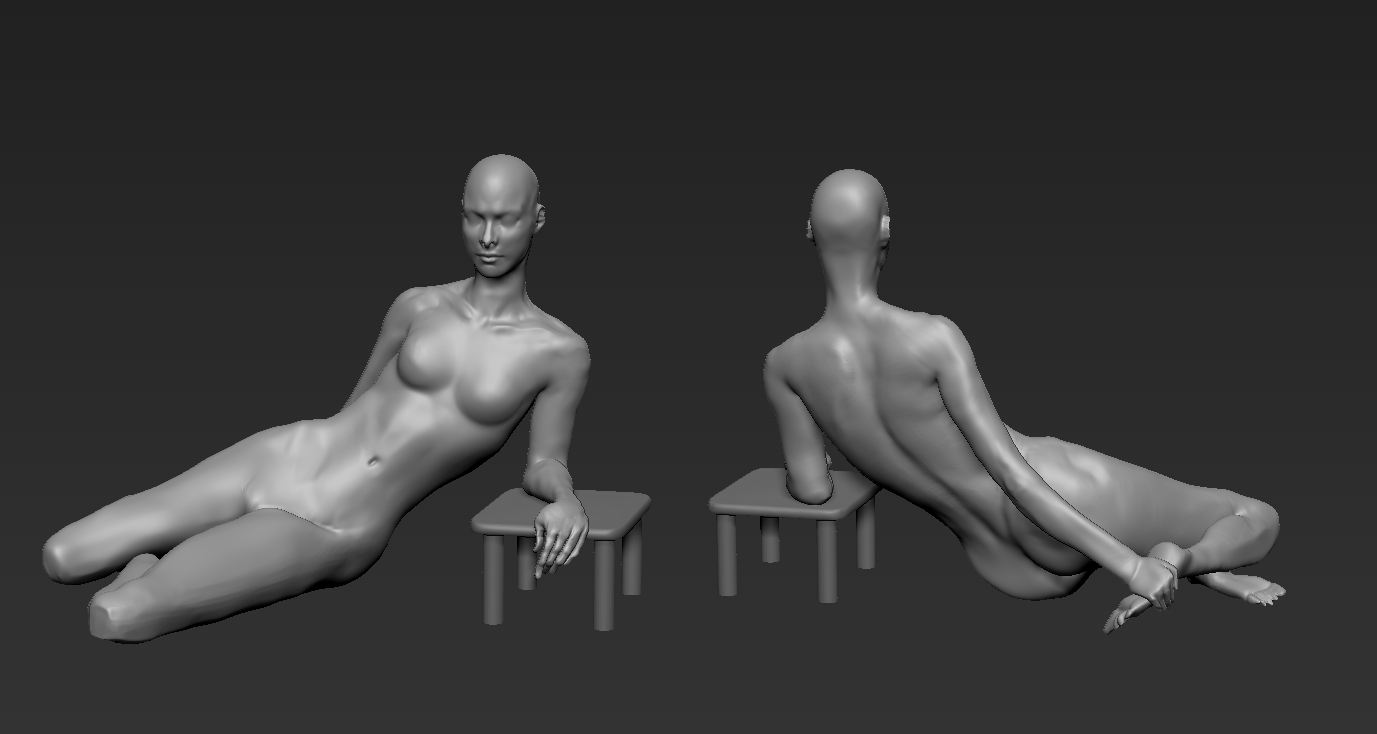
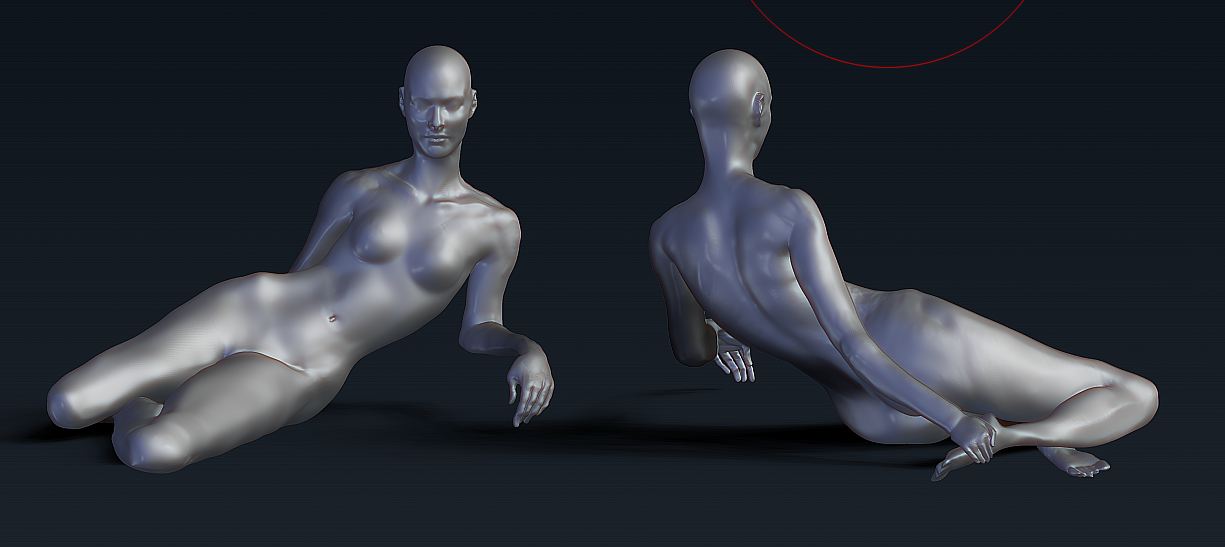
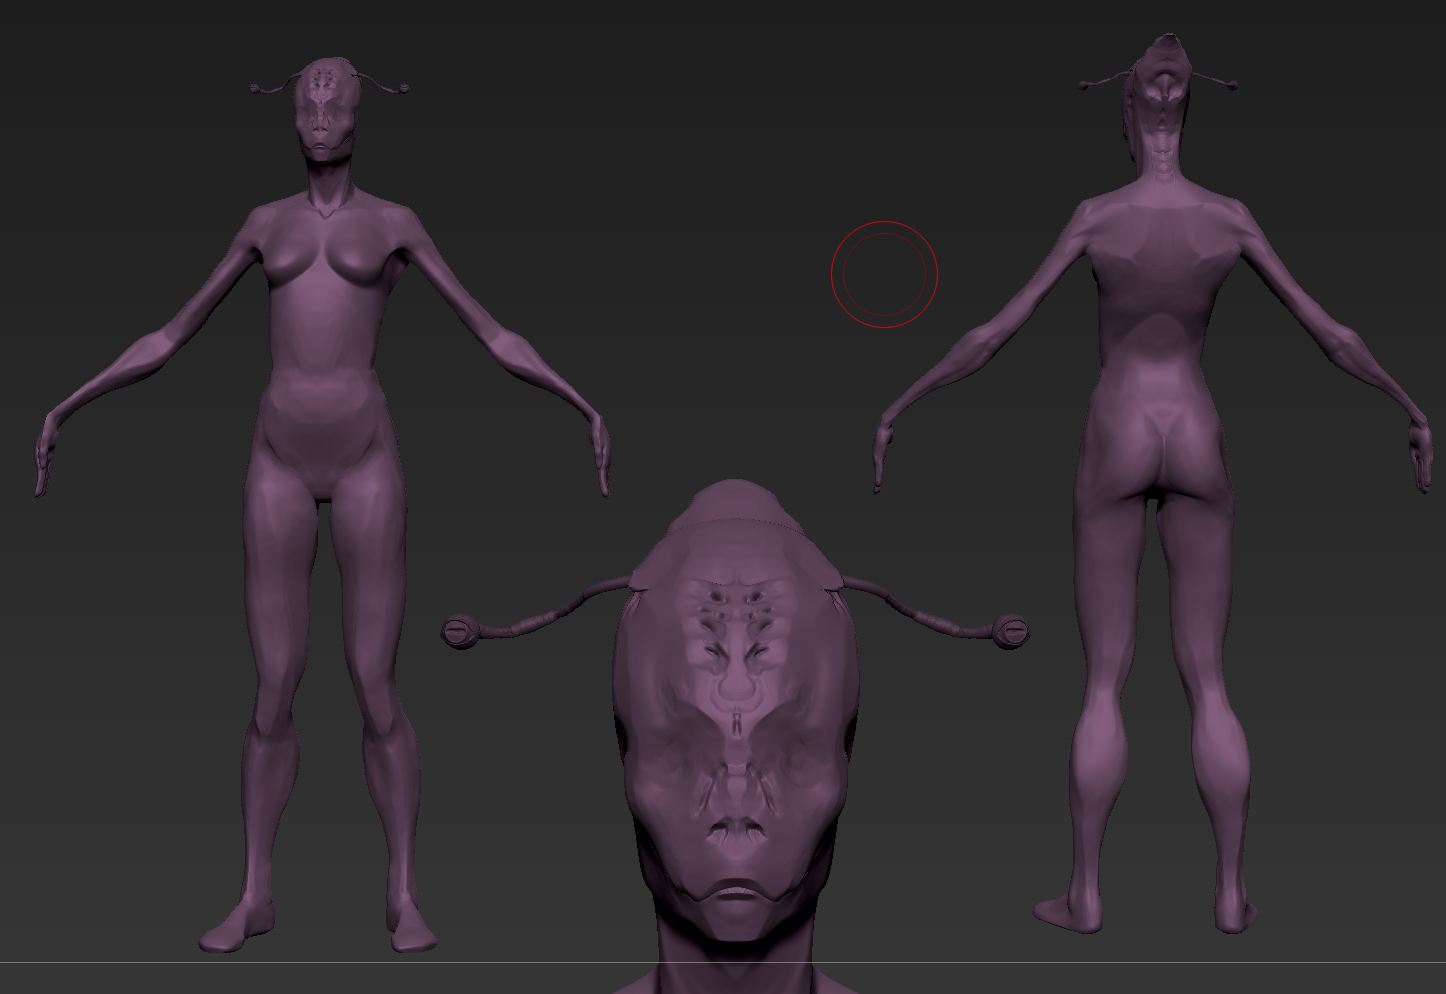
quick doodle of the night 
about the hair, I really tried everything to create a workflow that could be easily handled, for starters, i made several polygroups in the head, then i masked them all and created the fibermesh (beside the quick preview slider, there is a button that makes the fibermesh inherit the polygroups that are bellow. Later, i moved the hair with the move brush and the groom fast lenght brush with the option mask by polygroups (sometimes i would hide all polygroups but the one i was working). To make hair smaller i used the smooth brush (hehehe) it was usefull to make all the fibers with the same lenght quickly.
Now, exporting the hair was a big issue. As i rendered in the latest version of vray, i used the new hair material. So for starters, i exported the fibers with only 20% of the total. Then, i would import in max with the setting “import all as one mesh”, or else the software would import all the fibers as different splines and it would crash the program.
Ok, hair is set, now i need to add the hair and fur modiffier, then i will reset all the changes that are default of the modiffier, such as frizz, etc… and here is something that really mattered: using the interpolate function, so between two splines there would be a selected amount of hair, compensating the small percentage of the same, however, i had to manually choose what NOT to interpolate, because it would interpolate two strands that were very far appart. Well, the rest is quite easy, setting the material in vray, lights, and stuff.
This quick tutorial seems quite simple, but it took me a lot of time and experimentation to get to it, there isnt much out there concerning exporting fibermesh and rendering it with vray. =P
for now, i am too tired to make an image illustrating what i did, i hope my text is clear and that i’ve helped!
cya!
Today i had a job interview at Cafundó creative studio here in florianópolis,
if everything goes fine, i will be uploading pictures of their future short film!
Wish me luck people! I am sure that working there is exactly what I need to leave the valley of the suck
that Ryam Kingslien talks about
Cya!
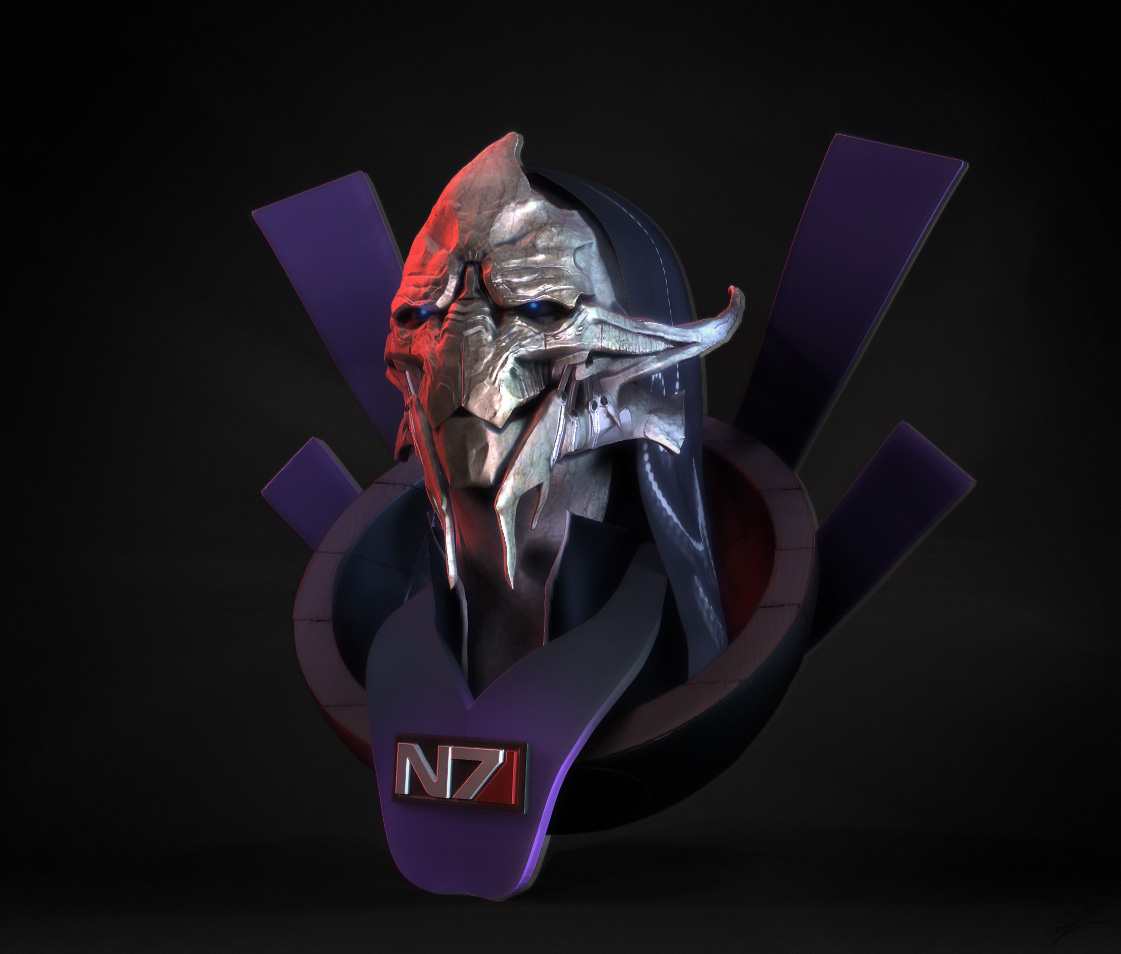
night doodle: TURIAN!
good luck ! 
thank you Bernard, by the way, i watched that video you made creating a cartoon character and it gave me the idea for tonight’s quick doodle
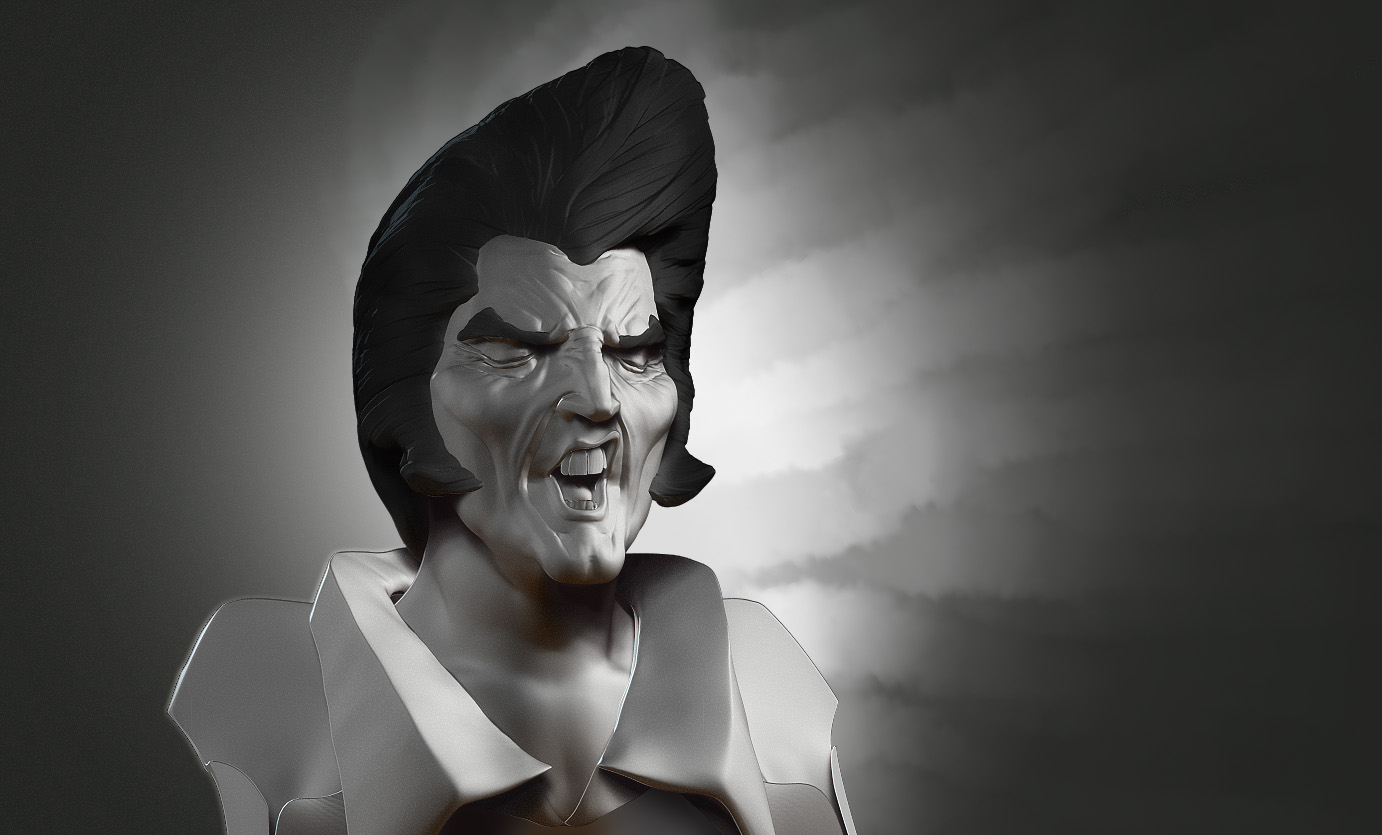
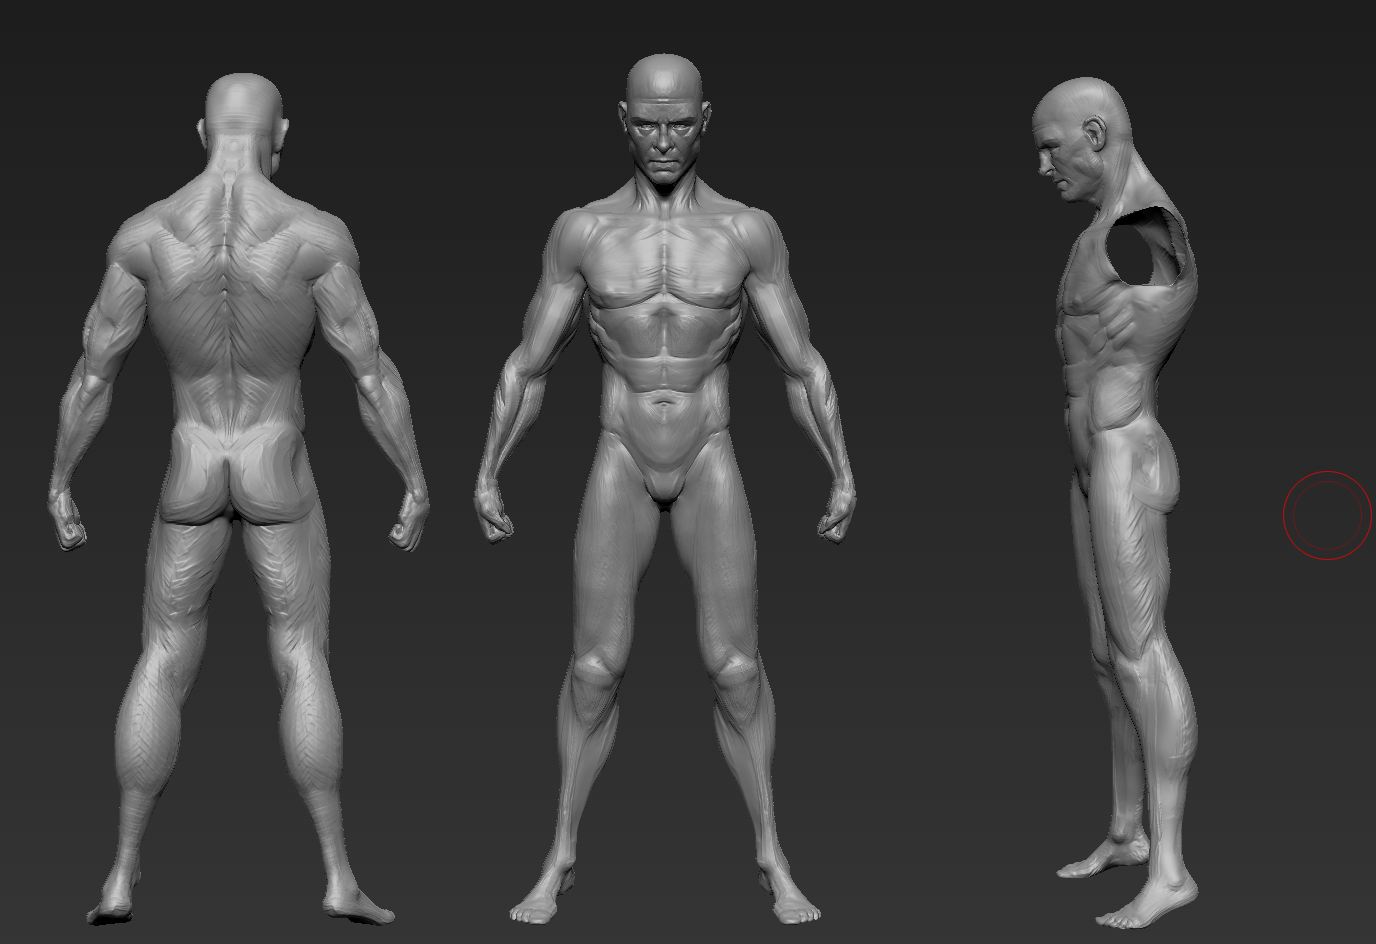
ELVIS!
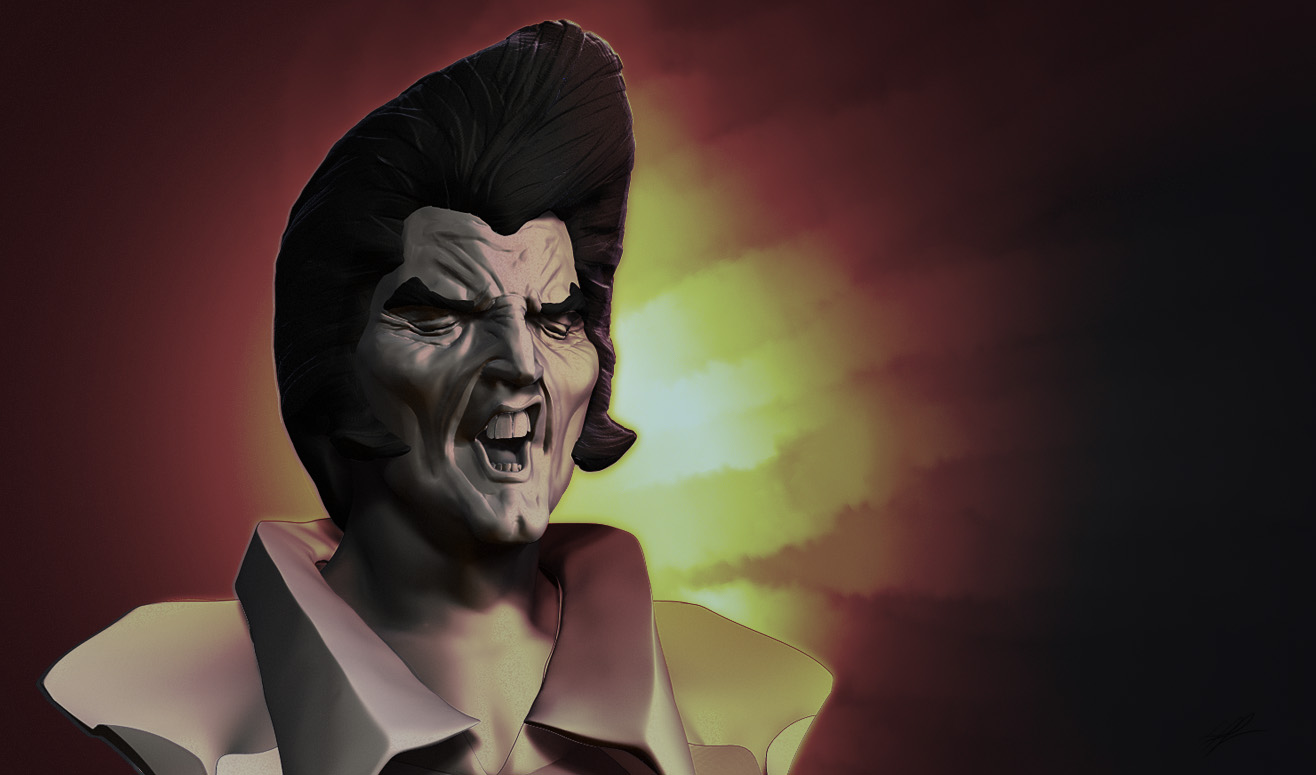
cya
Work in progress
this one will be epiccc
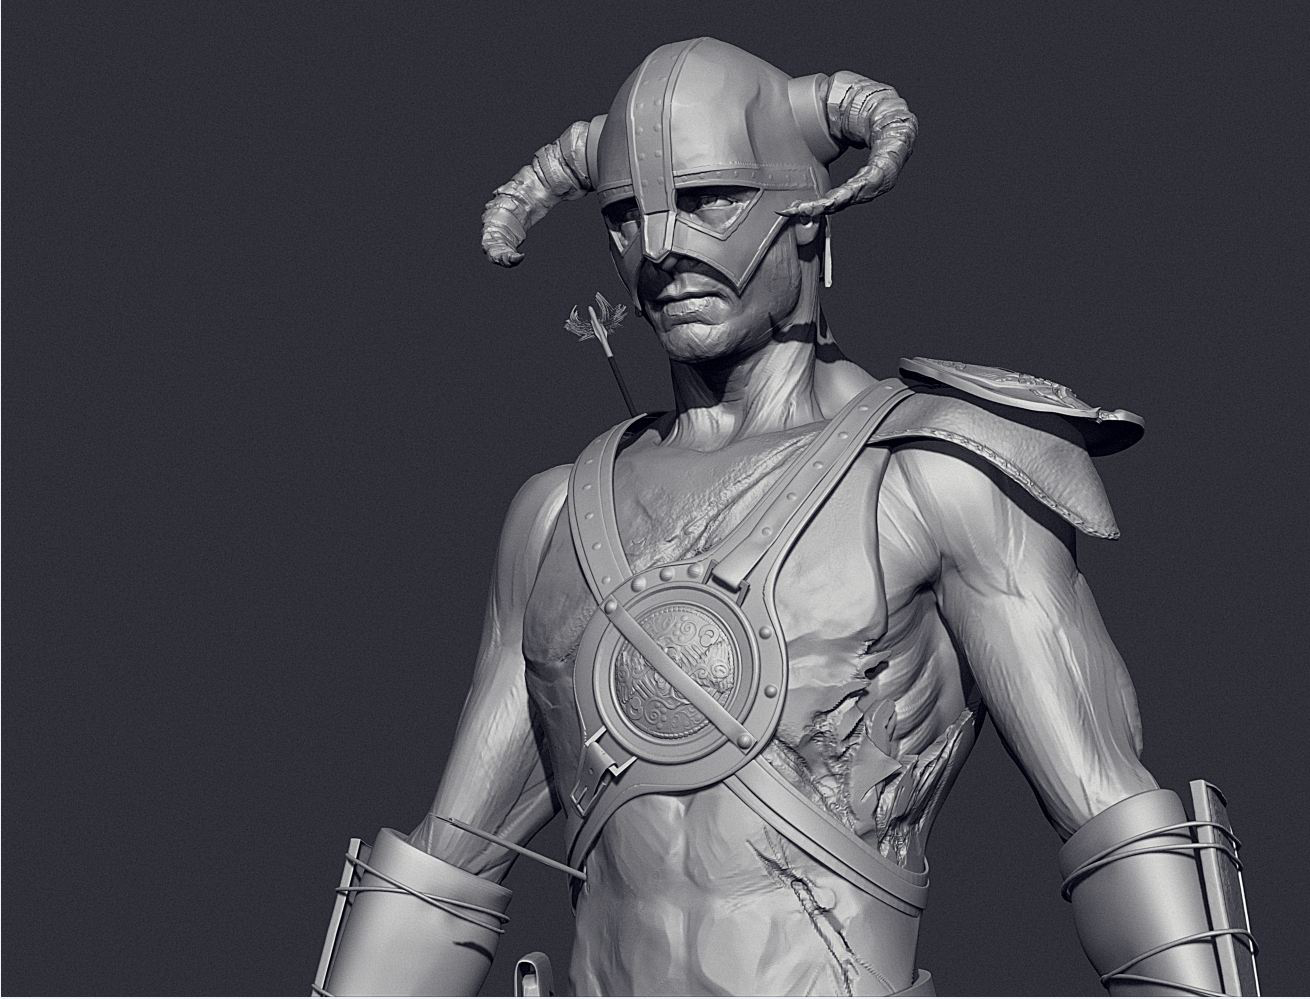
reference: http://static.zenimax.com/bethblog/upload/2011/02/dragonborn_1_1024x768.jpg
btw, sorry for the misleading thumbnail, i just want some attention, critics are realllly welcome
merci beacoup
well thats what happens if you mislead you don’t get anything people and your models is actually good nice job
hmm it turns out Armand Burger that it is againts the forum rules to post an image with something written on it with the purpose of attracting views,
sorry for that, however I did it with the intention to get some anatomy critics from the pros, which i believe will surely help me enhance my knowledge, i sincerely
dont know anyone in person that may give me some tips and advices so my only form of real interaction with zbrushers that know their business is through here (hence my
attempts to get some critics since i have so few)
ANYWAYS,
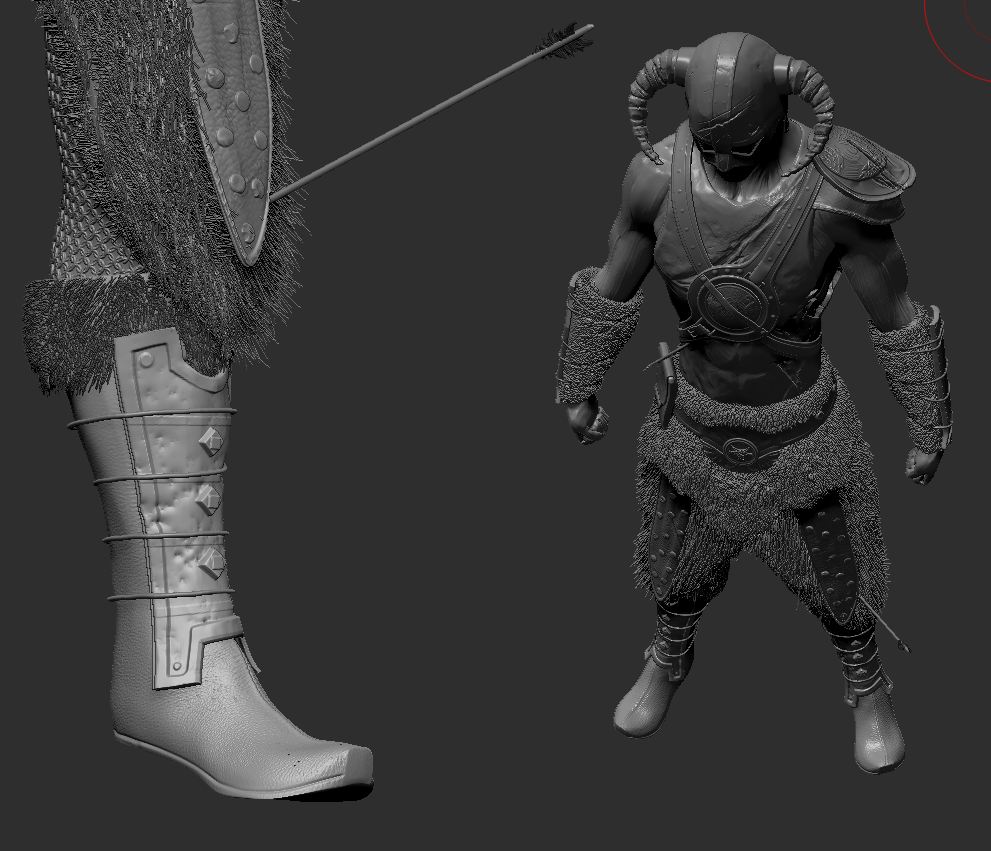
this is where i got with it today, i will apply fibermesh in his leg’s and pelvic’s protectors, his boots and gauntlets, and on his head
critics are very welcome, hope you guys enjoy
i was sculpting, but then i took an arrow to the knee
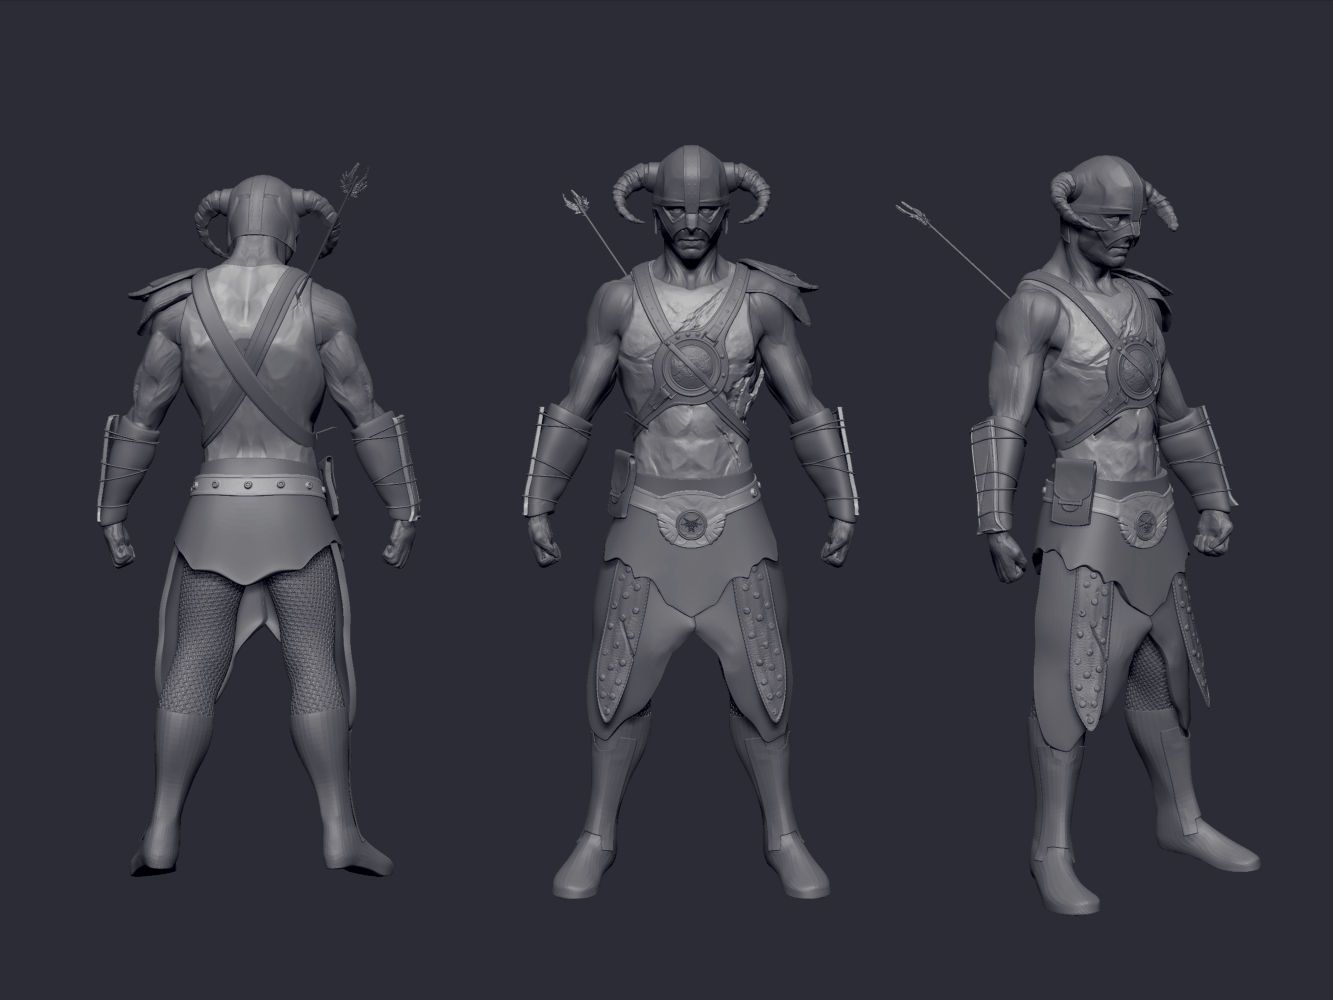
I still need to add:
1 sword (50% done)
1 dagger
1 sword sheat
1 rock underneath him
->> 1 dragon tail surrounding him :DD
i am considering makin smoke come out of his nose instead of his mouth (i would have to open the mouth, and for that retopology would be the option, me no like!)
well, critics as usuall are pretty welcome, just before anything i would like to add that his armor is not very protective on purpose, i guess his dragonborn arms are as strong as steel.
CYA!
Awesome progress! Keep going, this is shaping up to be an excellent piece.
he looks cool keep it up
Armand Burger and Senka: thank you guys for you comments i really appreciate the feedback 
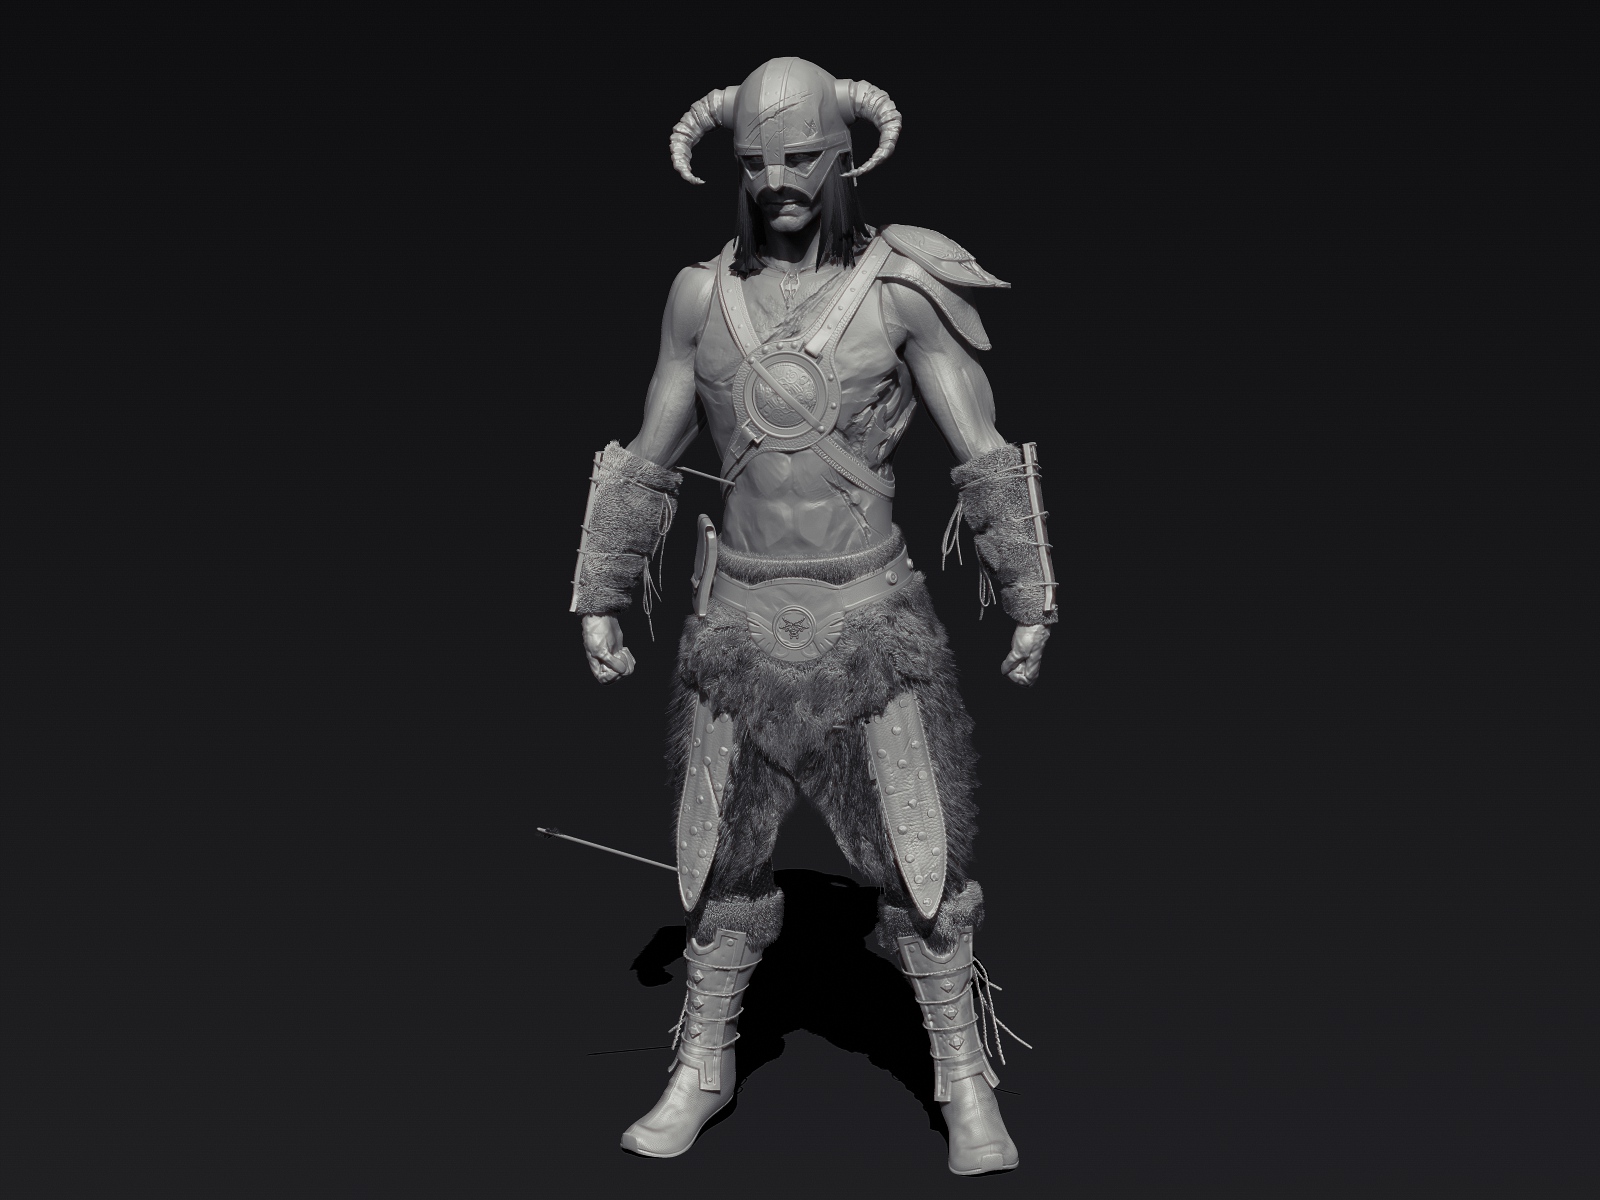
and this is how far i got to this evening, i posed him, created the rock and the sword, still plenty of work to do!
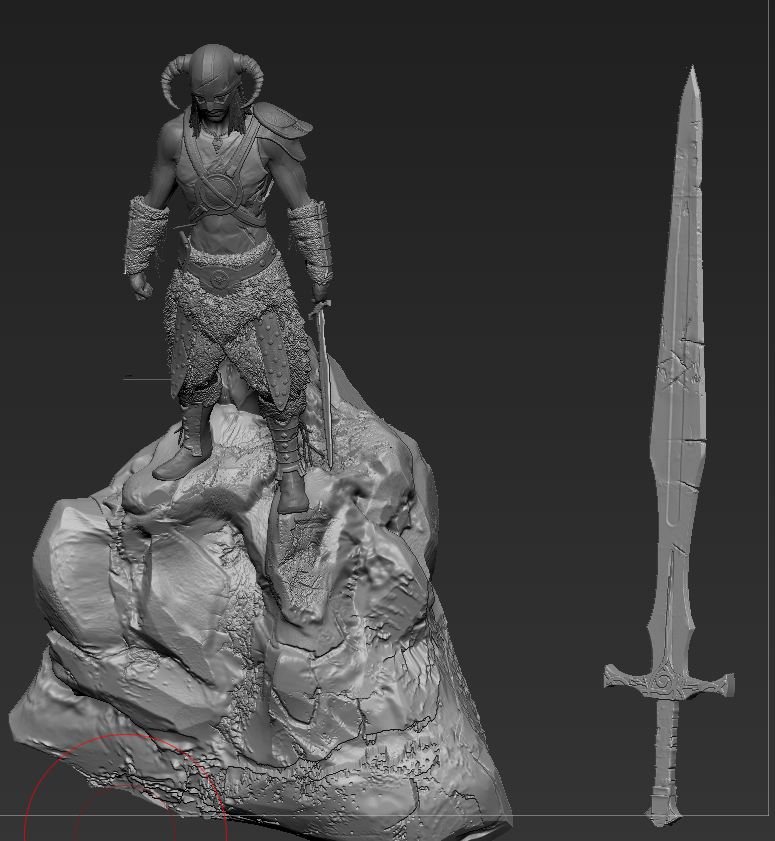
hope you guys like it
Fus ro dah!!!1!!!11!!:d