ZBrushCentral

Custom UI Buttons

Is there a way to create custom UI buttons? I would like to create my own Images for buttons/macros that I have in my UI. Currently they only have text applied to them that handles everything. While this is fine for now, each button needs to have a rather long name to define what it does…which takes up a lot of space and can’t easily be placed on my left bar (thin). If I can create custom UI elements then that would help me to be able to better manage my UI layout
I’m using a 30" monitor so I have quite a bit of space, but I would really just like to clean up the UI and make it more visual than having to read each button name.

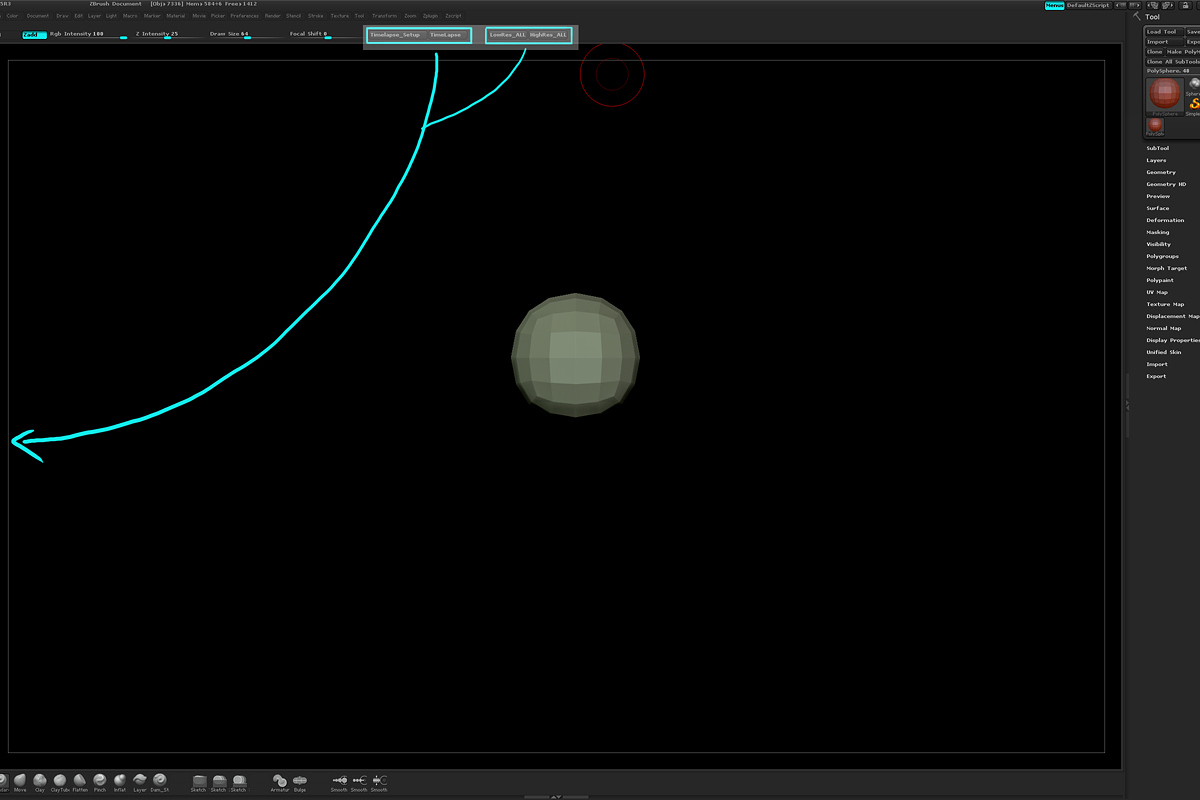
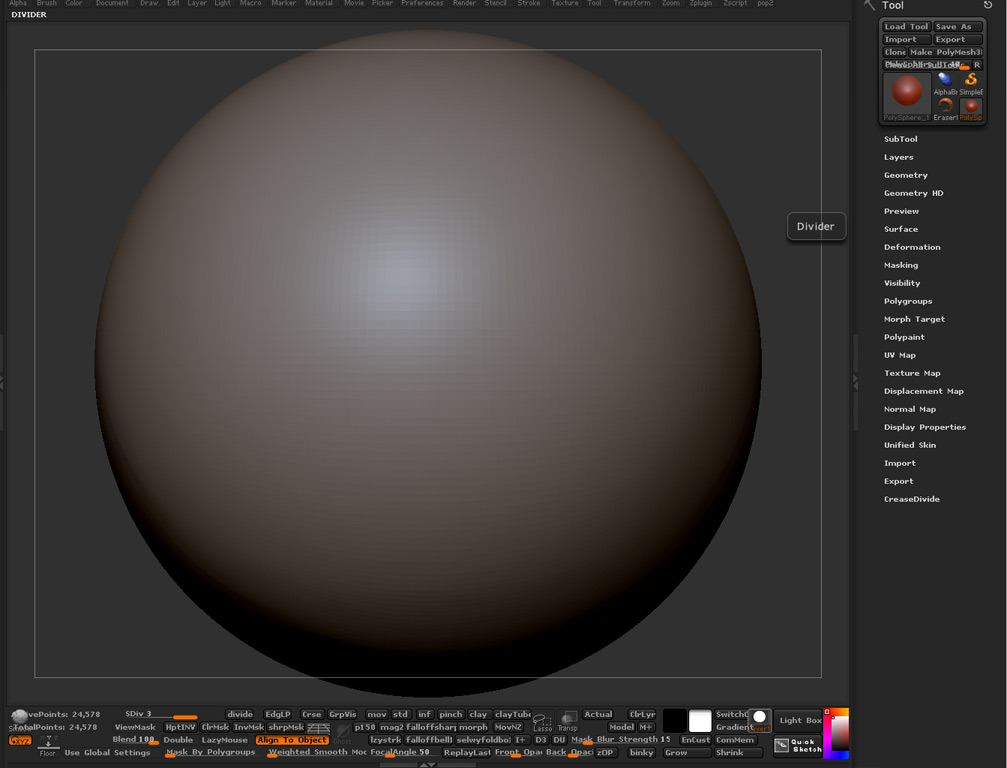
Attached is an image of one of my UI’s and showing where I have extra real-estate that I would like to be able to use. There are others with a ton more custom macro buttons as well.

Thanks

bump

i don’t have a real answer but for myself i’ve created macros, i think as you have, but i use small 4 to 5 letter abbreviation, eventually you won’t even need the name because you’ll know the location instinctively.
also from you picture it would make sense to put all the brush icons you have at the bottom over to the side and the text macros at the bottom, your monitor is way larger than mine(23") and i have 4 rows of macros at the bottom and no side bar and its plenty, and i don’t normally even have zbrush full screen so i can have reference.
i agree with you though it would be great to make custom buttons/macros with images.

Attachments

Untitled-1.jpg

There is no way to add icons to or change the name of macro buttons from within ZBrush. But if you edit the macro .txt file you can change the size of buttons, add an icon and change the button name and button description.

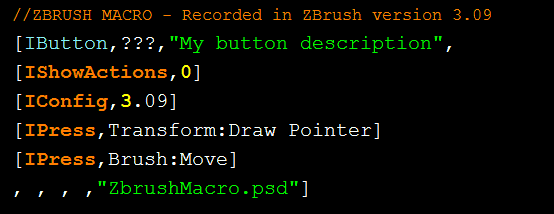
Don’t worry if it looks confusing as you will only be editing the second and the last line.

There are a couple of steps involved:

1 ) Open the .txt version of your macro in a text editor like Notepad for PC. In this example i open SetOldMoveMode.txt found in the ZStartup/Macros/Misc folder (default ZBrush 3.5R3 installation). It should look like this.

[attach=186715]MacroToZPlugin-1.gif[/attach]

2 ) Edit the second line to instruct zbrush on where to place the button in the UI, what the button is called and optionally change the button description. Here I place the button in the ZPlugin palette, call it SetOldMoveMode and edit the button description. Remember to separate the button location and the button name with a colon, :

[attach=186716]MacroToZPlugin-2.gif[/attach]

If you have many buttons you might want to place them in a subpalette instead of the main palette. To do that you add a subpalette definition before the button command. Here I add a Goast666 subpalette to the Zplugin palette and change the location of the button.

[attach=186718]MacroToZPlugin-3.gif[/attach]

3 ) Changing the size and adding an icon is done by editing the last line of the macro. You might notice this line contains the closing bracket of the [IButton,…] command. It is important that all commands have a starting and closing bracket.

The values that change the width, height and icon are separated by commas. If you add an icon you can ignore the width and height as the button will resize to the icon size (.psd or .bmp format).

Here I have added an icon which is located in a folder I have created in ZStartup/ZPlugins. The folder location is relative to the script location, so if you put the script in ZStartup/ZPlugins it will look for the icon in ZStartup/ZPlugins/Goast666Icons, for example.

[attach=186719]MacroToZPlugin-4.gif[/attach]

The full list of values for the [IButton,…] command can be found in the ZScript Command Reference.

4 ) That is all the editing you need to do. Next you probably want the script to load when starting zbrush. That is of course done by placing it in the ZStartup/ZPlugins folder. There is only one problem. ZBrush does not automatically load .txt files. You need to manually load the script once which will create a .zsc file (compiled script) in the same folder as the .txt. Compiled scripts are loaded automatically when placed in the ZStartup/ZPlugins folder.

Hope that helps more than it may confuse :slight_smile:

I just realised it would be possible to write a zplugin that could modify a macro for you. Hmmm…

Attachments

MacroToZPlugin-1.gif

MacroToZPlugin-2.gif

MacroToZPlugin-3.gif

MacroToZPlugin-4.gif

:smiley:

Not sure what I was thinking (was I thinking ?). There is no need to change the UI location of the macro or move the file around. So ignore step 2 and 4.

Once you have edited the .txt macro file simply save the .txt file and in ZBrush press Macro > Reload All Macros.

The edited macro could look something like this:

[attach=186729]MacroToZPlugin-5.gif[/attach]

The .psd icon would in this case be located in the same folder as the macro.

Attachments

MacroToZPlugin-5.gif

awesome tveyes you da man!
i swear i asked about icons for macros years ago but got a negative response, haha time to make icons…

TV - you’re my hero!
Thanks a ton. And code isn’t scary…well, I can’t code for ****, but I can edit code :smiley:
Thanks again.

sweet. Got it to work.
now…does anyone know the dimensions of the small buttons? the big ones seem to be 96x96. I’ll keep messing around with sizes unless someone gets back to me before I figure it out.

Hmm…now the big question…do I do a similar operation to change the UI buttons? I think they’re all fine and I don’t really see me changing them…just curious I suppose.

38x38

Glad you found it useful, despite my little brain fart.

I am nearly finished with a ZPlugin that will automate editing zbrush recorded macros. You should then be able to change the name, description, size and add an icon without manually editing a .txt file. But until then you might find this useful for determining the size.

The dimensions of the standard UI buttons are all related to the Preferences > Interface > Button Size value. That value is actually 1/4 of the available width of a subpalette, measured in pixels… minus 2.

So if your Button Size is at 42 (the default) you would create your icon at 38x38 in order to fit 4 buttons into a subpalette. Why 38? The icon needs to be slightly smaller to fit neatly within the dimensions of a button. It just happens to be that Button Size - 4 is the perfect fit in this case.

To calculate arbitrary button icon dimensions you can use the following equation:

Icon Width = (required subpalette width in % * (Button Size * 4)) - 4

For example, with Button Size at 42 and you want to fill half the width of a subpalette, the icon width should be:

82 = ( 0.5 * ( 42 * 4)) - 4

However (:wink: I know, nearly done), this is only valid if you also define the width and height of your macro button. If those values are not defined the button will resize to the icon dimensions and the icon will not fit neatly within the button.

Continuing from the previous code examples here is a macro that is the same size as the main Transform palette buttons, Transform > Edit for example.

[attach=186849]MacroEditing-1.gif[/attach]

Attachments

MacroEditing-1.gif

Mark. Thanks for the formula, that should come in useful until you release your plugin. :slight_smile:

Alright. New question regarding this. How do I get a macro button to show pressed or unpressed? Or how do I change the Buttons that are used in the Movie panel? I would like a record (timelapse) pause, export and delete, but I don’t want the super long pause button and super long delete buttons. I understand why they are the way they are in the standard UI but having them as simple buttons that I can dock on the button right hand side of my UI would be great.

If anyone knows, please let me know.
Thanks.
r

i don’t know about the highlight, wanted to know that myself for awhile.
the other buttons though you can just make macros of them and adjust the button size as posted in tveyes last post.

That would work except for buttons like timelapse and pause they are only available when one or the other is pressed. Same with delete. I’m sure there are a ton of other options that need to be on/off boolean operations but I don’t know enough code to make it work…probably just enough to break it.

Hmmm…

Maybe this can help… CUSTOM SIZED/NAMED UI BUTTONS