ZBrushCentral

Create a 3-D relief from photo

I ran across some software from a small company called Designs Computed (www.designscomputed.com) and they do a pretty good job of converting photos in 3d. Just like every approach to this their suffers from the same issue of lighting, etc. but they have some tools (a bit clunky but usable) that will let you adjust the z axis.

Anyway, if you’ve come up with any other processes I’d be interested in knowing - I’ve been trying to do some similar things with products (not people) photos and it’s been tough to get there.

Bill B:

Which effect are looking for the most?

Low Relief or High Relief?

Please see the following photo.

comic_tragicmasks.gif

I don’t know about Bill but the Bas relief stuff would be what would probably be most useful for me.

:+1: Interesting but expensive and you can’t use it with zbrush :-1:

:question: :question: :question: :question:
Is there something like that who can be used with zbrush ?
:question: :question: :question: :question:

It will be super cool if zbrush creates something like that.
I mean, doing a 3d model based on stereo pictures.

Roland has a machine/software combo which does that. However, all those machines including laser engravers only produce a ‘likeness’ when the sculpture is lit in the correct way to reproduce the shadows the photogrsphy/alpha had. Etching seems to be the only way to provide a good image on a metal surface. Well… it is a process analog to the photographic one.

LemonNado

PS:All results I have seen so far on trade fairs etc. have not “wow’d” me…
The best process with cool results imho is the metal powder one with the laser fused substrate, a sinter process after the run, and then a soaking in liquid brass to fill the voids. Results are spectacular even with tons of undercuts. Inclusions however make the pice HEAVY.

Dear ZBrush NG:

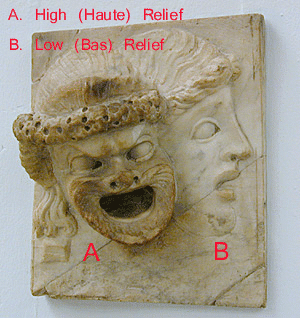
Both the high and low relief effects are possible using ZBrush and Projection Master.

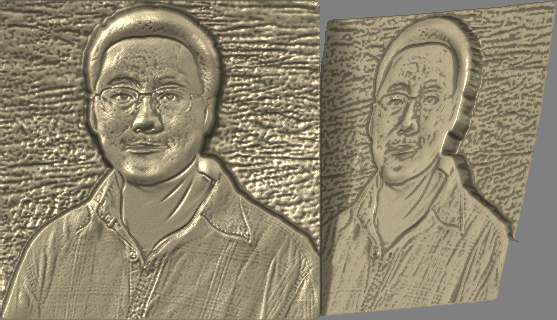
The high relief can be accomplished by using multimarkers and then converting the assembled “meshed” objects into a polymesh and then masking and deleting what you don’t want. (Like the the head “A” coming out from the flat plane in my last post.)

The low relief can be accomplished by deforming a mesh using an alpha from within projection master. There are numerous posts and a carving tutorial in the ZBrush Central Tutorials section to explore this effect. (Like the “B” head.)

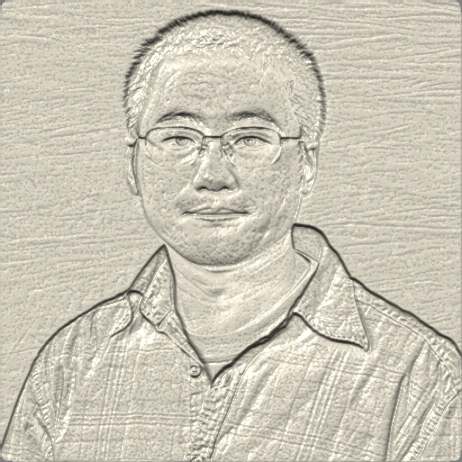
The use of photographs is limited in an automatic generation of a mesh with the correct “topography”. For instance, if a photograph of a face is used, the flash highlight on the forehead and nose is translated to either a gaping hole or a mountain depending on the direction of the displacement. (See aminuts post.)

Delcam has a software package called Artcam (www.artcam.com) that is very good at getting low relief effects for manufacturing. However, the creation of the original artwork that is “displaced” or “deformed” is still basically created manually - read “tedious”. Price and licensing fees rules out Artcam for me - plus its not as fun as ZBrush!

The best thing I have seen is ZBrush’s MRGBZ Grabber tool with its resulting Alpha or “depth map” based on a 3D model to create the ghostly type of “alpha” used as a brush.

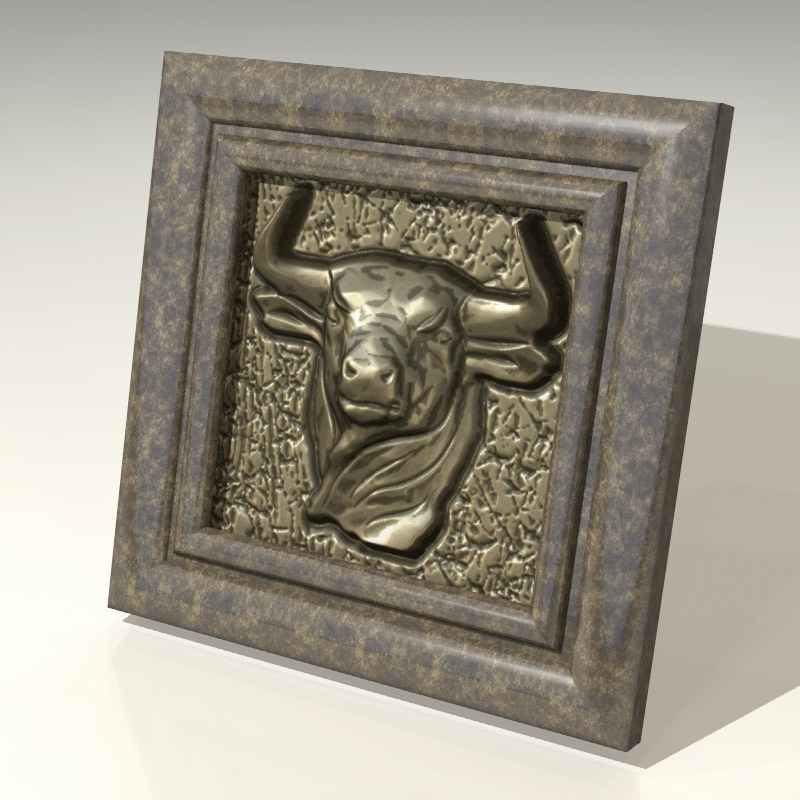
Here is a low relief model I created recently exploring these effects. Modeled and textured in ZB, rendered in Rhino / Flamingo.

The art of artistic carving still exists, just now it is in virtual 3D!

Cheers.

SW

Bull Head.jpg

Dear ZBrushers,

I’d like to use Zbrush to make a low bas relief of a person’s face from a photo (either from the front or side view). The model would be CNC milled, so control over depth and dimension is absolutely crucial.

It would need to take 30 minutes or less to create an accurately representational relief ready for prototyping, so if anyone can prove to me it’s possible, I’d be willing to pay for examples. I’ll email you some photos if you are interested in trying.

Thanks,

Cadartisan

Send me a photo and I will show you a sample. Make sure the picture is clear and of good quality . See my profile for email info.

Dear NG:

Here is a quick example of a low relief “carving” from a photo.

This effect is quick and can be accomplished from within Projection Master. I got the photo off the 'net as a quick example.

The effect is not bad, however, you will notice that the hair receed into the mesh rather than go out from the mesh.

This can be overcome, but it becomes more tedious.

Cheers.

SW

Low Relief A.jpg

Dear NG:

Here is a sample of the same image manipulated in Projection Master to a greater “sculptural” degree.

In this example, the portrait “alpha” was used as a stencil within Projection Master and different brushes were used to push and pull the different areas within the portrait to their correct reference planes.

(Forgive the fact I mangled the poor guys nose! :wink:

Best Regards,

SW

Portrait B.jpg

Looks nice! Better than I would have expected…:+1:

LemonNado

PS:Now… would that come out like that after milling (considering post process buffing it up etc…)

You have to make it a Stl file for most 3d milling software

Yes, Rhino3D can do that. Or a prog which comes with the mill if you are lucky…

Cheers
LemonNado

Steveo,

That looks very good! Much better than I anticipated, actually. The detail is pretty amazing. Thanks for taking the time to do it. I’m uploading a side view photo if any of you guys want to give it a shot.

Thanks again,

Cadartisan

Video tutorials “Creation a bas-relief from 3d models”. This is a new way to create a bas-relief from 3D-models by using «Blender composite nodes patch».http://www.youtube.com/watch?v=ZXPn2PF_Wy4&feature=g-upl&context=G2f9be6dAUAAAAAAACAA