Andreseloy
That is so you can use the alpha as a displacement map to give your lowpoly model the look of a high poly model to both save on resources, let you create a color texture for it more fitting your character than bumpviewer texture, and be able to render it in a scene all with in zbrush.
Two qüestions about this method…
I have created my model, a bump texture and I have gone to displacement->intensity for the alpha (bump texture) to apply to the model. ok perfect.
But then I save my tool, I save it with the alpha (bump texture) then I close zbrush. After that I open Zbrush I load the model with the alpha (bump map) and go to displacement-> intensity to apply my bump map (loaded as alpha ) to the model. But it does nothing, I can’t reapply my bump texture to the model, why ?!
Bye the way, using this method do you ever use ProjectionMaster->displacement?
Thanks for all !!
[color=Black]Hiya Macaco,
To answer your questions:
[color=Black] Ok, You have to also apply a colour texture to your model to see the results of the displacement map.
<b>
By the way, using this method do you ever use ProjectionMaster->displacement?</b>
[color=Black]Well, not usually. When painting bump maps, you dont really want to alter the actual mesh, you just let the bumpviewer material do the work for you.
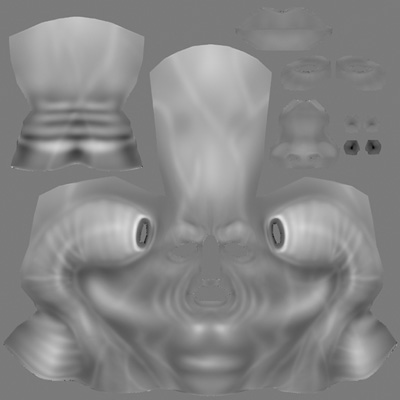
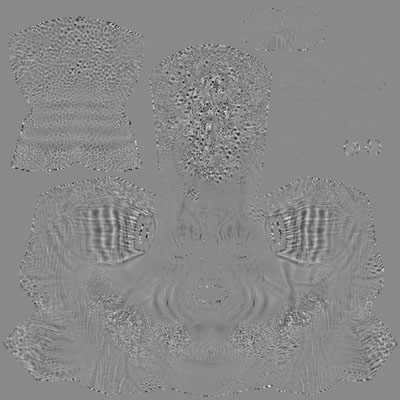
Hope that helps. :+1:</span>hi all! in my experimets with the xsi-zbrush worklow (but i think is good for any software-zbrush workflow) i tried this tecnique to create nice result in create bump and displacement mapping; here it is:
first i create the basic displace in zbrush at a level 5-6 of subdivion (itdepends on base geometry); after i go to higher subdivision level (6-7 for example) and i detailed it with projection master with my own alphas; finally i delete previous subdivided level so i have only a differnce between 6 and 7; i create another displace map for these two level and i obtein only the details added with the projection master; hope u understand it becouse my english is not so good yet.
here are the two maps as an exemple (u can find the WIP here: http://www.zbrushcentral.com/zbc/showthread.php?t=25397)
DISPLACEMENT MAP:
bye all! 
Attachments
sweet
first of all, thank you Grub for this tutorial. i do have a question i am unclear on, however. when you have created your bump map, you have been using it as a displacement map, to circumvent having to sculpt all of the detail in the geometry. however, is it possible to combine the bump into the displacement map? i have been trying to do this, and as far as i know, following these instructions exactly, but with no luck. i can simply add the bump in an external renderer, but i would like to be able to get that extreme detail in the displacements. is this possible?
it’s possible and it’s also easier i think; the problem of this method is that u need a very high-poly geometry to reach the original details
Awesome Awesome stuff I’ve been wondering about this stuff too just didn’t know how to do it  now I do.
haha… nice one 
Great tutorial, thanks. The only problem I have is that I have to use a very high polygon count to pick up all the details when clicking ‘Apply DispMap’ under tools/displacement. If I use lower levels of subdivision (and thus fewer polygons) all the details get washed out. This means that in the end I’m back to using a high poly model anyway, which is what I was trying to prevent. What am I doing wrong here?
Thanks!
Berco
thank you this information really did help out!
I have followed all the steps posted here and when I create my bump map in the projection master it looks fine and really detailed and very high. But then when I apply it as a bump map in zbrush with the bump viewer material it is much lower in quality and resolution and looks like crap.
My map is 4096 x4096
I don’t have Quick mode turned on
My Display Properties are turned all the way up as well.
Any help at all would be greatly appreciated.
I seemed to have fixed this. The problem seems to be that the uv layout that zbrush assigned to my mesh wasn’t ideal for the area I was doing tests on. I switched to GUVs and now it looks much better.
Great Tutorial…
Thanks
anyone can made a short video with this method… i try it but no succes.
thx a lot.
Really good information.
Thanks
Wonder if this inspired the Gnomon DVD on Alpha Texturing.
:mad: have to work! LOL