Very nice coloring and Transparant Look.
What’s the secret, …How’d Ya do it? :eek:
Love it. great work , man
cheers
Roland
Thanks,
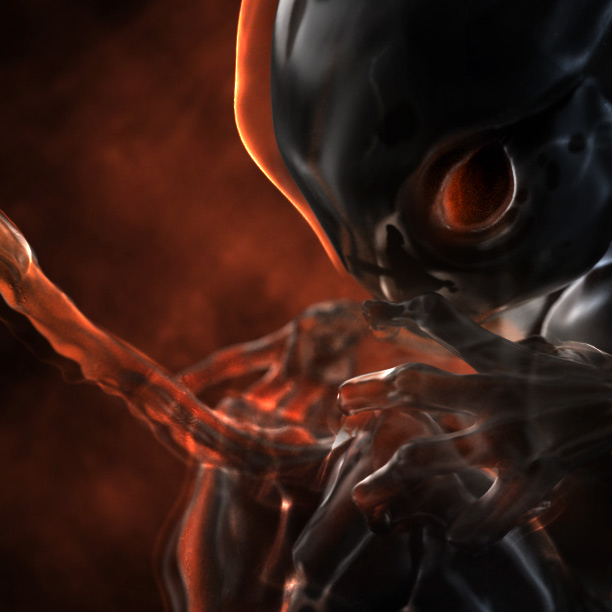
well, It`s rendered in Max with a SSS Shader and additional passes. Most of the effect is simple done by screening layers in Photoshop.
Regards,
Thomaskl
That last one has a finished work look to it. Very cool 
Sorry to see you had that little explosion 
Ooooh, love the glowing membrane! Nice touch, adds that embryonic feel…
Dickie
thanks
yeah, its the final now. I won`t touch it anymore…Leave it alone in its Darkness 
The Shader i used is composed the same way, we did last year when doing the SSS Stuff in this thread:
http://www.zbrushcentral.com/zbc/showthread.php?t=32481
I think it worked. I hope i got the feeling of the Lonleyness again ! Thanks for your crit !
Another Close Up:
Regards,
Thomaskl
Nice final picture. Less is more 
I have some problems with the transpose tool. Aus you can see, i masked the arm (checked mask for full opacity several times) and used the transpose-rotate Tool to rotate the arm backwards…The Fingertips stay in place even they are masked correctly. Any idea, why Z behaves like this ?
And the second thing is, that after transpose, i get those little gaps und stair-effect in the mesh…Seems to be a bug, too ?
Thx,
Thomaskl
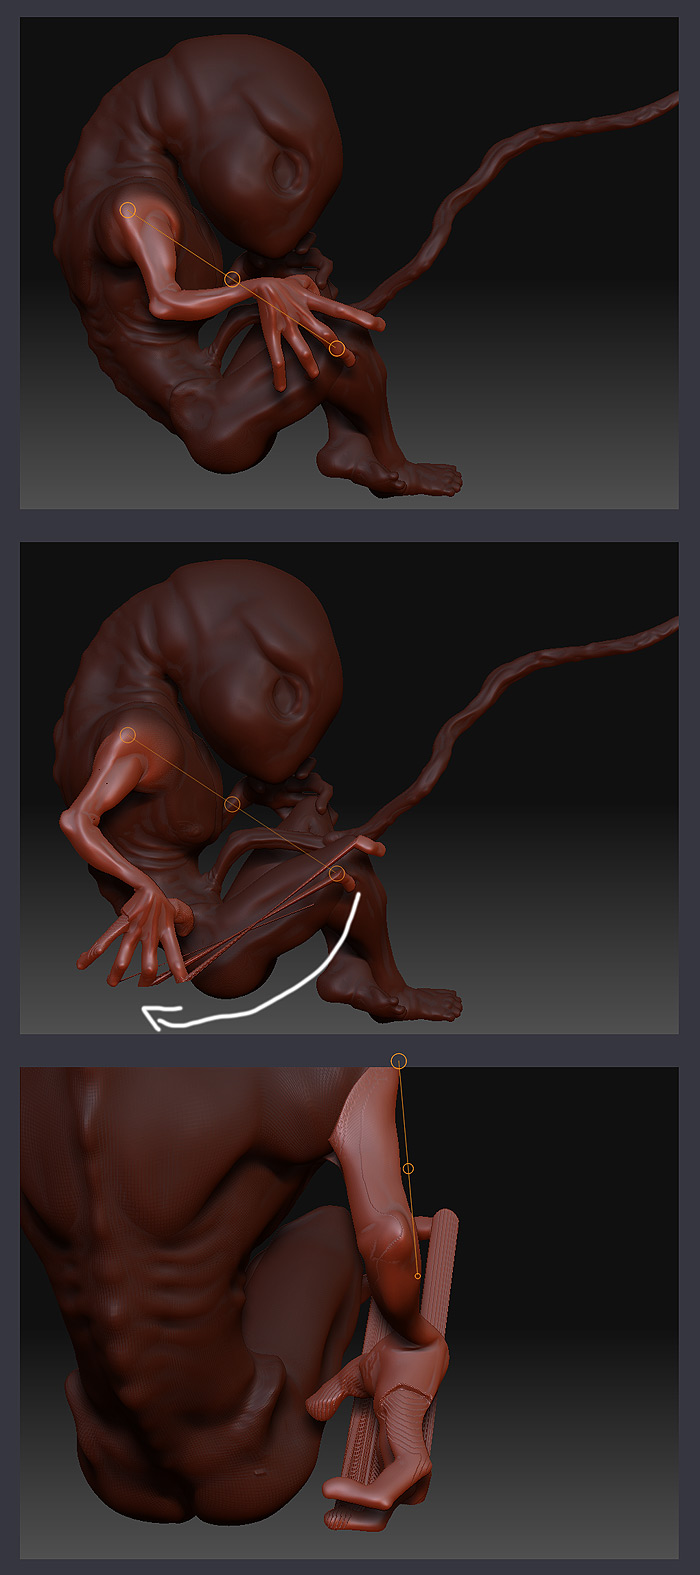
You mesh is too large.
Select high subdiv level, use deformations to unify the mesh, switch to lower subdiv level and transpose.
Thanks for your help, aurick…
Well, When i do press unify in the Highes Subdiv Level in the deformation palette, it scales my object down to about 50px in the workspace. Pressing Unify again, makes it down to about 1px. Nothing hidden, pivot set correctly…i am confused !
Thx,
Thomaskl
Please try these steps…
- Draw object in canvas, enter edit mode.
- Make sure object is fully visible and unmasked.
- Switch to highest subdiv level.
- Apply tool->deformation->Size at -75% once. This will scale the mesh down by 75%.
- Press the ‘.’ key, this will re-center the mesh to fit the canvas.
- Switch to a lower subdiv level and Transpose.
Thx aurick,
working better with the Disadvantage, that i cannot scale the model big enough to work on the smaller details like fingers. If i try to scale it bigger, it reaches it maximum, then the workspace is being scaled up…
But i think i can work this way…
Thx,
Regards,
Thomaskl
The maximum zoom is depended on the total bounding box of the visible mesh (including all other subtools). If you hide part of the mesh and only leave the part that you want to edit visible, you will be able to zoom further.
Again, thx for your help aurick,
well, i have started with the next image in this little “Black Butterfly” Story and this will become “The Death of the black butterfly”. Everything hard under work in progress…Anatomy isn`t correct at all, but i am on it !
Regards,
Thomaskl
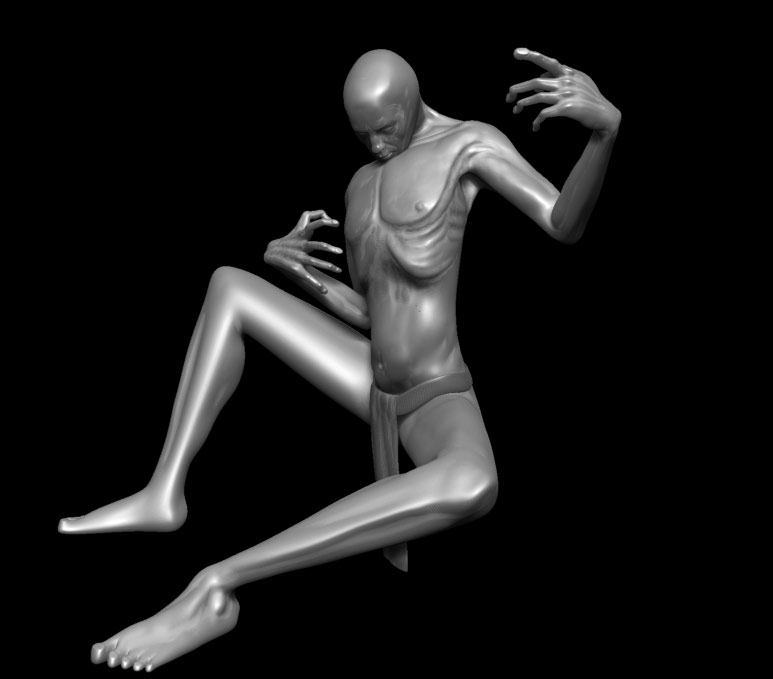
Next step…
[attach=59503]ASP_12.jpg[/attach]
getting closer to a final…80%
Regards,
Thomaskl
Attachments
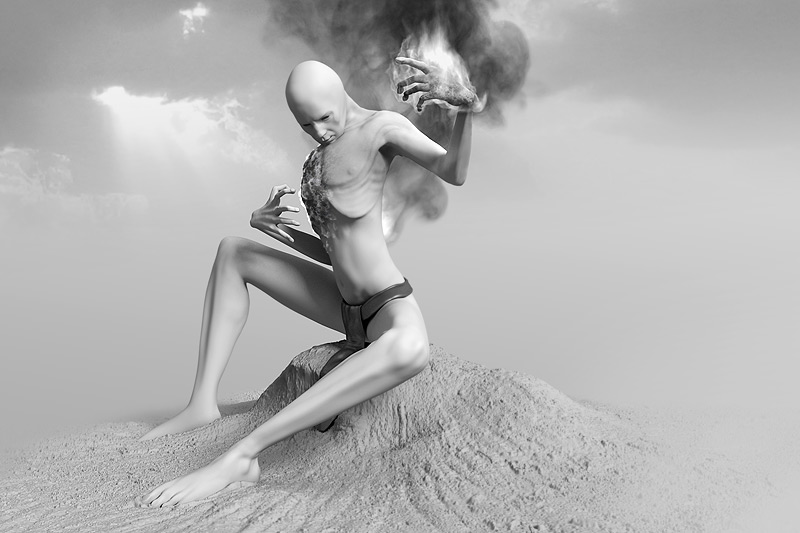
This looks pretty cool! Except when I first saw it, I thought his left knee was actually part of his hip. It took me a few seconds to realize his leg was foreshortened above the knee. I thought it was a strange design until I realized what was going on. Maybe the left leg should be repositioned a bit to make it a bit clearer what’s going on there.
After looking at it again just now, it could be the left foot that threw me. The angle it is posed at suggests his knee is pointing up, where you have it posed bent to the side. Kinda throws me a bit. Everything else looks pretty nice though.
I think your right Kraken. I think the left foot could be rotated to match the rest of the leg. Generaly looks cool though.
I like the fire or whatever that is. how did you do that?:eek:
Thanks for your thoughts,
well, it really seems to be a problem with the perspective for the left leg. I wished i could change this, but its rendered into several layers and it took me nearly the whole day to render all the passes, so i wont change it. I tried to work against the “effect” by painting additional shadows and used the “Burn” Tool in PS to shape it out correctly…
Well, i have to call it finished now, because i cant work on it anymore. So here is the final image.
Rendered it Max with Vray. Used FUME to create the Fire-Effect ! Used some textures from cgtextures.com to add some detail !
The “Text” is taken out of a song by ASP:
Translation:
I want to burn
Even if there`ll be only cold ash left
I hope you like it either !
Regards,
Thomaskl

Yeah, i agree about the left leg. I thought that he just had a short leg with no knee or something. It really hurts the piece as it is generally pretty strong.
The feet could also use some more work.
But i like the style that you use.
The leg just kinda ruins it a bit.